Separate rooms of numerous apartments from the housing stock that we inherited from Soviet times, the walls of which, as a rule, are painted in abundance, and more than one layer - a specific sight in itself. A modern person in most cases does not like this idea of design thought, and the question arises of how to get rid of the colorful heritage of rooms in the bathroom, toilet, kitchen and corridors. Considering the fact that the surfaces, to put it mildly, are not smooth and the differences reach several centimeters, the master is not given many options.
Wash off, scrape off, remove from the wall, chemically remove the unpleasant layers of stalactites and stalagmites, get to the concrete, and then begin painting work.
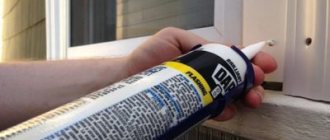
Applying plaster to paint, using a specialized primer first.
Applying putty to a wall with oil paint
The first option at least has a chance of existence. Still, it is too labor-intensive and time-consuming, because removing all the paint is a very difficult task. And breathing solvents and cleaning materials is not the healthiest thing to do. Fortunately, progress does not stand still, and today a primer based on unique components, called “Betonokontakt,” has appeared in construction markets and stores.
How long does it take for primer to dry over old paint?
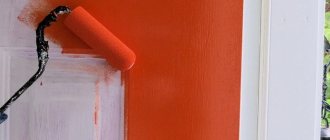
Retail outlets offer a special “primer for old paint.” This paint is applied to the surface with a roller in one layer. Drying time is two hours. But manufacturers recommend carrying out further work no earlier than 24 hours after painting.
Interesting materials:
The rubber on my sneakers has turned yellow, how can I whiten it? Tulle has turned yellow, how can I bleach it? The rubber has turned yellow, how can I bleach it? Curtains have turned yellow, how can I bleach them? The tulle has turned gray, how can I bleach it? The tulle has turned yellow from the sun, how can I bleach it? The tulle has turned gray, how can I bleach it? Tulle has faded in the sun, how can I bleach it? A white item is stained, how can I bleach it? How to bleach a yellow bath?
"Betonokontakt" properties
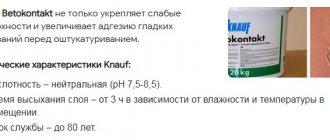
This miracle product consists of various fillers, binding polymers and other elements. Each manufacturer certainly keeps its formula secret. However, this primer is capable of establishing strong contact with virtually non-adhesive surfaces and is even used to bond minerals and glass. “Betonokontakt” is indicated for use in cases where walls have low moisture absorption capacity. If you pre-treat monolithic concrete with the specified solution, the contact strength increases many times. This primer is used for both interior and exterior work.
This primer will create strong contact with a non-adhesive surface.
Application area of soil
This soil is used for the following purposes:
- interior work in residential premises, in preparation for plastering and putty;
- processing of monolithic concrete surfaces that have low moisture permeability;
- preparation for decoration of external facade buildings and concrete structures;
- carrying plaster and putty onto paint;
- adhesion to such materials as glass and ceramics.
Concrete contact is used for concrete surfaces
Real experience of using “Betonokontakt”
And now from theory to practice. The master had to completely prepare the walls of the kitchen room for laying tiles in the work area and for wallpapering other walls. Below is the sequence of work performed.
First you need to get rid of the old tiles, for this the master used a hammer and chisel, and safety glasses. Using these tools I knocked off old tiles. I worked from top to bottom, it’s more convenient. Some tiles were flying off. I had to try. Using a spatula, the remaining tile adhesive was removed, and the freed area was rubbed with coarse sandpaper.
The second stage is getting rid of the old paint on the wall. Using a spatula, the surfaces of the kitchen walls were treated. In places where the paint could not be removed, it was decided to leave it.
Removing oil paint from a wall using a spatula
To get rid of small flakes of paint, we went over the walls with sandpaper.
Since a layer of grease could form in the kitchen, given the purpose of the room, all surfaces were treated with a solvent and degreased.
Don't forget about the benefits of serifs. The depth of the notch should be slightly deeper than the paint coating. Serifs should be applied in an amount of approximately 100 pieces per square meter. m.
Now you can start priming. Use a roller or a regular construction brush.
After a day you can do the plaster.
Applying putty to the surface
Deep penetration option
In addition to the basic qualities that are inherent in all types of primers, it has the property of penetrating deeply into the top layer of the surface, slightly leveling (more precisely, smoothing) and fastening the base.
Smoothing manifests itself in the fact that the primer “glues” together small particles on the wall, dust, and sand on its surface. Unlike universal ones, deep penetration primers penetrate into the surface layer of the wall up to 5-10 centimeters.
The depth of penetration of solution particles into the base material depends on the size of these particles. A deep penetration primer glues the top layer well, binds its small particles, and eliminates looseness of the material. This leads to the fact that in addition to creating a good connection of the new layer with the base, the consumption of the applied material is also reduced.
The deep penetration primer can be used for walls under wallpaper and plaster. It is used to treat the surface of floors and walls before laying tiles. It is also suitable for use as a primer for plastered walls.
Manufacturers
There are so many manufacturers on the building materials market today that it seems that choosing the right concrete contact is an impossible task. However, do not rush to panic.
Firstly: not all the mixture may be suitable. Manufacturers provide detailed information about the properties and purpose of the primer directly on the label. Just be careful here.
Secondly: the price range is quite decent. Focus on your budget and look for the best option. The abundance of products, in such a situation, only helps. If there are already favorites among the brands in terms of the quality of building materials, you can ask the seller if they produce the required concrete contact. This will also help make your search easier.
The table below provides a brief overview of the characteristics of popular brands of concrete contact. He will clarify which one is better.
| Brand and average consumption | Characteristics |
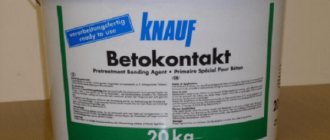
| "Knauf" 350 g/m2 | The popular brand uses quartz filler of various fractions as the main ingredient. It increases the “adhesion” of the mixture to the surface, which creates a qualitative advantage over competitors. |
| "Ceresit" 400 g/m2 | The mixture is pink. In addition to excellent functional qualities, it has proven itself to be the best in facing work. The Ceresit ct-16 soil mixture is an analogue of concrete contact, but its price tag will be higher. |
| "Axton" 300 g/m2 | A dry mixture containing marble chips instead of sand. The composition is diluted with water and mixed independently. The color of the concrete contact is white, universal - used for internal and external types of work. Its peculiarity is the possibility of application to uncleaned substrates. |
| “Prospectors” 200 g/m2 | The product composition is supplemented with latex additives. This helps it dry quickly in less than an hour, which is convenient for “quick” repairs. But it is used only for interior work. |
| "Bolars" 500 g/m2 | Concrete contact is produced with fractions of 2 types - 0.3-0.6 mm and 0.6 mm. But many note the high consumption of the mixture due to the expanded clay filler it contains. Drying time is about 12 hours. However, the material has a special advantage - resistance to frost, as well as very high temperatures (from -50 to +70 degrees). |
| "Osnovit" 300 g/m2 | "Bettokont" is suitable for work indoors and outdoors. The mixture is quite thick and requires some effort to apply, but has the great advantage of short drying time (up to 2 hours). |
| "Unis" 200 g/m2 | Concrete contact is suitable for indoor and outdoor work. The manufacturer allows the mixture to be diluted with water and treated with concrete surfaces before applying tile adhesive or plaster. |
| "Birss" 200 g/m2 | The domestic water-dispersion primer "Birss" is popular due to its low consumption and low price. The material is used for interior work and provides excellent protection against fungus. |
| "Feidal" 300 g/m2 | Premium material. Environmentally friendly composition. It is recommended to use for repair work in ancient buildings where oil paints or drying oil were used for finishing. |
| "Eskaro" 250 g/m2 | A primer that is diluted with water according to the instructions. It has an easy-to-apply texture and does not require constant stirring. However, the mixture has a strong odor, so it is recommended to work in a ventilated area and use a mask. |
Concrete contact has been selected, but it is important not to come across a fake when purchasing. In order not to waste time and effort working with counterfeits, it is better to first check the primer in use. Visually, no lumps or clots should be visible in the mixture. If there are any, return the concrete contact to the store. Next, you can do a little testing on any surface with your own hands: apply the required layer and wait until it dries completely. Did you manage to break it off? If not, great, you’ve purchased high-quality material and you can safely get to work.
Best ?
During the finishing process, it is important to understand that it is strictly not recommended to skimp on primer during application. Any professional will tell you that the thickness and uniformity of the layer play a major role in adhesion to the material. If applied incorrectly and if you save too much, there is a big risk of ruining everything: the tiles will soon fall off and the wallpaper will peel off. It is allowed to dilute the concrete contact with water only if the work will be carried out manually. Manufacturers always mention this possibility in the instructions.
What not to do
If you are working with a primer for the first time, then first be sure to familiarize yourself with all the rules and recommendations. Next, it is very important to find out what actions with soil-concrete contact are strictly prohibited. Examples from life and the opinions of professionals prove that this list is not small. Studying it will help you avoid everyday problems and be confident in a quality result.
Thus, when working with concrete contact, the following is prohibited:
- apply to a dirty, uncleaned surface (some manufacturers allow application directly to paint or tiles);
- use over bitumen mastic;
- dilute the composition with water in greater quantities than indicated by the manufacturer in the instructions;
- apply the mixture to a wet, damp surface;
- use the composition without first stirring;
- apply to the base at negative air temperatures;
- use expired composition;
- apply the primer without waiting for complete drying;
- Continue working if dust gets on the layer. It sticks very well, but then falls off along with the plaster.
Application concretecontact | Where not to use and where it is recommended to use concrete contact
Consumption of "Betonokontakt"
If the cleaning of the surface was successful, the wall did not crumble, no holes were formed and the surface is smooth, then the consumption will be small, from 0.15 to 0.25 kilograms; if there is porosity and it is significant, then the consumption will increase accordingly. At this stage, it is better not to skimp on the primer. The strength of contact between surfaces and the durability of the entire repair undertaken depend on this.
It’s better not to skimp on primer
When can further work be carried out?
The solution dries quite quickly - about 5 hours, some brands even faster - from 3 hours. But experienced craftsmen allow more time for drying, applying the solution in the evening and leaving it overnight.
Concrete contact is a unique primer coating with a “narrow specialization”. The cost is higher than for other types of primers, so before purchasing you should carefully read the information on the packaging and consult with more experienced professionals about the application in a particular case. Such caution will allow you not to spend too much and save on other repair needs.
Using "Betonokontakt" on a surface coated with paint for subsequent plastering
Before applying the solution, it is still necessary to get rid of unreliable areas of the paint layer, where it sticks only “on your word of honor.” In some places it will fly off easily, while in others the contact with the wall will be very strong. The main task is to achieve the most smooth and stable surface possible, then thoroughly clean the area of application and you can begin priming. The solution, as a rule, has a specific color, this makes the work of the master easier, who can clearly see the untreated areas. The primer can be applied in one or two layers, depending on the situation. Within 3-4 hours the surface will dry and become rough, and after a day you can safely begin plastering.
Applying putty to the wall
Application Feature
It is strictly forbidden to apply primer to a damp surface, this is especially true in the demi-season when covering open brick concrete surfaces.
The temperature should range from +5 to +30 degrees.
The product should only be used on a clean, dust- and sand-free wall.
Start plastering the surface when the soil is completely dry. Drying time depends on the manufacturer (read the instructions), layer and air temperature. The higher the temperature, the faster the soil dries.
Wall section treated with concrete contact
"Betonokontakt", technical characteristics and features
“Betonokontakt” is a styrene-acrylic mixture, which consists of technical components, filler and pigment and water. The primer becomes special due to its unique composition containing special components. As a rule, this is either marble flour or quartz sand, which increases the degree of adhesion when using the product and gives it antiseptic properties, which further protects the treated surfaces from fungus and mold.
Concrete contact mixture
Puttying surfaces with oil paint
As in the case of manipulations with plaster, the putty also “does not like” the paint and does not want to establish contact with it, which jeopardizes the entire repair effort. And here there are 2 ways to solve the problem:
- remove all layers of paint down to the concrete;
- resort to the help of a miracle primer called “Concrete Contact”.
If you do not intend to provide yourself with hard labor in the coming days, or even weeks, to free the wall from the legacy of the valiant builders of the last millennium, you can resort to the following method.
The process of applying putty to the wall
Firstly, it is necessary to bring the future front of work for applying putty to the most ready state for contact. To do this, the scale of the work is critically assessed and, if possible, all paint that can be cleaned is removed.
When renovating, you will definitely need to plaster the walls.
Secondly, prepare an arsenal of necessary tools, such as a spatula, sandpaper, an ax or drill, your own biceps and enthusiasm. Layers that barely hold on will quickly fall off the wall by themselves if handled skillfully with a spatula. Anything that has merged with the wall and doesn’t want to come off can be left; such embedded paint is very difficult to remove. After such a procedure, it is advisable to go over it with coarse sandpaper, make notches along the entire perimeter of the wall, and then thoroughly clean it for subsequent application of primer.
Applying putty to the surface