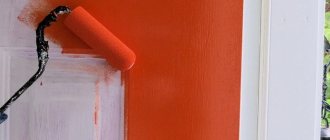
Painting is a frequently used method of making changes to the decor. In the process of using paints, other objects, including glass, may become dirty.
It is possible to clean them if you know how to clean stains properly. In this article we will tell you how and with what you can remove paint from glass, how to remove old and dried paint from a window.
Mechanical cleaning
This method is quite suitable for use at home: it does not require complex equipment or special skills. To clean the glass you will need:
- hot water;
- dishwashing liquid;
- a piece of clean cloth;
- blade or sharpened thin knife.
You can use a stationery knife, as well as a special scraper of the required size. If you don’t have anything at hand, then a hard metal dishwasher will do.
To begin, dissolve the detergent in a container of hot water and moisten the old paint on the glass with this solution. To prevent moisture from getting on freshly painted wooden window sills, they must be covered with film.
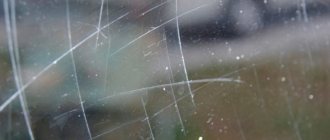
Scraping paint should be done at an optimal angle of 45 degrees. This will avoid the formation of cracks and scratches.
Removing drops of paint from glass is done with gentle movements and in one direction, periodically removing dirt from the blade. If the drop is wet enough, the stain will come off easily. Do not constantly move the tool from side to side - this will easily scratch the window glass.
The sound that the blade should make cannot be anything like grinding or squeaking. This may indicate a dull tool. In this case, it should be changed.
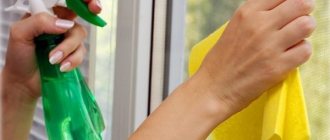
After the plastic window has been completely cleared of paint, they begin to wash the glass using a special product with a spray bottle.
Possible methods
Glass is a fragile material, but hard and chemically inert. Therefore, in order to wash paint off glass, you can use different methods:
- The simplest one is mechanical. Since glass is usually scratch-resistant, it can be rubbed with hard sponges or even scraped with a knife.
- Sometimes, to facilitate the process of mechanical removal of smears and drops, preheating is used. But here you need to be careful: a sharp temperature change can cause the glass to burst.
- The chemical method is less labor-intensive. Glass can be treated with various solvents; it will not cause any harm.
How to remove paint from concrete.
2. Concrete. At first glance, it seems that it is easiest to remove paint from a concrete wall. However, this apparent simplicity in practice turns out to be just the bravado of incompetent people. And when it comes to the actual work, yesterday’s “experts” shrug their shoulders, unable to give accurate recommendations for removing paint from concrete.
First you need to determine what kind of paint the concrete walls are painted with. If water-based paint is applied to the surface, you can use a spatula. This tool removes paint from concrete walls without any effort. If there is oil paint on the wall, it can be removed using a special remover. Before using this “chemical”, you need to carefully read the instructions in order to correctly calculate the proportions and find out the features of application. A few minutes after the wash is applied, the paint will begin to swell. As soon as this happens, it is necessary to remove it from the surface of the walls using a spatula.
Scraping paintwork
If there is a need to renew wooden frames, then it is worth preparing the surfaces before painting. The wood needs to be cleaned so that it is smooth, without any pieces of peeling paint. Then the new window covering will not come off after a short time.
The most common construction tool used for these purposes is a spatula.
Sometimes a metal sponge is used for dishes. It allows you to clean the window surfaces upon completion of the main work.
When wood frames are first painted, it is likely that the factory finish was polyurethane paint. In this case, before cleaning, the frames are wiped with soapy water and treated with sandpaper. Next, you can apply a special primer to make the paint stick better to the window.
A rather interesting method is to burn old paint from the window frame. Using a special cylinder, the coating layer is heated with a flame. Next, the wooden frames are cleaned with a spatula, and the remaining irregularities are removed with coarse sandpaper. Before painting, cracks in the wood are puttied and cleaned using a sanding machine.
Technology and consistency
Removing old paint from the plastic surface of a window, door or other element in a home interior is done as follows.
Immersion in solution
The easiest way to remove paint is from polystyrene. Washing is performed as follows. The panel from which the coating needs to be removed is immersed in a 20% solution of caustic potassium or soda (a 50% aqueous solution of caustic soda can also be used). For greater clarity, it is better to wash in a glass container.
After 4-5 hours, any paint (including acrylic, rubber or oil) will begin to bubble and move away from the surface of the plastic. To completely remove the previous coating, it is best to use an old toothbrush with increased rigidity.
For small surface areas of a window or door that need to be washed, you can use any solvent - solvent, acetone or white spirit. The easiest type to wash off is ABC grade plastics.
Compositions such as brake fluid and water-soluble compounds for cleaning sewer pipes such as “Mole” are quite effective for removing old paint from plastic.
Although their washing mechanism is different - brake fluid separates the coating layer by layer, and “Mole” simply dissolves the paint - the final effect turns out to be quite comparable.
After applying the chemical composition with a cotton swab or glass rod dipped in warm water, you should carefully wash off the remaining layers and areas of paint that have separated from the plastic.
Actively removes all types of paint from plastic plates - from water-based to alkyd enamel - methanol. However, the use of such a composition differs in two features:
- Methanol is toxic.
- After using it, clean the surface of the window, door, etc. It is necessary to rinse immediately with warm water, since traces of oil remain on it, and the cleaned product itself may turn yellow over time.
Financially expensive method - chemical
Despite the fact that chemicals will require financial costs to purchase them, this is still a method with three advantages:
- 100% effect from the use of chemicals;
- the speed of work is many times greater;
- There is no need to worry about damaging the glass.
Special products for removing paintwork materials can be purchased in stores or on the market.
Removes paint White spirit
The product is a strong and fast-acting one.
Operating procedure:
- a gauze or cotton swab is soaked in the product;
- apply the wet side to the stain;
- holds with your hand for about 60 seconds.
The paint is easily removed from the glass surface; the area is wiped with a cloth.
Budget option - liquid oil
The speed of work is lower, but the result is at a high level.
Work order:
- a cotton swab is soaked in oil;
- oil impregnation is applied to drops of paintwork;
- since the exposure time is about 3 hours, it is better to secure the tampon with construction tape;
- after the time has passed, the cotton wool with oil is removed;
- The treatment area is wiped with a soda solution.
Selecting a solvent
All products that are classified as solvents in their chemical composition remove traces of paintwork materials. They differ in price, but the result of their impact is the same for all. Purchased at construction stores. The manufacturer's instructions indicate how to clean glass from old paint with a solvent.
For mirror surfaces - acetone
The original shine of mirror surfaces is restored with acetone. It removes old and new stains.
Processing order:
How to remove oil paint from walls - step by step diagram
Step 1: Apply wash
The remover should be applied with a brush or roller, working in one direction, without repeated applications to the same section of the wall. Try not to splash the remover, avoid contact with the skin. If this happens, rinse with warm water.
Step 2: The wash works
You won’t have to wait long - some solvents can do the job in a matter of minutes, as evidenced by characteristic visible reactions.
Step 3: Clean with a spatula
The paint softens and can be easily removed with a spatula or a metal brush. True, the wash does not always cope with all layers at once - in this case the process has to be repeated.
Step 4: Neutralize the remover
If possible (so as not to flood your neighbors), try to wash off the remaining chemicals from the wall - such an aggressive composition should not be left on the surface.
There are also more gentle, and most importantly, less expensive ways to get rid of paint using chemicals. For example, if we are talking about removing such a coating from a plank surface, you can get by with water and soda ash. We wet the surface generously, cover it with a decent layer of soda, cover it with damp burlap or any other rough cloth and wait a day, periodically wetting the cloth. With a spatula, paint swollen from dampness can be cleaned off easily and simply.
Methods for identifying various types of household decorative and finishing plastic
Available methods for determining the type of plastic mass are as follows:
- Decoding the plastic markings on the back side of the product plate. Mainly used for imported window trim panels and plastic interior doors.
- Method of igniting the material: the nature of combustion also helps to determine the type of plastic.
- According to the density of the material, for which the part is immersed in water.
Let's consider these methods in more detail.
Marking
According to the international classification of plastic materials that are used in everyday life for the manufacture of window panels, door slopes, etc., all plastics have a certain digital designation. It is indicated in a triangle embossed on the back of the part. The international identification codes for the plastics used are as follows:
Plastic identification codes
- polyethylene terephthalate - PET, number in triangle 1,
- polyethylene, respectively low and high density - LDPE and HDPE, numbers in the triangle 4 or 2,
- polyvinyl chloride - PVC, number in triangle 3,
- polypropylene - PP, the number in the triangle is 5,
- polystyrene – PS, number in triangle 6.
How to wipe off polyurethane foam and plaster
It is best to remove polyurethane foam from windows manually.
If you find foam immediately after installing the double-glazed window, then most likely it has not hardened yet, so do not remove it at the moment. When the polyurethane foam dries, it will separate much better from the glass surface. After hardening, it breaks and crumbles like foam. You can wipe off plaster from plastic windows with soapy water. If you fail to completely remove it the first time, do not despair; several repeated procedures will not leave a trace on the window.
The main thing to remember is that to clean a plastic window, you cannot use abrasive products, as well as a razor or knife, which can scratch the surface of the glass.
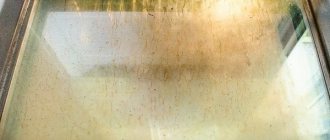
Prevention measures
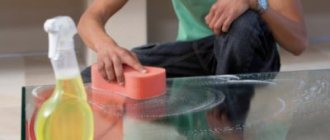
Removing stains and paint runs from glass is not a difficult job, but it is labor-intensive and time-consuming. Therefore, it is better to take measures in advance so that you don’t have to scrub anything later:
- When painting window frames, you should use masking tape. It is glued in strips close to the frame. After this, you can start painting - the marks will remain on the tape, and they will be easy to remove by simply removing the pasted strips.
It is not recommended to use regular office tape to protect glass. It will protect glass surfaces no worse than a painter's, but when removed, traces will remain on the surface, which will then take a long time to scrub off.
- If you don’t have tape, you can thickly soap the glass along the frames with laundry soap. After completing the repairs, you will need to wash the windows - traces of paint will be washed off with soap.
- An even more radical and effective method of prevention is to completely seal windows and glazed areas of interior doors with film. Such protection should not be removed until the repair is completed, then the glass will definitely remain clean.
If stains and smudges do appear, it is better to remove them fresh. In this case, much less effort and time will be required.
“Mechanical” options for removing protective film:
Option 1 Scraper + COSMOFEN
- Share
Excess film is removed with a scraper for cleaning glass-ceramic and hob surfaces.
Remains of adhesive and small scratches, if any, should be removed with COSMOFEN 10 or FENOSOL cleaner.
If there are no COSMOFEN 10 or FENOSOL cleaners, you can use an acrylic solvent, for example P-12.
Option 2 Hairdryer + COSMOFEN
- Share
We heat the film with an industrial hair dryer (or use a powerful “home” hair dryer). After which, quickly (until the protective film has cooled) and carefully, pry up the edge of the film with a scalpel (or a sharp stationery knife) and tear it off the window surface without stopping. We remove traces of glue, again, with COSMOFEN or acrylic solvent.
Option 3 Steam generator + COSMOFEN
Similar to method No. 2, but instead of an industrial hair dryer, you can use a steam generator. According to reviews, this method is more effective.
Traditional recipes for washing windows
You can also clean windows after renovation or during cleaning using home remedies. True, this will require more work.
Factory-made detergents can be successfully replaced:
- Vinegar solution. For 100 ml of table vinegar, 0.5 liters of water.
- Lemon juice. Squeeze two lemons into a glass of water.
- A solution of ammonia. For 0.5 liters of water, take 2 tbsp.
- Starch or chalk solution. Per liter of water 1 tbsp. starch, chalk or tooth powder.
Homemade solutions are sprayed onto double-glazed windows with a spray bottle. After this, the glass is rubbed until completely transparent with dry, lint-free wipes or old crumpled newspapers. When washing with starch or chalk, it is recommended to wipe the glass after the cleaning solution has dried.
Homemade solutions
There is not always available cash to purchase special chemicals for cleaning paint. Ingenuity and skillful hands will come to the rescue. Homemade solution consists of:
- caustic soda;
- slaked lime;
- crushed chalk
First, mix lime and chalk until smooth, and then add soda. The ideal consistency should look like thick sour cream.
Apply the prepared paste to the stains and leave the mixture for several hours. After the specified time has passed, you can easily remove the dirt with a spatula. The method is considered inexpensive compared to thermal and chemical ones.
Causes of leaks
There may be one reason, or maybe several at the same time. When painting any surface, the following factors should be avoided:
The thicker the coating, the harder it is to spread over the wall or ceiling.
Before starting painting work, the paint must be sufficiently diluted, this is most important for the very first layer. Manufacturers of paints and varnishes often indicate on the cans that the paint is ready for use or that it can be diluted no more than 10%. However, any coating needs to be thinned
Water-based paints are thinned with water, while oil-based paints and enamels are thinned with a solvent. The amount of liquid may exceed 10% of the paint volume, but at the same time you should not add more than 20%. After dilution and thorough stirring, you need to check the thickness of the coating. Dip the roller into the paint and lift it up. If the paint flows off it slowly (it flows, not flops), then the viscosity is normal. You need to apply and roll the paint over the surface quickly, without interruption. Otherwise, the painted areas will dry before you roll the boundaries between them. And after complete drying, the walls will become striped. It is best to paint a smooth surface with a short-haired roller. Using a long-haired roller is advisable only if you are working with a textured coating. In all other cases, such a roller will certainly “decorate” the ceiling and walls with smudges. The problem of poorly painted areas occurs when there is insufficient lighting or poor vision of the painter. On a wet surface it can be difficult to see areas that have not been completely painted. Therefore, you need to take care of a bright, but not blinding lamp, or don’t be shy about wearing glasses. If you apply paint to a plane in stripes, their boundaries become very clearly visible after drying. The coating should be applied in a W-shaped motion, which will be discussed in more detail below. A poorly puttied, sanded, or cleaned surface after painting will certainly expose the defects to everyone. Hoping that paint will hide some imperfections is deeply mistaken. On the contrary, she will show them “in all their glory.”
Reasons for the appearance of smudges and drops on the coating
First, let’s better understand the question of what are the main reasons for the appearance of these defects; this is necessary primarily for those who have not yet started work.
The list of factors is quite lengthy:
- low quality paints and varnishes.
- an incorrectly selected solvent or failure to comply with the proportion of paint dilution, which makes it too liquid and does not adhere well to the surface.
- incorrect settings of the spray gun and compressor, or applying the material at the wrong angle, and often the tool is moved too far from the surface. Here you need to follow the application technique.
- ingress of dust and insects.
- lack of temperature control, which at low temperatures leads to slow setting of the material and the formation of drops and smudges on the surface of the car body.
- failure to adhere to the drying regime between layers.
- lack of experience to apply a uniform layer of material.
These are basic things, and most of the nuances can be eliminated if you first try to apply the material to a test surface, set up the tool correctly and fine-tune the operating technique
Also pay special attention to the preparation of the workspace, this applies to cleanliness and temperature in the room
Stains and stains on the ceiling after painting: how to fix?
So, we figured out the reasons. In the future, this will help us not repeat mistakes. But what to do now, when the ceiling is already painted, and there are terrible stripes, stains, and smudges on it? How to bring it to mind?
The only sure way is to sand (sand) the entire ceiling until the surface becomes uniform and rough. Don’t worry, there won’t be a lot of dust and dirt, because only a layer of paint is removed. The skin should be relatively fine. You need to work quite carefully so as not to touch the putty layer.
Then you need to wipe the ceiling with a damp cloth and inspect the surface in bright daylight. If the ceiling has become smooth and uniform, you can start priming. If the surface does not inspire confidence, you should use finishing putty, applying it in a thin layer. After drying, light sanding again.
The next stage is priming
It is important to buy a quality primer for painting. It is better to prime several times - at least twice
Each time you need to let the surface dry completely.
When the ceiling looks perfectly even and smooth, like a mirror, you can begin painting.
Remember: if the base has streaks, spots and unevenness, all this will be noticeable even after painting! Therefore, before you take up the roller and paint, make sure that the ceiling is in perfect order. If in doubt, prime again.
How to deal with stains from old leaks on the ceiling? These areas require special treatment. First you need to thoroughly clean and wash them, wait until dry. Then treat with a biocidal solution (for example, Fongimur). Do not wash off the product! After this, use a universal blocking primer. It blocks stains from appearing through putty and paint.
Basic Safety Precautions
Since in most cases, paint removal is carried out using strong chemicals, you need to take care to follow basic safety precautions:
- Carry out cleaning work in a well-ventilated area or in the fresh air.
- Protect surrounding interior items from chemical splashes, especially for plastic and rubber products.
- When performing work, protect the skin of your hands with rubber gloves.
- Use special glasses with a high level of sealing to protect the mucous membranes of the eyes from the corrosive effects of chemicals.
- Wear protective clothing to prevent poisoning and don't forget a respirator to protect your airways from irritation.
What should you avoid when cleaning plastic windows?
When washing plastic windows after repair, you should remember that glass is only afraid of diamond and hydrofluoric acid. It is difficult to wipe glass units with fluffy napkins or rags, since fluff is very noticeable on clean glass. You will have to reapply the cleaning agent and wipe the glass units with lint-free wipes.
Cleaning plastic should be done with care. Plastic does not tolerate aggressive solvents containing acetone. Their use causes the plastic to turn yellow and its structure is destroyed. It is impossible to correct such an error. It inevitably leaves traces from:
- coarse abrasive powders;
- sandpaper;
- metal spatulas;
- scrapers and brushes.
Scratches left by a hard tool can only be removed by using liquid plastic. Chemical cleaning products are harmful to the eyes, skin and respiratory system. Therefore, it is not recommended to work without protective equipment (goggles, respirator, gloves).