Liquid plastic for PVC windows is basically an adhesive-sealant. Its use is necessary when finishing the joints of window blocks. The advantage over sealant is the absence of fading and peeling from the window. You can work with liquid plastic on any polymer surface. It is very resistant to ultraviolet rays. Due to the ideal combination of hardened parts, the appearance of a solid window with a slope is created. This bonding is obtained as a result of diffuse welding, which ensures the interchangeability of the materials of the parts.
The combination of individual hardened parts allows you to achieve visibility of the integral structure of the window and slope. The optimal result will be achieved by using diffuse welding technology, which will subsequently make it possible to replace individual sections, and not the entire structure as a whole.
Types of materials
Work can be performed using the following materials:
- Drywall. For production, GVLV brand slabs are used - this is a moisture-resistant plasterboard. Installation can be carried out in several ways: mounted on glue, putty, polyurethane foam, or mounted on a frame structure;
For the installation of slopes, moisture-resistant plasterboard is used - Plastic panels. They have a pleasant glossy surface that harmonizes with the profile of the PVC window. Fastening can also be carried out by fixing it with glue, foam or using modern material - liquid plastic;
Plastic panels - MDF panels. They are not used very often for the manufacture of slopes due to the fact that it is not easy to choose the appropriate appearance of the panels so that they are combined with the profile material;
The use of MDF when constructing slopes is rarely used - Sandwich panels. They are used to install insulated surfaces of window niches;
Sandwich panels are used to install insulated slopes - Plaster. The most inexpensive and traditional material. Most often used for outdoor work. To work with this material, you must have certain professional skills to do the job well.
Disadvantages of conventional sealants
When sealing cracks in window joints with conventional sealants, after some time problems arise due to their shortcomings during operation. Most often, silicone and acrylic sealants are used to seal cracks. Each of them has its own shortcomings that manifest themselves over time.
Rice. 3. A seam that has turned yellow during use of windows, made with acrylic sealant.
Their essence is as follows:
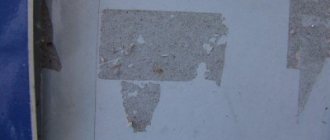
- Acrylic-based sealants, once cured, become porous and begin to absorb dust, dirt, odors, cigarette smoke and anything else present in the environment. As a result, the seam acquires a dirty yellow color, which looks unsightly (see Fig. 3).
- Silicone sealants have a transparent appearance and form a barely noticeable film after drying. When using windows, such a film begins to peel off and lag behind the surface, forming rags (see Fig. 4).
Rice. 4. The difference between seams made with silicone sealant and “liquid plastic”
The technology for applying liquid plastic and the disadvantages of other sealants are shown in the video:
Mounting method on polyurethane foam
You can glue the slopes to the windows using polyurethane foam. This is a universal material with a high degree of adhesion. How to glue plasterboard slopes in this way is shown below.
- On the window opening, the width and depth are measured from above. On the sides, the height is measured twice - at the window and at the wall;
At the side openings, measure the external and internal heights - In accordance with the obtained dimensions, details are drawn on a sheet of drywall;
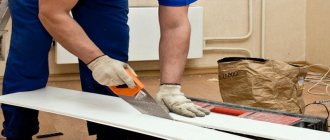
Part marking - Using a construction knife, cut out the necessary parts; Cutting parts
- The polyurethane foam is applied to the slope, the plasterboard part is pressed for a few seconds, then it is separated from the wall and wait until the foam expands again. Then the part is put back and fixed in the required position. In this case, you can use self-tapping screws, which are removed after the polyurethane foam has dried;
The part is glued using polyurethane foam - Metal corners with perforations are installed on plasterboard corners;
The corners of the slopes are covered with perforated corners - The corners are finished with putty and left until completely dry;
Finishing corners with putty - At the final stage, the surface is painted.
Slope painting
Initial data
Slope is the area of a window or door opening between the frame and the inner surface of the wall. To preserve heat, as well as to facilitate maintenance and a neat appearance, the slopes are sheathed with plastic (with or without colored film), laminate, sandwich panels, and plasterboard. And some, in the old fashioned way, plaster the slopes and paint (whitewash).
Gluing the corner to the slope is the final touch. It plays the role of a protective and decorative element: it closes joints and increases the resistance of corners to damage.
During installation, it is important to consider several points:
- Angle type. Corners for slopes are made of different materials: MDF, metal, plastic... We will look at the most popular ones - plastic corners. There are two main types of such products: rigid and flexible. The former are used for 90° angles, the latter for arches and non-standard openings.
- Type of surfaces. To glue the corner, choose an adhesive that is suitable for all three types of materials: the element itself, the finishing material of the slopes and walls. Most often these are plastic, PVC and wallpaper.
- Preparation. It is best to glue the corners onto well-developed slopes without cracks, irregularities and other defects. If high-quality repairs are not yet included in the plans, you need to make sure that the wallpaper on the wall does not peel off and the whitewash (paint) does not crumble. Surfaces are also cleaned, dried and degreased.
- Workload. Different types of glue have different speeds of adhesion to the surface. It varies from 30–40 seconds to tens of minutes. For a small amount of work, this parameter is not critical. But if you plan to use corners to decorate the slope of not just one window, but 4-5, or to decorate an arched opening, if the gluing speed is low, the work may take a whole day. Think about whether you have time to press each bar for 5–20 minutes?
- Glue transparency. White and cloudy glue may show through the plastic corners in spots. In addition, its excess may be noticeable on the wallpaper.
Why should you choose plastic products?
Plastic is the most common and versatile material.
Plastic slopes are most often installed
This is due to its performance characteristics and ease of installation. The advantages of plastic slopes include:
- Easy to care for the surface - just wipe the plastic with a cloth and soapy water;
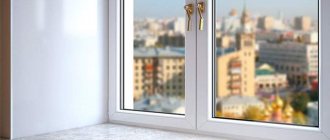
- High-quality plastic does not fade when exposed to sunlight;
- Plastic looks best combined with the profile surface of plastic windows;
- The service life of these products is calculated in decades;
- For plastic slopes, when insulating them, you can use mineral wool. In this case, heat loss through the window structure is reduced and the effect of window fogging is eliminated;
- The moisture resistance of the plastic is obvious, so it does not collapse under the influence of condensation;
- Simple installation - the parts just need to be treated with adhesive and fixed to the surface of the base.
Installation
Plastic slopes can be glued in the traditional way - on polyurethane foam. This installation has some differences from that used for plasterboard slopes.
- At the initial stage, a starting profile is installed around the entire perimeter of the window opening.. In order for the connection to have sufficient tightness, when attaching the profile, its back side is covered with a thin layer of silicone sealant;
First, fix the starting profile - Parts are cut out of sheet plastic 8 mm thick. The window is measured in the same way as when installing plasterboard parts;
Plastic part cut to size - A frame made of timber is installed around the perimeter of the window;
A wooden block is installed around the perimeter of the window - The starting profile is attached to the wooden frame;
The starting profile is fixed to a wooden frame - The resulting parts are inserted into the U-shaped starting profile. First, a layer of polyurethane foam is applied in a wave-like manner to the entire plane of the base, thus completely filling the space between the block and the frame;
The gap between the block and the frame is foamed - The plastic elements are fixed with masking tape while they dry.
After installing the slopes while the foam dries, they are fixed with tape
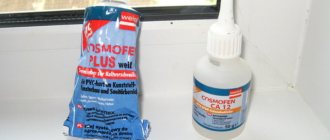
What is the difference between Cosmofen and Cosmofen plus?
These types of liquid plastic have a one-component base of low viscosity, while the material remains extremely transparent. It has a quick gluing effect, so it is recommended to use parts that do not have any defects on the surface. A material such as liquid plastic Cosmofen enjoys considerable popularity in the field of repair and household services when carrying out installation work of any complexity, both on a production scale and in repairs.
Some features of using Cosmofen liquid plastic:
- high resistance rate;
- resistance to sudden temperature changes;
- low heat loss rate.
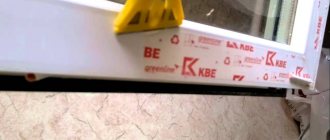
What is liquid plastic
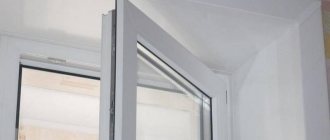
Liquid plastic has recently appeared on the construction market. It has found application in many areas, including the installation of plastic slopes.
Liquid plastic is used for gluing plastic slopes
Liquid plastic is a type of modern sealant that can be used as glue when attaching plastic slopes. The content of liquid PVC in its base gives this material many positive qualities.
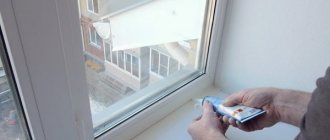
Mode of application
Using this glue, you can guarantee strong adhesion between the material and the surface.
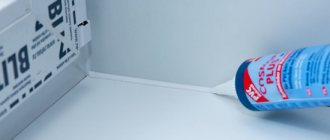
Using liquid plastic when processing joints and seams, you can be sure that it will never turn yellow, as happens with silicone analogues. This ensures a neat appearance of the window opening.
When temperature changes indoors, plastic panels secured with silicone may lose their joint tightness. And the panels, placed on glue in the form of liquid plastic, will stay in place for many years.
When working with this material, it is important to consider that it hardens in one minute . This is the interval during which it is necessary to apply it and distribute it over the surface. You need to work quickly and efficiently the first time.
It is also worth considering that liquid plastic is quite toxic due to the chemical reaction that occurs, so when working with it you must use a respirator and ensure a flow of fresh air into the room.
It should be noted that after liquid PVC-based glue dries, it will become absolutely harmless to the environment and people.
Positive qualities of liquid plastic
The appearance of this modern material did not go unnoticed by specialists involved in the installation of metal-plastic windows. For them, the question of how to glue plastic slopes has disappeared forever. Liquid plastic is characterized by the following positive qualities:
- When processing joints, the highest degree of sealing is achieved;
- It cannot be washed off with water, like its silicone counterpart;
- It does not turn yellow over time, does not emit or absorb foreign odors;
- The material does not change its qualities even after 10 years;
- It is moisture resistant;
- Does not rot or become moldy;
- Does not collapse or fade when exposed to sunlight;
- Resistant to mechanical stress;
- Has an affordable price.
If you glue the slope onto liquid plastic, you will get a neat monolithic structure.
Recommendations from the experts
To master the skills of gluing plastic corners, beginners may need advice from experts:
- After measuring, cut off the parts so that a slight overlap is formed (up to 1 mm), you can avoid unnecessary gaps.
Cutting line
- The joints must be sealed with putty; silicone darkens over time.
- Before applying glue, try it on, securing the fittings with tape.
Fixation with tape
- To take the correct shape of the arched opening, you can use a hair dryer.
Fixing the arched corner