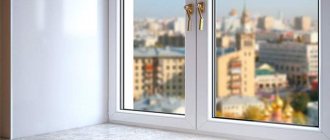
With one installation of PVC frames with double-glazed windows, work with the window opening is not completed - you need to create a frame for it, both outside and inside. There are several ways to do this, differing in the materials used and working methods. Do you want to learn more about them and understand how to properly make slopes on plastic windows? Then here you will find a fairly detailed description of these methods with step-by-step instructions for performing the work.
How to properly make slopes on plastic windows
DIY slopes for plastic windows
But first, let's look at several reasons why there is a need to install slopes on plastic windows.
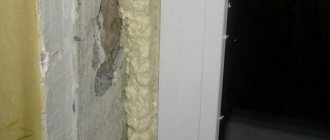
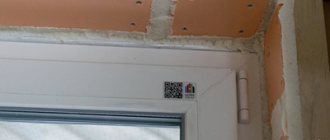
- The first reason is to protect the edges of the frame and the mounting foam on which it rests from damage by dampness and temperature changes. Without slopes, the installation seam of the window will gradually begin to collapse and become unusable.
- The second reason is to protect the window opening from cold, rain and drafts; high-quality slopes made of metal, plastic or any other material will provide reliable thermal insulation at the installation seam and will not allow water to penetrate inside. Also, slopes partially play the role of sound insulation
- The third reason is decorative. A plastic window in an opening without slopes does not look very beautiful both from the inside and the outside. Therefore, it is framed with metal, plastic, plasterboard or plaster.
Basic requirements for window slopes
On a note! There are four main types of slopes for plastic windows: metal, plastic, plasterboard and plaster.
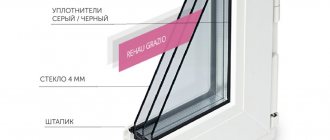
In the image you can see a detailed diagram of a slope made from a sandwich panel installed along a leveling profile, with insulation and fastening to a decorative corner and polyurethane foam
Frameless glazing of balconies
Among the many available methods of glazing balconies, frameless is considered the most elite. The design contains a minimum number of elements, but each of them is subject to the highest quality requirements. Read this article for more details.
In what cases are slopes made separately?
Typically, plastic windows are made together with slopes. In this case, there is no need to install them separately. Making slopes is most often required in the following cases:
- With limited availability, only windows could be ordered. In this case, additional slopes will have to be made.
- After long-term use or poor-quality installation, the structure needs repair and modification.
In these situations, it is necessary to eliminate the cracks and install high-quality and reliable slopes.
Composition of external slopes
The distance between the supporting window frame and the external environment is 2-3.5 times less than the distance between the substrate and the internal space. Still, the outer part of the window opening is suitable for finishing. In this case, use:
- Wood siding;
- Plastic siding;
- Metal siding;
- Clinker tiles.
Theoretically, the window opening can be finished on the outside with gypsum plasterboard and even plastered. However, the appropriate approach is unlikely to protect walls and windows from external influences. The materials themselves will quickly deteriorate.
Types of slopes for windows
After installing the windows, the owner can make the following slopes on the windows with his own hands:
- Sheathing is done with plasterboard.
- Installing plastic slopes yourself is an inexpensive and practical option.
- They can be plastered and painted. This is the most common option. This is usually done during renovation of the premises. If the work is performed at a different time, it will be more convenient to use another option.
- Make sandwich panels.
- You can finish the slopes using foamed PVC.
Do-it-yourself finishing of slopes must be done in strict accordance with the work technology. This will allow you to create beautiful and functional slopes.
Advantages and disadvantages
The advantages of plastic slopes include:
- durability;
- attractive appearance, harmonious combination with plastic windows;
- the ability to cut off the cold surface of the inside of the opening;
- reliable masking and protection of polyurethane foam;
- the material is easy to cut and process;
- the possibility of finishing not only standard, but also arched openings;
- easy care, no need to use expensive compounds;
- complete resistance to any contact with moisture;
- ease of installation, the ability to do the work yourself.
Flaws:
- low resistance to mechanical stress;
- the need to be careful during operation;
- If the plastic is of poor quality, it may turn yellow over time.
Expert opinion
Mezentsev Sergey Petrovich
Residential renovation and finishing specialist
The disadvantages of plastic slopes are due to the characteristics of the material and are not of fundamental importance. Most users prefer this particular window design option, since surrounded by plastic they look like solid and solid objects.
How to make slopes with your own hands (step-by-step instructions)
To make slopes beautifully, you need to choose the appropriate method and carefully carry out the necessary work. It is important to ensure a flat surface and accurate installation. The installation features of each type of slope are discussed in detail below.
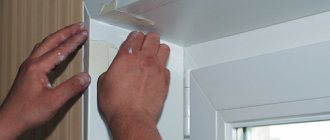
Drywall slopes
Installing slopes made of this material requires simple installation work. This sheathing is durable and allows you to additionally use a layer of insulation. This installation method does not create pollution during work.
To carry out the work there is no need to first level the wall. The plasterboard sheet is secured with dowels. During the work, you need to pay attention to the accuracy of installation. The sheet must be level.
You can first lay a layer of insulation. Mineral wool is often used for this. After installation, you need to putty the joints, prime and paint.
The sheets can also be secured in other ways: attaching them to a frame, gluing them onto putty, or using polyurethane foam.
Plastic slopes
The store sells plastic panels in accordance with the desired profile. This option is considered the easiest to install. If you install plastic slopes with your own hands, they will be durable, easy to clean, and provide good moisture resistance. Panels are available in various colors and sizes.
Plastic parts have an external and rough (internal) surface. It is recommended to place a layer of insulation between them. For this, for example, you can use mineral wool. This will improve the thermal insulation properties.
To install the plastic panel, it is necessary to make a guide profile at the window frame and on the outside. Plastic is attached to them. To decorate the edges and corners of the structure, special decorative details are placed on them.
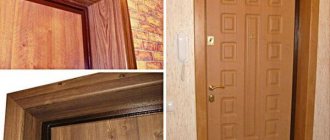
This technology can be used for mounting boards made of wood, MDF boards, laminate and other similar materials.
External metal slopes for plastic windows - installation instructions
During the construction of private housing in villages, towns and suburbs, slopes made of metal have become very popular. This is largely due to their advantages over other materials.
- High strength – slopes made of metal can better withstand mechanical loads compared to similar products made of other materials.
Remember that improperly designed window trim will lead to many troubles.
- Durability – metal coated with powder paint can serve the home owner for many years without losing its strength or appearance.
- Resistance to high and very low temperatures - the metal will not deform under extreme heat, and will not become extremely brittle in severe frosts.
- Attractive and neat appearance.
- Easy to install - metal slopes on a plastic window do not require much effort and time to install.
Plastic slopes for PVC windows
Decorative plastic slopes
Before we move on to describing the steps to install metal slopes, let’s consider the tools and materials needed to complete this work. For your convenience, they are summarized in the table below.
Table. Installation of external metal slopes - tools and consumables.
| Name | Why is it necessary? |
| Roulette | Taking measurements |
| Self-tapping screws | Fasteners for metal slope. It is desirable that the color of the caps matches the color of the product |
| Screwdriver | Fixing and tightening screws |
| Long cue ball for self-tapping screws | Working with metal slope fasteners in hard-to-reach places when installing the starting profile |
| Set of drills for metal and concrete | Creating holes in slope elements and walls for fastening |
| Metal cutting scissors | To adjust metal slopes to window dimensions |
| Sealant and mounting gun | Processing joints between individual slope elements, as well as between the slope and a plastic window |
| Construction knife with retractable blade | Cutting packaging of metal slopes for windows |
Window with external slopes
Important! Also, do not forget to prepare a large enough work table on which it will be convenient to trim individual elements of the metal slope. In addition, if the upper border of the opening is high, take a stepladder.
Now let's move on to a direct description of the actions that must be performed to install external metal slopes on plastic windows.
Step 1. Unpack the set of slopes for plastic windows. Check that all its components are in stock and without defects. In this case, the kit consists of fasteners, a lower ebb, one upper and two side slopes, and starting profiles for them.
Unpacking slopes
Step 2. Measure the width and height of the window opening. In this case, one must also take into account how correctly the window is installed - in some cases they are mounted in a plane that is not parallel to the external wall of the house and the decoration. A similar factor must be taken into account when adjusting the lower ebb and other slopes further.
Adjusting the bottom ebb
Important! It will also be useful to “try on” individual slope elements on plastic windows, installing them in the opening without fastening them.
Step 3. Transfer the measurement results to the lower ebb, which, as a rule, is initially slightly larger than the width of the window opening. You will subsequently cut this part to the required size and form side “ears” on the edges.
The measurement results are transferred to the lower tide
Step 4. Using metal scissors, cut the bottom flashing to the width of the window opening, leaving trapezoid-shaped “ears” at the ends. Then fold them up as shown in one of the photos below. Also, during the trimming process, leave a triangle on the outside of the ebb - it will cover the corner of the opening.
Trimming the bottom tide
Prices for construction scissors for metal
Construction shears for metal
This is what the edge of the lower ebb should look like after trimming - a bent side surface is formed in the form of a trapezoid and a triangular edge is left that will cover the corner of the opening from the outside
Step 5. Check if the bottom flashing is now the right size for the window opening. If everything is in order, mark the holes for fasteners and drill them (if they were not made in advance, as on the product in the example in the photo).
Low tide fitting
Step 6. Align the bottom ebb with the width and fix it in the opening using self-tapping screws.
Fixing low tide
Step 7. Try on the F-shaped starting profiles on the side surfaces of the window opening to see if they are suitable in height. Mark with a pencil the place to which these products reach in height.
F-shaped starting profiles are tried on
Step 8. Install on the upper horizontal part of the window opening the starting profile necessary for attaching the top strip of the metal slope.
Setting up a starting profile
Step 9. Insert the corresponding slope element into the upper starting profile and secure. If necessary, first trim the part to form the “ears” necessary for reliable fixation of the side starting profiles in the opening.
Attaching the top decorative element
Important! Factory-made metal slopes, as a rule, have a special polyethylene film that protects the product from scratches and other damage during storage and transportation. When installing, remove the film from those surfaces where it will be impossible to get rid of it later. Remove the remaining film from other places only after the installation of the slopes has been completed - this way you will reduce the chance of accidentally damaging the elements during the work.
Step 10. Using vertical “ears” on the upper and lower elements of the metal slopes, secure the starting side profiles.
Side profile attachment
Another photo of the process
Step 11. Mount the left and right slopes on these starting profiles, secure them with self-tapping screws or metal rivets. Then, if desired, seal all joints and crevices with sealant to completely eliminate any possibility of water getting into the window frame.
Installation of side slopes
Video - Exterior window decoration with metal slopes
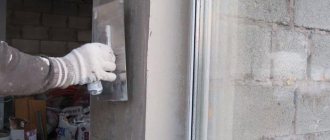
Plastering and painting slopes
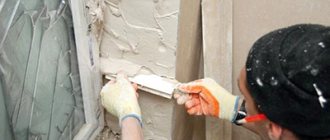
Gypsum plaster is usually used for this purpose. This is due to its durability and quick drying. The use of cement-sand plaster is also possible, but its layer should be thinner than that of gypsum. Special acrylic or latex based plasters are available for sale. They harden more slowly than cement or gypsum, allowing for a more even surface.
After plastering, the surface is puttied. In this case, you need to get the most even surface possible. It is sanded and coated with primer. The thickness of the layer depends on how smooth the walls are. If they have a smooth surface, the plaster can be applied in a thin layer.
After the layer has dried, you can paint. Water-based or acrylic paint is used here. During work, it is recommended to cover the window and window sill with protective tape to protect it from paint.
Difficulties and errors in the process
The list of errors depends on the selected material and installation method. But there are common ones for all cases. For example, lack of high-quality surface preparation or preparation was done incorrectly.
In addition, it should be noted:
- Poor and insufficient filling of voids with polyurethane foam. This will lead to the window blowing out and cold entering the room.
- Plastering slopes without insulation. The material does not protect well from cold air, so condensation will form on the windows.
- The seams between the frame and the opening are poorly insulated. In this case, the drywall will begin to get wet.
- Error in choice of material. There are products that are used only for external (metal) or internal (plasterboard) slopes. If this is not taken into account, the slopes will quickly collapse.
- Installation of internal slopes only. The lack of external design leads to rapid destruction of the polyurethane foam.
In any case, the result will be the same - poor-quality sealing, penetration of cold, condensation, reduced service life of the window.
Sandwich panels for slopes
This option is considered one of the most practical. Such panels are multilayer. They contain a special filler that improves thermal insulation and sound insulation properties.
When installing panel slopes with your own hands, you need to attach slats along the contour of the opening. They must be carefully aligned. A profile is placed on them for installing the slab.
An additional layer of insulation is placed in the cavity underneath. Then the panel is attached.
Consumables, tools and equipment for installation
Before starting work, you need to familiarize yourself with the installation technology of a certain material. Then the purchase of tools will be limited to the list of kits for this product.
To avoid stops and interruptions in work, you should familiarize yourself with the general list:
- drill;
- roulette;
- knife-cutter (sharp);
- screwdriver;
- construction marker;
- screws for plastic panels;
- screwdriver;
- hammer;
- construction level;
- rule;
- construction stapler.
Materials required for installation:
silicone (white);- self-tapping screws;
- dowel-nails (small);
- polyurethane foam;
- wooden slats;
- plastic corners;
- profiles - starting, J-profile, F-profile;
- construction staples;
- U-shaped bar;
- the material from which the profile will be mounted.
The installation process is divided into stages. Each stage will require its own set of tools and materials.
Foamed PVC slopes
This material is relatively easy to process. If necessary, it can be easily bent or cut to the desired size. This makes it possible to use different surface shapes. They do not have to be flat, but can, for example, have a concave shape or rounded corners.
Installing slopes with your own hands is done like this. To change the shape of the sheet, you will need to make cuts. In this case, you need to ensure that they are short. Otherwise, this can significantly reduce the strength of the structure.
After bending, the cut sites are treated with glue. A pre-laid metal profile is used for installation. The space between the panel and the wall is filled with foam or insulation. The use of sprayed insulation is allowed.
Pros and cons of doing the work yourself
The advantages of installing products yourself are:
- savings on work costs;
- gaining experience and gaining new knowledge;
- with strict adherence to technology, confidence in the quality of work.
If you do all the steps yourself, you can know exactly the nuances of each operation. This will help you quickly fix problems as soon as they appear.
Minuses:
- poor-quality installation in the absence of knowledge and experience;
- illiterate selection of material;
- incorrect measurements.
All these shortcomings reduce the performance characteristics of windows.
Photo of ideal finishing of slopes on windows
What is liquid plastic
Liquid plastic has recently appeared on the construction market. It has found application in many areas, including the installation of plastic slopes.
Liquid plastic is used for gluing plastic slopes
Liquid plastic is a type of modern sealant that can be used as glue when attaching plastic slopes. The content of liquid PVC in its base gives this material many positive qualities.
Mode of application
Using this glue, you can guarantee strong adhesion between the material and the surface.
Using liquid plastic when processing joints and seams, you can be sure that it will never turn yellow, as happens with silicone analogues. This ensures a neat appearance of the window opening.
When temperature changes indoors, plastic panels secured with silicone may lose their joint tightness. And the panels, placed on glue in the form of liquid plastic, will stay in place for many years.
When working with this material, it is important to consider that it hardens in one minute . This is the interval during which it is necessary to apply it and distribute it over the surface. You need to work quickly and efficiently the first time.
It is also worth considering that liquid plastic is quite toxic due to the chemical reaction that occurs, so when working with it you must use a respirator and ensure a flow of fresh air into the room.
It should be noted that after liquid PVC-based glue dries, it will become absolutely harmless to the environment and people.
Positive qualities of liquid plastic
The appearance of this modern material did not go unnoticed by specialists involved in the installation of metal-plastic windows. For them, the question of how to glue plastic slopes has disappeared forever. Liquid plastic is characterized by the following positive qualities:
If you glue the slope onto liquid plastic, you will get a neat monolithic structure.
Source
Types of glue for plastic corners
You can glue plastic corners to the slopes of doors and windows:
- “liquid nails”;
- “liquid plastic”;
- polyurethane glue;
- silicone sealant.
All of the listed types of glue are suitable for joining plastic to plastic, MDF, and wallpaper. They have a viscous consistency and fill voids well. The corners are securely fixed and do not fall off after a while if the installation is carried out correctly.
Top 3 popular glues
The construction market offers a large selection of adhesives for professional and home repairs. Such compositions differ from each other not only in the type of adhesive, but also in quality.
Experienced craftsmen prefer proven brands. These are considered:
- “Moment Installation MV-70”;
- Cosmofen PLUS HV;
- Titan Wild SM.
"Moment Installation MV-70"
It belongs to the category of “liquid nails” and is widely used for external and internal work. Allows you to do without dowels, nails and screws. They are used to glue wall panels made of wood, cork, and PVC. “Moment Installation” is also used for ceramics, foam plastic, gypsum, metal, and is used when installing door frames and window sills.
The adhesive has a high initial adhesion force of 70 kg/m². Tolerates temperature changes from –20 to +80 °C, moisture resistant. The approximate cost of a 400 g tube is 220 rubles. A gun is required for application.
The advantages of “Moment MV-70” when installing plastic corners are:
- no pungent odor;
- fast and reliable adhesion to the surface.
The adhesive is suitable for attaching rigid corners to curved surfaces.
The downside is the white color of the composition. Excess must be removed in a timely manner so that no traces are left.
Cosmofen PLUS HV
The so-called “liquid plastic”. The glue is characterized by fast setting, resistance to temperature changes and ultraviolet radiation. Widely used in window production. They are used to glue slopes, ebbs, and louver slats. Cosmofen PLUS HV is suitable for working with PVC, plastic, aluminum, vinyl, wood.
It is important that the surfaces are well prepared - free of dust, dirt, and degreased. To fix the PVC corner, force for 40–60 seconds is sufficient. After 3–4 minutes, the glue finally sets (functional strength occurs after 16 hours).
Among the advantages of glue:
- high fixation speed,
- economical consumption,
- resistance to yellowing.
The disadvantage is the relatively high price. A tube of 200 g will cost approximately 220 rubles.
Titan Wild SM
Popular universal glue. Type – polyurethane (vinyl acetate copolymers). A 0.5 liter bottle with a dispenser costs approximately 150 rubles. Many people know it as ceiling. However, the scope of application of glue is much wider. It is used to glue skirting boards, decorative profiles, stucco decoration to such substrates as concrete, cement and gypsum coating, wood, fiber boards, plywood, etc. It reliably holds surfaces together, is transparent, moisture-resistant, and retains its properties under temperature changes - from -30 °C to +60 °C.
The composition is applied to the product to be glued and after 2–5 minutes it is pressed forcefully to the surface. 3-4 minutes are enough for adhesion. Complete drying occurs after 4 hours.
The advantages of “Titan” are its affordable price and the absence of a pungent odor.
What is liquid plastic
Liquid plastic has recently appeared on the construction market. It has found application in many areas, including the installation of plastic slopes.
Liquid plastic is used for gluing plastic slopes
Liquid plastic is a type of modern sealant that can be used as glue when attaching plastic slopes. The content of liquid PVC in its base gives this material many positive qualities.
Mode of application
Using this glue, you can guarantee strong adhesion between the material and the surface.
Using liquid plastic when processing joints and seams, you can be sure that it will never turn yellow, as happens with silicone analogues. This ensures a neat appearance of the window opening.
When temperature changes indoors, plastic panels secured with silicone may lose their joint tightness. And the panels, placed on glue in the form of liquid plastic, will stay in place for many years.
When working with this material, it is important to consider that it hardens in one minute . This is the interval during which it is necessary to apply it and distribute it over the surface. You need to work quickly and efficiently the first time.
It is also worth considering that liquid plastic is quite toxic due to the chemical reaction that occurs, so when working with it you must use a respirator and ensure a flow of fresh air into the room.
It should be noted that after liquid PVC-based glue dries, it will become absolutely harmless to the environment and people.
Positive qualities of liquid plastic
The appearance of this modern material did not go unnoticed by specialists involved in the installation of metal-plastic windows. For them, the question of how to glue plastic slopes has disappeared forever. Liquid plastic is characterized by the following positive qualities:
If you glue the slope onto liquid plastic, you will get a neat monolithic structure.
Source
Plaster finishing
This option is now considered quite outdated because it has more disadvantages than advantages. But you can still consider this possibility.
There are two main advantages of this type of finishing:
- Low installation cost.
- If the windows were installed close to the walls, then this is the only possible option.
Unfortunately, there are many more disadvantages to this method, so you should consider the negative consequences of its use.
Among the disadvantages are the following:
- Plaster is not the final finishing option; you will still need to putty and paint the slopes.
- After work, a lot of waste remains.
- You cannot install additional insulation from mineral wool or plasterboard.
- Installation experience required.
- Unsightly appearance; expensive paint will be needed to solve this problem.
- Short service life. After some time, the plaster will begin to crumble.
If, after weighing all the pros and cons, you come to the conclusion that you can’t do without plaster, feel free to get down to business.