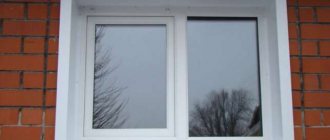
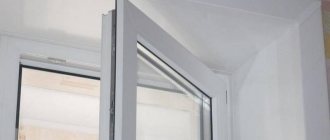
The final stage of the process of installing modern windows is finishing the slopes. A thick profile, multi-chamber double-glazed windows and reliable fittings provide excellent thermal insulation, but the interface between the window frame and the apartment wall remains a cold and unattractive place. If this area is not given proper attention, condensation, mold, and wall destruction may occur. Therefore, let's find out which slopes are best suited for plastic windows.
Do-it-yourself installation of PVC slopes
Like all construction work, the installation of plastic slopes begins with preliminary preparation, during which the materials and tools necessary for this work are purchased.
What materials and tools are needed:
U and F-shaped profiles
- Plastic for slopes with a thickness of at least 8 mm.
- U-shaped starting strip made of plastic.
- F-shaped plastic profile.
- Insulation material: mineral wool, polyurethane foam.
- Wooden slats.
- Drill for self-tapping screws.
- Building level.
- Roulette.
- Putty knife.
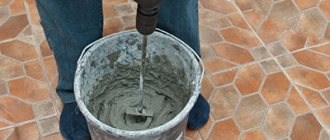
- Cement mortar.
- Long screws - 95 mm, self-tapping screws - 4.5 mm.
- Painting knife.
- Silicone sealant.
- Metal scissors.
- Construction stapler.
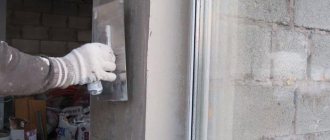
Next, the working surface is prepared: the remains of wallpaper or old plaster are removed from the old slopes, and the surface is treated with an antifungal agent. If, during the installation of a metal-plastic window, cracks appear on the street side, they need to be sealed with cement mortar. This procedure is necessary to protect the polyurethane foam from harmful sun rays and seal the external assembly seams.
Stages of installation of plastic slopes
- First of all, wooden slats are installed along the top and sides of the window openings. They are fixed with long screws (95 mm) and fastened in such a way that their edge does not protrude beyond the level of the wall. The holes for the screws are drilled using a drill. The screws initially do not tighten completely. Having decorated all sides of the window opening in this way, we check the position of the slats with a building level. This is necessary to create perfectly smooth slopes. After which the screws are tightened to the end.
- The starting U-shaped strip is attached along the outer edge of the window using self-tapping screws. The joints of the U-shaped strips should be even and smooth, small protrusions should be cut off with a paint knife. The U-shaped profile has a groove into which the plastic slope will be inserted.
- Next you need to install the F-shaped profile. The installation of this profile must be done so that its groove is installed opposite the groove of the U-shaped starting strip. The F-shaped groove located above the window must be cut off. The upper part of this profile is overlapped. After precise joining, excess parts of the F-strips are cut off with metal scissors. The F-profile is attached to wooden slats using a construction stapler. The part of the end of the profile that is closest to the wooden batten is attached. The F-profile, first of all, plays the role of a decorative element.
- Now you can proceed to installing the panels into the grooves. But before this, it is necessary to measure and also accurately cut the plastic with extreme precision. Simultaneously with the installation of slopes, mineral wool is laid. It is necessary to carefully ensure that the insulation lies evenly. If the joints of the entire structure are not perfectly smooth, you can use white silicone sealant to fill the defects.
Sandwich panels for window slopes can be installed using a slightly different technology. Its difference from the one described above is that after installing the starting profile, sandwich panels cut to size are immediately installed in it, the opposite edge of which is attached with self-tapping screws to wooden slats diagonally. Next, the F-profiles are installed and the joints are covered with sealant. How to do this work is clearly shown in the video.
We install PVC slopes ourselves. Installation instructions.
Watch this video on YouTube
This completes the installation of slopes made of sandwich panels. The result will please you if, when working with your own hands, you follow the following recommendations:
- Installation of slopes should begin from the top element.
- If there is a need to use polyurethane foam, remember that when it hardens, it expands and begins to put pressure on the structure.
- Remove excess silicone sealant with a piece of plastic.
- Choose plastic only with excellent quality indicators.
- It is not recommended to remove the protective film from the window until the installation of PVC slopes is completed.
- To prevent the plastic structure from being damaged or losing its integrity, leave it alone for 16 hours.
- Carefully study the information about the proper installation of slopes and the sequence of work stages.
Ready-made window slopes made of plastic
Installing plastic slopes on windows with your own hands, without using a starting profile, is another option. To do this, a small recess is made in the mounting foam around the perimeter of the window, into which a sandwich panel is then inserted. This technology is presented in the video.
Installation of slopes without PVC corners (full version)
Watch this video on YouTube
Sandwich panels for slopes
This option is considered one of the most practical. Such panels are multilayer. They contain a special filler that improves thermal insulation and sound insulation properties.
When installing panel slopes with your own hands, you need to attach slats along the contour of the opening. They must be carefully aligned. A profile is placed on them for installing the slab.
An additional layer of insulation is placed in the cavity underneath. Then the panel is attached.
Methods for finishing slopes
Surely, in almost any city in our country you can find companies offering services for installing window slopes inside, but, frankly, this procedure is not cheap. In this regard, a significant saving for the family budget will be the choice in favor of do-it-yourself finishing. Even though finishing window slopes with plastic seems complicated and overwhelming, in the right hands everything works out.
Before starting finishing work, a preparatory stage should be carried out: removing dust and old paint (if any) and impregnating the walls with an antiseptic primer.
The surface has been prepared, and now let’s look at what types of finishing of window slopes exist:
- plastering;
- plasterboard finishing;
- plastic finishing.
Let's figure out what the essence of each method is.
Which slopes are best for plastic windows?
All slope finishing options have pros and cons. There is no ideal material that is better than others in every respect. Therefore, when choosing, you need to decide which properties and characteristics are more important in a particular case.
| Requirements for slopes | The most suitable material |
| Speed and ease of installation | Plastic |
| Durability | Plaster, gypsum fiber |
| Strength | Plaster, gypsum fiber |
| Moisture resistance | Plastic, gypsum fiber |
| Natural material, natural look | Plaster, drywall, gypsum fiber |
| Tightness of the structure | Plastic |
| Practicality, no need for maintenance and care | Plastic |
| Best maintainability | Plaster, gypsum fiber |
| Low price | Plastic |
| Original finishing options (decorative plaster, tiles, mosaic) | Plaster, drywall, gypsum fiber |
| No corners or visible frame elements | Plaster, drywall, gypsum fiber |
| Possibility to change the design | Plaster, drywall, gypsum fiber |
Let's figure out how to make slopes on windows from the outside: fundamental importance and advantages
After the master, or maybe you yourself, have installed a new type of plastic window system, from the outside of the opening you can see that the resulting installation seam is exposed to all the winds. Most often, the seam is foamed using special foam, which, in essence, is truly an ideal fixer and sealant; it perfectly insulates the room from heat loss, as well as from unnecessary sounds from the street. However, despite all its valuable qualities, polyurethane foam can easily collapse from prolonged exposure to direct sunlight, as well as precipitation.
Important
It is worth understanding that it is very important to figure out how to make external slopes on plastic windows, because the durability, as well as the reliability of the entire window unit, directly depends on this. Finishing the outside can prevent unwanted condensation inside the frame, which can cause black mold or mildew, which is detrimental to both the room itself and the people living in it
That is, it is, of course, possible to postpone finishing the slopes outside, for an indefinite block, counting on the fact that the inside is beautiful, but the outside is unimportant, but you should understand that water can get into the porous foam. When the liquid freezes, it will expand, destroying the mounting seam, and as a result, serious repairs may be required, and perhaps replacement of the entire structure
This will entail considerable additional costs and will hit the family budget.
- Having figured out how to properly make slopes on outside windows, you can reliably insulate part of the wall around the window, as well as the window block itself.
- With proper finishing of external slopes, the noise level in the room is significantly reduced.
- The durability, and above all, the reliability of the structure, with proper finishing of the slopes from the outside, increases significantly.
It also makes sense to note that the building takes on a completely different appearance if the external slopes are installed beautifully and reliably, and this is not at all important, because it is much more pleasant to live in a beautiful house than with hanging “snot” of yellow polyurethane foam. Therefore, it is worth immediately, after installing a plastic window, to find out how to make slopes on windows from the street, and not just from the inside
Frequent mistakes and problems when finishing window slopes on the street side
External slopes can not only be plastered, but also sheathed with different materials, use:
- PVC panels;
- siding;
- moisture-resistant drywall;
- natural stone;
- sandwich panels;
- tiles;
- metal.
Home owners make a big mistake when they do not install insulation. Small cracks are the cause of drafts and the formation of cold bridges. Moisture entering through cracks and crevices will lead to the formation of fungus, destruction of the mounting foam, and distortion of the structure. Insulation will keep the house warm and prevent the increase in indoor humidity.
To finish external window vaults, you must use only material intended for external use, which is not exposed to moisture, sunlight and temperature changes. The use of cheap finishing materials is not economically justified; after a short time, repairs will have to be made again.
Beginners make the following mistakes when finishing external vaults:
- they do not seal the seams well enough, blowing them out with polyurethane foam;
- do not insulate the wall;
- use materials intended for interior work;
- do not use a perforated corner to strengthen the corners, such a structure will be fragile and begin to collapse;
- they attach PVC panels, placing them under the window frames, which leads to the formation of drafts.
Cladding window frames from the street on your own will cost much less than using the services of professionals. It is important to adhere to the technology and recommendations, to take into account the common mistakes made by beginners in the construction business. A large selection of materials makes it possible to create a high-quality finishing of the frame. Using high-quality materials, you will decorate the facade of your house and protect it during the cold season.
Types of plaster
To get the maximum benefit from upgrading newly installed plastic windows in terms of heating and achieving maximum comfort, you should first take a closer look at special heat and sound insulating plaster. It has high reflective properties due to the use of natural raw materials as components - vermiculite, perlite and their mixture with durable gypsum.
The scheme for preparing a solution for plaster is quite simple - you need to buy one of the above building mixtures and dilute it with water, mixing smoothly and thoroughly. The consistency of the finished solution should not be very liquid, otherwise the plaster will start to flow right on the slopes, but it should not be too thick and stretchy - such a solution will be very difficult to work with, and it will set too quickly.
Bags of mixtures usually indicate the optimal ratio of components when preparing the solution, so we advise you to follow the manufacturer’s recommendations. It will also indicate for what area this amount of mixture will be calculated for this preparation of the solution, therefore, having previously found out the approximate area of work (with a small margin), you can calculate how much of the mixture needs to be purchased.
Advice from the experts
When using plaster as a finish, which can act as a base for plasterboard sheets, it is recommended to level the mixture with a wooden spoon. The length of the tool will be determined by the width of the slope. Opening the window when working with the mixture is strictly prohibited. It is also important to ensure that the composition does not get into the fittings, as it will damage it, which will cause disruption of its functions.
Before choosing plaster as a facing for slopes, you should compare it with other materials, for example, gypsum plasterboard. The first is an outdated approach and has many disadvantages. The mixture bonds to the plastic frame, which can cause gaps. Cracks will certainly occur due to the low elasticity of the mixture and constant temperature changes. Plaster also has rather weak thermal insulation characteristics, which often leads to the formation of condensation and mold.
The traditional solution today is plasterboard. Preference should be given to its moisture-resistant variety. If you have plasterboard left over from the renovation and you want to use it, it is recommended to cover the surface of the sheets with a moisture-proof compound or primer in several layers. But if you still plan to purchase gypsum boards, you should choose moisture-resistant sheets, despite their higher price. The cost will be repaid by the excellent thermal insulation properties of the material, its high thermal stability and good rigidity.
Other options
Slopes for plastic windows can be made with your own hands and from other materials. One of the most commonly used is wood. Material selection options:
- commercially available platbands are attached to the window frame with lining nails;
- furniture panels require corners to be decorated with plastic corners;
- block house imitating wooden beams or logs, installation is carried out by analogy with plastic panels;
- dry, planed and sanded boards.
Repair of existing slopes is carried out in accordance with the characteristics of the material from which they are made, the type and degree of damage. Wooden panels are painted, tinted or varnished. Plastic ones are difficult to repair. They are easier to replace, since a dent, crack or chip in the plastic cannot be corrected. Only camouflage is possible by gluing a patch or decorative element at the location of the flaw.
How to insulate slopes
Slopes are insulated in three ways:
- polyurethane foam;
- mineral wool;
- polystyrene foam.
All these materials must be under the facing panels, so insulation is carried out at the stage of installation of the frame. The technology for performing the work is the same for external and internal openings.
- According to the step-by-step instructions for installing plasterboard slopes, a frame is made from metal profiles or wooden blocks.
- The cavities between the slats are filled with insulation - mineral wool or polystyrene foam. When using the latter, the gaps between the PPS and the frame are eliminated using polyurethane foam. Mineral wool is laid close to the frame.
- Cover the slopes with facing material. To finish the window opening on the street side, choose metal trim or plastic sandwich panels.
If you want to insulate the slopes, you need to do this before installing them.
You can make slopes for plastic windows yourself in different ways. All types of work are accessible to beginners and do not require special knowledge and skills
It is important to familiarize yourself in advance with the features of each design option for a window opening on the outside and inside of the room. Assess your situation and choose the most appropriate method
The provided step-by-step instructions will help you complete the task quickly and accurately.
What requirements must slopes meet?
Before considering window framing options, their advantages and disadvantages, let’s determine what is required of these elements.
Expert opinion
Anton Tsugunov
Construction expert. Entrepreneur. 17 years of experience. More than 100 completed objects.
Hello, friends!
First, I will talk about all types of slopes, as well as their pros and cons. I will describe the subtleties and share my experience. At the end of the article I will give recommendations on which slopes are the best choice, and in which cases one should give preference to one or another material and finishing method.
Important!
When applying for a slope installation service, be sure to enter into an agreement with electronic correspondence , then you can resolve all issues with the builders promptly and without headaches. Here is a link to my contract >>>
If you have problems with the quality of the slopes or with the timing of their installation, then you will need to write a claim. Here are samples of claims by deadline >>>
Enjoy reading!
Slopes should:
- Not inferior to the durability of the window design. Modern double-glazed windows are designed for a minimum of 15–20 years of operation. Slopes must withstand no less time without loss of basic qualities. Few people would like to redo them every two or three years.
- Comply with the general style of the window, forming a single whole with it.
- Maintain or even improve the performance characteristics of plastic windows.
- Withstand mechanical loads and impacts of the doors.
- If possible, be repairable.
List of preparatory works
Measuring, installing and adjusting plastic windows is carried out by specialized teams, which is the key to the correct implementation of all technological measures and entitles the customer to warranty service. But such operations as installing slopes of plastic windows, if desired, can be performed on your own.
Slopes come in various types, and may differ in color, shape, and materials from which they are made.
The most common materials used for the production of window slopes are the following:
However, plastic slopes have proven themselves to be the best. This is due to the fact that as a result of installing such slopes, a single structure is obtained, ideal for decorating any room.
Also, a significant advantage of such slopes is their low cost, durability, high speed of installation work (3-4 hours), ease of maintenance, and the ability to choose any color segment.
So, after the metal-plastic window has been installed and at least 36 hours have passed (the period of complete hardening of the polyurethane foam), you can install plastic slopes for windows.
First you need to decide on the list of necessary materials and tools required for such work.
Firstly, you need to purchase the plastic itself, and it is best to give preference to high-quality and durable products. The initial cost savings when purchasing a cheap (Chinese) product may result in additional costs associated with repairing damaged elements.
That is, when choosing plastic panels for future slopes, you need to make sure of the following:
In addition, the thickness of the plastic should not be less than 8 millimeters, and the lengths of the panels (cut in the store) should be equal to the specified dimensions of the opening in height and width (plus a five-centimeter margin). Accordingly, the width of the plastic panel should be at least 1 cm greater than the depth of the slope.
By the way, when cutting panels, you should take into account that most often they are 6 m long and 0.25 or 0.38 m wide. Therefore, before ordering and cutting the material, it is advisable to calculate the length of the blanks in order to eliminate the purchase of excess.
As for the color of the plastic panels, it all depends on the user’s preferences, but it should still be understood that white material is best suited for solving the tasks at hand, as it fits better with the window and window sill, and traces of dust are less visible on it.
Secondly, the following building materials will be required:
starting strip, F-shaped profile, polyurethane foam, cement mortar, silicone, small screws (bugs), tape, paper clips, insulation.
And when ordering the listed items, there are also certain nuances:
Starting line. Usually sold in 6-meter lengths and selected based on the thickness of the plastic. The strip is cut based on the actual dimensions of the window opening (near the window area). F - shaped profile.
Usually sold in 6 meters. The strip is cut based on the actual dimensions of the window opening (near the wall area) + 7cm is added for vertical stripes and 15cm for horizontal stripes.
Polyurethane foam
It is very important to use foam under the mounting gun, and order material with minimal expansion (foam manufacturers such as MAKROFLEX and TITANIUM have proven themselves to be excellent for the manufacture of plastic slopes)
Read about how to choose foam and what material characteristics to pay attention to here. The tools you need to have are a hammer, a drill or a screwdriver with a bit for self-tapping screws, a screwdriver, a gun for silicone and polyurethane foam, a trowel, a spatula, a tape measure, and a rag.
The tools you need to have are a hammer, a drill or a screwdriver with a bit for self-tapping screws, a screwdriver, a gun for silicone and polyurethane foam, a trowel, a spatula, a tape measure, and a rag.
When all the necessary attributes have been prepared, you can begin the procedure for finishing the slopes of plastic windows.
Plastering and painting slopes
Gypsum plaster is usually used for this purpose. This is due to its durability and quick drying. The use of cement-sand plaster is also possible, but its layer should be thinner than that of gypsum. Special acrylic or latex based plasters are available for sale. They harden more slowly than cement or gypsum, allowing for a more even surface.
After plastering, the surface is puttied. In this case, you need to get the most even surface possible. It is sanded and coated with primer. The thickness of the layer depends on how smooth the walls are. If they have a smooth surface, the plaster can be applied in a thin layer.
After the layer has dried, you can paint. Water-based or acrylic paint is used here. During work, it is recommended to cover the window and window sill with protective tape to protect it from paint.
Installation of metal slopes on windows, let's get to work
So, if the interior finishing work can still at least somehow wait, then with the exterior - every month counts. In order to prevent spontaneous destruction of the opening under the influence of the environment, we will try to master how to install metal slopes on windows.
Step 1: Taking measurements
Since they have a one-piece design and are made individually for each window, it is very important to take all measurements correctly. Even a beginner can cope with this, because you only need to measure the length, width and height of the window opening
In general, to solve this issue, all we need is a good tape measure. It is more reliable if the manufacturer provides measuring services.
Step 2: Preparation
At this stage of work, no difficulties should arise either. Preparatory work consists of removing all bulging foam. This can be done either with a simple sharp knife or with a special construction knife. We also clean the surface of all kinds of debris, dirt and residues of construction compounds. After which you can safely carry out the direct installation of metal slopes on the windows. And almost every owner has the tools needed for this work. These are a screwdriver, self-tapping screws, cylinders with sealant (silicone) and polyurethane foam, as well as the slopes themselves.
Step 3: Finishing the seams
It is very important that good thermal insulation of the room is achieved, and for this it is necessary to thoroughly treat all seams with sealant. So we pick up a gun with silicone and carefully apply it around the perimeter of the entire window
After drying, we do a visual inspection for the presence of untreated areas; there should not be any.
Step 4: Installation of flashing and corners
Installation work begins with the installation of window sills. We apply foam to the lower surface of the opening and place the ebb itself on it. Its height can be adjusted with wooden or metal spacers. If yours is not located horizontally, then you first need to set the level according to the beacons, and only then proceed with installation. For the corners, we screw special fasteners to the window frame with self-tapping screws.
Step 5: Installation
We apply construction foam to their inner surface and part of the window opening. Next, we lean one side against the pre-attached profile, and the other against the wall of the house (the slopes are made in an L-shape). First of all, we attach the “sides”. The top bar is first simply inserted into the seat, and then the free space between it and the wall is blown with foam. After this, the last element is installed, which closes the gap between the upper horizontal sheet and the wall of the house.
Thus, to install slopes for metal windows with your own hands, you do not need any special skills, and the work will not be dirty, but even interesting, especially for creative individuals who like to do everything on their own.
Using drywall
Most often, the decoration of window opening slopes indoors is done using plasterboard. This finishing material has high parameters that help quickly and easily create slopes with a completely smooth surface and resistance to environmental influences.
Drywall is lightweight and its installation on a vertical surface is not particularly difficult. It quickly turns into the desired color. In addition, such materials, when properly treated with antiseptic agents, help protect the surface from the appearance of mold and mildew at the junction of the window frame and slopes.
Selection of materials for work
You don’t need to think that you can use any type of drywall to create a beautiful slope design . The material must be selected taking into account the parameters of its operation. All plasterboard materials have a different indicator, which the master himself must take into account before purchasing all the necessary materials and starting to repair the window structure.
Any window is a source of moisture and condensation, which occurs due to the large difference between the temperature in the house and outside. As a result of this, the material with which the slope will be repaired should not be afraid of moisture. Otherwise, the finishing surface will retain its appearance and basic functionality only for a certain period of time. In addition, at the end of the work you need to use antiseptic compounds to coat the material, as well as special paint for painting.
Taking window measurements
Each repair job begins with measuring the structure, for which we need a special measuring tape. The final result will largely depend on the quality of measurements. If the slope does not fit tightly to the window frame, the following problems may arise:
- the development of mold and mildew both outside and inside the room;
- the appearance of small cracks through which cold air will penetrate into the house in cold weather. Over time, without eliminating the problem, the crack will become larger, which will increase the cost of heating the house;
- the operating time of the window is reduced, it quickly wears out and becomes of poor quality and unaesthetic.
Installation principle
Finishing the slopes will begin with taking measurements. All window parameters must be transferred to a plasterboard sheet, from which a piece suitable for the window opening is then cut out. Installation of the canvas can take place on the lathing, profile or without them. You need to choose an installation method based on the condition of the slopes themselves. It is necessary to evaluate how well the slopes are processed, as well as what the double-glazed window looks like.
Installation of drywall should be done using a special adhesive if the walls are perfectly smooth. If not, then you need to bring them to good condition in advance and level their surface.
Afterwards, you need to attach the strip to the window profile or a frame that can well hold the drywall on the side of the double-glazed window. A plasterboard panel is installed on top of the plank ; all voids are properly treated with a special sealant. It is this design that will prevent frosty air from entering the premises.
Siding installation technology
Siding can be used to finish external slopes in completely different ways. Everything directly depends on the design of the window opening. A widely used standard is the European one, when slopes are less than nineteen centimeters. In this case, the standard size of the window strip is used - up to twenty-two centimeters. It is very easy to secure it using the finishing profile into which the bar is inserted. Instead of a finishing profile, a J-profile and chamfer can be used, which will reduce the overall cost of the finishing process.
According to CIS standards, slopes are more than nineteen centimeters, so for them only the J-profile is used, which is placed near the frame. It is necessary to mount an outer corner along the entire perimeter of the window, into which the siding panels will be installed. When it comes to windows without slopes, you will have to install platbands, which will serve as the basis for attaching the siding. An arched window can only be finished with a flexible J-profile. Naturally, you can use a regular one, but it will have to be trimmed a little just in those places where the window shape bends.
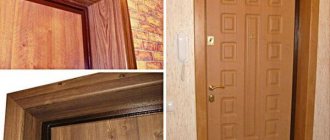
Platbands
Platbands can serve as interior decoration for window slopes. They may be based on different materials, but these products perform the same role - they protect the seam and give it an aesthetic appearance.
Types of platbands
The side walls near the window should look attractive. To do this, you can use different platbands, which differ in shape, texture, and base material. The simplest and cheapest are flat products. They look inexpensive, but are quite functional. Another type of finishing is profiled products that have a convex surface. The decorative function is enhanced here, but such platbands are somewhat more expensive.
If you feel that you may have difficulties installing slopes, you can easily install shaped products with complex terrain with your own hands. Such cladding can imitate natural materials, such as wood. If you do not want to finish the slopes with plasterboard, you can choose carved platbands, which are more expensive than others, but can have individual dimensions and are made to order.
Materials for production
In order to finish the slopes of the windows of a wooden house, you can use platbands made of different materials, for example:
- plastic;
- wood;
- metal;
- MDF.
When choosing a tree, you must be prepared for the fact that you will have to take care of the products all the time. Every few years the material requires blocking or painting. Only then will the products not dry out and retain their original appearance. The advantage of such products is that they can be different, are environmentally friendly and look quite presentable. But the most logical way to finish the slopes of plastic windows is with PVC. All maintenance will be reduced to wiping the surfaces from dirt; no other manipulations will be required. Plastic platbands are resistant to external factors, do not fade and tolerate freezing and thawing well. The advantage of this material is its low cost, but the decorative function here is not performed very successfully.
The inside of the slopes can be finished with MDF. Externally, this material will not withstand exposure to moisture and sun. The surface of the products is covered with a laminated film, so the base can imitate different materials, for example, stone or wood. If you don't want to use plastic, but don't have enough money for wood, MDF is just for you. This is a budget option and a compromise of two solutions.
Finishing windows with metal slopes is done quite often. This cladding does not look very presentable, but it will last much longer than wooden products. The metal can be periodically renewed and also coated with compounds that will protect it from corrosion and external negative factors. When choosing window trim with metal slopes, you prefer a budget option that will last for decades. This window design is suitable for houses in a modern style.
Fastening
When finishing windows with metal slopes, you will need to prepare the surface by removing all excess from it, including polyurethane foam. The seams are filled with silicone sealant, only after which can we proceed to installation work.
The next step is to measure. If you make the slopes yourself, you can cut them from a metal sheet. Next, the installation of ebb tides should be carried out, the horizontalness is checked by the building level. The joint between the frame and the wall should be supplemented with thermal insulation tape to protect against moisture and noise. In those places where the slopes will come into contact with the frame, sealant is applied. The side elements are installed first, while maintaining an outward slope.
But when renovating an apartment, you can finish the window slopes with wood. The material can be lining. At the first stage, you need to prepare slats according to the size of the opening. These elements will be necessary to create the sheathing. They are installed around the perimeter on dowel-nails. When finishing windows with clapboard, the frame is positioned perpendicular to the cladding. The frame can be insulated with foam plastic or mineral wool.
Self-tapping screws should be recessed in the center of the panels, filling the caps at the final stage.
Finishing window slopes with laminate is carried out according to the same principle, which cannot be said about stone. Masonry begins from the bottom of the slope. As soon as these elements are strengthened, you can proceed to the next row so that it does not slide down. Corners are formed by trimming the end elements at an angle of 45˚. Before finishing the window slopes with decorative stone, the surface must be leveled and coated with a primer. The preparatory stage can be carried out using drywall, which will act as a leveling layer.
Methods and materials used for outdoor work
There are a number of ways to decorate windows, let's look at the most common ones.
Plastering slopes is the cheapest and easiest option
So, you can improve and refine the design of plastic windows using:
- plastering slopes;
- sandwich panels;
- sheet plastic;
- cellular plastic;
- natural or artificial stone.
The first three types of work are the most common, but the last two materials are not used so often, at least for this purpose.
If you are finishing the external slopes of windows with plaster, you should first become familiar with the disadvantages of this method:
- repairs are required 2-3 times a year;
- plastic structures have poor adhesion to plaster;
- the surface will inevitably crack;
- It’s difficult to do everything as accurately as possible.
A more preferable option for exterior finishing would be sandwich panels. This material is a multilayer structure of two sheets of plastic, between which there is foamed polyurethane foam.
Sandwich panels, thanks to their design, are good at preventing blowing and freezing
Sandwich panels are easy to install and clean, they are resistant to weather conditions and provide additional thermal insulation. Available in a variety of colors. A fairly affordable material for finishing plastic windows is sheet plastic. Most often, the role of plastic is a specific type – polyvinyl chloride.
This material is resistant to moisture, steam, acids and alkalis. Foamed plastic also has increased thermal insulation properties. All these advantages allow this cladding to be used for both interior and exterior work.
If you need additional thermal insulation, you can add a layer of mineral wool between the wall and the plastic.
Another rare, but this time extremely attractive material is natural or artificial stone.
External finishing of plastic windows
In terms of technical and aesthetic characteristics, this option is superior to all those described above, however, such disadvantages as the complexity of installation and high cost make the choice of PVC or sandwich panels more appropriate.
In the end, it all depends on your financial capabilities and personal preferences.
Main types of coating
Decorative types of plasters are divided into groups according to their main substance in the composition and type of filler. They can be textural , structural and Venetian.
- Textured plaster has a special pattern, which the consumer knows about in advance.
- Structural plaster creates a simpler relief compared to textured plaster, but its pattern becomes unpredictable.
- Venetian plaster includes several layers at once, as a result of which the surface becomes smooth and acquires a characteristic pattern.
Master class on finishing slopes with polystyrene foam
Finishing slopes with polystyrene foam allows you to simultaneously level and insulate the openings. For this, slabs with a thickness of 15-20 mm are used. When working with this material, it is necessary that the surface be as smooth as possible. Expanded polystyrene is not flexible, but, on the contrary, has increased rigidity and fragility. Therefore, on significant protrusions it may crack or even break. The advantage of this finishing method is that you don’t need to have deep construction knowledge to perform it and you can do the installation yourself.
To carry out the work you will need:
- knife for cutting polystyrene foam boards;
- mixer for preparing tile adhesive;
- a set of different-sized spatulas;
- construction square, ruler;
- level;
- polystyrene foam 15-20 mm thick;
- tile adhesive suitable for outdoor use;
- plaster mesh;
- metal perforated corners.
Finishing stages:
- We properly prepare the surface - clean it from dust and cement mortar residues, cover existing cracks and crevices with putty or cement.
- We cut out the parts of future slopes from foam plastic and connect them together with glue.
- Apply glue to the surface and fix the prepared parts. You should not save glue, as voids may form between the slopes and the polystyrene foam. It is better to remove excess composition with a rag. During the gluing process, check the correct installation using a level. After the glue has dried, you can further secure the material with dowels. It is better to drill holes in advance or a couple of hours after gluing the boards. The main thing is to prevent the foam from moving.
- Apply glue to the surface on which the window sill will be installed.
- The next stage is to apply a starting layer of putty, carefully covering all joints and cracks. We apply a sickle mesh.
- We install the perforated corners and apply a finishing layer of putty.
- After drying, the surface can be painted with facade paint. It should be applied in several layers.
Repair of slopes from GVL
In this case, the slopes were installed more than 8 years ago. During the process of cosmetic renovation (dividing the room into two parts), the slopes were partially puttied, sanded and painted. The work on the slopes took 2 days, the cost of the work is insignificant (compared to installing new slopes - even when compared with budget plastic ones). The walls were also painted, so no corners were needed.
An entire corner of the slope was missing. Crushed from being hit by a window for 8 years. The slope has been completely restored and painted in 2 layers.
Expert opinion
Anton Tsugunov
Construction expert. Entrepreneur. 17 years of experience. More than 100 completed objects.
I use moisture-resistant GVL Knauf-Supersheet with dimensions 10x2500x1200 mm. One sheet is enough for several windows. I order and pay with a card with 33% cashback .
Peculiarities
The slope is the space between the window frame and the load-bearing wall inside the room. It is so called because it is most often done at an obtuse angle relative to the window frame. Such a turn helps to maximize the penetration of daylight into the room. Finishing rules will depend on what material you have chosen to create the slope, and also that it does not differ from any other finishing work using the material. But there are specific subtleties that you should pay attention to, as well as installation methods that will make it possible to reduce work time. The technique will be selected individually depending on the preferences of the apartment owner and his capabilities.
Previously, back in ancient times, a wooden box was used as a slope, which was covered with a platband. In modern times, glass packages are used to make windows, which help improve light permeability and increase the width of the slope, since only one window frame will be used instead of a frame. It can be made of plastic, wood or metal. The uniformity of the material used in the manufacture of the slope and frame helps to give the structure a holistic look, so most often metal will go to metal, wood to wood, and plastic to plastic.
Please note that, on the other hand, the room with a window opening can be brick, concrete, iron or wood. This factor should definitely be taken into account when selecting the material from which the slope will be made, since it can become a continuation of the wall itself, and not the window frame.
Modern window systems are designed to minimize heat loss from the room. In order for this function to be successfully completed, the windows are isolated from the walls using a layer of polyurethane foam, which is resistant to moisture, ultraviolet rays and mechanical damage. Internal slopes are needed in order to maintain the integrity of this layer. The amount of work during installation of slopes will depend (not always, but most often) on the window measurer. During the dismantling of old boxes, hidden defects in the opening often become visible, which could not be detected before.
The walls may have cavities with air or be in terrible condition, which can lead to partial destruction. Plaster on old slopes may seem very strong; it is especially difficult to work if the walls are made of poured concrete. In wooden houses, the presence and condition of the deck becomes a complication. When starting work and ordering a window, the measurer must have excellent work experience and think about the future, even about slopes. The main feature of finishing internal slopes is that it can be done as simply as possible, and this will reduce installation time.
Subject to the need for the technological process of the material chosen for the work, it is almost impossible to make a slope in less than 3 hours. Installation time is reduced only when several slopes are installed at once at the same time, for example, to the entire apartment or throughout the house. Basically, they are made in the form of a single-color plane and are not subject to mechanical loads.
Please note that it should be noted that in the vast majority of cases, the slopes are hidden from view with the help of drapes or curtains, and you remember about them only when washing the windows 1-2 times a year. For this reason, preference should be given to plain material that can be easily washed.
Necessary tools and consumables
Slopes are installed using different technologies, hence the different list of materials for work. Plastic options require a galvanized profile for the frame, screws and dowels for fixation. PVC strips are framed with corners, starting strips, and after installation the seams are sealed with acrylic sealant to match the color of the surface.
The tools also depend on the type of finish. Prepare for plastic:
- tape measure, building level, pencil, square;
- hand hacksaw, knife, miter box;
- hammer drill, screwdriver;
- sealant gun, screwdriver.
Decorative stone is placed on adhesive mixtures, which are sold in the form of a dry powder. Grouting compounds are used to treat the joints between tiles. Drywall at the joints is glued with a sickle mesh, which is installed on the finishing putty. The materials for plaster depend on the type of composition used; it is better to take ready-made mixtures with improved qualities. The surface is primed with adhesive compounds, painted with acrylic paints, and sometimes oil paints are used.
Materials
In addition to the external characteristics of the wall or frame material, the choice of facing will largely depend on the thickness and condition of the window opening. Sometimes, after the old windows have been dismantled, it is necessary to replace the pre-selected solution using certain materials. When planning, it is advisable that you consult with a specialist who can analyze the condition of the surface, and then advise with arguments the choice of variety and, in fact, material for future slopes.
Please note that for installation work you should calculate the amount of material used, and also prepare all the required tools in advance. It is also worth considering in more detail all the most popular options for finishing slopes.
PVC panels
Sheets of plastic that are used for cladding are called lining. They are presented on sale as a standard elongated rectangle shape with different widths. As a rule, these are long panels that can be easily cut and attached to vertical and horizontal surfaces. Due to the fact that the material is thin, plastic will not take up much space and will perform decorative and other useful functions, for example, it will protect the inner layers of the window opening from the cold.
The best option for installing slopes made of plastic are sandwich panels, which are named because they resemble a closed sandwich. And it looks like this - between two sheets of lining there is a layer of thick foamed polystyrene, which is the material for insulation, and also makes it possible to simplify the installation of slopes. The number of panels required for installation will be calculated based on the width and height of the slopes, and the thickness of the walls will also be taken into account. To the footage that you get, you should add from 15 to 20% of the material reserve. If you plan to finish the slopes of windows indoors on your own, then you should carefully read the theoretical information, and then select the appropriate tool (strictly professional).
Also included with the panels you should buy the following materials:
F-shaped or U-shaped profile, as well as material for the internal corner.- Material for thermal insulation if you use lining rather than sandwich panels.
- Wood slats and screws of the required length.
- Colorless or white silicone for sealing seams.
- Polyurethane foam.
What's better than the second option?
Drywall
Drywall is a durable and convenient material that is widely used for lining pipe ducts, multi-level ceilings, and is also ideal for creating window slopes. Among the varieties of material for slopes, you should choose GKLV (green), since this particular type of drywall has an increased level of strength and resistance to moisture, and this is of fundamental importance for the opening.
Installation of a plasterboard structure can be done using the frame and glue method. Accordingly, in addition to the main finishing material, you will also need to buy either adhesive for drywall, or special profiles from which the frame will be made. The profiles should be attached to each other using screws or dowels, and then fasten the cut facing sheets to them. Before starting work, you should clean the old layer of cladding, remove plaster that is crumbling or insulation that has become unusable. Since the adhesive method requires a flat surface, the base should be leveled by applying a conventional putty solution. It is advisable that the prepared area be treated with an antifungal solution; this is especially important if we are talking about a room with a high level of humidity.
Please note that this often happens when it is not possible to provide a completely flat surface, which means that material calculations may have errors. In this regard, you should prepare materials with a reserve, and then trim the excess parts during the installation process. slopes made of wood or cork are made according to the plasterboard principle.
Decorative plaster
Decorative plaster has gained incredible popularity due to its aesthetic appearance, resistance to wear and practicality. The material will serve as a finishing touch and can be applied to absolutely any surface. It will work great on leveled drywall surfaces and can also be applied to concrete, wood or brick. Decorative plaster will contain elements that make it possible to obtain different types of textures on the surfaces to be coated. Plaster can hide small irregularities and defects and enhance thermal insulation and sound insulation qualities.
Installation
The correct installation of the slopes will determine whether the window unit will be airtight and reliable. Slopes help provide not only a beautiful appearance, but also additional protection from drafts and moisture. With certain skills in construction, slopes can be made with your own hands, the main thing is that the technology and installation rules are strictly followed.
For PVC panels, the installation process will look like this:
- First, clean the surface and remove excess hardened polyurethane foam using a construction knife. The cleaned surface must be leveled using putty, cracks and crevices must be covered.
- When the surface is ready, place wooden slats that will serve as a frame for attaching the panels. The profile should be fixed to it, and the slope space itself should be insulated using polystyrene foam, polyurethane foam or mineral wool.
- Sandwich panels or lining should be inserted into the profile, which will be secured in several places. The joints should be treated with silicone.
What is the best way to finish the window slopes inside, or rather, what method? The frame method is much better and more reliable, but you will need to correctly align the supporting base so that the dimensions on each side of the window are the same.
The process goes like this:
- Measure the distance from the wall to the window, using lines to mark the boundary of the installation. The guide profile should be secured with the outer side to the line.
- After the frame is ready, you should insulate the slope inside in the same way as when installing PVC panels.
- Drywall should be cut to the size of the frame, its parts should be fastened with self-tapping screws in the designated places, and the joints themselves should be sealed with a non-woven mixture.
Interestingly, the adhesive method makes it possible to finish a window block much easier, since panels cut from plasterboard should be fixed to the surface using construction adhesive or polyurethane foam.
The stages of finishing slopes using plaster differ in specifics. Before starting work, you need to seal the window sill, as well as the glass using a protective film if it was torn off during installation of the window structure. Next, the process must be carried out according to all the rules for applying a decorative layer of plaster to any type of surface. For slopes, it is better to choose a mixture that has small granules of the same size. The larger they are, the more difficult it will be to apply the mixture in an even layer. The composition of the mixture with small inclusions is usually more liquid and is made on a lime basis, so it will not be difficult to apply.
The first stage is applying an acrylic primer to the prepared surface. Next, prepare the plaster mixture and check the specific texture and shade on a small area.
Plaster is applied using different methods depending on the desired result:
- Using a trowel or steel float.
- Using a sponge or roller.
- Spraying from a broom, brush or broom.
And at the end, we have prepared tips for you from professionals.
Features and need for interior decoration
After replacing or installing windows, it becomes necessary to make slopes, which are an inclined plane between the window frame and the surface of the load-bearing wall. You simply cannot do without timely, high-quality cladding. It performs a decorative and protective function. On the one hand, it helps to hide seams, irregularities, and polyurethane foam; on the other hand, it makes it possible to insulate the window, protect it from excess moisture, and prevent noise from penetrating into the room.
If you do not line the opening in time, then over time the polyurethane foam will lose its qualities, leaky seams will let excess moisture into the room, and warm air will not be retained. Also, condensation will constantly form on the windows, and fungus and mold will appear on the walls. It should be remembered that the foam layer does not tolerate sunlight, precipitation, temperature changes, or mechanical stress very well.
Some people put off the issue of finishing slopes for a long time, and when they decide to complete it, to bring the job to an end, they are faced with unpleasant consequences resulting from the destruction of the installation material. This situation can lead not only to certain difficulties, but also to unforeseen expenses. Therefore, it is recommended to complete this type of work on time.
Preparatory moments
Removing the remnants of polyurethane foam
To finish the inside of the window slopes with plastic in a high-quality manner with your own hands, you need to clean the walls and prepare all the necessary fixtures and building materials. To form slopes, the thickness of the plastic strip should be 8 mm. The width and duration of the plastic must correspond to the size of the opening. You should prepare and clean the walls step by step:
- Remove excess foam.
- The shipping tape must be removed from the window profile.
- Seal the internal seams.
- The upper reaches and side sections of the hole must be freed from whitewash and leveled with putty.
- It is recommended to wipe the prepared area and apply 1-2 layers of primer.