Plastic window structures are considered reliable and airtight. But over time, they also begin to let in cold air. This is especially unpleasant in winter, when precious heat is literally blown out of the apartment. Changing the situation doesn't always require installing a new system. In most cases, it is enough to properly insulate plastic windows. Let's figure out how to do it right.
When to insulate plastic windows: reasons for heat loss
By purchasing single-chamber and double-chamber plastic windows, homeowners are confident that their home will be reliably insulated from noise, drafts and cold air. However, over time, this confidence can be dispelled by unpleasant realities, and the resulting heat loss will make you think about ways to insulate Euro-windows.
Common reasons that lead to the above problems may be:
- Installation of PVC windows with violations of technology and without compliance with GOSTs. The large number of people who want to replace old wooden frames with new double-glazed windows has become the reason that installation began to be carried out by people who have only a general understanding of it.
- Misalignment of the window frame caused by shrinkage of the house, which is a common occurrence in a new building.
- Physical wear of the rubber seals and the clamping mechanism. Under the influence of weather conditions (cold, heat) during operation, all window components wear out, and this is inevitable.
- Violation of basic operating rules, which include the need to wash the seal and treat it with glycerin to prevent drying out and cracking.
- Poor quality profile. Cheap windows often use cheap plastic parts, which are susceptible to deformation in the heat and can crack in the cold.
If the windows begin to fog up, there is a draft coming out of them, and residents complain about cold glass, then they need additional insulation.
Having found out the reason that led to the violation of thermal insulation, you can already decide whether to look for a specialist for this work or you can do everything yourself.
Identifying problem areas
Before you begin insulation, you need to find and identify all the places that need thermal insulation . Particular attention should be paid to the joints, as well as the junction of the walls and the frame. You should also check the slopes and window sill. To identify areas where cold air enters, you can use a regular lighter. It should be passed over all possible places of blowing.
Damage to thermal insulation can cause condensation to form on the glass.
Condensation, frost or drafts may also indicate an area that requires insulation. Depending on the cause of the thermal insulation failure, you need to think about how to fix it.
How to check windows for ventilation and tightness
Visually or using tactile sensations, it is quite difficult to determine the place where the tightness is broken.
Thus, in winter, blowing can often be confused with cold glasses (“cold background”), so to determine possible problems it is better to use one of the following methods:
- A lit candle will help you determine from inside the room where the air is blowing from. You need to bring it close to the window and walk around the perimeter. If the flame burns evenly, then everything is in order in this area. The rapid fluctuation of the flame indicates air currents entering the room from the street.
- If you run a damp palm along the contours of the valves, you will feel a sharp chill in the places where the air is blown. It can blow from under the sash or at the junction of the frame and the slope, and cold can also be felt inside the plastic frame.
- You can hold a piece of paper between the closed window sashes and tug it a little. If the paper is easily removed, or the window does not close tightly, then you cannot do without replacing the seal or adjusting the clamping mechanism.
- A piece of chalk will also help you find places where the seal is not pressed tightly. To do this, you need to paint the rubber parts with it, then close and open the window and inspect the frame. If there are places where it is not painted, then the opening is blown through here.
- You can try to press a little on the closed doors; if the noise from the street becomes noticeably quieter, then it is blowing from the doors.
Basic methods
There are 2 main ways to insulate windows: before or after finishing. By combining both types of work, thermal efficiency can be significantly increased. In some cases, you can use only one of the insulation methods, since work on its insulation is not always done during installation.
When installing
During the installation of windows, several types of work are done to insulate them, for example, warm installation.
This procedure consists in installing the entire structure around the perimeter of the opening on a vapor-tight insulation. One type of insulation is EPPS (extruded polystyrene foam, another name is penoplex).
In addition, slopes, window sills, as well as the outer part of the wall adjacent to the window opening are insulated using polymer slabs. This is necessary in order to remove all cold bridges that may form at the junction of the frame and the opening.
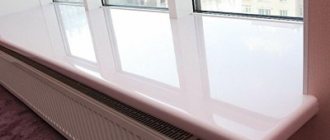
Note! In order for a double-glazed window to have a higher thermal efficiency, not become covered with condensation, and also not become moldy, it is necessary that there is a heating pipe under the window sill. The heat it generates prevents drafts from forming across the floor.
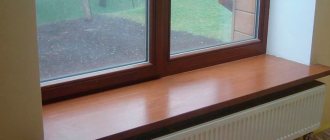
For free passage of heated air upwards, you need to reduce the length of the window sill to the optimal size. You can also make holes in it, install a convector or heating elements. In some cases, to achieve the desired effect on wide walls, the window is moved closer to the inside of the room. This is done by thickening the quarter.
Additional after finishing
In some cases, insulation of the walls around the window using polystyrene foam is carried out some time after the installation of PVC windows. This type of work is carried out to reduce heat loss through the opening , as well as to remove cold bridges.
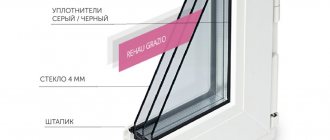
Another important element of insulating PVC windows after installation is replacing double-glazed windows with warm ones or gluing the glass with a special reflective film. 15-20% of all heat loss occurs through glass, since they have sufficient thermal conductivity.
To avoid this, a higher-quality double-glazed window is used, which consists of laminated glass, as well as a larger number of air chambers. A more budget-friendly version is to cover the glass with a protective film , which slightly reduces natural light, but allows you to reflect thermal energy.
After prolonged use, fittings or rubber insulation may wear out, causing blow-out spots to form.
With improper care (or lack thereof), the hinges or clamping mechanism gradually become loose or wear out.
In the first case, the blowing can be corrected by simple adjustment, and in the second, by replacing the fittings. Rubber seals with proper care (cleaning, lubrication with a special compound) can last 5-8 years without replacement.
But when debris gets in, temperature changes, or frequent opening of windows, the insulation wears out (loses elasticity, wears off, is pressed through, cracks), which leads to a loose fit of the sashes or double-glazed windows. Because of this, cold drafts and bridges are formed.
When should window insulation be left to professionals?
Before you rush to insulate windows yourself, you should think carefully about whether you need to contact a company specializing in this.
It is advisable to involve a specialist if:
- the plastic window was installed recently, and the installation company’s warranty has not yet expired; its specialists must fix all problems free of charge;
- the window is located at a considerable height (in an apartment in a multi-storey building) - such work is associated with a high level of danger;
- there are manufacturing defects or the insulation needs to be changed - in this case, the master will be able to install components and fittings that will be “like original”;
- The work is carried out in the cold season - a professional will be able to do everything efficiently and quickly, without cooling the room too much.
Since the comfort of living in a room depends on the temperature inside the room, if you have the slightest doubt about your ability to do it yourself so that it does not blow, it is better to contact a company specializing in such work.
Scotch tape, cotton wool and foam rubber
Paper or masking tape is an old, proven and fastest option to eliminate drafts from plastic or wooden windows. It does not provide significant insulation, but the work is carried out quickly and the materials are cheap. Be prepared that in a strong draft such tape may come off.
If the apartment blows too much, use additional cotton wool or foam rubber. Seal large gaps between the sashes, between the sashes and the wall, or window sill with the material. The cotton wool or foam rubber is sealed on top using masking tape or special paper tape.
You can buy ready-made self-adhesive foam strips. This is an economical option to seal cracks on both wooden and plastic windows. Due to the adhesive base, you do not have to seal the material with tape, and the insulation will easily last throughout the season.
In this case, there is no need to work with water and liquids, which increases the convenience and practicality of the procedure. But sheathing with cotton wool or foam rubber and tape must be repeated before each cold season, since such products absorb moisture well, swell and no longer protect against drafts. In addition, a sealed window cannot be opened for ventilation.
How and with what to insulate plastic windows if there is a draft
Once you have identified the problem, you can begin to fix it. Below are the most common reasons for blowing and ways to properly get rid of drafts inside a room.
If there is air between the window sill and the frame
In most cases, this problem can be fixed on your own. The sequence of actions and the necessary materials will depend on the thickness of the cracks and the intensity of drafts.
If there is a small gap (no more than 1-2 mm) from which there is not much blowing, white moisture-resistant silicone sealant will help correct the situation. It must be applied using a special gun so that it falls into the gap.
If the gap is uneven and its thickness ranges from 2 to 5 mm, then sealant alone will not do. To seal such cracks, it is better to use a plastic profile for tiling the inner corners of walls in bathrooms. From it you need to cut off a decorative part with a flat plate (1-1.5 cm wide). The gap must be filled well with sealant and the prepared decorative corner must be inserted into it.
If it starts to blow from the window immediately and very strongly, then you need to check the insulation of the ebb. To do this, it is necessary to remove and inspect the mounting seam between the frame and the doorway. Then blow out all the fistulas, holes and voids with polyurethane foam.
There is no need to try to caulk the cracks with padding polyester, foam rubber or construction waste. Foam is the best choice for these purposes; it can be plastered on top with cement.
Protection for polyurethane foam
PSUL (abbreviation for self-expanding tape) is glued to the frame before installing it in the window opening. Within about half an hour (depending on the ambient temperature), it increases in volume, filling the space at the outer junction of the edge of the opening with the window frame.
PSUL tape serves as reliable protection for polyurethane foam from all possible destructive processes, because it:
- does not rot;
- moisture resistant;
- does not deteriorate from exposure to sunlight;
- has good vapor permeability;
- when expanded, it perfectly fills small protrusions and irregularities;
- retains its protective functions at temperatures from -50 to +90.
The service life of the self-expanding tape is 50 years and, in theory, its protection is sufficient for external slopes. But, unfortunately, there are no ideal finishing materials.
Therefore, the self-expanding tape also needs protection, and such finishing protection can be the installation of external slopes.
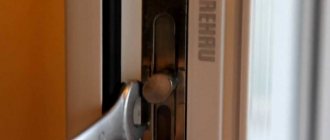
If it blows around the perimeter of the sash
The reason for the swelling may be that:
- windows are not set to winter mode;
- the rubber seal has become unusable;
- The clamping mechanism has become loose.
To prepare the window for low temperatures, you need to adjust the lower and upper hinges, and also move the locking pin to the desired position.
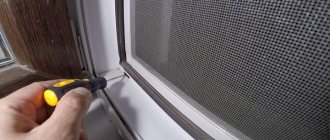
Step-by-step instructions for replacing the seal if it is unusable will be as follows:
- Remove the window sash so that the design features do not restrict access.
- Remove the old seal on the frame and sash and replace it with new contours.
- Be sure to glue the rubber bands together at the joints so that gaps do not form later. Avoid the formation of “accordions” and overlaps.
The clamping force can be adjusted on the upper and lower hinges using a No. 4 hex wrench. If you rotate the hex clockwise, the sash will be pressed against the hinge, and counterclockwise, vice versa. A video on the Internet will tell you how to do this correctly.
If it blows along the edges of the slopes
The main reason for such a draft is a damaged assembly seam. Even with the best-quality installation, this can happen after 5-10 years. To fix this problem, you need to disassemble the slopes, then apply foam along the seam and reinstall the slopes.
You can additionally insulate the slopes inside:
- polystyrene foam - this is the most affordable material that even a beginner can work with;
- foamed polyester - it is resistant to moisture and can provide additional heat and sound insulation, but care must be taken to seal the joints in the slopes;
- mineral wool - for plugging seams, it is not inferior in quality to previous materials, but you need to work with it in a respirator so that its particles do not irritate the mucous membranes, getting into the eyes and respiratory tract.
It is important not only to insulate slopes from the inside, but also from the outside. This will help protect the polyurethane foam from drying out, the doorway from fungus, and also make the temperature in the house warmer.
Preparing for work
Before you insulate plastic windows with your own hands, you need to carry out a complete diagnosis.
To do this, critical areas that allow wind to pass through are identified. It can come from different places, but it mainly comes from the window sill, window sashes and areas with worn out insulation. To understand where the wind is blowing from, you just need to raise your hand to different parts of the window. If this method does not help, then you can light a candle and sweep it across the entire structure, since fire is most sensitive to air currents. Rain can also help with diagnosis. Places where a lot of moisture has accumulated and lingered are the most problematic. If moisture was noticed in the middle of the window, this may indicate that there is a small crack in the glass.
The seal can be easily checked using a sheet. It must be inserted into the opening and the window closed. If the sheet is easily pulled around the corner, it means that the seal does not fit tightly to the frame.
Before insulating plastic windows with your own hands, you need to understand the purpose of the work. Naturally, this is done to save heat, but not every compromise can be made. You need to decide whether it is worth abandoning the aesthetic appearance of the window structure for the sake of savings or limiting access to the light flux.
Additionally, cost must be taken into account. Some materials are inexpensive. For example, sealant can be bought for several hundred rubles. Better and more durable solutions may require larger financial investments and the help of a qualified specialist. But don't be afraid of the high cost. High-quality insulation done once will please the owner for a long time.
It’s easy to do all the work yourself, but you can also resort to the help of specialists. It is quite possible to insulate the frame, window sill and replace the insulation on your own.
Before installing the insulation, do not forget to check the frame for chips and dents
It is worth remembering that windows have a warranty period. If during this period defects begin to appear on the windows, the company must eliminate all defects at its own expense.
It is necessary to insulate windows immediately before the onset of winter. This time is the most favorable for work. It is also necessary to take into account the specifics of materials. For example, a sealant can only be used in a certain temperature range, otherwise there is a risk that it will lose its properties.
Insulating windows for the winter with your own hands
It is not always possible to carry out complex insulation work with the involvement of specialists. In this case, simple methods will help to quickly and briefly eliminate the causes of drafts at home, postponing the work for a while.
In a wooden house, plastic windows from which it blows can be insulated from the outside by simply covering them with cellophane. To do this, it is better to use film in several folds, and its cut should be slightly larger than the area of the window with slopes. You can cheaply and securely fasten cellophane using thin wooden glazing beads or slats and nails.
Another way to make your home warmer is to sew new curtains or make winter blinds. To sew warm curtains, you need to use thick fabrics that will not allow the cold to pass through. It is acceptable to use 2-3 fold fabric or lined curtains. Winter blinds can be made from ordinary ones by simply wrapping them with woolen fabric.
You can deal with drafts using the same method used for wooden frames - seal all joints and cracks. It is not necessary to use strips of paper and soap solution for this. Painting tape will provide more reliable adhesion.
It is important to remember that all of the methods listed do not fundamentally solve the problem, but only give a little time to wait for favorable conditions.
Average prices
The price of insulation for PVC window blocks is determined based on a linear meter or a finished set. It depends on the brand, type of material, length and color of the product.
Average prices for popular insulation materials:
- EPDM Montblanc, 16 RUR. for 1 p.m.
- Ultima TPE 4952 LM, 150 rub. for 5.5 p.m.
- EPDM Century black, 18 RUR. p.m.
- KBE TPE, black, 18 rub. p.m.
- Schlegel polyethylene, polyurethane foam, 45 rub. per p.m.
- Hotrock Smart basalt mats, RUB 270/pack.
- Foam plastic PSB-S 25, 2000*1000*25 mm, 210 rub./sheet
- Penoplex 1185*585*50mm, 500 RUR/sheet.
- Foam insulation VASmann thermofoam, RUB 300/cylinder.
Insulation for plastic windows
Relatively recently, new insulation for plastic windows has appeared - energy-saving film and built-in window heating.
Energy-saving film on glass
Energy-saving film is a very thin transparent material with a layer of rare earth elements applied to it. It is practically invisible on the windows and does not affect the level of illumination. The film can reduce overall heat loss through windows by 30%.
When choosing it, you first need to find out the coefficients of light transmission and heat reflection, and the wavelength range. Another important point: the heat-saving film does not allow UV radiation inside, which is necessary for the life of plants, so green friends will need to organize additional lighting.
Based on the installation method, a distinction is made between shrink film and that which is applied wet. To glue heat shrink material, you must perform the following steps:
- Prepare the window by washing and degreasing the glass.
- Apply double-sided tape to the edges of the sash or frame.
- Attach the film to the adhesive tape without pulling too much.
- Heat the surface with a hairdryer so that the film shrinks and stretches, forming a flat surface.
With the wet method, the glass is also first washed with window cleaner and degreased with alcohol or gasoline. Then the film is cut, leaving no reserves. Moisten the surface of the glass with a soap solution (colorless shampoo or other detergent will do). A piece of film begins to be glued on top and smoothed from the center to the edges.
You can also insulate balcony doors using shrink film.
Rating
No specialist can give a definite answer to the question of which sealant is preferable for a PVC window, since the selection criteria are very diverse and numerous.
On a note. Silicone products are extremely popular today due to their high strength characteristics, but EPDM has a lower price, also with good qualities, and TPE is optimal for use in mild climates.
In order for the user to navigate among the countless different modifications of insulation, large online trading platforms compile ratings for products based on customer reviews. According to the latest data on customer reviews, the TOP popular insulation products are as follows:
EPDM Monblanc , Russia, performed well for Rehau and Mont Blanc profiles.
Advantages: high strength, wide temperature range from -60 to +120 C, high elasticity and low sensitivity to ultraviolet radiation.Disadvantages: cannot be welded, colored ones have a higher price.
- Ultima TPE 4952 LM Russia , performed well for the REHAU profile. Advantages: Flexible foam material, high heat and sound protection characteristics, long service life of more than 20 years. Disadvantages: hardens in the cold, difficult to replace.
- EPDM Veka black, Russia, has proven itself well for Veka, VHS profiles and their analogues.
Advantages: Service life 20 years, temperature range - 50 to 100 C. Ultraviolet resistance. Disadvantages: maintenance required 2 times a year. - KBE TPE , black, Russia, has proven itself well for KBE profiles and their analogues.
Advantages: Service life 20 years. UV resistance and high strength. Disadvantages: hardens in the cold, difficult to install. - Schlegel polyethylene, polyurethane foam, Germany, for KBE, Brusbox, Grain and Montblanc windows.
Advantages: not affected by ultraviolet radiation, easy to clean, high elasticity, wide temperature range from +70 to -60 C, service life more than 20 years, ability to withstand 285,000 opening/closing cycles, high noise and heat protection. Disadvantages: high price, small number of colors. - Hotrock Smart basalt mats : 1200x600x100mm, 0.28 m3.
- PSB-S 25 polystyrene foam, 2000*1000*25 mm.
- Penoplex 1185*585*50mm.
- VASmann thermofoam foam insulation.
Step-by-step instruction
Insulation instructions depend on the chosen method and material, but for all options there are mandatory preliminary works :
If insulation is carried out after plastering, then the layer of old putty must be carefully removed.- Clean the entire surface of the window opening from dirt, protruding concrete and debris.
- Large irregularities in the opening should be repaired using a concrete mixture.
- It is recommended to treat the walls with an antiseptic before starting work, since when microorganisms and fungi form, the insulation layer quickly becomes unusable.
- When using liquid materials, it is recommended to cover the surface of the frame and glass with construction tape so as not to stain or damage the surface of the window during work.
If polystyrene foam or expanded polystyrene is used as insulation, then for its installation it is necessary:
- Cut the slabs into pieces of the desired size;
- Coat the surface of the insulation on one side with heat-insulating glue (a layer of 1-3 cm) and press firmly against the wall. This should be done carefully so as not to push through the polymer board;
- In some cases, in order to more reliably fix the insulation in it after the glue has dried, holes are drilled using a hammer drill, dowels with mushroom-shaped caps are inserted there and the whole thing is fixed with self-tapping screws;
- Next, you need to install corners so that the surface of the opening is more aesthetically pleasing and the insulation is not accidentally damaged;
- After drying, the surface of the plates is coated with another layer of glue, inside which the reinforcing mesh must be embedded with a trowel or spatula;
- When the external glue has dried, it needs to be leveled with sandpaper and then puttied;
- A layer of water-based paint is applied over the plaster to enhance the appearance of the window.
When using sandwich panels, the step-by-step instructions are different:
- To fill the void between the panel and the opening, you can use polyurethane foam or mineral wool.
- In both cases, the insulation must be placed outside the window frame when insulating.
- First you need to install a profile for the sandwich panel on which it will be attached and wooden slats along the outer perimeter.
- Seal the place where the joint between the opening and the frame is located with foil insulation.
- Next, cut the sandwich panels into plates of the required size.
- After this, fill the gap between the slats and the foil with insulating material.
- Install the panels into the required grooves and secure with corner fasteners and self-tapping screws.
- Those places where self-tapping screws are visible in the corner joint can be covered with special overlays.
- The corners of the slopes need to be puttied, and PVC corners should be installed on top of the plaster.
Important. When using plaster as insulation, the surface of the opening is treated with an antiseptic, after which a layer of this plaster is applied, leveled, and after drying, treated with finishing materials.
Let's sum it up
In conclusion, it should be noted that window insulation is an important and responsible job, which must be taken very seriously. After all, the warmth and comfort in your home depends on this, so it is better to entrust it to professionals.
accepts applications from residents of the Moscow region for insulation of wooden and plastic windows in a wooden log house and bathhouse. We employ qualified and experienced craftsmen to whom you can confidently entrust the finishing and thermal insulation of your home. We work in strict accordance with technology, use safe materials, guarantee high quality and fast turnaround times.
To contact us or leave a request, go to the "Contacts" page.
Calculate the cost of painting and insulating your home right now