A window sill is an interior detail that can hide the sloppy appearance of the wall near the window. It is often used as a stand for various items. If plastic windows were installed in the apartment, then its installation is the final stage of the work. It is installed almost simultaneously with the window unit. It must have a number of properties: it must not melt under sunlight and have high resistance to various mechanical damage.
Next, we’ll look at how to install a window sill with your own hands, and the video will clearly demonstrate this.
Which window sill to choose?
The window sill has a practical and decorative function. These two parameters are equally important, so you need to carefully select a window sill, taking into account its functional and practical features, appearance and ability to keep it in its original form for a long time.
You should not assume that installing a window sill on a plastic window yourself requires choosing fittings from the same material. You can choose any material as long as it goes well with the window and the design of the room.
- Polyvinyl chloride or plastic, simply put, is often chosen to create not only window profiles, but also window sills. The structure is empty inside, but has ribs that are responsible for the rigidity of the window sill. This option is affordable, durable, and resistant to moisture. Savings are inappropriate here; you need to choose a high-quality window sill. Otherwise, after about six months, the structure will acquire a yellow tint, become covered with cracks, or change its shape. We will tell you how to install window sills and slopes on windows in great detail.
- Plastic with an acrylic base attracts the user's attention with its high strength. You will have to pay a lot for such a “fat” advantage. Another advantage is immunity to high temperatures, which the previous option cannot boast of. Acrylic has a glossy surface and can be available in any color.
- Wood is even now a popular material chosen for creating window sills. An affordable and even the most successful option is pine. The choice of expensive species will be appropriate only in the case of a special profile that displays the pattern of a special wood. How to install a window sill if there is already a window made of wood will be described below. You need to immediately prepare yourself for the complexity of this process.
- Chipboard and MDF with a laminated surface cost much less than the previous option, although in terms of appearance and functionality they are not inferior to natural material. Chipboard is more affordable than MDF, but does not tolerate high humidity conditions.
- Natural stone is very expensive, but such a high price is not justified by its performance characteristics. It will be difficult to install a window sill to plastic windows with your own hands; its operation must be careful, and you also need to remember the critical points. If you really want to install a window sill made of stone, then you need to choose an artificial option. In appearance it is indistinguishable from natural, less prone to external damage and is highly durable.
This is all the theory you should know. When the window sill is delivered, you can move on to the essence, and we are ready to tell you how to install the window sill on the windows.
Installing window sills on windows with your own hands is not a difficult job, but it requires compliance with mandatory rules. Only in this case can a positive result be achieved.
Advantages and disadvantages of PVC window sills
PVC window sills are very popular due to their durability and moisture resistance
The popularity of plastic products is due to the fact that they have many advantages over finishing elements made from other materials. The advantages of plastic window sills include:
- attractive appearance;
- ease of cleaning from dust and dirt;
- long service life;
- high strength due to the presence of stiffeners;
- harmless to health (PVC window sills are made from environmentally friendly and non-toxic materials);
- high moisture resistance.
In addition, when fixing the product, polyurethane foam is used, which prevents the penetration of dampness into the room and, as a result, the appearance of mold in the house.
Plastic window sills also have disadvantages, but they are very few. Thus, PVC plates are susceptible to scratches in case of careless use. You should also not place hot objects on them - this can lead to deformation of the surface and loss of the beautiful appearance of the finishing element.
Dismantling the old structure
When installing a new window, the window sill is not always removed. In this case, you will need to make room for a new structure yourself, otherwise learning how to install a window sill and slopes on windows is pointless. If this is not your situation, then you can safely move on to the next stage, while we will begin dismantling the window sill, which has already served its purpose.
This work can be performed in different ways, which are determined by the material of the window sill.
- The wooden structure is removed with a hacksaw and a pry bar, which can be replaced with a crowbar. The window sill must be cut into pieces, otherwise serious damage to the slopes can be caused. Initially, the middle part is removed, after which the side elements will remain. They are firmly connected to the slopes, which complicates dismantling. It is necessary to carefully knock the side parts of the window sill out of their position. The blows must be applied to the end. The use of an angle grinder is unacceptable in the case of a wooden structure; serious injuries can occur. Only after understanding this warning can you continue to learn how to install a plastic window: slopes and window sill.
- Stone or reinforced concrete is cut using a grinder. You need a special diamond blade to create through cuts. After this, the slab is broken using a sledgehammer or large hammer. Strikes must be struck from bottom to top. The remaining elements are removed using a pry bar.
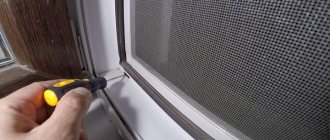
- The plastic window sill has the weakest and simplest fastening. There is no need to rush to dismantle the structure. First you need to remove the ebb, which acts as a kind of external window sill. This will allow you to examine the outside for the presence of fasteners on the inside that need to be unscrewed. If there are no fasteners, simply remove the foam with a knife and dismantle the window sill, rocking it.
When the issue with the old window sill is resolved, you can move on to the next stage. To find out how to install a window sill on windows, you need to prepare the surface for work, which is what we will do now.
Tool
In order for the installation to go smoothly, we will need the following tools:
- hammer;
- roulette;
- level or laser level;
- construction corner;
- polyurethane foam and gun;
- Bulgarian;
- chisel;
- linings made of plastic or other material;
- acrylic or silicone sealant;
- side plugs.
Foam can have varying degrees of expansion. You should choose it according to your needs. But it’s better not to take one that won’t expand at all, because... it will not be able to compensate for some gaps, and they may remain after installation.
Preparation of the workplace
Whether you completed the previous step or skipped it, in any case it is necessary to carry out preparatory work at the workplace. And only after that you can learn further how to install a window sill on a plastic window. The essence of preparation is to clean the surface of various debris. Serious indentations also need to be repaired.
Some experts may recommend creating a screed. There is not much point in this; the window sill will be fine without it. If you really want to, you can level the surface with a screed.
How to install a wooden window sill on plastic windows and plastic construction are different processes. Naturally, we will have to consider these two options.
Conclusion
We figured out how to make a window sill on a balcony without outside help, you can choose any option from those described above and implement it. The video in this article will help you understand some of the nuances even better, and if you suddenly don’t understand something, then write all your questions in the comments under this review.
Did you like the article? Subscribe to our Yandex.Zen channel
September 14, 2016
Balcony and loggia, Windows
If you want to express gratitude, add a clarification or objection, or ask the author something, add a comment or say thank you!
The process of installing plastic window sills
It is necessary to make side grooves in the wall; this is required by the instructions. Their depth should be within 5-7 cm. When you have to install window sills on all the windows in the house, these centimeters in total can amount to an entire window sill, which leads to additional costs. This subtlety should be taken into account when taking measurements and calculating the total amount of materials. As a last resort, you can reduce the depth of the grooves to 2-3 cm.
The grooves must be even, which means you need to use a level. The measurement is performed as follows:
- the square is applied to the frame;
- a line is drawn in the horizontal direction from the top line of the groove to the outer cut on the slope.
This will create the top line for the future groove. Deep cuts are made along the marked lines and excess material is knocked out. The window sill should not end directly at the cut of the wall. The structure should protrude 5-7 cm beyond this boundary.
This completes the side grooves, and the slab itself can be left alone and learn further how to properly install the window sill on plastic windows.
How to install without errors?
When installing a window sill board with your own hands, a home craftsman may make a number of mistakes that will lead to disruption and problems during the operation of the product :
The main mistake is considered to be inaccurate markings.
Before cutting, you need to check the correctness of each line several times. If the window sill is sawn and, as a result, its dimensions are much smaller than the landing plane, it is not possible to correct this situation.- Cutting should only be done with a sharpened tool. Old cutting blades often leave torn edges and chips that are difficult to rework.
- When installing PVC products, there is no need to apply too thick a layer of foam. Self-expanding material fills all cavities and irregularities within a few minutes after extrusion. Excessive amount of foam will lead to deformation of the window sill board.
- Before fixing the window sill after gluing, you need to make sure that the product is in the correct position. Before the composition has polymerized, the geometry of the board can be corrected with simple movements. After hardening, this can no longer be done.
- Before applying glue, you need to take care of cleaning and degreasing the joining surfaces. If the adhesive compound is squeezed onto a dusty surface, the adhesion deteriorates many times over.
Important. When working, you should also follow safety precautions, use gloves, safety glasses and respirators.
During cutting, you need to fix the element in such a way that it remains stationary, regardless of the force of pressure.
To fix or not to the frame?
There are two ways to carry out the work of installing a window sill. The difference between them lies in fixing the window sill to the window frame, which is done at the beginning. All further stages are carried out according to a single scheme, regardless of the chosen method. How to seal a window sill after installing plastic windows will also be described below.
The fixation process does not involve any difficulties. In the area where the boundary area of the window sill meets the window frame, we make through holes every 30 cm. We press the window sill tightly and screw self-tapping screws into the holes made from the outside. They should go into the slab at least 3 cm, preferably more.
If the fixation described above is not possible, then the window sill is placed tightly under the frame. At this point you can squeeze out the polyurethane foam in thin strips.
Installation methods
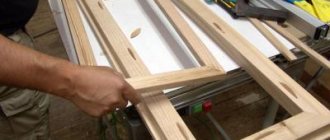
Installing a window sill using wooden pads requires a lot of time, but this method is the most reliable
There are several methods for installing PVC products. Let's look at each of them.
- The first method, the oldest, involves fixing the element using a special composition. Nowadays, this method is used extremely rarely, as more convenient and reliable ones have appeared.
- The fastest installation of a window sill is carried out using self-tapping screws. First, holes are drilled in the window frame into which hardware is screwed. The connection point is treated with acrylic sealant, after which the edge of the window sill is placed under the glass unit and fixed with self-tapping screws. To give maximum rigidity to the slab, special pads are placed under it and the resulting space is filled with polyurethane foam.
- The next method involves installing PVC window sills using spring brackets. These fasteners are screwed to the substitution profile of the product with self-tapping screws. After this, the plate is mounted in the groove formed between the window frame and the bracket, and the product is installed.
- In the last option for installing plastic window sills, no fastening elements (screws and staples) are used. This is the most time-consuming method, but also the most reliable. Its meaning is that the wedges are driven under the slab until its edge is pressed against the frame as tightly as possible.
Each method has its pros and cons. For example, it is not advisable to install a window sill using self-tapping screws near the opening sash. The installation options for PVC window sills differ only in the method of fixing the product under the frame. The remaining stages of work here are absolutely identical.
Leveling the window sill
We lay the slab and look at its position. It won’t be perfect right away, so we align it as follows:
- We tilt the window sill slightly towards the room, which will allow water to drain from it and not accumulate in the joints. 5 mm will be enough.
- Wedges are placed under the slab every 30 cm. Each piece of wood will be cut individually until the desired result is achieved.
- The position of the plate must be constantly checked with a level. The result must be perfect, otherwise you will have to periodically make minor repairs in the form of filling up the cracks.
How to whiten at home?
To clean and bleach a plastic window sill at home, both special household chemicals and folk remedies are used. When choosing purchased products, you should pay attention that they do not contain reagents harmful to plastic (solvents, acetone, acid), and such compositions should not contain abrasive particles that leave scratches on the product.
After installing a PVC window sill, traces of foam, cement and other construction compounds will certainly remain on it. You can get rid of them using special purchased pastes and gels, which are applied to the adhered particles and left for several minutes.
Attention
Adhered foam and cement are removed from the product with a rubber spatula or a brush with stiff bristles. Next, the product is wiped with a damp cloth and wiped dry.
Among purchased household chemicals, the most common effective ones are:
- Sif.
- Mister proper.
- Domestos.
Have you decided to repair or replace the window sill in your home? Our experts will give a huge amount of necessary and useful advice on the following topics:
- How to make a concrete window sill?
- How to install a window sill on a balcony?
- In what cases is repair of this part of the window required?
- How to update or level different types of construction?
Fixing the window sill
If the slab is not fixed to the frame, then polyurethane foam is used. The surface on which the foam will be applied must be moistened with water, which will provide better adhesion. The window sill is installed in its place, and foam is blown under it. Here you need to feel in moderation. Excess foam will still find a way out.
An object weighing up to 20 kg must be placed on the windowsill. In this case, the foam will not be able to swell and squeeze out the slab in the middle part. The stove will remain in a depressed position for at least 10 hours.
All that remains is to restore the beauty (cut off the foam and apply putty to the slopes) and be proud of yourself. We told you how to install a window sill on plastic windows, also made of plastic. The wooden structure was left without attention, the installation of which needs to be carried out a little differently.
Installation instructions
Use a special gun to blow in polyurethane foam.
As noted earlier, fixing the product can be done in several ways. We will consider the latter - using wooden spacers and polyurethane foam, since it is the most reliable and very popular recently among people doing repairs with their own hands. The procedure is as follows:
- We insert the window sill into the prepared place. In this case, we use a building level and wooden beacons, which we place in increments of no more than 80 cm.
- At the front end we install wooden support blocks under the slab. The distance between them is no more than 50 cm. In this case, the load-bearing elements should not extend beyond the plane of the wall. The distance from the blocks to the side slopes is 10 cm.
- We check the angle of the window sill again with a level. If it does not correspond to the previously specified value, then adjust the thickness of the pads.
- We fill the hole between the slab and the concrete surface with foam. But not completely, but only to fix the product.
- Place the load evenly on the plate. This will prevent the foam from lifting the sill. It is important here not to overload the structure, as its surface may become deformed. Often, 3-4 tanks of water with a volume of 5 liters are used as cargo.
- We blow out all the free space under the window sill with foam. Use a special gun to prevent the sealant from splashing around and getting on your clothes.
- After this, we leave the window sill alone for 2-3 days so that the foam completely hardens. We cut off the excess binder with a utility knife.
- If you subsequently find cracks under the slab, treat them with acrylic sealant.
- At the final stage, plugs are installed at the ends of the window sill. To do this, use glue for PVC products. In the end, all that remains is to remove the protective film from the product.
Place several bottles of water on the windowsill to prevent foam from lifting the slab
Important: The window sill must fit tightly with the window frame, and the gap between the slab and the walls should not exceed 4 mm. The “ears” of the product (the part protruding beyond the internal slopes) should also be pressed tightly against the wall.
The process of installing wooden window sills
Some stages will coincide with those that have already been described, so we will not describe them in detail. The work is divided into the following stages.
- We mark the slab and arrange grooves in the wall. There are no differences in these processes.
- It is better to fix wooden window sills on the window frame, which can be replaced by the base profile underneath. Performed similarly to the above description.
- From the end side, a damper tape is glued to the window sill. Thus, the difference between the performance of plastic and wood (thermal and moisture expansion) will be compensated.
- Leveling the slab is again done using wedges.
- Any wooden window sill has an impressive weight, so foam is not suitable for its installation. It is better to use gypsum mortar or cement with sand, which is applied to the wedges.
- Place the slab on top and press until it rests against the wedges.
- We remove the remaining mortar and apply putty to the slopes.
We told you how to properly install a window sill on plastic windows if it is made of wood. This method can be modified a little to protect yourself. The essence of the modification is to drive a long nail into the wedges. The nail should go right through and protrude a centimeter from above. Anchors are used to secure the wedges. In this case, the window sill rests on nails that stick out from the wedges. This method is more reliable, but requires utmost attention and careful checking of all parameters.
You know how to install a window sill on plastic windows and nothing stands in the way of putting your knowledge into practice. Moreover, you even know how to repair the void under the window sill after installing the window. In addition to foam, insulation can be laid.
Installation work
The first step is cleaning. It is better to do it using a construction vacuum cleaner, since brushes and brushes are not able to remove all the dust.
For good adhesion of foam to other materials, moisture is necessary. Therefore, it is recommended to moisten the surface with water. But you can go further and kill two birds with one stone. You should not use water, but a primer. This way it will be possible to remove any remaining dust and also provide the necessary moisture. You can apply it with a brush, but it is more convenient to do it with a hand sprayer. If you use the latter, then cover the windows with something or wipe them immediately. If you let the impregnation dry, then you will have to remove it later with consequences.
It is better to use a primer.
The window sill is marked. Its total width will be the width of the opening plus 10 cm (this overlap is necessary to provide 5 cm for each “ear”). The depth will be equal to the distance from the window support to the middle of the heater, if it is located under the window. It's better not to close it completely. If you do this, then warm air will not flow to the glass, and they will fog up, which will lead to the accumulation of condensation and the growth of mold and mildew. If there is no battery and radiator, then the protrusion can be made by 5 cm. In some cases, at the request of the customer, an even larger protrusion is made. Perhaps the space will be used as an extension of the desktop or in some other way. In this case, it is necessary to install metal corners as supports. Their base is recessed into the plaster. The length of the window sill is adjusted taking into account that the edges will be recessed into the wall by 1 cm.
Features of installing a PVC window sill
Using a hacksaw for metal or an electric jigsaw, trimming is carried out.
Wooden wedges for a plastic window
Next, you need to prepare supports on which the plane will rest. Special plastic plates are often used, but they may not provide the necessary rigidity. Instead, you can use parts of the cut window sill. They should be placed every 40-50 cm. They are set using a building level or using a level (when using the latter, a line is projected and measurements are taken from it at both ends to the supports, the distance should be the same). Their height should be such that the window sill fits right under the bottom of the frame and rests against the installation bar. In order to prevent them from moving during the process, you can fix them with self-tapping screws. If the platform is made of aerated concrete, then you can simply screw it all the way through with self-tapping screws; in the case of brick, you will have to use hammer drills and dowels.