Repair work depends on the existing problem. And the first step is to determine the cause of the violation.
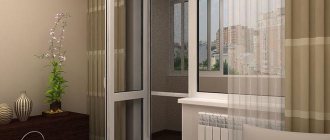
Plastic door is inexpensive but reliable
Necessary tool
Having installed a plastic door in an apartment, it is recommended to immediately purchase the tools that will be needed for repair work:
- screwdriver with a set of attachments;
To repair a plastic door you need different screwdriver bits
A plumb line will help you adjust the door
Repairs will not be possible without a hex wrench.
A mallet will help replace a double-glazed window
Some materials will also be required:
- specialized glue for working with PVC products;
- adhesive sealant;
- putty for restoration of PVC products;
- rubber compressor;
- handles, clamps, locks (depending on the breakdown);
- plastic cover.
When replacing fittings, it is recommended to choose a product of the same brand that was originally installed on the door.
How to repair a handle on a plastic door
There are several reasons that can cause the handle on a plastic door to break:
- wear, failure due to end of service life;
- mechanical damage;
- improper use.
Problems that arise for various reasons also need to be solved in different ways:
- Cracks on the handle body as a result of improper use. They cannot be repaired, so the handle will need to be replaced. To do this, turn the handle plate at the base 90 degrees, unscrew the screws and, along with them, the fittings themselves. Next, install a new element in the same place.
If the handle is cracked, it needs to be replaced
Video: replacing a door handle
Plastic door lock repair
A plastic door is considered reliable, but various troubles can happen with its lock, for example, the locking mechanism may break and the door will not close.
You need to prepare all the necessary tools and materials in advance:
- new fittings identical to those that will be repaired;
- plastic gaskets;
- silicone or plastic sealant;
- insulation for doors if the system was installed a long time ago, regardless of its condition.
You can repair a plastic door lock yourself. This must be done in the following sequence:
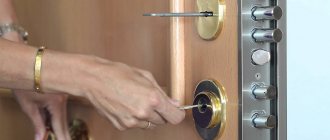
- Remove the door handle by first turning the plate and then unscrewing the screws.
To repair the lock, you need to remove the plastic door handle.
The lock cannot always be repaired; sometimes it is easier to replace it
Video: repairing a multi-point lock
Replacing a plastic door lock with your own hands
If the damage is significant and repairs are not able to solve the problem, a complete replacement of the locking mechanism may be required. It must be performed in the following sequence:
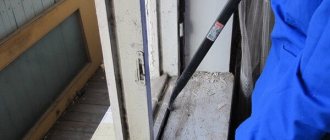
- Open the sash, then unscrew all the screws.
All screws on the end of the door must be unscrewed
To replace the lock, the handle must also be removed.
Before fixing the lock, you need to check whether it fits into the prepared groove
Keep in mind that during the first uses, the lock may work if you apply some force.
How to remove a bead from a plastic door
This procedure may be required if the glass unit needs to be replaced. This is quite easy to do. First, prepare the necessary tools and materials:
- gloves, as there is a risk of damaging your hands;
- screwdriver;
- putty knife;
- knife, the sharper the better;
- suction cups, preferably rubber ones.
Rubber suction cups help prevent glass from breaking
Next you need to do the following:
- Remove the sash by pulling out the retaining rod, which is located in the top hinge.
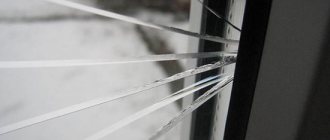
- Now you need to use a knife or spatula to pick up the glazing bead itself, placing the tool between the frame and the glazing bead. Repeat a similar procedure along its entire length. This must be done as carefully as possible, since there is a high risk of scratching the glass unit.
Beads must be removed carefully
You can also insert a double-glazed window quite easily:
- Remove dust and dirt from the rebated frame.
- Insert a double-glazed window into the opening.
- Install glazing beads. The horizontal ones are installed first, and then the vertical ones. If necessary, they can be driven in with a hammer with a rubber nozzle.
- Now the glass unit needs to be wiped and checked for scratches. If they are found, then it is worth treating the surface with sandpaper.
How to remove film from a plastic door
When installing a door with your own hands, you must remove the film from it. This is easy to do, for which you need:
- Using a hair dryer. To remove the film, a stream of air must be directed at the frame and ensure that it does not fall directly on the glass unit. As a result of exposure to hot air, the film dissolves and is removed almost independently. But a regular hairdryer won't help.
The best way to remove the film is to heat it with a hair dryer.
If you remove the film with a knife, there is a risk of damaging the plastic.
Any plastic solvent should be used with caution.
Video: how to remove film from a plastic structure
Operating rules
To avoid damage to plastic doors, the following recommendations must be followed:
- Periodically treat the locking mechanisms and hinges with oil, and the seal with an appropriate spray, which is sold in specialized stores or companies that install plastic windows.
- Regularly check the fastening of door handles and, if necessary, tighten the bolts.
- Adjust the hinges if the door does not fit tightly.
- When opening and closing the door, turn the handle completely.
- Do not use excessive force when opening and closing the door.
- Do not lean on the glass.
It is also recommended to adjust the degree of door pressure with the onset of each season. This will prevent cold from penetrating into the room. If more serious problems occur (hinges break, welds come apart, etc.), you should contact a company that installs plastic structures.
Share link:
Where are the locks installed?
The lock (its locking device) can be either separately located - not combined with the door locking mechanism, or integrated into the locking device, which makes its use more convenient and does not require any design changes to the door. The first time a lock is used is extremely rare. Requires a change in the door design and is practically not used in plastic balcony doors. The second one is widespread and there are a lot of manufacturers who produce replacement balcony handles with a built-in lock.
The lock can be installed both outside and on the side of the room. Usually it is enough to install only from the side of the room. Moreover, the lock may not be fully functional, but have a push-button or leaf lock, which prevents the door handle from turning, both from the living room and from the outside. If the goal is to prevent a child or animal from opening the lock, this is quite enough, but if we are talking about protecting against unauthorized entry through the balcony, of course, it is better and more reliable to use a cylinder mechanism with keys.
The cylinder mechanism can be located either indoors - in this case, when the lock is locked, the possibility of opening the door from the outside, from the balcony, or from the inside is completely eliminated. In this case, you can open the door with a key from the side of the balcony, and from the side of the room it is locked either with a push-button or a leaf lock. This scheme is also used very rarely, since it is meaningless. Exceptionally rare cases when the entrance to a room is arranged through a balcony - rather relates to the commercial use of premises on the first floors of buildings, when balconies are converted into vestibules or additional space.
What it is?
A glazing bead is an integral part of a window (not only plastic, but also old-style glass), which the owner of the window is often not even aware of. You can’t see it from the outside, since it is attached from the inside to avoid unwanted entry into the apartment through the window (by removing the glazing bead, you can easily remove the double-glazed window itself). But even indoors it blends in with the plastic frame and is not particularly noticeable. Thanks to this, it gives the window a look of completeness, integrity and aesthetics.
And yet the main function of this inconspicuous part is to secure the glass unit in the frame. Thanks to the glazing bead, the tightness of the glass unit is achieved. If the glazing bead is installed poorly, windows lose their sound and heat insulation qualities, fog up, and lose their attractive appearance.
A bead is an elongated wide or narrow strip made of foamed polyvinyl chloride (PVC), reinforced with a rubber gasket. Recently, glazing beads made of glass composite, a plastic material made from fiberglass and polyester resins, have been used as a binder. In terms of strength, this material can be compared to steel.
Beads differ in their shape:
Curly ones have a somewhat complex shape and are more expensive than regular square ones. They also differ in size. There are narrow and wide glazing beads. Wide ones are installed in windows with single-chamber frames, narrow ones in windows with three-chamber frames, and reinforced glazing beads are suitable for four-chamber windows.
Repair of windows and doors made of PVC, wood and aluminum
In the field of repairing windows and doors made of PVC and aluminum, you often have to deal with the need to replace a double-glazed window or straighten a sagging sash using the so-called unpacking (Installing additional spacers in the sash). To perform this type of work, it is necessary to dismantle the glazing beads of the product. You will learn how to remove the glazing bead in a PVC window yourself and without consequences for the window from this article about repairing PVC products.
To perform this type of work we need the following tools:
- Chisel (the wider the better) or a specialized knife
- Inertia-free plastic hammer
If we remove glazing beads from a sash, it must first be closed. We begin to remove the glazing beads with the longest length; as a rule, in standard windows these are vertical glazing beads. In the center of the product, between the glazing bead and the window profile, carefully insert a chisel, helping if necessary by tapping the hammer on the chisel.
Master's advice
If you are removing beads to adjust the sash, you should start dismantling from the handle side
When the glazing bead moves just a little away from the window profile, it is necessary to tilt the chisel so that it is directed in the direction of removing the glazing bead and, when struck by a hammer, pushes the glazing bead further and further from the profile of the product. When the glazing bead is far enough away from the window profile to be picked up, put the tool aside and gently pull the glazing bead, removing it by hand.
After removing the first bead, the next will be two shorter beads. (For standard windows, these are horizontal glazing beads: top and bottom.) We insert a chisel at the edge of the glazing bead from the side of the previously removed element and, carefully working with a chisel and hammer, move it away from the window profile. Now you can remove the last remaining glazing bead
It is very important to hold the double-glazed window or glass while dismantling the remaining glazing bead to avoid the filling falling out and resulting in injury. Be extremely careful and careful!
After replacing the filling or performing adjustment work, it is necessary to return the glazing beads to their place. We install the glazing beads in the reverse order. We insert the edge of the bead into the corresponding corner of the product so that the “whisker” of the bead disappears into the corresponding groove in the profile and carefully hammer it in with a plastic hammer. Impacts on the glazing bead must be applied with emphasis and in an almost parallel plane to the glass unit. Do not overdo it with the force of the blow, because... Excessive zeal can lead to a crack and another replacement of the double-glazed window.
Master's advice
If you remove beads to adjust the sash, you can often leave the bead on the hinge side because it will not interfere with the installation of linings and at the same time will keep the glass unit from falling out.
When installing the last bead, insert the edges of the bead into the corners of the product, lightly tapping it with a hammer and trying as hard as possible to move its edges towards the edges of the already mounted beads. When the corners are installed, pressing the bead against the glass unit, we begin to hammer in the bead from the edges to the center until complete installation.
In aluminum windows, to dismantle the glazing bead, you must carefully remove the seal of the glass unit and lightly press the glazing bead in the direction “towards the glass” to make it snap off from the product.
Selection criteria to be considered
There are four classes of burglary resistance:
- The first is the most simple, easy to break into, which are used for internal doors. It takes less than 5 minutes to open these.
- The second one is opened within 5 to 15 minutes. They can be installed in interior and entrance doors.
- The third one has increased protective qualities, and opening them will take more than 15 minutes.
- The fourth one is the most reliable, it opens in no less than 30 minutes. Installed in doors for rooms that require increased protection.
The price for metal doors depends on the burglary resistance class, which implies the use of especially durable materials and devices with a high level of secrecy.
In addition to persistence, there is also secrecy. The number of possible combinations in it and the key can reach enormous values.
But it must be borne in mind that secrecy is a complex concept that includes:
There are three levels of privacy:
Highest. In this case, the secrecy exceeds 100,000 possible combinations. There is protection against master keys and mechanical influences. Key profiles and pin combinations are very complex.
The materials used to make the devices are acid resistant and the assembly is carried out with great precision.
Average. The number of possible combinations ranges from 5,000 to 5,000,000. Sometimes designs lack protection from the effects of master keys and mechanical damage, but a complex combination of pins is always used.
Durable and wear-resistant materials with average quality parts are used for manufacturing. Typically, in such locks, the locking bolts of the mechanism are of high quality, and the body and handles are made of low-quality materials.
Low. The number of possible combinations ranges from 10 to 10,000.
The devices do not have protective elements against mechanical impact. The location of the pins in the lock and the key profiles are quite simple. The materials used for manufacturing are not of high wear resistance and low strength, and the quality and assembly are not very good, which can be determined even by eye.
Reasons for replacing the lock
The most common cases for replacing locks on metal doors are:
Purchasing a new metal door. The lock is not included with the canvas; it is selected separately.
Lost keys. This is the most common reason.
Even if you have a spare key, or make a duplicate, there is still a risk of the original falling into unreliable hands. Replacing a damaged mechanism. Poor quality parts and rough operation of the device can cause damage to the cylinder and lead to deformation of the crossbars. Using such locks is unsafe.
The video in this article shows how to correctly change locks on metal doors of any type.
Your home is like a fortress - it needs a reliable lock
If you are in doubt about which lock core to buy in Kyiv for an apartment or for a house in the suburbs, use our tips. The “ultra-safe” cylinders of the Phillips-key lock are opened by a sharp and strong turn of a Phillips-head screwdriver. Elementary English larvae open with special devices in 3-6 minutes. The best option for an apartment is a new lock cylinder for a punched card key, for a country cottage - a counter-pin lock for a comb key. Although the choice of a lock cylinder can be determined not only by strength, but also by financial capabilities. It is quite possible to find an affordable option with good strength indicators.
When purchasing a cylinder, use promo code 2020 and receive a discount on cylinders with increased burglary resistance.
Features of replacing glazing beads on aluminum and wooden windows
Removing the glazing bead from an aluminum window is not particularly difficult; the operations are carried out similarly to the example above - aluminum sashes also use clamping strips inserted into profile grooves.
Glazing beads made of aluminum profiles, due to the lack of elasticity, have a slightly different design; their ends are cut at a right angle, and not at 45 degrees, as is the case with PVC products, so their removal is easier and does not present any particular difficulties.
When removing aluminum beads proceed as follows:
- Use a spatula to pry up the side plank and remove it from the sash opening; do the same with the opposite one.
- Then knock out the lower glazing bead, and holding the double-glazed window, take out the upper one.
- Upon completion of dismantling the pressure strips, remove the package from the sash and set it aside in a previously prepared place.
Wooden window profile
When dismantling glazing beads from frames made of wood, take into account their fastening to nails - this requires great physical effort and caution when bending them to avoid breaking. When carrying out the work, use a similar tool used when dismantling plastic strips, while taking into account the high probability of breaking the wooden strip at the points of fastening with nails, so the bender should have as large an area of contact with the glazing bead as possible
A spatula with a width of at least 50 mm is best suited for these purposes; narrow chisels and slotted screwdrivers should be discarded. You will also have to make a lot of effort to push the spatula into the cracks, so you will need a metal hammer to knock it in
When carrying out the work, use a similar tool used when dismantling plastic strips; however, one should take into account the high probability of breaking the wooden strip at the points of fastening with nails, so the bender should have as large an area of contact with the bead as possible. A spatula with a width of at least 50 mm is best suited for these purposes; narrow chisels and slotted screwdrivers should be discarded. You will also have to make a lot of effort to push the spatula into the cracks, so you will need a metal hammer to knock it in.
When removing a wooden bead proceed as follows:
- Insert a narrow spatula into the gap in the middle of the right side plank so that its center is at the location of one of the driven nails.
- By moving the spatula to the side, slightly bend the bar, then move the tool to other points to the locations of the fastening nails and perform a similar bending of the bead.
- A wider tool (chisel, screwdriver) is inserted into the resulting narrow gap and the resulting gap is carefully increased, after which the bead is removed by hand.
- Since the second side bead is quite difficult to remove without damage due to the emphasis on the ends of the others, it is easier to remove the lower and upper strips by prying them with a spatula in the corners, then carefully bending them with a chisel and removing them with your hands.
- After removing 3 beads, removing the last side one is not difficult; the only inconvenience in the need to maintain the double-glazed window is compensated by the simplicity and reduction in the likelihood of a break when dismantling it.
Dismantling wooden beads
Indecent beginning or introduction :)
The thing is that not so long ago your humble servant visited one of his friends, where, of course, he consumed a certain amount of “surrogate”. I myself am a non-smoker (I quit 7 years ago), but my acquaintance is an ardent lover of “smoking”, and in general when drinking alcohol. So I ran with him to the balcony every five minutes and, of course, I couldn’t help but turn my attention to the fact that his balcony door stubbornly refused to close, the lock was dangling so that it should have remained in his hands.
And of course, like a true handyman, I immediately pointed out to my friend that, well, you have two hands, you have a tool, take it and repair the plastic balcony door.
After all my comments, my friend reacted quite adequately, that is, he sent me on a walking erotic journey to the dog’s genital organ, motivating his argument by the complete absence of the hand-ass area in the brain.
Well, I don’t let up - they say, oh well - call a plastic door repairman and let him carry out a competent, and most importantly high-quality repair of the plastic balcony door lock, and adjust the door so that it doesn’t catch.
And my friends, I heard another heartbreaking story, which I will now tell you from a third person with full respect for copyright.
What is a glazing bead and why is it needed?
A glazing bead is a narrow strip, usually made of a material corresponding to the profile (PVC plastic, wood, aluminum, glass composite), that holds the glass or double-glazed window in the window frame (door) and gives it structural completeness. The plastic bead has a shaped shape and, when installed, fits into the grooves of the profile, where it is securely fixed with teeth due to the elasticity of the material; for a tighter fit, the strip is equipped with a welded or glued seal.
The outer surface of the PVC glazing bead has a different shape and, depending on the design solution, can be round, rectangular, or shaped. Another feature of plastic glazing beads is their different width, which allows you to install double-glazed windows of any standard thickness into the window opening without changing the design or replacing the window sash.
In addition to hermetically holding the glass unit in the frame, the bead prevents dust from entering the room, isolates it from street noise and reduces heat loss, acting as a kind of plug.
Plastic glazing beads - types
Replacing the front door lock cylinder (Kale): step-by-step instructions
Have you decided to replace the cylinder lock cylinder yourself? Use the instructions from Torex professionals. It is designed for Kale locks, but the cylinder of other similar models can be replaced in the same way.
If you plan to change only the cylinder lock cylinder, use the following instructions. It is compiled for Kale locks, but the general procedure is similar for all similar models.
Repairing and replacing locks on metal entrance doors requires attention and patience. Before disassembling the lock, read the information, watch videos, check that you have the necessary tools, and most importantly, spare yourself some time. Be prepared for the fact that the process may take a long time, since lock designs from different manufacturers that seem similar at first glance have their own nuances.
Even in simple locks, replacing the front door cylinder can lead to undesirable consequences. For example, the lock may simply jam. If you have doubts about your own abilities, it is better to invite an experienced master.
If you are replacing it yourself to save money, buy a new lock or spare parts from official retail outlets so that the mistakenly purchased item can be returned or exchanged.
Otherwise, replacing the cylinder in the front door lock may cost more than the services of a master.
If you are not sure that you can cope with replacing a lock or cylinder yourself, it is better to contact a professional so as not to damage the structure of the lock and the door as a whole.
Repair of metal entrance door locks
The reasons for the breakdown of a metal entrance door lock can be very different: urgent dismantling due to an accident, wear and tear, improper operation and others.
Depending on the type of breakdown, you can repair the front door lock yourself or call a specialist. Some manufacturers do not produce additional parts, and elements of others may not be suitable in size or configuration. Then the only way out is to replace the entire mechanism.
If there is no key
If the key has been preserved, then removing the lock cylinder is a matter of unscrewing a few bolts. Another question is if there is no key - in this case the lock pin will remain engaged with the bolt and without physically destroying the lock, it is simply impossible to remove it.
There are several ways to turn or break a pin - which one to use depends on the desire to maintain the integrity of the door lock and the lock itself.
Knockout
This method should not be seriously considered, since it does not correspond to the task at hand - leaving the lock intact to work with another secret.
This method of opening is akin to the banal breaking of doors, only here it is not the door leaf that is damaged, but the lock.
In any case, it is used in the most extreme cases, when the door needs to be opened urgently, but there is no time to prepare.
To get the result, you need to hit the lock cylinder with a chisel and hammer. The pin will simply bend the metal of its body, and the secret will pop out, after which it will be possible to move the bolt and open the doors.
The hammer should be quite heavy, and the chisel blade should be no wider than the socket. If you take a light hammer, it will not be able to overcome the force of elasticity and will simply bounce off after impacts. If you take a chisel that is not the right size, it will ruin the door leaf.
The lock, and possibly part of the door leaf, will have to be completely replaced.
Breaking out
When using this method, the door remains intact, but the lock will also have to be completely changed. The essence of the method is to hook the secret and turn it sharply. An adjustable (gas) wrench or similar device is suitable for this.
As a result, all fasteners break off and the lock cylinder can be pulled out of its mechanism.
Everything is clearly shown in the video:
Reaming
Compared to knocking out the door, this is an order of magnitude more humane to the lock way of removing the secret without a key, but if for some reason the secret needs to be kept (when there is a key, but it has been forgotten), then it is absolutely not suitable.
If there is no hope of opening this lock again with a key, then drilling will be the easiest and fastest way to open the door, and you can do without calling repairmen.
Drilling out the cylinder is quite simple - the drill is attached to the key hole, which is drilled out at least to the middle, where there is a fastening pin that clings to the bolt. The mount no longer clings to the locking mechanism and rotates inside the cylinder under its own weight.
Sometimes it may happen that when drilling, the metal will bend and in this case the pin must be pushed into the cylinder manually. A steel knitting needle is suitable for this.
Master key or bumper key
The safest option for a lock is to use a master key. True, this requires certain skills and because of this, preference is often given to the previous method of opening the lock (especially if the door needs to be opened urgently).
If there is nowhere to rush, and you want to keep the lock mechanism intact, then you can try yourself as a burglar and use a master key. To do this, you need to understand how the secret mechanism works.
Inside the cylinder, on springs, there are so-called pins, which consist of two halves. If the center of the pin does not fall on the circumference of the cylinder, then the rotation of the latter will be blocked. The more complex the lock, the more pins it uses, which must be simultaneously positioned at the required height.
To open the lock, you need 2 wires - one straight to try to turn the cylinder, and the second, with a curved tip, you need to tap on the pins until they line up one by one in the desired combination. Time for such manipulations can be spent from ten minutes.
In addition to the wire, you can use a piece of metal file blade
How to insert into a wooden entrance door
If you have already inserted or at least a handle with a latch into an interior door, then you can handle this job.
You will need:
If you want to put a mortise in your front door, before buying it, measure the thickness of the leaf - it should fit in it without weakening the structure too much.
So:
If you have a cylinder lock on your front door that you want to change for some reason, you don't have to change it completely. Your problem can be solved by replacing the front door lock cylinder, which is less expensive and does not require experience or tools. You only need a Phillips screwdriver.
Find the screw on the end plate that holds the cylinder in place and unscrew it.
Then insert the key into the lock and turn it slightly clockwise so that the flag goes into the body of the larva and no longer holds it in the lock. After this, it will easily fall out if you press on it from the inside of the door.
Having chosen a new cylinder of the same size in the store, install it in the lock in the reverse order.
How to disassemble a plastic structure?
Removing an entrance door made of plastic has some nuances, since it has reinforced hinges and is equipped with a mechanism that prevents a break-in attempt. The weight of the structure is significant, which makes independent work difficult. Dismantling procedure:
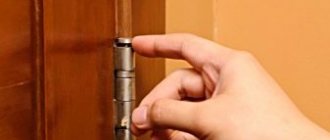
- First you need to disassemble three hinge boxes. For this purpose, the protective linings are removed from them.
- Press firmly on the top hinge pin, then it can be removed from the groove below with pliers.
- Similar actions are performed with a loop located in the middle.
- To remove the door leaf from the bottom hinge, you need to lift it, tilt it towards you, and then turn the sash.
Preparation for dismantling and tools
Removing the bead manually involves further removing the glass unit from the window sash; before dismantling work, the following preparatory operations are carried out:
- They free up free space in the room on the floor in a place where the location of the package will not create additional inconvenience.
- Place cardboard, an old bedspread or blanket on the floor to prevent damage to the floor covering by the sharp edges of the glass unit.
- If the glass unit is leaning against the wall to reduce the space occupied, additionally prepare material or cardboard to isolate its sharp edges from contact with the wall covering.
To remove the glazing bead from a plastic window, you will need the following household tools and protective equipment:
- A narrow spatula, a wide chisel or slotted screwdriver, a knife for bending the bead away from the profile.
- A small rubber hammer for knocking down the putty knife, strips and glass during installation.
- Be sure to wear rubberized gloves to protect your hands from the sharp, raw edges of the bag.
- Tape measure if you plan to independently replace the package with an order from the manufacturer of a product of a similar size.
- A pencil for numbering the removed glazing beads; under no circumstances should you use a felt-tip pen, which leaves hard-to-remove marks on the white polyvinyl chloride.
The main stages of removing PVC glazing bead
Eliminating the problem with poor door opening
To adjust the awnings you will need a hex wrench
If the plastic entrance door no longer opens/closes as expected, it may have sagged and needs to be adjusted. To adjust the canopies, pry it up, open the cap on the hinge, remove the decorative trims, and adjust the canopy with a hexagon.
If the sash squeaks, it is necessary to lubricate the awnings with thick lubricant.
It is not possible to tighten the screws because their seats have expanded and the threads are turning. Let's fix this problem:
- we change the bolts to longer ones and of a larger diameter (if necessary, you will need to drill holes in the metal plate of the hinge);
- We compact the planting nests with wooden chips;
- We move the loops to another place, slightly shifting their location up or down.
Replacing the lock on the balcony door
We change the lock and handle with our own hands. Stages of replacing a lock for plastic doors:
- Open the sash and unscrew the screws.
- Turn the decorative plug on the base of the handle horizontally and unscrew the bolts holding the handle.
- Remove the lock and handle.
- We measure the length according to the old drive, aligning the holes for the handle pin.
- We prepare the lock, install it in the groove, you can hammer it into the hole with gentle blows using a rubber hammer.
- We install the handle, tighten the bolts, and cover the fasteners with a plate.
After installing the lock, the first turn of the handle always occurs with force. To learn how to repair locks on a plastic door, watch this video:
Lubricate the necessary elements of the lock and fittings. The door is ready for further use.
Adjusting plastic doors
Adjustment of a plastic door may be required for various reasons. Most often this is necessary in case of sagging. You can make the adjustment as follows:
- Remove the plugs from the hinges.
- Depending on whether vertical or horizontal adjustment will be made, insert a hex key into the top or end screw. The top one is responsible for vertical adjustment, the end one for horizontal adjustment. You need to turn the key clockwise.
The hinges can be adjusted in vertical and horizontal directions
To adjust the door you need a hex key
Video: adjusting the top hinge of a plastic door
Trouble with a plastic door can happen at any time during operation, even if the installation was carried out in compliance with the technology and no violations were identified during use. Therefore, it is so important to know how to repair the most common complications yourself.
The handle is loose, the locking mechanism is faulty
During operation, the screws that secure the handle may become loose. Repairing a loose plastic door mechanism is very easy to do yourself. At the base of the handle there is a vertical decorative plate covering the fasteners. We turn it to a horizontal position, pry up the plate, pulling it slightly toward ourselves, and turn the plate to a horizontal position. Access to the fasteners is open, use a Phillips screwdriver to tighten the bolts, and return the trim to its place.
If the handle breaks, we purchase a new one from the window company.
The square rod for the fitting groove is standard for all handles; pay attention to the material from which it is made. We unscrew the broken product from the balcony door, insert the square into the fitting groove, and fasten it with bolts
If the handle is intact, but turns with difficulty, it is necessary to lubricate all moving elements of the fittings.
If the locking mechanism is broken, you need to figure out whether a separate element can be replaced or the entire mechanism needs to be replaced. To more accurately determine the extent of the damage, we call a specialist from a window company.
Can't turn the handle
If the door is hanging on one hinge and you can’t turn the handle, it means the door to the balcony was opened in two modes at once. You can fix this problem yourself within a few minutes. We find the opening blocker at the end of the sash; it looks like a tongue, located in the middle at the end; by pressing, we bring it to a horizontal position. We press the sash tightly against the frame, turn the handle to the ventilation mode, and then to the opening mode. The sash will fall into place, the handle will turn properly.
Do-it-yourself replacement of double-glazed windows in a plastic window or door with photo.
on December 09, 2016. Published in Articles about windows
You can replace a broken double-glazed window using our services. To do this, just call our specialists or send a request by email.
Tel. 8-911-750-92-61; 8-952-242-59-07
Let's consider the sequence of actions for replacing a broken double-glazed window.
Do-it-yourself measurement of the glass unit you want to replace.
The next thing you need to know is how many cameras your double-glazed window has. The easiest way is to look at the documentation for your plastic window, but if there is none, which happens most often, bring a burning lighter or match to the window. By the number of reflected lights (should be 2 or 3) you will see the number of glasses. Two lights - single-chamber double-glazed window, three lights - double-glazed window.
How to properly remove beading and glass from a plastic window or door with your own hands.
To remove the bead, you can use a dull, dull knife or a hard spatula and a hammer, preferably a rubber one. Under no circumstances use sharp or thick objects such as a chisel; they will cut and crush the glazing bead.
First, the vertical beads are removed. To do this, we lean the blade of a dull knife against the junction of the glazing bead with the frame in the middle of the height and carefully, tapping with a hammer, press the glazing bead away from the frame. We do this from the center to the edges until the glazing bead moves away from the frame. After which you will see the edge of the glass unit, the thickness of which can be easily measured with an accuracy of 1 mm. To completely remove a double-glazed window from a plastic window, after the vertical glazing bead, the upper horizontal glazing bead is removed; you can even pry it off with some kind of hook or in the same way, whichever is more convenient. Further in a circle. The lower bead does not need to be removed at all. Be sure to wear gloves, tilt and remove the glass unit.
Make sure that the plastic gaskets of the glass unit remain in place
Remember where they are, this is important for the geometry of the window
Order double-glazed windows for a plastic window or door.
Having the dimensions of the double-glazed window, you can order a ready-made double-glazed window from ours in St. Petersburg by phone or leave a request by e-mail. It usually takes 2-3 days to produce a double-glazed window.
Installing double-glazed windows in a plastic window or door with your own hands.
Before installing a double-glazed window, check it for chips and scratches. Reinstall the plastic spacers in the window or sash frame if they have moved. We install the double-glazed window into the frame of the plastic window. We insert the top bead into the groove, then the bottom one. We insert vertical beads into the grooves from the corners of the frame, slightly bending the bead. We hammer in all the glazing beads with a hammer. If you use a metal hammer, be sure to use a spacer, such as a block of wood.
After replacing a double-glazed window, be sure to check the operation of the opening sashes, even if you replaced it in the blind part of the window. When driving in beads, the mullion may move if you apply too much force.
Specialists in St. Petersburg will always be happy to help you understand various PVC profile systems, and will qualitatively manufacture and install a plastic window or door in your home. We will help you glaze your apartment or house at very competitive prices. From us you can order glazing, insulation and finishing of a balcony or loggia, and we can also manufacture and install a roof on the balcony.
Only from us, when ordering plastic windows and doors, you can receive:
- PVC windows and doors made from high-quality German profiles IVAPER-Gealan, VEKA and REHAU. - only high-quality German fittings Siegenia Aubi, Roto NT and Axor. — double-glazed thermal package DS from the STiS company at a very low price. - high-quality window sills made in Russia Vitrage and Brusbox and German Danke and Möller. — gifts: mosquito nets, micro-ventilation, false opening blocker and other useful accessories for plastic windows. - fast and free window measurements - within 24 hours. — free delivery of products to St. Petersburg on the fifth working day. - only high-quality installation, Russian installers with extensive experience.
How to remove a bead from a plastic window: replacement instructions
Plastic windows made from PVC profiles are very popular among the population due to their low cost and excellent physical characteristics; sometimes during operation it becomes necessary to remove the glass unit for various purposes. When carrying out dismantling operations with your own hands, the user should know how to remove the glazing beads from a plastic window on their own, because this is the only way to remove the double-glazed window from the opening.
Although the procedure for removing a window bead from a plastic window does not look complicated and almost any housewife can handle it, knowledge of some features can be useful to everyone. In addition, carrying out further operations with double-glazed windows requires certain skills and deeper knowledge in the field of window glazing.
PVC profiles with glazing beads of different widths
Useful video on the topic
Detailed video guide for troubleshooting balcony doors:
- Adjusting the tilt and turn sash “up and down” will help if the scissors rub against the frame when opening or closing the door.
- Wedging the sash - will help if the sash is sagging and adjusting with screws does not give the desired result;
- What to do if the balcony latch does not hold;
- How to remove scratches on white or laminated PVC profile;
- What to do if the sash does not fit the frame.
How to independently adjust the door to the balcony:
Most problems with a balcony block can be fixed with your own hands, saving on calling a technician. If it was not possible to repair a plastic or other door on the balcony using the methods described, contact a professional. Otherwise, you can only aggravate the breakdown, which will lead to higher repair costs.
Types of faults
Most often, fittings break or canopies become loose.
Plastic doors are a reliable design with high thermal insulation characteristics, but sometimes troubles happen to them.
Types of breakdowns:
- the lock or handle is broken;
- the handle is difficult to turn or, conversely, dangles;
- the sash does not fit, the fittings require adjustment;
- the awnings were loose.
Many of these problems can be fixed yourself.
If the design is under warranty, call a repairman; if the owner tries to repair the metal-plastic product himself, the warranty will be canceled.