Tips for builders | 04.10.2020
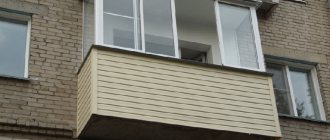
If the apartment is constantly cold, it’s time to insulate the balcony. This is a vulnerable spot through which heat leaves the room due to close contact with the cold outside. Read this article on how to insulate a balcony in a panel house.
How to insulate a balcony with your own hands. Step-by-step instructions with photos.
Each of us dreams of a large and spacious apartment, where there would be a lot of free space not only for storing things, but also for living.
An excellent option for expanding the area is insulating the balcony. We will tell you how to insulate a balcony with your own hands. Unfortunately, not everyone has enough square meters that they have, especially for old houses. Therefore, most Russians are accustomed to using every corner of the apartment, including the balcony and loggia, as rationally as possible. Many people choose the old “Soviet” option and fill the loggia to the brim with unnecessary things. But there is a more practical, modern and aesthetic solution to this issue. A balcony or loggia can be converted into a place to relax, a winter garden, a mini gym or a study, thereby expanding your living space. Here you can spend your time regardless of the time of year. Depending on your preferences and the size of the loggia, you can place your favorite plants, sports equipment, storage cabinets, you can put a wicker table and chair and other interesting accessories. We will tell you how to insulate a balcony with your own hands.
Mineral wool
0
Source:
For insulating a balcony, basalt mineral wool is better suited - the most environmentally friendly type of material with excellent technical characteristics. Advantages: low thermal conductivity coefficient - almost like penoplex; waterproofness - if a basalt type of wool is selected; good breathability – formation of a healthy microclimate; excellent sound insulation – noise from the street is reduced to a minimum; sufficient strength - mineral wool can be used for floor insulation; fire resistance – melting point is 1000°C; safety for the environment and health - there are no emissions of harmful substances, the development of mold and fungi is excluded; resistance to chemicals. Disadvantages: high cost; dust formation when cutting; special clothing is required for work. You should not insulate the loggia yourself using traditional glass wool - its particles can become embedded in mucous membranes, skin and hair.
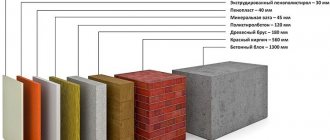
Types and features of materials for insulation
1. Foam plastic can be confidently called the king of thermal insulation, due to its low thermal conductivity, light weight, ease of installation, low cost and a number of other advantages.
2. Penoplex is a material developed on the basis of foam plastic, characterized by increased wear resistance, resistance to different weather conditions and strong compression. Penoplex is an ideal solution for insulating small balconies.
3. Expanded polystyrene, practically consisting of air, has excellent heat-insulating properties.
4. Polyurethane foam has low flammability and is an environmentally friendly material. Installation of this material is carried out by pouring or spraying.
5. Penofol is a multilayer polyethylene foam of varying density, structure and thickness. With a thickness of several millimeters, this insulation has high heat-saving efficiency and is suitable for use in small areas in order to maximize the usable space.
6. Mineral wool is thick and has different installation features.
7. A modern and practical insulation option is extruded polystyrene foam URSA XPS. This material is especially convenient for insulating a loggia, as it perfectly prevents heat loss and has the best thermal insulation properties among other insulation materials.
Using URSA XPS is very convenient and profitable, as it is used for both floor finishing and wall finishing. For a standard size balcony or loggia you will need only two packages of this material. It is lightweight, easy to transport, does not crumble or break, and is easy to cut with a knife. Its rigidity allows the use of extruded polystyrene foam as a base for the screed. Compared to other insulation materials, it has a thickness of only 5 centimeters, which is 1.5 times less than other insulating materials. At the same time, its thermal characteristics do not change. Thus, this material allows you to save space on a small loggia.
With the right choice of material and high-quality installation, you can make a balcony or loggia a full-fledged warm living space.
Expanded polystyrene (foam)
0
Source:
The most popular material for insulating balconies. Typically, sheet foam is used with a thickness of 5 cm, or, in harsh climates, 10 cm. Advantages: low thermal conductivity coefficient - i.e. high thermal insulation even without additional materials; satisfactory strength - dense finishing materials can be used; high moisture absorption rate - there is no need for an extra layer of waterproofing; environmentally friendly and hygienic - does not emit hazardous substances, mold will not develop, and dust does not form during operation; ease of installation - sheet foam is easily cut into pieces; long service life - up to 30 years (subject to technology). Disadvantages: poor air conductivity - additional ventilation methods are needed; low noise insulation; poor resistance to chemicals based on alcohol and petroleum products, as well as some varnishes and drying oils; high flammability. Insulation of a loggia or balcony is carried out with construction foam with a density of 35–40 kg/m³. It is easy to distinguish it from packaging by its polygonal cells.
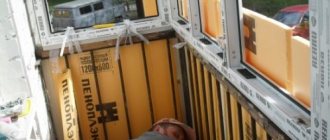
How to insulate a balcony and loggia with your own hands
You can carry out work on insulating the loggia yourself. They include several stages.
- At the first stage, the loggia is glazed, then the balcony door and window of the room are dismantled.
- Next you need to insulate the floor. To do this, all the holes need to be filled with foam, and when it dries, apply lubricating waterproofing, for example, Ceresit CR65, to the lower part of the walls and to the slab.
- Self-leveling cement-sand mixtures are used to level the floor. In a situation where it is necessary to raise the floor, a five-centimeter layer of expanded clay is laid.
- URSA XPS slabs are laid at the base, and all joints between the walls and the insulation are sealed with vapor barrier tape in order to avoid the appearance of “wet” walls and the formation of fungus and mold.
- The next layer is laid with lightweight polymer concrete 4 centimeters thick and reinforced wire mesh.
Extruded polystyrene foam (penoplex)
0
Source:
The disadvantage of extruded polystyrene foam is its high cost. There are several types of material on the market (according to their intended purpose): “Foundation” - for insulating structures buried in the ground. “Roofing” - for finishing attic spaces, it is fragile. “Wall” - for cladding external walls and partitions above ground level. “Comfort” - for insulating loggias and balconies (balanced view). Typically, penoplex sheets are fastened with polyurethane foam or “liquid nails.” This material is an improved version of conventional foam - lower thermal conductivity due to its uniform porous structure. Other differences of penoplex include lower fire hazard and greater strength - it can even be laid on the floor. Otherwise, the advantages of the materials are the same.
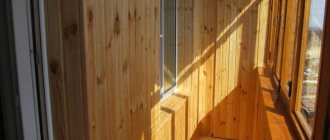
We insulate the ceiling and walls
It is much easier to insulate the ceiling and walls.
- To do this, URSA XPS boards are glued to the surface of the walls, and on top of them is a cladding made of moisture-resistant plasterboard.
- In order to preserve the internal area of the loggia as much as possible, it is necessary to glue the slabs with cold bitumen mastic, evenly distributing it over the surface and covering at least 25% of the surface.
- The ceiling is insulated using the same technology, although instead of plasterboard you can use a suspended ceiling and hide under it all the necessary wiring for lighting the balcony.
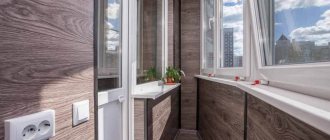
At the last stage, the loggia is finished and the radiator is installed. Often construction work and material costs frighten people, forcing them to abandon such a convenient corner for relaxation.
But after weighing all the pros and cons, you will understand that everything is not so scary. All work will take you no more than 7 days, and the cost is not that expensive.
Attaching the insulation
The insulation material can be attached directly to the walls and ceiling with or without lathing.
With frameless fastening, the insulation is glued with special glue and additionally attached at the corners and in the middle with plastic dowels (fungi). The use of lathing slightly increases the cost of the structure, but makes it more stable and reliable. For insulation with soft mineral wool, lathing is a mandatory element, but when insulation is done with hard slab material, it is usually also installed for the convenience of finishing work.
After laying the insulation, clapboard, plastic or plasterboard sheets are attached to the sheathing for subsequent wallpapering, painting or laying ceramic tiles.
The lathing can be made of a special metal profile or wooden beams. The finished sheathing is a cellular structure with cell dimensions of 40 x 60 cm.
Windows - as a stage in the insulation of loggias and balconies
Are there special profile systems that will help keep the house warm?
The WDS 505/70 mm profile system is designed specifically to reduce heat loss, thereby reducing energy costs and at the same time creating a comfortable indoor climate, regardless of weather conditions.
This is achieved due to the installation depth of the profile of 70 mm, which provides the highest level of thermal insulation and allows significant savings on heating in winter, which is especially important for houses with an autonomous heating system. The overlay width of 17 mm increases wind resistance and improves the aesthetic appearance of the window. An optimal rebate between the frame and the sash prevents the penetration of dirt and water.
The rectangular shape of the lower part of the sash allows the use of standard fittings when making a window. This optimizes the cost of the design, which is often a decisive factor when choosing a system. Along with functionality, manufacturers have not forgotten about the design of the window structure. You can order the profile system in white, as well as with one-sided or double-sided lamination that imitates the structure of wood.
Installation of balcony frames
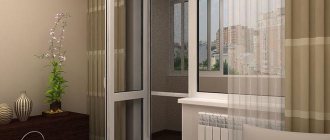
To create a warm room on the balcony, you should first think about glass frames. The best windows for a loggia are plastic bags with two chambers. Frames can be aluminum, wood, polymer.
To install them, you should contact specialists. The preservation of heat inside the room will depend on correct installation. Therefore, you should not save on frames.
Errors in insulating balconies and loggias
When insulating a balcony or loggia, many owners make a mistake - they install double-glazed windows, hastily seal the cracks, and then install a heating radiator or “warm floor” in the room. This approach has a big drawback, since the heat will go outside, and maintaining the optimal temperature will not be easy. A professional approach necessarily involves good insulation of the loggia.
High-quality insulation of a balcony or loggia will significantly reduce the level of heat loss from the apartment. Start insulation by installing metal-plastic windows, then pay attention to finishing the walls, floor and ceiling, as well as the parapet facade with modern insulation materials. If with the onset of cold weather it will be cool on the balcony, install an electric heater there.
Use our tips and you will have another warm corner in your home, which you can arrange in your own way.
Izolon
0
Source:
An improved version of penofol, already well suited for insulating loggias and balconies. Also available in rolls and reflects heat flow. Advantages: fire resistance - in contact with fire it breaks down into carbon dioxide and water; good heat and noise insulation; resistance to sudden temperature changes; long service life - more than 100 years; ease of installation - the flexibility of the material allows you to close difficult places; protective properties - can act as a barrier in case of water leakage. Disadvantages: high cost; thinness - the structure is easily damaged and loses its characteristics; the need for strict adherence to installation technology.