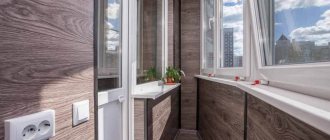
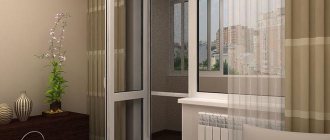
The threshold on the balcony is an integral element of the interior of the room adjacent to the balcony. If the appearance of this element leaves much to be desired, then no matter how beautiful the room adjacent to the balcony or loggia is, an old or poorly finished threshold will be striking and spoil the integrity of the picture. And if it still blows, then installation or replacement is simply necessary.
In this article, we will look at how to make, replace and finish the threshold on a balcony step by step without involving specialists, since this type of work does not require additional skills and there is an opportunity to save money .
Preparatory work
The first step is to make the base. There are two options for creating a base for the threshold: from brick or from cement-sand mortar. If you already have a level base that is suitable in height, then you can skip this step and immediately begin finishing.
Note!
The height of the base of the threshold is made taking into account the fact that a layer of finishing material will be laid on top. The point is that the finished balcony threshold does not interfere with the opening and closing of the balcony door.
Instructions for creating a brick base:
The brick base is made when there is a large difference between the balcony frame and the floor (not less than the height of the brick).
- Leveling and cleaning the base. The smoother the base, the easier it will be to lay the brick.
- Prepare cement-sand mortar following the instructions on the bag.
- Distributing the mortar onto the base and laying the first brick. Next, you need to apply the mortar to the end of the brick so that all the seams are filled. Then the next bricks are laid. Usually one row is enough for a nut.
- After all the bricks have been laid, it is necessary to apply a layer of mortar to the entire surface of the brick row and level it.
- After the mixture has dried, moisten the surface with a small amount of water and treat with a grater.
Other types of materials
To finish the threshold on the balcony door, you can use other materials:
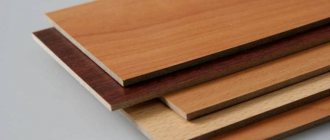
- Natural wood. Eco-friendly, holds heat well. Looks appropriate in interiors made in eco or country styles. Working with it requires certain skills and abilities. The main disadvantage is the high cost.
- Laminate. It is a cheaper analogue of wood, but has good aesthetic and thermal insulation properties.
- Linoleum. One of the most inexpensive and easiest to work materials.
- Cork. An environmentally friendly material that gives originality and exclusivity to the interior. Has excellent thermal insulation properties. The main disadvantage is softness and instability to damage.
So, it’s not difficult to give a finished look to a balcony door. Carefully consider the design solution, and then carry out the work correctly - as a result, the room with a balcony will become even more cozy and comfortable.
Threshold made of plastic window sill
A plastic threshold on a balcony is considered the most practical, inexpensive and versatile option. It looks most aesthetically pleasing if the entire balcony block is made of plastic.
Instructions for installing a plastic threshold from a window sill:
- The surface under the threshold is cleaned of dust, debris and primed. If there is an old threshold, it must be dismantled.
- Next, you need to lay out the beams on the base of the threshold. We do not recommend installing the threshold only on polyurethane foam - it is unreliable. The threshold will be laid on the bars. The size of the bars must be selected in such a way that the finished threshold does not interfere with the opening and closing of the balcony door.
- The next step is to cut the plastic window sill to the size of the threshold.
- Next, we place the threshold and check whether everything fits and check the evenness of the surface with a level. If necessary, we trim the threshold. If the threshold is suitable, but the surface is not flat, it is necessary to install a base under the bars. Substrates can be any available materials (for example: pieces of drywall or plastic).
- After the threshold is adjusted to the level, we proceed to applying polyurethane foam. Carefully remove the threshold and apply an even layer of polyurethane foam between the bars, and liquid nails can be applied to the bars themselves.
- Next, carefully glue the threshold. It should be noted that foam tends to expand, so after installing the threshold it is necessary to place a weight on its surface.
- The threshold from the plastic window sill is ready.
How to make and veneer a threshold from brick or concrete
Piece building material is used for large distances from the door frame to the floor of the room. Apply putty to the cleaned and leveled floor surface and lay bricks on it. To hold the materials together, a mixture of cement and sand (1:3) is useful.
The first layer is cement, the second is brick. After the entire structure has set, cover the brick with a layer of cement composition, level it and tile it. Remnants from the collections with which the bathroom was lined will be useful as finishing. You only need a few tiles, so finishing does not require large investments.
The brick structure will last for several decades. The cement mixture is used for small forms. Mix sand with water and cement, build formwork in the area where the threshold is formed, pour in the composition and wait for it to dry. After drying, cover with any material.
Tile threshold
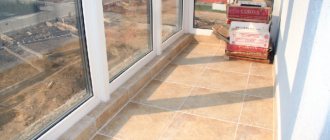
Tiles are a durable, beautiful and practical option. A variety of sizes, textures, colors and patterns makes it possible to choose tiles to suit any design and interior.
Instructions for finishing the balcony door threshold:
Important!
You should not choose tiles with a glossy surface as they are slippery.
- The first step is to take measurements, calculate the number of tiles and draw a masonry diagram. It is important that there is a solid tile in the center of the threshold, and trimming on the sides - this is done for symmetry.
- After taking measurements, you need to cut the tiles using a tile cutter or grinder.
- Next we move on to installation. Apply glue to the tiles and lay them on the base according to the diagram. If you do not use a pattern, then place solid tiles in the center, and trim along the edges as in the picture below. To ensure the surface is level, use a level.
- After drying, remove excess glue and cover the seams with grout.
In addition to the text version of the instructions, we recommend that you read the instructions in video format, where the installation is shown in more detail with an explanation of the nuances.
Finishing technology
Prepare the necessary tools and equipment for laying tiles: level, hammer, notched trowel, tape measure.
To carry out installation work you will need the following tools and equipment:
- construction level;
- glass cutter (tile cutter);
- hammer;
- notched spatula;
- pencil;
- roulette;
- clean rag;
- sponge;
- wire cutters
In addition to this, you need:
- special separators (crosses);
- glue;
- sealant (silicone seal);
- grout.
A polyethylene waterproof mat is laid on the hardened screed. As soon as the mat sticks to the surface of the screed, you can safely begin laying tiles. Laying the tiles begins from the wall of the balcony.
A polyethylene waterproof mat must be laid on the previously prepared and already hardened screed. Its width should match the width. As soon as the mat sticks to the surface of the screed, you can safely begin laying ceramic tiles on top of it. Laying should begin from the wall.
Laying on the loggia should be done using a special frost-resistant elastic glue.
At the junction of the tiles with the walls of the balcony, it is necessary to do the so-called local stretching (dilatation). Special profiles are useful for this. If the area of the balcony or loggia is large, or, on the contrary, it is quite narrow and long, it is recommended to perform a transverse expansion. To do this, it is necessary to divide the balcony into two approximately equal fields, separating them with a dilation profile.
The framing row from one corner is laid first. It is final and is laid dry. Ideally, a whole quantity can be laid. But, as a rule, corner tiles are cut at 45 degrees.
Styling tips
In order to ensure that the distances between the tiles are absolutely identical, you need to use special plastic crosses.
When laying the floor, you must remember that the distances between the tiles over the entire area must be absolutely identical, so you should use special plastic crosses.
Tile adhesive is applied directly to the surface of the glued mat. The material is laid from the corners, relative to the framing row. Laying in the form of bricks looks very interesting. That is, when the seams of adjacent tiles do not coincide with each other, if one of the rows ends with a whole tile, then the other should start with a half.
Once the flooring has been installed, it must be left to dry completely. And only after the mortar on which the tiles were laid has completely dried, you can begin to grout the tile joints using a special grout. The grout can be of any color, fine-grained or coarse-grained. It is best to use a fine-grained one to avoid shedding. The color is selected based on the color of the coating. Using a silicone spatula, the seams are filled with the prepared solution and compacted until they are completely filled. After the solution has dried, the tiles must be wiped with a soft sponge soaked in water.
No other material used for finishing balcony floors has yet been able to compete with floor tiles. This material is not only durable and practical, but also aesthetically beautiful. The variety of textures and colors of this material cannot but rejoice
It will allow you to bring to life any design solutions and make your apartment stylish, interesting and eye-catching
Laminate threshold
How to make a threshold for a balcony from laminate with your own hands - instructions:
- The first step is to putty the threshold.
- Measurements are taken and the necessary laminate elements are cut out. In most cases, one strip may be enough, since laminate comes in different widths and it is possible to choose the optimal solution. When cutting the material, use a wood saw with fine teeth, a hacksaw for metal or a jigsaw.
- To beautifully design the joints between the wall and the laminate, starting guides are used. We cut them to size and fix them around the perimeter.
- Apply silicone sealant or liquid nails to the base of the threshold and glue the laminate.
- The final stage is cutting to size and installing a decorative corner.
Related videos
Video materials will help you choose how to design the transition from the room to the balcony:
Economical solution from a piece of linoleum:
Laminate decoration:
As you can see, creating a comfortable transition from a room to an adjacent room is not so difficult; the main thing is to follow the technology of working with the selected materials and not forget about the features of interior design. If you are not confident in your abilities, entrust the work to experienced installers who will quickly and accurately complete your order.
YOU MAY ALSO BE INTERESTED
Linoleum threshold
- A piece of linoleum is applied to the surface and the cutting locations are marked. It is necessary to cut carefully so that the joint with the wall is as smooth as possible.
- Apply liquid nails to the surface of the window sill, level the material over the entire surface and press the canvas. Particular attention should be paid to the joints.
- The final step will be to install the baseboard and install the decorative metal corner. In addition to decorative purposes, these elements are intended to cover the joints of the material.
Requirements for floors on balconies
Balconies can be open or glazed, which means that the requirements for flooring will differ significantly. Much depends on how the balcony is used: as a relaxation area, a study, a greenhouse or a warehouse for unnecessary things. In each specific case, you need to take into account the operating conditions so as not to make a mistake when choosing materials.
Open balconies
Open balconies
The floor on an open balcony is constantly exposed to temperature changes, exposure to sunlight, rain and snow. Therefore, the floor covering must have high strength, frost resistance, not absorb moisture, be easy to clean from dirt, be non-flammable and non-slippery. Such requirements greatly limit the choice of materials, but it is still quite wide: ceramic tiles and porcelain stoneware, rubber tiles, decking, special rubber paints, PVC panels. Linoleum is also suitable for balcony floors, but not ordinary, but frost-resistant, which appeared on the construction markets not so long ago.
Closed balconies
Closed balconies
On glazed balconies, the floor is protected from rain and snow, fades less in the sun, and is less dirty. The most important factor here is the presence or absence of heating. A heated, insulated balcony is practically no different from a living room, and any covering can be laid there. If the balcony is not heated, but is insulated, the floor covering must withstand temperature fluctuations in winter and summer. If the balcony is simply glazed, without insulation of the walls and floor, the floor covering must be frost-resistant.
Balcony operating conditions
Relaxation corner with soft rug
When planning to create a relaxation area on the balcony, choose a material that is pleasant to the touch, environmentally friendly, but at the same time resistant to abrasion and ultraviolet rays. If you do not plan to have a warm floor underneath the covering, you should not lay tiles or make a self-leveling floor - such a surface will be very cold. It is better to use laminate, any wooden coverings, or linoleum on a thick backing.
Linoleum on the balcony
Any practical covering is suitable for a work office, not necessarily expensive or overly decorative. The material should be easy to clean from dust, not emit harmful fumes, and not be pressed under the legs of a table with a computer or other furniture.
Office on the balcony. Covering: ceramic tiles
If you plan to arrange a mini-greenhouse or winter garden on the balcony, the floor must be waterproof. When watering and replanting plants, water often spills on the floor, soil, and flower fertilizers get in. It is very easy to slip and fall on a dirty wet surface, which means you also need to choose an anti-slip coating.
Balcony - greenhouse. On the floor there is fine gravel and wooden boards
In the case when the balcony is used as a warehouse, it is best to cover the floor with an easy-to-care material that is not afraid of temperature changes and mechanical stress. It can be ordinary tiles or the same linoleum. It is not practical to lay expensive decorative materials on such a balcony. So, knowing the list of requirements for floor coverings, you should study in more detail the properties of the most popular materials.
Tools for repair
Before you begin repairing a PVC profile door, you need to prepare the tools that may be needed during the work process.
No specialized equipment is required for minor repairs of balcony doors and windows.
In most cases, it is found in every home.
- screwdriver with replaceable bits (screwdriver set);
- screwdriver-drill (cordless);
- set of metal drills ∅1-10 mm;
- building level;
- construction plumb line;
- set of hex keys;
- pliers;
- metal saw;
- a mallet with a white rubber hammer;
- white rubber spatula;
- plastic or wooden spatulas for removing cash.
Consumables that may be required when repairing PVC profile products include:
- PVC adhesive Cosmofen Plus-S white;
- adhesive-sealant Cosmofen 345;
- COSMOFEN RM putty for restoration of hard PVC products;
- rubber seals - in case they are damaged and need to be replaced;
- door handles and latches - in case of breakage;
- plastic gaskets.
New seals, handles and gaskets must be from the same manufacturer that are installed on your doors!
In case of repairing dents, cracks and chips on the surface of a balcony door, you may need sanding paper to sand the surfaces with a grit of P-1000 or P-1200 according to ISO or M20 according to GOST (designations of different manufacturing countries may have their own grit designation).
Causes of failure of PVC doors and windows
The PVC profile, which is used in the manufacture of balcony doors and windows, must initially cope with such loads. But time, careless handling or increased load on fasteners can lead to door breakage or loose fit to the door frame. These defects not only create inconvenience in use, but also tend to further aggravate the situation, up to the failure of fastening elements or door locking.
To prevent this from happening, it is sometimes necessary to carry out preventive work. In the event of an obvious breakdown, make repairs.
It should be noted that not every repair of balcony doors and windows can be done with your own hands. Large surface defects, frame destruction, damage to the integrity of the glass unit, and deformation of the door frame due to exposure to high temperatures cannot be repaired. In these cases, it is necessary to contact the company that installed the doors or specialists working in this profile.
Minor repairs to plastic doors and windows, which can be done with your own hands, may include the following operations:
- handle repair;
- seal;
- minor surface defects;
- clamps;
- glass unit replacement;
- door position adjustment.
Dismantling the old structure
All work on the construction of a new structure in a house must begin with proper dismantling. It's always much easier than building something new. It is very easy to dismantle wooden structures. But with brick ones you need to work hard.
All work must be carried out carefully, because the main tools for dismantling are a chisel and a hammer. Sometimes you will have to use a hammer drill.
It is better to carry out work near the wall with a grinder, using an attachment for working with stone. If in some places the disk cannot be reached, then you will still have to use a chisel.
You should also take care of your own protection. After all, the work is dusty. Therefore, it is necessary to wear construction glasses and a respirator.
Portal about construction
Plastic balcony doors are subject to intense load, especially if there is a winter garden or workplace on the balcony.
The balcony door may experience deforming load due to the formation of condensation or temperature changes. Then it stops functioning normally and the question arises: how to repair the plastic door leading to the balcony with your own hands? In this article we will answer these questions by briefly describing the malfunctions and how to fix them, which you can do yourself.
Replacing a door handle
The most common and at the same time easily removable reason.
To remove a broken handle, you need to place the broken handle in a horizontal position - parallel to the floor, press out and turn the decorative plug at the base of the handle 90°. Unscrew the exposed bolts and remove the broken handle. Pull out the square rod on which the handle was attached. Install a new handle with a square rod and secure it with the bolts that were removed when dismantling the old handle. Rotate the decorative plug at the base of the handle to its original position, closing the heads of the screws.
Adjusting doors and windows
The most common problem is doors and windows not closing tightly due to sagging under their own weight or loosening of the hinge fastening elements.
To eliminate the distortion with your own hands, first determine the verticality of the door leaf relative to the door frame using a plumb line. Use a plastic marker (water-soluble) to mark the places where the door hooks onto the frame.
After this, remove the decorative plug from the top door hinge and use hex keys to adjust the door position.
It should be remembered that the top screw at the end regulates the movement of the door in the vertical plane, and the screw located on the side in the horizontal plane.
If adjusting the top hinge fails to skew the door leaf, perform the same operation with the bottom hinge.
After the adjustment is completed, the decorative overlays on the hinges are installed in place.
Choosing interior thresholds
- After you have laid the flooring in adjacent rooms and installed an interior door, you need to measure the width and length of the gap that has formed between the joints, for example, of laminate and linoleum. The stores have a huge selection of thresholds in width and length, so be sure to measure.
- It often happens that the floor levels in adjacent rooms are different and in this case ordinary thresholds will not suit us. It is necessary to purchase multi-level thresholds. I’ll tell you in more detail how to choose them below.
- Thresholds are mostly made of aluminum. The colors and shapes are varied. There are also more durable metal ones, which are made from brass and stainless steel.
- Thresholds made from wood are, of course, very beautiful, but they will be expensive. They also require more complex care. They are generally not popular because they are not durable at all.
Please note: How to install platbands on interior doors
In order to make a horizontal connection between two different floor coverings, a cork expansion joint is usually used. This plank is an indispensable part, especially in those rooms where sudden temperature changes occur, as well as in those where there is a high level of humidity. It can expand and contract almost twice, which will absorb any thermal expansion.
10.1. Structural disadvantages of protruding balconies
1. The length of the projection is limited: 0.6÷2.3 m (depending on the cross-section and pitch of the balcony beams, the type of balcony floor and climatic conditions).
2. The beams of the protruding balconies pass through the heat/moisture insulating materials of the outer wall. This can lead to damage caused by moisture accumulation and depressurization of the building envelope
Therefore, it is very important that wind and waterproofing around the balcony beams is done efficiently
3. Projecting balconies are not suitable for facades that are often exposed to strong winds that direct rain horizontally.
4.The construction of protruding balconies requires special knowledge and skills, and also requires additional time and effort.
11.1. List of used literature
1. Anders Fröstrup, 2008 “Theory of carpentry. Wooden structures", Gyldendal Undervisning, Oslo, 2008.
2. Haakon Einstabland, Brit Ruald, 2010, “Protruding wooden balconies”, SINTEF, Oslo, 2010.
3. Eurocode 5, EN 1995-1-1 “Design of timber structures”, British Standards Institute, London, 1995.
4. Eurocode 0, EN 1990 “Fundamentals of structural design”, British Standards Institute, London, 1990.
5. Eurocode 1, EN 1991 “Actions on load-bearing structures”, British Standards Institute, London, 1991.
Construction of houses in St. Petersburg, prices, projects. This information is available by phone:
Installation
Before starting work, clean the area that you plan to use for the threshold. Remove everything extraneous, outline the contours, take measurements of length, width, height. Next, start preparing the tiles - they need to be cut into the required sizes.
Ceramic threshold
Note. It is better to carry out cutting with a special machine - the work will be faster, safer, and of better quality.
The next step is formwork. For it, use a couple of wooden beams; they need to be secured in the designated places. Carefully place the pieces of the slab for the sides of the threshold parallel to the bars, so that they become part of the formwork.
After this, make a solution of sand and cement (3 to 1, respectively), fill the formwork with it, and cover it with a slab on top. The cement hardens within 24 hours; during this time it is forbidden to walk on the thresholds; it is better not to touch them at all. After a day, remove the dividing crosses and rub the seams.
Proper sizing is the key to success!
The standard sizes of door leaves are
- height 2000 mm
- width 600 mm, 700 mm, 800 mm and 900 mm
All other sizes that go beyond the scope are usually custom-made items. (I mean single canvases, not swing ones)
You need to add 70 mm to the size of the door leaf - this is the standard width of the door frame. If the dimensions of the door frame are different, then the size will naturally change up or down. And we also add 6 mm - this is the technological gap between the leaf and the door frame.
Now you need to check how the door frame fits into the doorway. If it needs to be expanded, then we are not in a hurry to break everything at once. We soberly assess the situation - we may have to strengthen the opening with lintels. If you need to reduce the opening, then we fill it with bricks, or “sew on” bars - it all depends on the situation.
Usually the dimensions of doorways are controlled at the construction stage, but in older private houses (like mine) there are “hard” discrepancies.
The next important dimension is the gap from the floor to the door leaf. Before calculating it, you need to check the level of the floors for the width of the door “swing”.
You can do this in two ways:
- Using a hydraulic level
On the side walls of the opening we place marks at the same level. We measure the distance from each mark to the floor plane. The difference that you get when measuring should be added to the minimum height of the posts so that when opening the door does not rest on the floor. If you still “miss” this moment, then you can eliminate it only by trimming the door leaf, and this is still a “handjob” :(
2. Using a laser level
If you are the happy owner of a laser level, then everything becomes much simpler. We set the level and, using a construction square, determine the curvature of the floors. The obtained values are taken into account when setting sizes.
The minimum gap is 10 - 15 mm, depending on what kind of floor covering is planned. But it is better to immediately lay linoleum, or carpet, or laminate, and then carry out the installation.
See the table of correspondence between door blocks and openings.
And here is another table of typical door frame sizes
9.1. Protection of wooden structures from damage caused by fungus and insect pests.
External load-bearing wooden structures in contact with soil or water must be made from industrially impregnated lumber. Impregnated wood does not harm people, animals and plants, but is protected from damage caused by fungi and insect pests due to prolonged exposure to moisture and contact with the ground. The impregnation class of lumber used in these conditions must correspond to class A or AB. Saving on the quality of materials used can cause damage to the life and health of people, as well as material property.
In overhanging balconies with open plank floors laid with narrow gaps, all supporting beams and floor planks must be commercially impregnated to impregnation class A or AB.
