Andrey
12950 0 2
Andrey November 10, 2016Specialization: facade finishing, interior finishing, construction of dachas, garages. Experience of an amateur gardener and gardener. We also have experience in repairing cars and motorcycles. Hobbies: playing the guitar and many other things that I don’t have time for :)
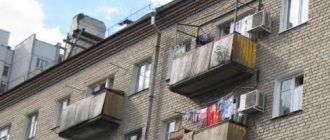
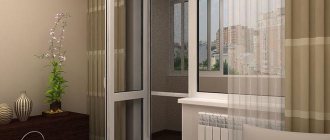
If you correctly approach the decoration of a balcony in a Khrushchev-era building, you can add a few more square meters to the usable area of your home. On the one hand, this is not a lot, but in a small apartment, where every centimeter counts, this is a quite significant increase. Therefore, in this article I decided to tell you how to decorate a balcony yourself so that it can be used profitably.
Finished balcony in Khrushchev
Repair
To make global changes, a special work permit will be required. The corresponding paper can be obtained from the housing inspectorate at the address of the property. To obtain a permit, you must submit the following package of documents to this authority:
- application for transformation;
- a copy of the certificate that confirms the ownership of the premises - such a document is certified by a notary;
- registration certificate for residential premises;
- balcony reconstruction project.
You can start work only after you have the permit in hand.
Preparatory work
- dismantle old window frames and coverings from all surfaces;
- building foundations are tapped with a hammer to detect and remove unstable fragments;
- metal parts are cleaned of rust and treated with an anti-corrosion agent.
If the floor reinforcement is thoroughly rusted, it is recommended to fix new material on top. It is best to lay a mesh with cell sides of 150-170 mm, connected from class A-III reinforcement, with a diameter of 3 mm.
Slab restoration
Do-it-yourself slab restoration can only be done if the building base has minimal damage or simply needs leveling. If the floor is destroyed to a significant extent, it is recommended to invite professionals.
The help of specialists will be required in the following cases:
- a piece of cement has collapsed, resulting in through defects or a significant part of the reinforcement being exposed;
- a deep crack has formed at the junction of the slab with the house;
- the concrete base has collapsed or the material has peeled off.
Self-leveling of the slab is carried out as follows:
- the building base is primed, the primer is applied in two layers and after each treatment a break is taken so that the product hardens;
- Cement plaster is laid, the material is leveled over the surface using the rule;
- install the formwork using a board 15-17 cm wide;
- Concrete is poured, the material is leveled, and activity is stopped until the composition hardens.
Replacing the fence
At the very beginning of the work, the old fence is dismantled along with the glazing and coverings. After this, a new structure is installed. To do this, it is recommended to invite professionals. Specialists will take the necessary measurements, after which they will manufacture and install the fence. Usually the structure is made of metal, but you can order the parapet from glass or other material, depending on personal preferences.
You can also do the fencing yourself. For this, a rectangular profile pipe is used. This material has the following advantages:
- strength;
- ease of use;
- external attractiveness.
To manufacture the fence, measurements of the balcony are taken and a diagram of the parapet and its installation are developed. After this, the material is prepared, and the pipe parts are welded together according to the plan. The fence is then installed on a concrete base using anchors.
To make a parapet, you can also use foam blocks. The material is laid on a concrete base using a repair mortar. If you do not have a welding machine and experience in drawing up diagrams, it is best to use this particular method of arranging a parapet.
Finish plating
This stage completely depends on the taste preferences, interior and financial capabilities of the owner. There are several options for decorative finishing of the balcony:
Wood paneling
To secure it, clamps and nails or staples are used. This material is environmentally friendly and aesthetically pleasing in appearance. Among the disadvantages, it is worth noting its fragility and the need for periodic processing.
Plastic decorative panels
For their installation, “liquid nails” are used. This material is inexpensive and easy to install. Service life is not limited.
MDF panels
To place them on the walls, clamps and nails are used.
Such panels have increased moisture absorption, which negatively affects their service life. After all finishing work is completed, window sills, trim, sockets, switches and other decorative elements are installed at the request of the owner.
Increase
In the case of planning to increase the balcony to 30 cm, permission and approval are not required if the house is not an architectural value, in other cases it is necessary to coordinate the work and obtain permits, but as with everything there are some nuances that you need to familiarize yourself with.
Approval and permits can be obtained from the following authorities: Ministry of Emergency Situations, BTI, City Expertise, design organization and others.
In what cases is approval necessary:
- If the expansion of the balcony is planned in a house that has architectural value, then the final appearance must be agreed upon;
- It is also necessary to obtain permission if you plan to expand the area of the balcony in the Khrushchev building by more than 30 cm;
- It is necessary to coordinate repair work if the weight of the structure being installed is large, which entails a high load on the walls of the house;
- Permission must be obtained for the installation of a concrete slab, regardless of the size by which the increase is planned;
- Before carrying out repair work, it is necessary to check the condition of the balcony slab and walls.
Extension along the window sill
This option is also called remote glazing. The method consists in installing the glazing frames outside the balcony parapet using special metal brackets.
To expand along the window sill up to 30 cm, permission is not required; however, the quality and condition of the balcony slab will be an important factor, since when installing a metal frame and double-glazed windows, the weight on the balcony slab will be significant.
The expansion of balconies is possible both frontally and on the sides.
It is not advisable to carry out on the windowsill in the following cases:
- if the balcony is located on the lower floors of a multi-story building, since precipitation and debris from the upper floors will fall on the expanded area;
- if the house is already old and its ceilings are in poor condition. In this case, additional costs will be required for repairs and strengthening of the balcony slab.
It may seem that such an expansion is insignificant and unnoticeable, but taking into account the initial small width of the balcony, it turns out that its dimensions will increase by about a third.
A wide window sill can be used as a place to grow plants, a countertop, or just like a bar counter.
Instructions for enlarging a balcony in a Khrushchev-era building along the window sill:
- Brackets are welded to the metal parapet in increments of 50-70 cm. If the parapet is made of concrete, then the brackets are secured with anchors.
- The frame from a metal corner is fixed to the brackets by welding.
- Next, the external cladding of the balcony or loggia is performed.
- The next step is to insulate the floor and walls of the new frame. For convenience, the same material is used for the walls, floor and ceiling. We recommend using penoplex or mineral wool.
- Next, the glazing is installed.
- The final stage is finishing the interior and setting up the balcony.
Features of “Khrushchev” balconies
Before you start developing a design project for a balcony in a Khrushchev-era building, you should pay attention to some features of this part of the apartment.
As a rule, such balconies have a small area, but there are no single typical sizes. The footage varies:
- from 0.8 to 1.5 m wide;
- from 2.6 to 3.2 m in length.
For those who are lucky enough to have a larger balcony, you can show a little more imagination when renovating. But even for very small rooms there are several useful and beautiful ideas.
Another important factor is the isolation of the balcony. In small apartments, most often the balconies are not glazed, which means that they cannot be used immediately as additional living space. In some cases, glazing a balcony is completely impossible, for example, when the ceilings may not withstand such a load.
The “panels” of those times were designed for only 25-30 years of operation, but these houses survived more than one generational change. This means that the reliability of building structures must be checked during repairs in any case, especially the balcony base slab. It is mandatory to check with documentation about the maximum load the structure can withstand. If possible, it is better to carry out work to strengthen the balcony.
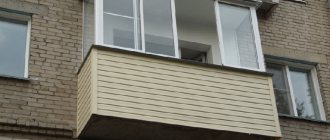
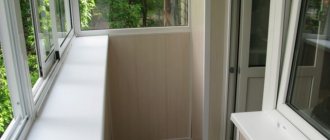
Exterior finishing
The cladding of a balcony in a Khrushchev-era building from the outside is carried out in several stages and is conventionally divided into cladding of the upper and lower horizontal chords, the design of corners and the installation of siding strips. Let's look at all the presented elements in more detail.
- Installation of sheathing
The presented work can be carried out on a pre-prepared balcony area. They provide for the installation of horizontal and vertical beams, to which siding sheets will later be attached. Initially, horizontal sheathing elements are installed, and then vertical ones.
Important! There must be gaps of about 5 mm at the joints of the panels to prevent deformation of the plates when the temperature changes. For the same purpose, it is better to turn the screws back a quarter turn, in case the material expands.
- Sheathing: installation of the lower horizontal chord
The horizontal lathing strips are mounted to the balcony slab using metal corner dowels. The beams are additionally fastened together with self-tapping screws. If the balcony grille is pressed tightly against the slab, you can attach the sheathing to the lower part of the fence.
- Sheathing: installation of the upper horizontal chord
Finishing the balcony with siding from the outside at this stage is carried out as follows:
- The installation height of the material is measured from the balcony slab.
- Using a building level, markings are created for installing the timber.
- The material of the required length is selected along the perimeter of the parapet.
- The timber is installed on the parapet using dowels and self-tapping screws.
After completing such work, the side sheathing strips are installed in half-meter increments. Two strips are placed at the joints to securely fix the material.
- Decoration of cladding corners
The corners are formed using special L-shaped profiles. They are inserted between two corner beams of the sheathing and fixed with self-tapping screws. This work begins when the sheathing has already been installed.
- Installation of siding strips
After finishing work on the sheathing, you can proceed to installing the siding itself. It should work like this:
- Attach the starting strip to the bottom trim with self-tapping screws.
- Measure siding panels. Trim them as necessary. When performing this part of the work, it must be taken into account that the outer cladding must have a gap of 4-5 mm in relation to the corner profile. This margin is given for thermal expansion of the material. If this is not done and the sheets are installed end to end, they may bend when exposed to strong heat.
- Start installing panels. They are placed over the sheathing and inserted into the corner profiles. The first panel is inserted into the starting strip and secured with self-tapping screws. The fasteners are clamped loosely so as not to deform the sheet. All subsequent panels are installed adjacent to the previous ones.
- Attach the finishing profile above the panels.
At this stage, the exterior finishing is considered complete.
Video instruction:
Leveling technology
You can prepare the floor in the loggia (on the balcony) for installation of the floor covering using a screed or without a screed. First, let's look at how to level the floor on a balcony with your own hands using a wet and dry screed, and then with joists and self-leveling flooring.
Wet screed
Let's consider pouring a wet screed using the example of an unheated balcony. The work is performed step by step in the following sequence:
After 7-8 days you can lay tiles on the balcony, after 10-12 - laminate, after 28 - put furniture.
Dry screed
Dry screed is made with expanded clay. First, a layer of expanded clay sand 3-4 cm thick is poured onto the floor of the balcony. This is done so that the backfill does not part underfoot. After that:
Self-leveling mixture
Leveling the base of the balcony with self-leveling mixtures begins with preparing the solution. To do this, pour a bag of dry mixture weighing 25 kg into a mixing container. 6 liters of water are added there. All this is first kneaded with a trowel and then with a mixer. During the stirring process, you need to make sure that splashes do not get on exposed skin - many types of mixtures leave chemical burns. If everything is done correctly, you will get a flowing paste without sediment or separation.
The prepared mixture is poured onto the floor with a thickness of 5 to 20 mm. Alignment in the center is done with a paint roller, in the corners and near the walls - with some kind of plastering tool. A spatula works best.
The process is completed by removing bubbles from the mixture. To do this, pass over the flooded floor several times with a needle roller.
In conclusion, let’s look at how to level the floor on a balcony without a screed. There are many operations in the screed device, such as the installation of beacons, which novice builders are afraid to get involved with. In this case, logs will help. You can install them in several ways:
The easiest way to level the floor is to install joists along the walls with a 3-5 cm indent from them on the sides and at the ends and mount a platform on them. Difficulties arise when leveling needs to be done while simultaneously raising the floor. Other technologies are needed here. They are described in detail here. Let us briefly recall their essence.
Hairpins. Installing joists on studs is the most complex and labor-intensive technology for leveling the floor on a balcony with timber. The process looks like this step by step:
Metal stands. U-shaped posts are attached to the concrete base with the cross member down. Logs are fixed between the plates. The principle is clearly visible in the photo below.
Wooden stands. In this option, the logs are laid on wooden blocks, if the floor height is small, or on racks. The latter are attached to the floor with two metal corners. The logs laid on the racks can be secured with a long self-tapping screw, using metal strips or corners.
Lathing. The double lathing method is the simplest to implement. Here it is important not to make a mistake: do not fix the beam to the wall. It may swell with changes in humidity and temperature. Changing the linear dimensions of the joists in such cases leads to deformation of the floor.
In conclusion, there are several ways to level the floor on a balcony or loggia. The choice of a specific type depends on whether the balcony is glazed or not, whether there is heating there or not. The technologies are simple, but with different costs and labor intensity. The easiest way is to use logs, but they have a shorter service life compared to screeds.
Source
Glazing
When it comes to how to make repairs on a balcony, first of all, the question of its glazing arises. To perform this type of work you can use the following materials:
- Metal-plastic. This is the best option for glazing your balcony yourself. The advantages of the material are a long service life and reasonable cost. In addition, it retains heat for a long time.
- Aluminum. This material can only be used if there are no plans to insulate the balcony.
- Tree. The main advantage of this material is environmental friendliness. Among the disadvantages, the following points are highlighted: high cost, short operational period, the need for regular restoration, lack of moisture resistance.
Roof replacement
When completely reconstructing a balcony, it is worth re-covering the roof with lathing for insulation. This step will subsequently protect you from leaks and damage to fresh repairs. The standard option is a roof made of metal tiles, rafters made of wood, or less often steel. All bases and guides must be securely attached to the wall. For better sound insulation, you can install foam sheets between the rafters and foam the seams with polyurethane foam.
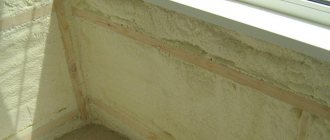
Insulation
For insulation, special materials are used that are fixed to building foundations. The most commonly used materials are mineral wool or penoplex. Below you will find step-by-step instructions for insulating a balcony with penoplex.
Instructions for insulating a balcony in a Khrushchev-era building with your own hands:
- It is necessary to measure the width of the side walls of the balcony and use a construction knife to cut the foam boards to the required size.
- After cutting the required amount of insulation, we proceed to installation. Let's start with the walls. It is necessary to attach the penoplex to the wall, having previously applied polyurethane foam along the edges on the reverse side. There is no need for glue; dowels will be enough for reliable fastening.
- To securely attach penoplex to the wall before installing penofol and sheathing, it must be secured with dowels with caps. To do this, use a hammer drill to drill holes directly through the insulation boards into the wall, then insert the dowel and tighten it with a screwdriver.
- To install the second and subsequent sheets, apply polyurethane foam to the edge at the junction.
- When all the foam boards are installed, it is necessary to seal all the seams with polyurethane foam.
- Next we move on to installing the insulation to the ceiling. Usually, attaching foam boards to the ceiling is problematic. It is necessary to drill holes and secure the insulation with plastic dowels.
- Next, you need to seal the joints between the plates with foam. It is important to choose a polyurethane foam that does not react chemically with penoplex.
- Next, we move on to thermal insulation of the balcony with penofol. Penofol is secured using a construction stapler. The sheets are laid overlapping so that there are no gaps.
- Having completed the installation of penofol, we proceed to the installation of the sheathing to further secure the decorative material.
- For the sheathing, wooden blocks with a cross section of 3 by 3 cm are required.
Instructions for floor insulation:
- Let's start by installing a wooden sheathing made of 5 by 5 cm bars. We lay the bars crosswise so that after laying, an air layer is formed under the penoplex. The bars are fastened with dowel nails and to each other with self-tapping screws. An important point will be the treatment of wood with fire retardants and antiseptic compounds, this will increase the service life and ensure fire safety.
- Next, we cut the insulation into parts of the required size and arrange them between the longitudinal parts of the sheathing. We lay it in such a way that there are smaller seams between the insulation and the wood through which heat can escape and cold can penetrate.
- We blow out the joints with foam.
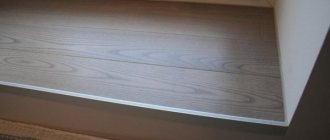
- Next, sheets of plywood are laid on the sheathing. And any floor covering can be laid on these sheets.
Video instructions for insulation:
Choosing furniture for a balcony in Khrushchev
Based on the above features of Khrushchev’s balconies, one can guess that the choice of furniture will have to be given no less attention than the choice of decoration and purpose of the room. Here are some useful tips:
- it is better to choose pieces of furniture that are as light in weight as possible (made of plastic, wood, with hollow insides, etc.);
- massive shelves (bookshelves, with appliances or equipment) can be placed on the wall adjacent to the room, but it is better not to overload the side walls with objects and decor;
- folding furniture will help to significantly save space if the balcony is used not only for relaxing and receiving guests;
- Also, folding chairs and a table are suitable for an open balcony - in autumn and winter they will not take up much space in the apartment, but in summer you will have an excellent place to relax;
- try to combine comfort and ergonomics - you can organize closed storage boxes under the seating areas;
- if the balcony is not 100% insulated, it is better to give preference to furniture made from materials that do not deteriorate from changes in temperature and humidity (various options can be found in departments with outdoor furniture).
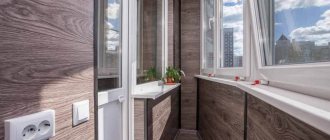
Interior decoration
The renovation of the balcony inside will be unfinished if the interior decoration is not done. Most often the following materials are used for this:
- Wooden lining. This is an environmentally friendly product, so its use does not have a negative impact on health.
- PVC panels. This is the most popular material. It has the following advantages: environmental friendliness, affordable cost, long service life, ease of installation and maintenance.
- MDF panels. This is an environmentally friendly and visually attractive material. The disadvantage is the high cost.
Instructions for finishing the walls of a balcony in Khrushchev:
- Installation of sheathing. A beam of the required width is installed 5 cm from the ceiling. In this example, spot lighting will be installed, so the ceiling will be suspended. If there is no need for a suspended ceiling, then the timber must be attached directly to the ceiling. Fastening is done with dowels and nails. The timber must be treated with a colorless antiseptic.
- The next bars are located parallel with a step of 50 cm.
- On the opposite side, at the same level from the ceiling, a beam is installed.
- The next beams, as well as on the opposite wall, are installed in parallel with a step of 50 cm. The position of the beams is checked by a level.
- We proceed to installing the sheathing to the inner wall of the balcony. Subsequent beams are also arranged in parallel with a step of 50 cm.
- The part of the timber that overlaps the window block needs to be cut.
- We proceed to the installation of the sheathing on the balcony parapet. The beam is attached to the window sill with self-tapping screws. It is important to calculate the size of the screw so that it does not break through the window sill.
- Parallel to the beam on the window sill, the beam is attached to the floor.
- Between the fixed slats, beams are attached at right angles. Installation step 50 cm.
- Next, install the batten parallel to the sheathing frame. If you have a wide balcony, you will need to install a second rail. It is installed overlapping the first one and secured with a self-tapping screw.
- In the front parts of the balcony, the rail is fixed with a self-tapping screw at an angle.
- A U-bar is also placed at the window sill and secured with brackets.
Electrical wiring and electrical fittings
Before lining the inner surface of the balconies, electrical wiring is pulled along the walls and ceilings, leaving the ends for connecting lighting fixtures and electrical fittings: switches and sockets.
Socket boxes are attached to walls and ceilings with dowels. The ends of the wires are brought out through the boxes.
In the cladding of walls and ceilings of balconies, circular cutouts are made at the points where junction boxes are attached.
The electrical wire is placed in a special corrugated polymer hose, which is secured on loops or clips with dowels to the brick and concrete surface of the room.
After installing the cladding, sockets and switches are connected through the cutouts in the boxes.
Design ideas
Below is a photo gallery of balcony design. If you wish, you can choose a suitable design option for your balcony in Khrushchev.
How much does infrared heated floor consume?
What mistake do many people make in calculations? Wanting to calculate how much an infrared heated floor consumes, everyone multiplies the power of the heating film of the infrared heated floor by the coverage area and by the time. This is not entirely correct. Now let's figure out why.
For example, there is an infrared film with a power of 150 W per 1 m2. It heats up to a maximum temperature of 60 C. If it is laid out over an area of 10 m2, the power consumption will be 1.5 kWh for 1 hour of operation. If the heating operates 10 hours a day, we will therefore receive a consumption of 15 kWh (per 1 day). Now let’s estimate this power for our loggia of 8 m2.
Let’s assume that the area covered by the film will be 80% of the entire area of the loggia, we get 6.4 m2. From here, per hour of heating operation we get 0.96 kW*h, and per day 23.04 kW. It’s somehow difficult.
But this is if the film works for 24 hours without shutting down and at full power. In practice this does not happen. In addition, you simply cannot walk on a floor heated to 60 C. And the floor covering may become unusable.