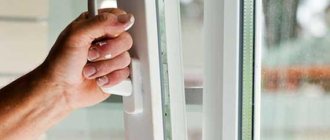
Despite all the reliability of plastic windows, they periodically require preventive maintenance and sometimes repairs. Many jobs can be done with your own hands at home. To do this, you need to understand the principle of operation of the mechanisms, as well as prepare the necessary tools. In this review, we will talk about the most common problems with window frame designs and how to eliminate them.
Many repairs can be done at home
Adjusting the PVC window sash when sagging
Sometimes when closing a window, the sash doesn't fit well into place. Most likely, the moving part of the window structure has sagged and needs to be adjusted.
Horizontally
To adjust the lower part of the movable PVC sash, you must perform the following steps with the lower hinge.
- Open the window.
- Remove the trim.
- Install the key into the groove located at the bottom.
- If it is necessary to move the moving part of the window to the left, the hexagon is turned clockwise, and, conversely, when rotated counterclockwise, the sash moves to the right.
For the upper part, all manipulations are performed with a loop located in the upper part.
Adjusting the Bottom Hinge
Manipulations carried out with the upper loop
Vertically
To adjust the moving part of the structure vertically, the algorithm of actions is as follows.
- Open the door.
- Remove the PVC trim from the bottom hinge.
- Insert the key into the groove located higher and adjust the lift of the sash: clockwise - the window will rise, counter-clockwise - the window will lower.
Adjusting the moving part vertically
Related article:
How to adjust plastic windows yourself? In a separate publication you can find detailed instructions on how to adjust windows in different situations.
What tools are needed?
To repair the fittings of plastic window structures, the master will need a certain set of tools, which can be purchased at any hardware store :
Phillips and straight screwdriver for the ability to adjust mechanisms using screws.- A miniature hammer with a striker weight of up to 300 grams and a nail without a point to allow knocking out the hinge rod when dismantling the sash.
- A screwdriver with a set of bits for removing hardware and, if necessary, dismantling and replacing fittings.
- Pliers, if metal products are fixed in the profile with clips or with adhesive compounds.
- Rags, brushes with stiff bristles, detergents for cleaning the mechanism from old dirt.
- Penetrating lubricant or machine oil to provide a protective coating to the metal.
- Sandpaper for removing rust from parts.
- If it is necessary to apply markings, you will need a tape measure, a construction angle, as well as a marker or pencil.
- To make additional holes for self-tapping screws, you need to purchase a simple drill with a thin drill bit for plastic.
Important. Tools and consumables must be of high quality and free from signs of mechanical damage.
What to do when blowing
If you feel that the sashes are not pressed tightly and there is a draft coming from the window, you can check this with a candle, lighter or match, passing them around the perimeter of the frame. In any place where the light deviates, it means that repairs are required there, which you can do yourself.
Diagnostics of window frame blowing
Adjusting the clamping unit
First of all, to eliminate blowing, you can adjust the clamping unit. There are two options here.
- The key is to change the position of all the eccentrics that are located at the ends of the movable structures. They only need to be rotated a few millimeters.
- If it is impossible to turn the eccentrics, then you first need to slightly loosen the fasteners of the strike plate and move the assembly slightly.
Eccentric of the movable sash
Adjusting the response mechanism
All methods of adjusting hinge pressure
If blowing in the swing-out flap is felt from the hinge side, you must first remove the trim. Next, you should look at the shape of the adjusting screw located below. Then you need to pick up a screwdriver and, holding the sash from below with one hand, adjust the tightening mechanism to the right or left.
A video about pressing the hinges in case of inflation can be seen in the video:
If the moving part of the window is only rotating, there may be no pressing fittings installed on it on the hinge side. In this case, you should secure it with your own hands. Manufacturers produce two types of fasteners:
- external clamping devices that are installed on the outside of the swing sash;
- internal, they are installed from the inside of the sash.
It is first necessary to determine exactly at which points of the window structure it blows and mark these places. Further, all work is performed in the following order.
| Illustration | Description of action |
| Remove the lining from the hinges, move the pin, and remove the sash from the hinges. | |
| Install the outer clamp on the sash, the edge should not overlap the elastic band. | |
| The internal clamp consists of two parts. First, use self-tapping screws to secure the clamp to the inside of the sash. | |
| Place the window in place and secure the outer clamp to the screws. | |
| Cover the outer clamp with a decorative cover. | |
| Open the sash, mark the installation location of the counter part from the inside and secure it with self-tapping screws. |
You can watch the whole process in more detail in the video:
Related article:
A plastic window does not close : possible problems, their causes and solutions, prevention of malfunctions of plastic windows, useful tips and recommendations - in this publication.
Average price per service
There are many companies on the market offering repair of PVC window fittings. All officially registered enterprises compete with each other both in terms of quality and the best price for customers. Average prices for professional service and repair of fittings for plastic windows are given below:
- Adjusting hinges and locking elements without removing the sash - from 250 to 550 rubles.
- Adjustment of elements with removal of the sash - from 900 to 1300 rubles.
- Lubricating fittings – from 200 rubles. per element.
- Replacement of a set of fittings with installation of imported parts - from 3,000 rubles, domestic mechanisms - from 2,000 rubles.
- Replacement of the handle – from 500 rubles.
All prices are reference information and are constantly changing, so they cannot be used to calculate the final cost of window maintenance.
There is a misalignment in the profile - the straightening plates need to be replaced
Another big problem that often occurs in everyday life is sash misalignment. There are quite a few reasons for this, for example, poor-quality installation, when the window frame could be stretched by anchors, which is why the clamping units simply did not function. The second option: the straightening partitions were simply not installed in production or they fell. If the design is under warranty, it is better to entrust the repair to specialists.
If the service is not possible to restore the geometry by replacing the straightening plates, the algorithm of actions is as follows.
| Illustration | Description of action |
| With the window closed, draw a line at the top and bottom of the sash. | |
| Having opened the frame, measure the distance to the line. According to standards, it should be no more than 8 mm on each side. | |
| Remove all beads from the sash, starting with the vertical one, then from the adjacent corner. | |
| Remove the glass unit from the frame. | |
| Place bridges of the required size at a distance of no more than 5 cm from the corner. Technology requires this. Then insert the glass unit into place. | |
| Using a plastic spatula, slightly push the glass unit and install bridges of the required size in all corners. | |
| Hammer the glazing beads in the reverse order until you hear a characteristic click and check the tilt-and-turn mechanism. |
You can watch the entire process in more detail in the video:
Preparing the window unit for installation
Before installing the window unit, you need to prepare it a little. We will look at the installation of window blocks using the example of the most common ones today, made of plastic profiles.
Before installation, the window block is freed from double-glazed windows. The doors that will open or recline are removed entirely. Double-glazed windows are removed from blind sashes. If you pay attention, you will see that when making a window block, manufacturers do not finish the glazing bead that holds the glass unit in place in the blind sashes. In the middle, a small gap is usually left unplanted, especially so that when installing the block, the double-glazed windows can be pulled out quite easily.
How to clean and adjust fittings when clogged
PVC window fittings require careful treatment; they can be called the “muscle” of the system. During operation, street and household dust gets into it. If repair work has been carried out on the house, its consequences pose a serious danger to the functioning of the entire structure.
Advice! Manufacturers recommend cleaning and lubricating the fittings and moving mechanisms of a plastic window twice a year: in spring and autumn, as well as after repair work. This will ensure the product a long and impeccable service life.
The sequence of cleaning work is as follows.
- Remove the movable frame from its hinges.
- It is most convenient to start cleaning with a vacuum cleaner, this will prevent dirt from getting even deeper into the grooves.
- After mechanical cleaning with a vacuum cleaner, it is necessary to remove any remaining dirt and dust with soft cloths.
- Pour lubricant into the fittings. A special product should be used for sealing rubber bands.
- Place the sash in place.
We repair window locks and locks
Now there are many models of PVC windows on the market, and in particular turnkey fittings. Such methods help to be calm when there is a child in the house.
These locks also require maintenance and can break down. Most often this happens when:
- The lock itself is defective or of poor quality,
- It broke due to external mechanical influences,
- It failed over time and became worn out.
And replacing one lock is much more reasonable and cheaper than completely changing the fittings.
Replacing the rubber seal yourself
The service life of the rubber seal is 5-10 years. Its wear is easily determined visually. When purchasing a new element, it is advisable to give preference to German manufacturers; the quality of their products is always at their best. In addition, the rubber band will have to be replaced both on the frame side and on the sash.
The work algorithm is as follows.
| Illustration | Description of action |
| Remove the sash, unfasten the scissors and remove the seal, starting from the top. | |
| Insert the sash seal into the groove of the profile with the protruding “leg”. You can't pull it. Installation always starts from the middle of the top. When joining, coat the edges with glue. | |
| Replace the scissors. | |
| The seal is removed from the frame from the corner. | |
| Insert the seal into the grooves. In this case, the thick side should be directed towards the edge of the frame. Glue the edges of the elastic band and put the frame in place. |
The entire algorithm is presented in more detail in the video:
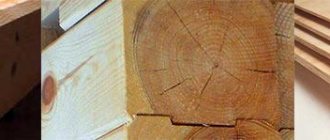
All about repairing wooden windows
When talking about repairing wooden windows, first of all we are talking about the quality of the wood itself. If the frames show even the slightest signs of rotting, such a window will have to be thrown away, and nothing else. If the window looks normal on the outside, start inspecting it.
Step one - remove the glass. Step two - we get rid of the coating, and only using an industrial hair dryer and/or special solvents.
Removing old paint will allow you to better evaluate the quality of the wood. You can also put the frame up and swing it in different directions. This way you will check the “margin of safety”.
Step three - work with putty. It is worthwhile to dwell on this point in more detail.
What to do when the PVC window handle is faulty
Another weak link in the structures is the handle. If it malfunctions, it will become impossible to open or close the moving part. The most common problems encountered are:
- fasteners have become loose;
- the handle does not turn well;
- the unit is jammed.
Let's take a closer look at troubleshooting each problem.
The handle is loose
If the handle becomes loose, this means that the fasteners have become loose and the mechanism may fail. To work you will need a screwdriver and 2-3 minutes of time.
- Pull the cover towards you and move it to the side.
- Tighten any loose screws.
- Put the cover in place.
Repairing a loose handle
Problems turning the handle
If the handle is difficult to turn, there may be several reasons for this:
- The lubricant inside the mechanism has dried out. This problem is easily solved. It is enough to apply lubricant to all moving parts of the handle and pour it into the holes. Then you need to turn the handle several times so that the composition is distributed over all nodes;
- the fittings are clogged , to do this you will need to disassemble the handle and clean it. If you can’t turn to specialists, you’ll have to act on your own. First of all, you need to photograph the mechanism. This will make it easier to determine the order of its assembly. Then, take everything apart, clean and lubricate. After this, reassemble the handle;
- the mechanism has failed. To fix this problem, you will need to find a suitable mechanism and replace it yourself.
WD-40 is suitable for lubricating moving parts.
Craftsmen can immediately install a handle with a security lock
Jamming occurred
If the handle is stuck in the “open” or “closed” position, it means that the lock has been activated. It is installed in the mechanism in order to protect the structure from sudden breakdown, and, unfortunately, sometimes it works spontaneously and always at the wrong time.
In the open or closed position of the movable structure
You can correct this situation with your own hands. The procedure depends on the brand of accessories:
- for “AUBI” fittings, the algorithm of actions is as follows: put the sash in a vertical position, find a plate with a spring on the end side at the level of the handle, press it against the rubber seal, then turn the handle;
- On the handles of other manufacturers, find a locking tongue on the end side. It is located at an angle relative to the opening window. To unlock, you need to turn it over to a vertical position, then you can turn the handle;
- If the lock breaks or slips, to adjust it, you need to open the window slightly, unscrew the response mechanism, place any plastic pad under it and tighten it.
Adjusting the blocker
Adjusting the response mechanism
Another option for unlocking the window can be seen in the video:
In reclining position
If the handle is stuck in the ventilation mode position, most likely the element called the scissors has broken. The action algorithm is as follows.
- Remove the movable sash from its hinges.
- Install the upper scissor assembly into the prepared grooves.
- Turn the handle slightly to the side. Press the lock if the handle does not turn.
- Check the correct functioning of the locking unit.
- Reinstall the window.
If adjustment does not help, you need to lubricate the moving parts of the scissors with a special compound, such as WD-40.
The scissor lock is a regular button
What to do if the movable structure opens in two positions simultaneously
This can happen when the user starts to turn the handle while the window is open, and the lock will activate. The algorithm of actions is as follows.
- Turn the handle up.
- Carefully, without additional effort, press the movable window structure from above to the frame.
- Holding the movable sash with your hand, lightly press the lock bar. At this time, the handle should be turned to the opening mode parallel to the window sill.
- Check the functionality of the handle in different modes.
Sequence of actions in case of opening the sash in two directions simultaneously
How to replace a PVC window handle
If the handle breaks or none of the adjustment options helps, there is only one way out - install another one. When choosing new fittings, pay attention to the following factors:
- quality of the handle;
- shape and color, which should be in harmony with the overall interior;
- handles with a lock have appeared on sale - this is excellent protection against children, the mechanism will protect the window from unauthorized opening.
Let's look at the entire procedure for replacing the handle in more detail.
| Illustration | Description of action |
| Turn the handle parallel to the window sill. | |
| Move the decorative trim aside and unscrew the screws. | |
| Remove the handle from the plastic window. | |
| Take the whole pen. Holding it by the body with one hand, turn it at an angle of 90º with the other. | |
| Bend the cover and turn it perpendicularly. | |
| Insert the handle into the holes. It should fit exactly into the groove and fasten with screws. | |
| Turn the decorative trim to a vertical position. |
You can watch the entire process in more detail in the video:
Advice! If the decorative trim is closed, it cannot be moved to the side. There is a recess in the lower part into which you can insert a flat-head screwdriver or a file and pry it slightly. The bar will move away from the knot.
We repair other mechanisms in plastic windows
We often say that my window is broken. But, most likely, a separate part of it failed. And first of all, you need to figure out which mechanism has failed, and then understand how to replace or repair it.
Do not skimp on elements and parts of mechanisms. Their service life depends on their quality. Even if you decide to repair the window yourself, it is better to buy spare parts in a store where you will be advised.
And do not forget that PVC windows require minor but regular maintenance. And it’s not just the glass and window sill that you need to take care of. Treat moving mechanisms with neutral lubricant a couple of times a year.
Damaged double-glazed windows - no problem, step-by-step guide to action
In more complex cases, a complete replacement of the double-glazed window or glass will be required. It is advisable to invite professional specialists for such work. If desired, all manipulations can be performed at home yourself.
Complete glass replacement
A double-glazed window is a sealed structure that consists of several sheets of glass. Sometimes there is a need to replace it. This may happen in the following cases:
- glass is broken or cracked, respectively, depressurization of one chamber has occurred;
- condensation appears on the glass surfaces, and the desiccant rolls down in the form of yellow resin;
- street noise can be heard in the room, it became necessary to install a noise-absorbing double-glazed window;
- drafts have appeared that are not regulated by any of the above methods. Accordingly, heat is not retained in the room;
- the structure has lost its tightness, or it is necessary to install a double-glazed window with a large number of chambers.
Depressurization of a double-glazed window
To replace a double-glazed window, you must perform the following manipulations.
- Determine the marking of the glass unit, which is printed on the aluminum frame, and order a similar one from the manufacturer.
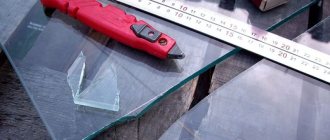
- First, remove the bead from the vertical side of the glass unit, then the closest one from the free corner. After dismantling all beads, remove the glass unit. It is advisable to use a spatula and mallet when working.
- Install a new double-glazed window, having previously laid the straightening plates.
- Secure the beads until you hear a characteristic click.
Glass unit marking
The procedure for dismantling a double-glazed window
How to replace glass in a double-glazed window with your own hands
Replacing glass in a double-glazed window requires certain knowledge and skills. Let's look at the whole process in more detail.
| Illustration | Description of action |
| Remove the beads around the perimeter of the glass unit. | |
| Remove the glass unit and place it on a horizontal surface with the broken glass facing up. Using a utility knife, cut through the sealant around the perimeter to the spacer frame. | |
| Remove the broken glass from the glass unit. | |
| Cut off the sealant layer at a slight angle, wipe the new glass with a cleaning agent, remove all dirt and place the washed side inward on the glass unit. | |
| Thoroughly treat all connections with plumbing grade silicone. Acrylic sealant cannot be used in this case. Wait until it dries completely, cover the edges of the structure with tape, insert it into the frame, and install glazing beads. |
You can watch the entire process in more detail in the video:
About the intricacies and stages of puttying wooden windows
The lion's share of not only the external qualities of the window, but also the issues of its tightness depends on the quality of the putty and its elaboration.
Don’t be lazy or skimpy, find a high-quality putty that’s suitable for exactly the wood you have. After drying, you will appreciate the advantages of high-quality material at the varnishing stage.
Step one - arm yourself with a special rubber spatula for putty, Step two - fill and smooth out all the gaps, cracks and uneven spots, Step three - use the corners to get rid of the gaps, they can also be puttied, leveling the surface. Step four - wait for it to dry completely and sand the surface (preferably using special tools).
If you are unsure about the quality of fastening the frame to the wall, it is better to break the slopes and double-check them again. Because even the highest quality glass will not change anything if the problem is in the frame.
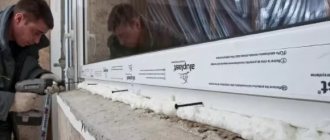
You can seal, insulate and fix the window with polyurethane foam. You can also handle it yourself if you are extremely careful. And the glass itself “sits” on special sealants. Don’t skimp on them; the quality of glass fastening will depend on the presence or absence of blowing, dust penetration and unpleasant rattling.