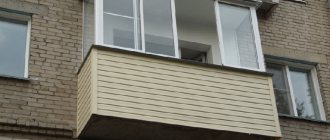
Finishing a balcony with laminate is an excellent solution for giving the room a stylish wooden look. Many are accustomed to seeing laminate only on the floor, but with the right technology, this material can be used to decorate both walls and ceilings.
In this article, we will analyze the advantages and disadvantages of laminate, and using step-by-step instructions, we will do the finishing ourselves.
Requirements for the coating and condition of the balcony
The requirements for materials for finishing balconies and loggias are very high, since these rooms are characterized by temperature changes, high humidity and high exposure to ultraviolet rays.
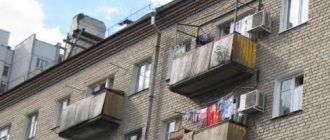
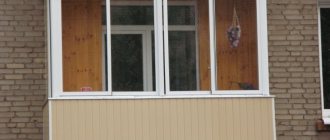
An important condition for finishing with laminate will be the presence of a glazed balcony on which precipitation will not fall, since most of the laminate is made of wood (MDF, HDF, fiberboard) and this material will swell when in contact with moisture. As an option, you can use a more expensive moisture-resistant laminate.
To prevent deformation of the material, the balcony must be glazed with two or three chamber double-glazed windows and have a layer of insulation on the floor and walls. The minimum recommended temperature should be +5 degrees.
If it is not possible to create suitable conditions, then it is better to choose another material.
Metal frame
The metal frame is mounted on balconies using the same technology as a wooden frame. But in this case, insulation of the enclosing structures can be carried out before installing the profiles. When using this technique, frame profiles are attached to the material of the parapet and side walls using long dowels screwed through the insulation.
The profile is mounted on the ceiling on special U-shaped hangers. These elements are attached to the ceiling in increments of no more than 60 cm.
Installation methods
You can connect laminate slabs to each other in two ways:
- Lock. The connection is made using the tenon-to-groove method and is hammered down for tight fixation. It is worth noting that mistakes made in installation can lead to unevenness and come apart over time, and relaying with the Lock system is almost impossible.
- Click. It is a more modern and simpler connection option. The flat hook system is used here. Subsequent sheets are first joined at an angle of 45 degrees, and then moved to a horizontal position. A click indicates correct installation of the laminate tiles.
Selecting a substrate
The main function of the backing is to provide a tight fit and additional protection from moisture and excess noise.
The choice of material is small, but requires attention:
- Cork backing. It has good shock absorption and is resistant to stress. This option is not suitable for a balcony - the material is susceptible to moisture. But you can use impregnations.
- Polyethylene foam (isolon). The cheapest option with increased moisture resistance. The material is fragile and begins to deform under load. The service life is short because it soon loses quality.
- Expanded polystyrene (Penplex, TechnoNIKOL, Styrex). It is better to choose it for installation on a balcony area. Provides noise and thermal insulation, durable, moisture-resistant material. Over time, it wears out like any resource.
The thickness of the substrate is different for each type: about 2-20 mm when using polyethylene foam, 3-5 mm when using polystyrene foam.
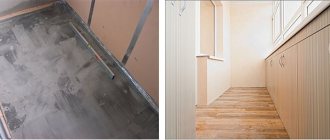
Installation of sheathing
Wooden beams are used to install the sheathing. It is advisable to combine the installation of the sheathing with insulation of the balcony.
- Eliminate cracks and seal joints with polyurethane foam; after the foam has dried, cut off the excess.
- Apply an antiseptic solution to the base of the balcony slab and place a layer of foil insulation.
- Lay out the wooden beams on the floor level in increments of 50-60 cm and attach them using anchors.
- Place insulation (penoplex or mineral wool) cut to size in the spaces between the joists.
- On top, under the base for the laminate, you need to place sheets of plywood or fiberboard on the sheathing and fix them to the sheathing with self-tapping screws.
- Next we move on to installing the sheathing on the walls. Attach vertical bars of the required size to the parapet at intervals of 40 cm from each other and secure horizontal bars to them. If horizontal laying is planned, then you need to make a vertical sheathing.
- Place insulation between the joists.
- If you plan to install the laminate on the ceiling, then the lathing on the ceiling is done using the same method.
Laminate construction
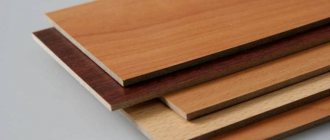
It must be said right away that laminate is a multilayer material, due to which its high characteristics are achieved. The laminate pie looks like this:
- Upper layer . There is a transparent film on top that provides the coating with good protection from mechanical damage.
- Decorative layer . Under the protective layer there is a film that imitates various materials and coatings.
- Base layer . Due to the base layer, which is a composite wood board, most of the positive qualities of the laminate are manifested.
- Bottom layer . At the bottom there is a layer of waxed paper or stabilizing film.
To better understand the design of the laminate, it is better to look at the photo for greater clarity. Next we will talk about whether it is possible to lay laminate flooring on the balcony, what is required for this, and how difficult the work will be.
Installation on walls
Laminate tiles can be attached both vertically and horizontally. The choice of method depends on the length of the board, the size of the surface and the design idea. The optimal method of fastening is installation on liquid nails with fixation with clamps.
Preparation of tools and calculation of materials
This stage also includes calculation of the required amount of materials and the tools that will be needed for installation. Determining the required volume of laminate is very simple. The required size will depend on the installation method; if the installation is along the balcony, then about seven percent should be added to the balcony area.
If you install it across, then add ten to twelve percent. Because of this, decide in advance how you want to attach the laminate, lengthwise or crosswise. Manufacturers forge laminate into packages of 10 pieces or several square meters, you should check how much area of the laminate is in the package.
List of required tools:
- A hacksaw or jigsaw with a metal blade.
- A hammer with a rubber seal to secure the laminate to each other.
- A stationery knife or any knife with a fairly sharp blade.
- Tape measure, pencil and construction square.
- Special wedges for laminate flooring.
The surface should be carefully prepared. Carry out preliminary leveling of the wooden floor under the laminate and perfectly level the surface, completely clean it from dust. There should be no dust at all, as it can cause squeaks that are difficult to deal with.
Before laying, you should roll out the backing and glue it. It will serve as a barrier and prevent squeaks and various noises, and prevent minor unevenness that could not be leveled out. If installed on a concrete floor, then it is enough to glue only the joints.
Laying on the floor
There are 3 installation options for finishing the floor:
- Perpendicular to the window. In this option, the joints between the panels will be invisible and a monolithic surface will be obtained, but in this case the material consumption increases.
- Diagonally. This option is suitable for loggias and balconies of non-standard or complex shapes. Visually expands the space, but at the same time the material consumption is higher than in the other two cases.
- Parallel to the window. This method visually increases the area of the balcony, while the joints will be more noticeable than in the other two cases, but the material consumption is minimal.
The sequence of finishing a balcony with laminate with your own hands:
- Install spacer wedges at the threshold and walls.
- Lay the first row according to the chosen pattern. The installation should begin on the wall opposite the exit.
- We lay subsequent laminate tiles using the tongue-and-groove method until they click and carefully tap them through the block with a hammer.
- When laying the last row, it may be necessary to trim the material.
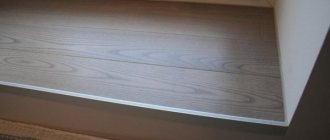
- The last step is to remove the spacer wedges, and close the gap between the wall and the floor with a plinth.
Disadvantages of “artificial parquet”
There are no ideal building materials suitable for use in various conditions and maintaining properties over a wide range of loads. Laminate flooring also has its disadvantages:
- When facing any vertical surfaces, the significant weight of the material creates certain difficulties. This problem does not exist for working with horizontal planes.
- Cellulose, which is part of the laminate, under certain operating conditions of the coating is capable of reacting to short-term increased or constant humidity.
- The susceptibility of the material to temperature changes (especially in combination with high humidity) is expressed in a short-term change in its linear dimensions. The gaps around the perimeter of the laid laminate are designed to smooth out the possible consequences of this property.
- Laminate has poor performance in terms of thermal and sound insulation (the acoustic effect of this coating is quite strong).
- Its installation is carried out on an ideal surface - completely dried, smooth, without cracks, differences and debris. Proper foundation preparation may require additional money and time.
The listed disadvantages are not critical, allowing us to definitely reject the material as a floor covering. But it is necessary to take them into account when choosing.
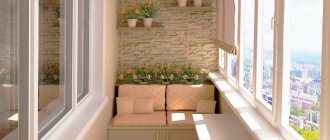
Photo design ideas
Photo gallery of the design of a balcony finished with laminate.
Care instructions
A well-laid coating has a perfectly flat surface without gaps, protrusions, or visible damage to the outer layer. You can check the evenness of the installation using a ping pong ball. Ideally, it will stay where you put it. If you step on the laminate, it may spring slightly. This is normal - a soft substrate works, which absorbs a small amount of kinetic energy.
Every month the floor must be washed of dirt and dust. You can use alcohol-based detergents to remove grease and dirt from laminate flooring. Apply and rub with a soft cloth or sponge. You cannot clean laminate flooring with a hard brush or too much water - the joints between the boards will pick up moisture and swell over time. An ideal tool for cleaning a balcony would be a powerful vacuum cleaner with a detergent injection system.
Key Benefits
Immediately after its appearance, laminate quickly gained popularity. The material has many strengths:
- Low cost.
- Easy to install. There is no need for scraping, sanding, varnishing or oiling.
- Low requirements for the qualifications of the master. After studying the instructions, the home owner can carry out the installation with his own hands.
There are other benefits too.
Presentability
The coating was created as an inexpensive alternative to parquet boards. Complete similarity was achieved, so the laminate, at its low cost, looks elegant and durable.
Environmental friendliness
The composition does not contain components that emit formaldehyde, styrene and other harmful substances. This distinguishes laminate from linoleum. The coating is suitable for all categories of the population, incl. allergy sufferers and children.
Easy to care for
The material does not require periodic scraping, updating varnish or rubbing with oil. Dirt is easily removed during wet cleaning using non-aggressive detergents. Indelible stains are removed with acetone.
Water is not absorbed into the laminate.
Durability
At home, the material lasts up to 15-20 years (33 strength classes). During this time, any coating becomes obsolete, and it is changed so that the interior matches fashion trends.
As the strength class decreases, the service life decreases. Thus, a coating with the numbers “31” in the characteristics has a service life of 10 years, with “22” - 4-6 years (when laid on the floor).
How to sheath - lengthwise or crosswise?
The direction of laying the laminate is not of fundamental importance. The main condition will be the formation of a compensation gap (about 1 cm) around the perimeter, allowing the material to expand as air humidity increases.
At the same time, we must not forget about saving material . Before laying, you need to calculate which direction will be more economical and will not create a large amount of scraps.
Most often, the longitudinal direction is used, which is more advantageous from the point of view of rational use of the laminate.
Before finishing
Insulating a balcony from the inside: description of materials, complete step-by-step instructions on how to do everything yourself (40+ Photos Video) + Reviews
Any “dirty” work must be carried out before finishing the upholstery.
Before completing the finishing touches, think about whether you want to remodel the room, insulate it, replace outdated double-glazed windows or window-door frames. All of the above work must be done before facing, so as not to damage its integrity. Remember, an insulated area with reliable steam and waterproofing will preserve the original appearance of any type of finish much longer.
Did you know that the original purpose of balconies was as a safety measure against fires and emergencies? These sites were invented to make it easier for rescuers to evacuate people from multi-apartment birdhouses. Today, this architectural element is used as a storage room or converted from “street” space to living space.
Think over the interior in advance
When the preliminary work is completed, cosmetic repairs begin. Let's consider all the options for finishing the loggia, their advantages and disadvantages.
User reviews
Semyon, 44 years old, Kursk: “I partially covered the balcony with laminate, and plastered the rest. I chose lamellas with a chamfer so that when cracks appear they are invisible. It turned out well, quickly (finished in 2 days) and inexpensively. Recommended to all my friends."
Galina, 32 years old, Tver: “We bought an apartment with a balcony already covered. I liked it, only in winter the laminate becomes especially slippery. Those who like warm slippers should be careful."
Victor, 39 years old, Orenburg: “I made a “warm floor” on the balcony with infrared film and laminate cladding. When the cold weather set in, the lamellas above the heater began to separate. This is not observed in the apartment corridor. Most likely, the reason is uneven heating."
Classes
Currently, classes are used from 31 to 34. They indicate the degree of resistance of the material to mechanical stress and abrasion.
There is no direct connection with moisture resistance, but in practice there is a situation that high classes have a higher quality load-bearing layer that can better withstand the effects of moisture.
Therefore, when choosing a covering for a balcony, you should take into account the complexity of the operating conditions and prefer a material of a higher class, 33 or 34 . This will help avoid unpleasant situations and eliminate the need to quickly replace the canvas.