If you need to repair the floor on the balcony, and you don’t know or can’t decide how to level and finish the surface of the balcony or loggia, then don’t rush to call a specialist because even a beginner can do this amount of work, and there is an opportunity to save money .
Follow the step-by-step instructions in this article, and you will see that this type of work is very simple and does not require excessive skills.
Selection of materials
What material to choose depends on whether the balcony is glazed, insulated or completely open. For each option, the material is selected individually.
For a glazed, non-insulated balcony
If your balcony is glazed, but does not have heating systems and there are no plans for such in the future, then it is necessary to select moisture-resistant materials. Despite the fact that the balcony is closed from precipitation, condensation will still form during temperature changes.
In this case, the following types of materials are suitable for leveling:
- moisture-resistant plywood;
- drywall;
- gypsum fiber sheet (GVL);
- cement bonded particle board (CSB);
- cement strainer;
- oriented strand board (OSB).
Finishing materials:
- moisture-resistant laminate;
- tile;
- linoleum;
- carpet
For an open balcony
The most difficult case when choosing materials is an open balcony due to constant precipitation and low temperatures in winter.
In this case, the following materials are suitable:
- cement strainer;
- oriented strand board (OSB);
- cement bonded particle board (CSB).
Finishing materials:
- terrace board;
- porcelain stoneware;
- ceramic tile.
Note!
The balcony slab should not be overloaded. If you plan to raise the floor by more than 5 cm, it is better to use lightweight materials and structures such as wooden beams (joists) or dry screed instead of cement.
For a glazed and insulated balcony
If your balcony or loggia is glazed, has or will have in the future a radiator, a heated floor system or one of the existing constant heating systems, then you can use materials that are used when leveling and finishing rooms in an apartment.
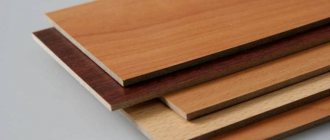
What to choose for the floor - laminate or linoleum?
If the user decides to choose laminate, then there is no need to save, it is better to buy high-quality material. It will take a little. If the owner intends to purchase the product cheaper, then it is worth remembering that the first time water gets in, the coating will become wet and deteriorate. To transform a balcony, it is better to choose a laminate with the appropriate markings.
Insulated linoleum is also a good option. It differs from the usual one in its fibrous base and great thickness. This material is more expensive than simple types, but you can walk on the surface barefoot and without socks.
It is wise to first repair it, level the surface, insulate it, and then lay linoleum.
The owner can use a simple covering and lay it on a heat-insulating base, but it is recommended to use a single piece. After purchasing linoleum, you need to spread it and leave it for 3 days to level it out. The final coating option has a lot to do with fixing the baseboards.
Experts advise buying a collapsible plinth equipped with an elastic edge.
Subfloor and leveling methods
The most popular and common methods of leveling and creating a subfloor on a balcony or loggia are described below
Cement strainer
A cement screed can be made provided that the layer is from 3 to 5 cm. If the height of the floor screed on the balcony is less than 3 cm, there is a possibility of cracks, and if it is more than 5 cm, then there is a large load on the balcony slab.
How to level the floor using a cement screed with your own hands:
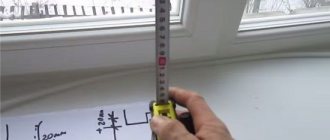
The area of the balcony in this example is 3.7 square meters. To obtain a screed 3-4 cm high, 6 bags of 40 kg of sand-concrete were needed.
The solution is mixed with a puncher with a mixer attachment.
- We clean the surface from dust and debris.
- The first step is to make beacons from mortar using a trowel or other convenient tool. It is necessary to place a hard surface on the beacons (pieces of drywall, ceramic tiles or other similar material at hand). Next, using a building level, we make beacons of the same level with each other and leave them to dry for a day. This is necessary in order to align one beacon relative to another horizontally. Thanks to this action, the floor on the loggia or balcony will ultimately be level. In this example, the beacons are located at a distance of approximately 90 cm from each other since a meter-long level was used.
- After the beacons have dried, we connect them with a solution using a trowel and level this solution horizontally using a rule. This is how lighthouse lines were created. Let it dry again for a day.
- Next, distribute the solution between the pulp lines and generally level the entire surface. Where the solution has had time to harden, but the result is not even, you can moisten the surface with water in this place for better leveling. Where the solution turned out to be insufficient, it must be added and leveled using the rule. The main thing is that in the end the floor of the balcony is level.
- On the third day, using a spatula, we carefully remove pieces of material from the beacons, and fill the remaining recesses with mortar and level them using a trowel and a rule. All you have to do is wait for it to dry completely and you can start finishing the floor on the balcony. Approximate drying time for the screed is 25 days (7 days for every 10 mm of layer).
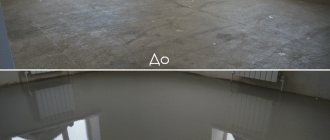
Self-leveling floor on a balcony or loggia: pros and cons
Modern technology of self-leveling floors has found application not only in industrial, but also in residential construction. Particularly in demand for filling closed balconies and loggias are self-leveling floors, which are created for year-round use on sports grounds. The main advantages of such floors are a high level of wear resistance, moisture resistance and temperature resistance. They are easy to care for and also have an original appearance.
Self-leveling coating provides unlimited possibilities for creating a floor with an original design
The main disadvantage of this coating is the high price of materials. In addition, the surface turns out to be very smooth and therefore slippery, and therefore it is impossible to do without rugs on such a loggia.
Installation is carried out according to the principle of a concrete screed, so you can organize a self-leveling floor on the loggia with your own hands. The process itself includes the following steps:
- Cleaning and priming the surface. Prepare the entire area for pouring, including the lower part of the wall. The primer must be selected in accordance with the selected self-leveling floor.
- Fastening a border strip around the perimeter, which will prevent damage to the floor in case of displacement.
- Preparation of the composition for filling the floor. Here it is necessary to act strictly in accordance with the manufacturer’s instructions and observe the proportions of water and mixture. It is important to mix the solution thoroughly using a special construction mixer.
- Floor filling and leveling. As a rule, the mixture itself lays down in an even layer, but sometimes it is necessary to use a special needle roller.
- Solidification of the mixture. This will take about a day, after which the floor is ready for use.
Finishing Instructions
Below are step-by-step instructions for finishing the floor on a balcony or loggia with your own hands using the most popular materials.
Laminate
- The first step is to measure the distance between the walls of the balcony and mark the required distance on the laminate sheets. You need to make a small gap between the wall and the floor covering. This is done if the size of the laminate changes due to moisture and temperature changes. The laminate should be cut at a right angle, otherwise it will not be possible to lay the slats evenly along the walls. In this case, an electric jigsaw is used to cut the laminate. You need to cut at a low speed to avoid the appearance of jagged edges, and when approaching the edge, the jigsaw needs to be moved even more slowly to avoid chipping.
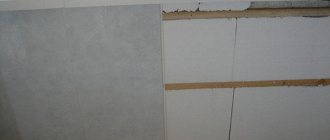
- The next step is to lay a backing on the surface of chipboard or plywood. The underlay is laid on the floor cleared of construction debris.
- We fix the substrate to the wooden base using staples and a construction stapler. This is necessary so that the substrate does not fidget or move while laying the laminate. Alternatively, you can use double-sided tape.
- After fixing the substrate, we install the first part of the laminate. In this example, one piece of laminate covers the entire surface of the balcony; as a result, the seams are located perpendicular to the long walls of the balcony.
There are other ways to lay laminate: diagonally, longitudinally, herringbone or squares. In these cases, more finishing material will be required and there will be more undercuts. - Next, we move on to installing subsequent elements. The connection technology depends on the method of processing the ends of the products. In this example, there was a lock that snaps into place with a slight pressure on the lamella.
- Difficulties may arise in the area of the balcony door threshold. At this point it is necessary to cut the lamella into a recess. We measure the length and width of the recess, transfer it to the lamella and cut it out.
- The last element of the laminate is laid after preliminary cutting. On the last lamella, the cut must be made lengthwise. It’s okay if it turns out a little uneven, as this area will be covered with a plinth, and small defects will not be noticeable.
- The floor is ready.
Traditional wood floor
When talking about what to make a balcony floor from, we cannot fail to mention the relative ease of making wood flooring. The process of installing a wooden floor can be done with your own hands, without any special tools or special devices; it is even easier than a screed.
Wooden floors can undoubtedly be called the most environmentally friendly flooring. It is visually attractive, looks natural and has a durable structure.
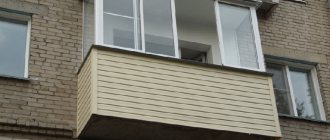
- As a disadvantage, it should be mentioned that the tree is afraid of water. Unfortunately, if the balcony is open, precipitation in the form of rain and snow easily penetrates inside and has an adverse effect on the wooden covering. To avoid this, the balcony or loggia must have glazing.
Wood floors are considered quite strong and durable, and they are also easy to install.
Technology for making wooden floors on the balcony
The initial stage of work is absolutely the same as in the manufacture of screeds. That is, you should start by carefully sealing all the cracks using regular polyurethane foam. Once the base is prepared, you can move on.
Waterproofing
Waterproofing should be done in the same way as in the case of a screed, but in the case of a wooden floor, it does not protect the renovation of the inhabitants of the lower floors, but the insulation layer from capillary moisture and condensation.
Schematic structure of a wooden floor on a balcony: 1 - vapor barrier, 2 - wooden board, 3 - counter-batten, 4 - waterproofing, 5 - insulation, 6 - floor slab
Lags
In construction, joists are the transverse (support) beams on top of which the floorboard is laid. For a balcony, a wooden beam of 50×100 or 50×70 mm is usually used. Before starting work, it is recommended to treat the logs with a special antiseptic to prevent the appearance of blue stains and the formation of rot.
- In order for the floor on the balcony to withstand high pressure, the bars are placed on an edge, parallel to one of the walls and in relation to each other in a circle. As a rule, one lag is placed in the middle and several (two or three) on the sides. They are fixed firmly, right through to the concrete slab itself, using self-tapping screws with anchor fastenings or metal corners.
The recommended distance between floor joists is 500 mm
Insulation process
Using ordinary mineral wool as a thermal insulation material is not the best idea, since it absorbs moisture well, after which it loses its insulating properties. For these purposes, it is more advisable to use: expanded clay, polystyrene foam, polyurethane foam, glass wool or basalt insulation.
The material should be laid (filled) in the spaces between the joists, but there is no need to reach the very top; builders usually leave a slight gap for ventilation.
Advice! To protect the insulation from water, a layer of plastic film is laid on top of it. The easiest way to fasten polyethylene to joists is with a simple construction stapler filled with metal staples.
To prevent the walls on the balcony from freezing, they must also be well insulated
Laying wood flooring
To install a wooden floor, you can use not only edged boards, but also simple plywood, especially if the balcony is reliably insulated, and the choice is made in favor of parquet boards or laminate as the floor covering.
In principle, the wooden covering on the balcony does not require any additional processing at all. The boards can be simply painted or a special varnish applied to them in several layers. The plywood can be covered with a long-pile carpet, this to some extent solves the issue related to insulation.
A visual guide on how to make a balcony floor with your own hands: 1 - concrete slab, 2 - rough counter beam, 3 - logs, 4 - basalt fiber insulation, 5 - plywood
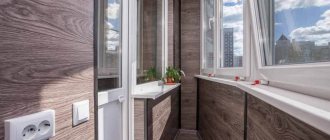
Photo of floor design ideas
Photo gallery of floor design on a balcony or loggia.
"Heated floor" device
In apartment buildings, connection to the general heating system is prohibited, so a heating cable is used.
The floor “pie” consists of several layers:
- concrete slab;
- waterproofing;
- thermal insulation with a thickness of at least 30 mm;
- heating cable;
- reinforcing mesh;
- screed 40 mm.
The cable laying step is 7.5-10 cm. Foil materials, such as Penofol, Isofol, serve to reflect heat rays in the air. They do not work in screeds, but are used as an underlying elastic layer for cable laying.