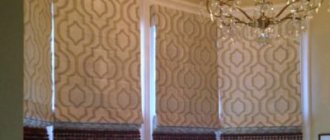
DIY balcony roller shutters
Good day/evening/night everyone!
Even if this is no longer so relevant, I still want to share with you my rather budget-friendly solution for decorating balcony windows: do-it-yourself fabric roller shutters.
As a rule, there are quite a lot of windows on the balcony)) and, having seen the prices for ready-made or custom-made roller shutters, my brain came to the need for an anti-crisis solution to this issue.
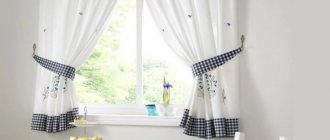
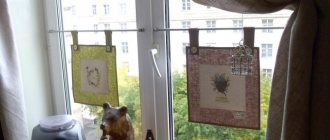
Here's what happened in the end:
So, we buy this set of fastenings for roller shutters (1 window = 1 set), the price at Epicenter is 65 UAH.
Here are all the components of this kit. It is designed for both mounting on opening windows (mounting on top) and on blind windows (mounting on double-sided tape).
We assemble the following side plugs according to the diagram (for any mounting option), 1 set = 2 side plugs.
This is double-sided tape that we glue to the back of any plug plate.
Then we fasten the plug into the plate (until it clicks).
We get a full side mount:
This is how it is attached to a blind window (using double-sided tape, which in fact turned out to be very high quality and strong):
To attach, in fact, the curtain itself, we need a tube. We buy a pipe of the required diameter in the department of pipes for plumbing, the price of 2.8 meters is about 30 UAH.
We cut off the required length (according to the width of the window), and insert the plug from the kit into the tube.
Now we cut the fabric itself for the curtains. It should be quite dense and not crumble, because... We will not process (hem) the edges, otherwise the roller shutter will not be wound correctly.
I have curtains from Ikea, purchased earlier, which have now found their second use. Dense, natural (composition 100% cotton).
We cut the edges as evenly as possible (as best we can))), we sprinkle the edge of the threads several times, something like this:
Then we wind the fabric onto the tube.
And quickly and carefully glue it with pistol glue:
It is necessary that it turns out very evenly, this is the key to a beautiful position of the curtains.
These are the fastenings for the opening window:
We hem the bottom of the roller shutter and insert a plumb line to make the lower edge heavier. I have some kind of plastic strip left over from a long-standing repair)).
Thank you for your attention))).
PS If I didn’t explain the fastening system very clearly, it is described very easily and in detail in the instructions for them))), nothing complicated.
The cost of the roller shutters was: 65 (fastening) + 10 (about this, a tube for one window) = 75 UAH. Plus the cost of the fabric.
Girls, additional photos of details and in general:
Here is a clear sunny day with the shutters closed:
Raised view:
Type of edge (fabric cut):
View of the plumb line below (weight bar):
Open window view:
View of the window in ventilation mode (here you can see that the bottom of the roller shutter is not pressed, it just hangs, but there are special fasteners that secure the bottom of the roller shutter when the window is open, I promise to buy it by spring)))):
And here are the roller blinds I made in the kitchen:
Here the bottom is weighted with these round wooden planks:
Automation
Installing automation is a separate, costly process that we have not included in this article. To install and configure the motors, the appropriate qualifications of the installer are required. Despite the rapid simplification of motors for roller shutters, there are still rare cases when you just need to plug them into a power outlet. But even with new generation engines, adjustment difficulties arise if the control extends to more than one roller blind.
There are instructions, and we can create a similar article for those who would like to go the whole way themselves. As they say, “like and subscribe to the channel” - write to us and we will share our experience in installing automation in a new article. But we recommend finding the best use of your free time and calling specialists.
Join our group on VKontakte and receive up-to-date information about discounts and prices for roller shutters ->
go
To order roller shutters, call
8 (800) 707-71-06
What do we know about blinds
The choice of window accessories for your home is so varied that it’s worth deciding in advance what you need. Next, we will introduce you to their types in more detail, tell you about the top three and teach you how to make curtains and blinds for your windows with your own hands from wallpaper, fabric and thread.
“Dressing” windows is an interesting and difficult task, because complementing the interior of a room with stylishly selected “decoration” is not only a sign of good taste, but also an aesthetic and functional necessity. Sometimes you can get lost among the variety of new types of fabrics and models.
With the advent of the Internet, we have an excellent opportunity not only to contemplate, buy, but also to make the things we want with our own hands: create blinds from fabric, wood and even... from paper! Next, we will consider what types of window accessories exist, how to make fabric blinds and decorative curtains with your own hands.
Types of blinds: a brief overview
The role of blinds in everyday life is far from minor, because in the summer they save us from the sun, in the winter - from prying eyes, and give us coziness and comfort all year round. And also - they will not only fit perfectly into the home, but will also fit well into an office space.
All that remains is to make a choice: with horizontal or vertical slats? What material are they made of (fabric, wood, metal, plastic). What is the mounting method (adjustment mechanism)? It is the availability and accessibility of this mechanism in construction hypermarkets that determines whether we will be able to make window blinds with our own hands. After all, it’s not difficult to make lamellas with your own hands (with the exception of metal or plastic ones), but we can’t do without a ready-made or prefabricated mechanism.
Although here you can compromise and choose another type of blinds - Roman blinds.
At one time they became very popular, so it is not surprising that in some countries their appearance was subject to change. Thus, the “Austrian” version of Roman curtains was distinguished by excessive drapery, while the “London” version was distinguished by a restrained and somewhat romantic “falling oval”. They will certainly delight you with their expensive fabric solutions and luxurious appearance. Below we will tell you how to sew a Roman blind at home.
Another good, and perhaps the simplest option for windows is fabric roller blinds. Do it yourself or buy ready-made ones - they will look equally good. The material is suitable for fabrics of any density and texture, with patterns or plain; they are also made from bamboo. These roller shutters can be easily attached to a wall, ceiling or window frame. They are easy to operate thanks to a simple mechanism, which can be open or closed (when the mechanism on top is hidden behind plastic curtain rods).
TOP 3 blinds for the home
The most popular choice of buyers has been and remains fabric blinds. To suit your taste, you can choose a material that will emphasize simplicity and lightness, severity and restraint, or add energy to the room with bright colors. The favorites here are:
- vertical fabric blinds
- Roman curtains
- fabric roller blinds
Do-it-yourself vertical blinds made of fabric look good on large windows, while horizontal ones are better suited for small windows. To create such blinds, rigid curtain fabric is perfect. It should be taken at the rate of two widths per slat: fold it right side inward, stitch it on three sides, turn it inside out and iron it - the lamella is ready.
Ladies are so fond of such products that sewing curtains or blinds on windows (even of a non-standard shape) with your own hands today does not look so difficult. If the first two options are a completely independent accessory, then the third is boldly complemented with tulle.
You can make fabric roller blinds/curtains with your own hands from scrap materials - leftover fabric, ribbons, and the like. The design of the blinds is quite simple. Although it will take more time, the result will be more durable.
The availability of handmade materials allows you to create wooden blinds, paper blinds, and even... thread curtains with your own hands! From now on, the question “what can you use to make curtains” and “how to sew blinds” will not bother you.
Wallpaper blinds: step-by-step instructions
For the “cheap and cheerful” option, paper curtains are ideal. You will spend no more than one hundred hryvnia and a maximum of an hour of time on making such blinds, so this option can be made every year in the summer season. Next - DIY curtains from wallpaper step by step.
This includes pleated curtains or pleated paper blinds (also called corrugated blinds), which are not only cheap to produce, but also have a beautiful appearance. True, they won’t last long, but they can protect you from the sun in the summer season.
So, to make pleated paper blinds with your own hands:
- select the required width (measuring the window in advance) and length (+ 10 cm margin)
- fold like an accordion, maintaining the same width of the fold
- pierce it on the sides or in the center with an awl (depending on what you like best) and thread a rope (preferably the same diameter as the awl). We thread a fastener at the end of the rope under the finished product.
To make an oval, we “bend” both ends of the lower fold into a fan and fasten it with Velcro or tape. Lifting and lowering the finished product must be done with caution.
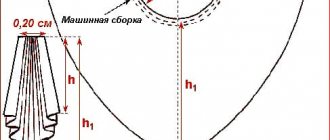
How to make blinds from wallpaper with your own hands can be clearly seen in the above diagram.
DIY Roman blinds
To make fabric blinds with your own hands, we need a dense material that holds its shape. For seams, leave 25 mm of fabric on both sides. Also - wooden or metal strips for the edges and each fold. We buy rings with a diameter of 10-15 mm and strong rope. When sewing, use the given pattern. You can also find videos on the Internet on how to make them yourself - this will help you avoid mistakes.
Positive qualities of roller blinds
Choosing the perfect decor for windows is not easy, especially if you have to hang them in a gazebo or on the veranda. These products have an important task. They should not only decorate the room, but also protect it from adverse external influences. For the terrace you can choose fabric roller shutters.
They have the following advantages:
- protect from prying eyes due to their tight fit to the window frame;
- suitable for use on wooden and plastic structures;
- do not adversely affect usable space;
- suggest a rich palette of colors and a wide selection of designs;
- easy to care for;
- equipped with an easy-to-adjust control mechanism.
Roller blinds for a room or gazebo can be adjusted to provide a particular level of illumination.
How to make fabric roller blinds with your own hands? Master Class!
Fabric roller blinds are products that make you look at them. They are also called roller blinds or roller blinds, which can be made from different types of fabrics, including zebra and black out.
The design of fabric roller blinds is simple and clear. There are never any difficulties in using roller blinds. But when it comes to the production of fabric roller blinds, there are some subtleties. All fabrics for roller blinds must be designed specifically for the manufacture of these products.
Regular tulle or curtain fabrics are not intended for use on roller blinds:
- Firstly , they will create folds on the canvas, which may lead to incorrect operation of the product. The fabric simply cannot be wound onto the shaft, since on any mechanism there is always limited space for winding it.
- Secondly , they will sail, that is, the edges of the fabric on the right and left will not keep a straight shape, but will curl. As a result, significant gaps between the fabric and glass will be visible.
If this does not scare you, and you decide to make fabric roller blinds for the windows of the kitchen, living room, bedroom, nursery, balcony or loggia with your own hands, you need:
- Firstly , the fabric;
- Secondly , the tape is double-sided;
- Thirdly , a shaft for winding fabric;
- Fourthly , the roller blind mechanism is assembled, namely: a driving and driven mechanism, a chain with a weight and a lock (sometimes additional brackets for lower fixation are included).
- Fifthly , fabric weighting material (bottom bar).
Now we will describe step by step how to make fabric roller blinds yourself:
We cut the fabric to the width of the product. The edges of the fabric should be smooth. In order to make it easier to work with the fabric and the material becomes similar to the material for roller blinds, you must first starch it and lay it on a flat surface, let it dry and iron it well. After this, the material will become denser and will create fewer folds.
We sew a strip measuring 1-3 centimeters into the lower part of the fabric. This bar must be level so that it can evenly stretch the fabric and give it good tension.
We take the Shaft, which can be made of any material (metal, aluminum, plastic, wood). For example, it could be a tubular cornice. The main requirement is that the shaft be round and have not very thick walls.
Double-sided tape is glued to the shaft along its entire length, and the fabric is fixed. The width of the fabric should be 2-3 millimeters narrower than the shaft on each side.
We insert the mechanisms into the shaft. The mechanisms must be firmly fixed. If your shaft diameter is larger than the mechanism, then you can wrap tape or any other tape around the mechanism, which will increase the internal volume of the bracket. If the shaft is smaller, then the mechanism can be ground down to a size that can be inserted into the shaft.
It is important to take into account that the size of the change in the shaft up or down should not exceed 5 millimeters for normal operation of the roller blind.
Do-it-yourself fabric roller blinds are ready. After this, it is important to install the roller blind correctly. You can find information about detailed installation of roller blinds on our website in the appropriate section.
There is another way to make roller blinds, which few people know about. This roller blind is slightly different from the standard control method. It does not require special mechanisms and is easy to do yourself without the use of professional parts.
Standard fabric roller blinds are controlled by a chain and the fabric is wound onto a shaft, which is placed on top and fixed. We propose to make a roller blind that will be controlled using a cord (or thread), and the movable shaft for winding the fabric will be located below.
You need to know this
When installing a roller shutter on a window, it can be installed with a roll towards the wall or a roll away from the wall. If you install the roll in front, then the gap between the curtain and the glass will be minimal .
The winding mechanism can be located on any side, the main thing is that it is convenient for you to use it.
If the plug does not fit into the roll, then you do not need to make any effort to avoid breaking it. The part needs to be slightly rotated around the axis, then it will find its place and become as it should. To position the roll correctly, you need to use a level. When the shaft is properly connected to the mechanism, the chain will move easily. Before attaching the bracket with the chain, you need to be sure that the chain is not twisted.
Disadvantages and advantages of such curtains
- No light leaks through them, nothing is visible through them, that is, no one will be able to look into your window.
- They can be hung anywhere.
- They take up little space.
- Fresh air flows easily and freely through the roller blinds.
- These curtains are suitable for any room.
- Roller blinds can be hung either independently or in addition to others.
- Their selection is huge.
- Roller blinds absorb unpleasant odors.
- They need to be constantly looked after.
- After some time they may become warped.
- The mechanism that raises the roller blind quickly breaks down.
How to sew roller blinds on plastic windows with your own hands
To sew roller blinds with your own hands, you need to choose the right fabric. When choosing a fabric, you need to consider that it is:
To make roller blinds, you can use fabric of one color or multi-colored and with a pattern. It will depend only on you and your choice.
Making it yourself: step-by-step instructions (photos and videos)
- Textile.
- Cord.
- Rope.
- Ribbon.
- Weighting agent (metal or wood).
- Rod shaft (wooden beam or metal tube).
- Screwdriver.
- Self-tapping screws.
- Drill.
- Iron.
- Sewing machine.
- Fasteners
Advantages of window roller shutters
Window roller shutters are widely used in apartments, private houses, cafes and offices. They look more aesthetically pleasing than regular blinds. During production, you can choose fabric of any color and transparency. Having sewing skills, you can make roller shutters for windows with your own hands.
- giving the window opening an aesthetic appearance;
- protection from sunlight and prying eyes;
- regulation of the degree of illumination in the room;
- long service life;
- ease of control;
- slightly increase thermal insulation and sound insulation.
The use of a day-night model, which uses double-sided fabric, allows you to perfectly regulate the lighting in the room.
How to make with garter ribbon
To make such a roller blind you will need:
- textile;
- sewing machine;
- iron;
- weighting agent;
- block and lath.
- First you need to make a pattern from the fabric. Measure the desired width and length of the future curtain. Cut out the resulting rectangle and sew it on three sides. Turn the fabric inside out and iron it.
- Insert the strip into the unstitched side, and then sew it up. This will be the bottom.
- Attach the top of the roller blind to the block.
- Now prepare the ribbons. They should be twice as long as the roller blind itself. There should be two of these tapes.
- Attach the ribbon to the block.
- The roller blind is ready.
Do-it-yourself roller blinds
To make roller blinds you will need:
- fabric for sewing;
- paper template;
- a simple pencil;
- a piece of soap or chalk;
- ruler;
- adhesive pad;
- fringe;
- special glue for fabric.
Master class on making them:
- First you need to make a pattern. It is done in the same way as for regular roller blinds. But there is also a difference - you need to leave an allowance of 25 centimeters. This is necessary to finish the edge.
- Now make a template. It is made from plain paper. Its width is equal to the height of the carved edge, and its length corresponds to the length of the roller minus one centimeter. On the resulting rectangle, make the pattern you like.
- The rectangle must be folded like an accordion. Draw the desired pattern on the first strip. Using this pattern, cut the remaining stripes. So, the pattern will be the same across the entire width.
- Make a drawstring. Insert the tube into it and sew up the edges.
- Place the paper template under the drawstring and secure with pins. Trace the pattern with a piece of chalk.
- Glue the fringe along the bottom edge.
- Attach the resulting roller blind to the roller.
Now you know how to make roller blinds with your own hands, as well as how to make roller blinds yourself without the help of a specialist. Good luck!
Description
- For roller blinds, dust-resistant fabrics with antistatic impregnation are used, which makes cleaning easier; such curtains do not require washing.
- Fabric roller blinds harmonize perfectly with curtains and drapes, if the design idea requires it.
- They perform a protective function against fading of fabric interior items, from overheating and scorching sun rays, and from the glances of passers-by.
- Easy replacement of roller blind fabric allows for numerous variations of changing the interior according to the season or mood.
- Fabric roller blinds can be fixed at different levels, thanks to which you can regulate the degree of illumination of the premises. And thanks to special BlackOut fabrics, you can create complete impermeability and darkness.
- An air layer is created between the curtain and the double-glazed window, which prevents cold air from letting in in winter and keeps it cool in summer.
What do we know about blinds
The choice of window accessories for your home is so varied that it’s worth deciding in advance what you need. Next, we will introduce you to their types in more detail, tell you about the top three and teach you how to make curtains and blinds for your windows with your own hands from wallpaper, fabric and thread.
“Dressing” windows is an interesting and difficult task, because complementing the interior of a room with stylishly selected “decoration” is not only a sign of good taste, but also an aesthetic and functional necessity. Sometimes you can get lost among the variety of new types of fabrics and models.
With the advent of the Internet, we have an excellent opportunity not only to contemplate, buy, but also to make the things we want with our own hands: create blinds from fabric, wood and even... from paper! Next, we will consider what types of window accessories exist, how to make fabric blinds and decorative curtains with your own hands.
Types of blinds: a brief overview
The role of blinds in everyday life is far from minor, because in the summer they save us from the sun, in the winter - from prying eyes, and give us coziness and comfort all year round. And also - they will not only fit perfectly into the home, but will also fit well into an office space.
All that remains is to make a choice: with horizontal or vertical slats? What material are they made of (fabric, wood, metal, plastic). What is the mounting method (adjustment mechanism)? It is the availability and accessibility of this mechanism in construction hypermarkets that determines whether we will be able to make window blinds with our own hands. After all, it’s not difficult to make lamellas with your own hands (with the exception of metal or plastic ones), but we can’t do without a ready-made or prefabricated mechanism.
Although here you can compromise and choose another type of blinds - Roman blinds.
At one time they became very popular, so it is not surprising that in some countries their appearance was subject to change. Thus, the “Austrian” version of Roman curtains was distinguished by excessive drapery, while the “London” version was distinguished by a restrained and somewhat romantic “falling oval”. They will certainly delight you with their expensive fabric solutions and luxurious appearance. Below we will tell you how to sew a Roman blind at home.
Another good, and perhaps the simplest option for windows is fabric roller blinds. Do it yourself or buy ready-made ones - they will look equally good. The material is suitable for fabrics of any density and texture, with patterns or plain; they are also made from bamboo. These roller shutters can be easily attached to a wall, ceiling or window frame. They are easy to operate thanks to a simple mechanism, which can be open or closed (when the mechanism on top is hidden behind plastic curtain rods).
TOP 3 blinds for the home
The most popular choice of buyers has been and remains fabric blinds. To suit your taste, you can choose a material that will emphasize simplicity and lightness, severity and restraint, or add energy to the room with bright colors. The favorites here are:
- vertical fabric blinds
- Roman curtains
- fabric roller blinds
Do-it-yourself vertical blinds made of fabric look good on large windows, while horizontal ones are better suited for small windows. To create such blinds, rigid curtain fabric is perfect. It should be taken at the rate of two widths per slat: fold it right side inward, stitch it on three sides, turn it inside out and iron it - the lamella is ready.
Ladies are so fond of such products that sewing curtains or blinds on windows (even of a non-standard shape) with your own hands today does not look so difficult. If the first two options are a completely independent accessory, then the third is boldly complemented with tulle.
You can make fabric roller blinds/curtains with your own hands from scrap materials - leftover fabric, ribbons, and the like. The design of the blinds is quite simple. Although it will take more time, the result will be more durable.
Key Features
According to designers, blinds are not always suitable for residential premises. They look more appropriate in the office. Roller curtains are replacing these devices. They make the room feel cozy and homey, and they are quite easy to use. Sewing them is not difficult. Moreover, they can be easily installed.
You can hang such curtains:
- on the wall;
- on frame;
- above the window.
The easiest way to hang such curtains is on plastic windows. The window sash continues to function thanks to the cassettes installed on the frame. U-shaped guides are responsible for supporting the fabric. They give it a tense position. Guides may also be present on products that are fixed to the wall surface. This installation method effectively protects against drafts. The use of opaque materials creates an absolute darkening effect.
Almost any fabric can be used to produce roller curtains. But it is better to buy special fabric with antibacterial impregnation. There are also materials that provide an antistatic effect.
Treatment with specialized compounds is mandatory if the curtains are planned to be placed in the bathroom or kitchen. There is a classification of products according to the degree of transparency. They can be:
- translucent;
- transparent;
- darkening.
There are no restrictions on the colors and designs available. Polyester is most often used when sewing roller curtains. It does not stick to the canvas if the material is treated with an antistatic agent. There are models with a pearlescent shine and made in a metallic shade. Due to their water-repellent properties and ability to resist dirt, Teflon-coated sheets are very easy to clean.
Special materials that are resistant to fire are popular. Good impregnations that form a protective layer on the fabric do not harm the body. To avoid stumbling upon a fake, you can ask the seller for the appropriate certificates.
How to choose fabric
Fabric for roller blinds should be:
- dust-repellent;
- moisture-repellent;
- antibacterial;
- opaque (or reflective).
The fabric acquires these qualities after using a special impregnation.
Advice. By choosing a fabric with cross stripes, you will visually increase the width of the wall, and the vertical pattern will make your ceilings higher.
The color and pattern on the fabric should be selected to match the interior of the room. You can use a plain fabric that contrasts in color with the wallpaper in the room, then the roller blind will serve as an interesting color accent. By choosing a translucent fabric with ruffles, you will create the illusion of stained glass windows.
If you have not yet decided on the choice of roller blinds for your home, our website will always help you out. After looking through the photos of various options for roller blinds, you are sure to find something of your own.
Necessary materials
To properly make roller curtains, consider some nuances. For example, initially you need to sew two fabrics with the wrong side if the fabric is one-sided.
When calculating the amount of fabric, do not forget about the additional 2-4 cm that will go to the seams. Consider also the location of the curtain in the window opening: whether the curtain will cover the frame or just the glass.
When choosing fabric colors, do not lose sight of the geographic location of the room. Bright, cheerful shades are suitable for the sunny side, and transparent roller blinds can be hung on shaded northern windows.
A few useful tips will make choosing curtain material much easier:
- so that the windows do not merge with the walls, the color of the fabric should differ from the tone of the wallpaper;
- designers recommend choosing a palette for curtains in accordance with the furniture upholstery;
- if you want to visually increase the internal space of gazebos or verandas, you can use translucent canvases;
- transverse stripes on the curtains visually expand the walls, and a vertical pattern can increase the height of the ceiling.
Watch the video on the topic - production of roller blinds.
- After purchasing fabric suitable for the interior, take care of the remaining components necessary for making roller curtains yourself:
- rod-shaft for winding the fabric - mounted above the window opening and performs the functions of a cornice;
- special weighting material - fixed at the bottom of the curtain panel, does not allow the fabric to puff up.
decorative cords and ribbons - used as garters to securely fix the fabric, placed in the upper area of the system, near the shaft mechanism;
Cassette roller blinds - fastening mechanism
Cutting fabrics for roller blinds
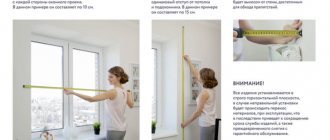
In the case where the curtain will be attached to a window opening, we measure the opening itself. If it is close to the frame, close to the glass, then measure the size of the glass. After measurements, we cut the fabric like this:
- along the width of the opening or glass, plus 3 cm for allowance;
- along the length we measure the height of the opening or glass, plus 15 cm for the allowance and “pocket”.
For one window we make two panels of the same size. Choosing ribbons for garters. Their length should be two lengths of curtains, plus 20-25 cm. You can make a lifting mechanism using two nylon cords: the first is three sheets long, the second is three sheet lengths plus the width of the product.
Tools for work
- two slats along the length of the opening or glass;
- sewing machine;
- screwdriver;
- screws;
- Double-sided tape.
For the first step-by-step instructions you will additionally need:
For the second step-by-step instructions
- ribbons;
- two plastic rings;
- two nylon cords.
Caring for the mechanism
Before washing the window, the curtains should be rolled up, and if possible, removed completely.
Contaminated fabric can be refreshed using a regular soap solution and a soft cloth or washcloth. To dry it, just leave it unfolded. You can remove stains from curtains using a regular stain remover. If you fail to achieve the result, you can turn to the cleaning company’s specialists for help.
For the kitchen, it is best to install closed-type fabric roller shutters, since the box will protect the fabric from dust and kitchen soot. Such curtains will not need to be washed often.
Step-by-step instructions: creating curtains with garter tape
- Step #1. We sew the resulting fabrics from the wrong side along the length and only on one side along the width. You should end up with a bag. We turn it inside out and iron all the seams.
- Step #2 . We take a weighting material (in our case it’s a strip) and carefully fold one part of the unstitched edge, making a pocket in which the strip will be located. Sew up the remaining part of the curtain (top of the bag). The bottom of the curtain is ready.
- Step #3 . We fasten the upper part using a furniture stapler to the remaining block.
- Step #4 . We attach pre-prepared garter tapes, designed to hold the rolled curtain roll, to the top bar; this can be done with a stapler. You should get a ribbon hanging from the outside and inside.
The roller blind is ready, all that remains is to fasten it to the window, screw the lower part with the weighting material to the desired length and secure the bottom of the curtain with ribbons.
Step-by-step instructions: creating curtains with a side cord
- Step #1 . We sew the fabrics from the wrong side along the length. We make a pocket at the top and bottom.
- Step #2. We insert the strip into the bottom pocket and fix it there, and on the top side we sew plastic rings onto ribbons. You should retreat 15 cm from the edges, and sew approximately 5 cm from the top edge.
- Step #3 . To make a mechanism for raising such a curtain, you should fix it on the window or in the window opening with hooks.
- Step #4. Tie the first nylon cord (smaller) to the hook and pass it through the pocket with the rail. Thread it through the ring.
- Step #5 . The second cord (which is longer) is fixed in the same way, only it must pass through two rings sequentially.
- Step #6. Nylon cords are collected and fastened. Now, when they are pulled, the curtain will twist due to the counterweight. The cords are fixed on the wall.
Roller blinds are easy to install. If you plan to attach them to a plastic frame, use a good wide double-sided tape, and if such a curtain will hang in the window opening, you can secure it with screws and a screwdriver.
Roller blinds in the interior: video
Roller blinds in the interior: photo
- French curtains for the kitchen: master class on sewing marquise
- Roller blinds for PVC windows - correct installation
- A wonderful transformation: from old things into exclusive do-it-yourself rugs
- Master class for beginners: do-it-yourself organza topiary
During the summer, you can attach reflective foil to the outside of the curtain (the one facing the street). It can be easily found in household goods. This way we can easily protect the room from excess heat. And in cloudy weather you won’t need to remove the foil from the glass. And it will all look much neater!
Of course you can use foil. of course. But the idea is completely different. There is also a design motif here. There is no talk of accuracy at all. It’s clear who likes what. But I share the opinion with the author of this article because I myself also sewed roller blinds. I'm going to continue the themed creation in the kitchen since they are already showing off on the balcony!
Installation procedure for roller shutters in a garage
It is better to install roller gates from scratch with one or two assistants. It is problematic to complete such a volume of work alone, even if you have the skills. First you need to install the guides and assemble the frame.
Fastening the guides
Holes with a diameter of 4 mm are drilled into the guides. The distance between adjacent holes should be no more than half a meter.
- a groove is made in the room to install a spring supporting the control mechanism;
- a box is formed: the body is connected to the sides using aluminum rivets;
- a spring is inserted to the right of the shaft;
- the shaft is connected to the box located on the ceiling;
- the frame is attached and the fasteners are marked;
- holes are made and guides are mounted;
- the lace is threaded into the spring;
- the frame is screwed in with self-tapping screws;
- the holes are closed with plugs.
The lower and upper holes should be made at a distance of up to 15 cm from the edge. If this restriction is not observed, the frame may not be attached firmly enough. In this case, the gate will quickly fail.
Installation of roller shutters
When the frame is fixed, they begin to install the canvas. Its ends are fixed from below with a special profile. A pair of holes with a diameter of 6 mm are made in the bottom bar. Stoppers are installed in these grooves to support the slats. Then the roller shutter is closed with a lid. A roller is screwed onto the inside of the lintel. Evenness is controlled by the building level. Upon completion of the work, the smoothness of the movement of the canvas is tested: it is raised up and lowered.
