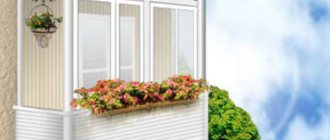
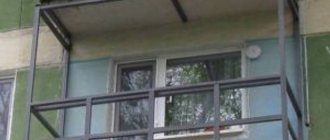
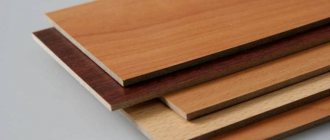
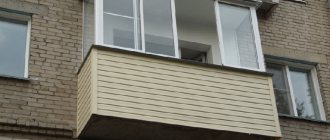
Balcony glazing improves the thermal insulation of housing, reduces heat loss and heating costs. Most residents of apartment buildings choose economical and durable plastic window blocks for glazing. Nevertheless, a wooden balcony remains an indispensable attribute of elite residential complexes, fashionable foreign hotels, and prestigious offices. In terms of aesthetics and durability, glazing made from high-quality wood is superior to synthetic materials.
Pros and cons of wooden glazing of balconies
The non-acceptance of wooden window frames and balcony glazing is due to the low quality of traditional budget construction in Russia. Making balcony blocks and wooden balcony windows from insufficiently dried cheap coniferous wood leads to rapid warping and drying out of the wood.
Builders of luxury housing are well aware of the undeniable advantages of wooden glazing of loggias and balconies:
- aesthetics of wood (properly processed wood is unique in texture, pattern and shades of wood layers);
- durability (wooden windows and doors made of bog oak, larch have been preserved in houses built 200, 300 years ago);
- environmental purity of natural material;
- thermal insulation properties of wood (exceed all common structural construction materials).
Affordable cost and ease of machining cannot be considered an advantage of standard or homemade wooden balcony frames. These advantages apply only to inexpensive conifers; in practice, they turn into disadvantages of a wooden structure.
The subjective disadvantages of glazing a balcony with wood are:
- ventilation of frames (when using one glass);
- damage by insects (wood borers, bark beetles);
- shrinkage and warping due to temperature changes (typical of undried conifers);
- wind vulnerability of the structure (occurs when using insufficiently massive structural elements);
- limited color palette of wood to only brown tones.
An objective disadvantage of glazing a balcony with durable wood for budget repairs will be the high price of beech, oak, hornbeam, and hard exotic wood. In addition, working with hard wood requires remarkable carpentry skills, so it is difficult to make a glazing frame yourself; you have to order it.
Price for a wooden balcony block
The price for the structure is determined taking into account:
- sizes;
- type of double-glazed windows and fittings;
- material for manufacturing (wood species);
- configuration (number of windows and doors).
The most inexpensive wood is pine; oak blocks are the most expensive.
The average price of a product made from pine is $600-630, from larch - $700-740, from oak - $990. The cost of structures does not include the cost of window sills, ebbs, slopes, installation and delivery.
Installation work includes:
- block installation;
- installation of a window sill indoors;
- threshold setting;
- placement of ebb tide outside;
- finishing of slopes of windows and doors.
The more complex the installation, the higher the cost. Thus, the final price of the structure is formed from the cost of the array and installation work.
Types of wooden glazing
According to the degree of thermal insulation, wooden balcony structures are divided into cold and warm. For cold balconies, thin frames with ordinary window glass (4–6 mm thick) are used. On such a balcony the temperature differs from the street temperature by 5 - 10 degrees. The main functions of window glass are additional protection of the apartment from dust, rain, snow and additional sound insulation.
For warm balconies, massive frames with double or triple glazing are used. In this case, the outer area is used as a small workshop, a miniature office.
The thermal insulation properties of triple glazed windows allow you to create a winter garden in an additional room, place lounge furniture, library shelves or wardrobes.
Typical sizes
The dimensions of the balcony block depend on the type of house. For different types of houses, the standard sizes are as follows:
- “Brezhnevka” is a brick or large-panel 5-story building. Door 750x2150, window 1400x1400 mm.
- "New layout." Building type: panel. Door 750x2150, window 800x1430 mm.
- "Stalinka" . Building type: panel. Balcony T-shaped block: 1500x2700 mm.
- "Khrushchevka" . Building type: brick. Door 680x2070, window 1350x1340 mm.
- “Czechka” - houses built according to a Czech project. Building type: panel. Bedroom No. 1: door 750x2150, window size 1050x1400 mm. Bedroom No. 2: door 750x2150, window size 1400x1400 mm. Hall: door 800x2150, window size 1760x1400 mm.
These dimensions are constant for all houses of the listed types.
Step-by-step instructions for installing wooden frames
Specialized companies usually accept orders for the production of expensive frames with three-chamber double-glazed windows along with installation. It is unrealistic to make such a design at home. Therefore, it is rational to consider the installation of simple glazing of balconies with wooden frames.
In terms of installation methods, installing sash with single or double glass differs little, but will save household financial resources (up to 20 - 30 percent of the cost of the window unit).
Tools and preparatory work
For installation operations you will need a small set of tools:
- plumbing tools (hammer, screwdriver, wrenches or socket bits);
- measuring instruments (tape measure, metal ruler, construction square, level, plumb line, laser plane builder);
- rubber mallet;
- carpentry tools (for finishing, sanding, varnishing, polishing windows);
- power tools (wrench, air chisel, screwdriver, electric drill, grinder);
- mounting guns for foam, driving dowels.
How to install a balcony block
To save a little on repairs, you can mount and install the balcony block yourself. This is not the most difficult task, but it must be solved correctly. There are many text instructions on the Internet, but it is advisable to watch the video. A visual representation of all operations will help you understand the sequence of actions and complete the work.
A balcony block is a door to a balcony, combined into a single unit with a window.
Several options for window and door combinations are used, depending on the size of the visit and the purpose of the block. The window can be located on the right or left side of the door, but there are also options where it is located in the middle, with windows on the sides.
The components of a block with double-glazed windows or glass can be hinged or folding, that is, capable of opening in different planes. But the window may be “dead”, which cannot be opened in any way. This is a cheaper option.
The delivery set includes the following components:
- Windowsill.
- Threshold.
- Slopes.
- Low tide.
- Accessories.
A window in a block consists of a frame and sashes, and a door consists of a frame and canvas.
Materials
Before proceeding with the installation of the balcony block, select the material from which the structure is made.
Classic is wood. It is environmentally friendly, beautiful, matches the furniture, but is capricious, does not have a very long service life, and requires careful care and regular painting. Wood does not like temperature changes, high or low humidity, it can become moldy or crack, warp, and paint or varnish can peel off.
Natural wood is expensive to produce, install and maintain. But it is necessary in historical interiors, during restoration, or if the owner wishes to order a wooden product for a home or office.
Wooden balcony block
Aluminum profiles are beautiful and fashionable, but expensive. They have proven themselves to be excellent in operation, last a long time, are easy to install, and are fire-resistant and resistant to strong winds. They are light in weight and can be used to create complex shaped structures.
Metal-plastic products benefit compared to all other designs. They are reliable, durable, look stylish, and last a long time. Can be made in any shape, size, color.
Metal-plastic balcony block
With an insulated and well-insulated balcony, you can limit yourself to the simplest and most inexpensive option with a single double-glazed window. It is enough to keep the room warm and allow sunlight to enter.
The choice of the appropriate option is always up to the consumer.
Types of balcony blocks
With a wide selection of profiles from different materials, there are no problems with creating a block.
Manufacturers offer the following options:
- Standard – door plus window. There are many variations: a single-leaf window, a double-leaf window, a “blind” window, with a window, a transom with different placement; swing, folding.
- A door plus several windows in various combinations.
- Sliding doors with different opening mechanisms. Read more in the article “Sliding doors to the balcony”.
- Double-leaf French windows to the balcony.
French doors to balcony
It is most rational to order and purchase blocks with a combined tilt-and-turn opening mechanism. It allows you to wash the window without any problems and open it slightly for ventilation. The door leaf is often hinged, but ideally it should also be equipped with a combined system.
An economical option includes a fixed window and a hinged door leaf. This limits ventilation, but allows you to save on the cost of the kit.
Tools and accessories
Installing a balcony block will require the use of a set of tools and accessories.
It includes:
- Hammer drill.
- Screwdriver.
- Angle Grinder.
- Electric jigsaw, file.
- Tape measure, triangle, level determination device.
- A hammer connected to a nail puller.
- A mallet made of rubber or plastic.
- A device for applying polyurethane foam and silicone sealant.
- Knife, metal scissors.
- Marker or simple pencil.
The following components are used as fasteners:
- dowels - screws for fastening in a concrete structure;
- anchor bolts;
- anchor plates with dowels.
There are no strict requirements for the use of fasteners; they are chosen according to the situation. The most reliable, strong and durable is the use of anchor bolts or dowels.
When using anchors, be sure to take into account the presence of a small free space between the wall and the frame for attaching the plates. They should also be chosen as durable as possible, with a thickness of at least 2 mm.
Thin fasteners are not reliable, especially if a massive wooden structure or a very large window with a door is installed.
This is enough for installing balcony blocks. Auxiliary elements may be required - polyurethane foam, sealant, a means for removing old polyurethane foam, pads, additional hardware.
Necessary preparation
When the components have been assembled and prepared, it is time to install the balcony block.
To do this you need to prepare:
- Remove old parts and components, remove frame.
- Clean the future work area from any remaining foam, dirt, or dust.
- A window opening that is not level enough or has been damaged when removing the finishing residue must be leveled to obtain perfectly horizontal and vertical surfaces. This will simplify and speed up the installation of the new window structure.
- Remove packaging materials from new items.
Do-it-yourself installation of a balcony block begins with detaching the sashes and leaf from the frame. First, the window sash is removed. It is necessary to remove the rod from the loop at the top, open the lock, turn the sash and remove it from the second loop.
dismantling the balcony block
When there is “solid” glass in a window, you have to remove the glass unit. To do this, use a knife to carefully press the fixing pads towards the glass, remove all four, and then remove the glass unit. Similar operations are carried out with the door - it is carefully removed from its hinges.
A balcony block is a fairly large and heavy element that must be inserted into the opening accurately and evenly. The work will require the efforts of at least two people, so you need to find an assistant.
After all the preliminary procedures, you can begin the installation of the balcony block. Videos can help you understand the sequence of operations. They have step-by-step instructions that clearly explain all the actions and stages of work.
Installation of plastic balcony blocks: video
Before starting the installation of the balcony block, prepare the frame: attach the parts for installing the mosquito net, and attach a special tape. It does not allow solar radiation to destroy the polyurethane foam and acts as waterproofing.
To install the balcony block, holes should be drilled around the perimeter of the frame, excluding where the door meets the window. The holes must be made the same diameter as the chosen fastener, for example, dowels. The frame and box in those places where they will be in contact must be glued with tape or foam and connected. If the structure is massive, you can additionally use hardware.
The fastening strips are secured on three sides of the frame at the top and sides with strong screws. You need to step back 15 - 20 cm from the corners, attach the planks, pointing from the inside of the room. Additional plates are fixed along the entire length at intervals of half a meter. The screws are screwed into the central part of the profile, where there is a groove.
After preparation, the installation of the balcony block begins.
Step-by-step work plan
Install the product in the following sequence:
- Insert the prepared block into the opening.
- Using special mounting wedges, align it horizontally and vertically. Plastic wedges are better suited than wooden ones because the spacers remain in the completed structure and are not removed. The wood may suffer from moisture or cracking, negatively affecting the condition of the entire work. Special tools are required for precise installation. Chief among them is the spirit level, or level. If the structure is distorted due to installation errors, the sashes will creak, rub against other parts, and function incorrectly.
- The prepared frame is secured using the selected fastening devices. The pre-attached mounting plates bend slightly without displacing the precisely installed system. The wall is drilled through the holes to a depth of 8–10 cm. This ensures the strength and stability of the fastening. A dowel or any other selected fastening device is screwed into the resulting hole. Repeat the operation for all fixed plates, constantly checking the position of all system components with a level.
- The next stage in the installation of the balcony block is securing the window sill, ebb and sill.
- First, a pre-made sill is attached to the profile of the window facing the open balcony using screws, decorative corners are installed, and the junction of the sill with the wall is sealed with sealant.
- The window sill must be wide enough so that it can be inserted at least 2 cm under the frame. Secure the window sill with wedges, place a weight on top to avoid the plane from turning out under the weight of the window, and fill all cracks and voids with a special foaming composition.
- After hanging the sashes and doors, the perimeter is filled with polyurethane foam.
- All locks on the finished product are closed and the structure is left for a day. This time is necessary for the foam to harden and firmly fix the frame.
- Once drying is complete, you can proceed to the slopes. Excess foam is cut off with a knife.
A correctly inserted block functions perfectly. It does not cause any inconvenience and does not make any extraneous sounds. It does not require complex maintenance or frequent repairs.
The nuances and dangers of installing wooden frames
When making boxes and window frames yourself, it is necessary to impregnate the wood with antiseptics. On the outside, all surfaces are varnished with acrylic varnishes with water-repellent properties. The inside of the box and binding can be varnished with oil-based furniture varnish and polished.
Countersunk holes are drilled for through bolt anchors. This method allows you to disguise a metal bolt with a wood plug, which is not visible when the sash is open. At the same time, the metal fastening is additionally protected from rust. Do not use wedges or bars filled with mounting foam to strengthen the frame structure. They are not strong enough to withstand strong gusts of wind.
If you plan to install a balcony extension, it is better to make its frame from a metal channel, the parts are fastened by welding or bolted connections.
Installation operations at height are dangerous. When working with the upper fastenings of wooden glazing of balconies and loggias, it is recommended to use stable, wide scaffolding. The normal methods of insurance when mounting at height would be a mounting belt or a chest strap with a three-meter end of a strong rope. The rope is secured to the metal parts of the fence or tied to the door of the balcony block. It is not recommended to install the structure alone; it is better to work with two or three people.
Correct installation of a wooden balcony door
You can install a balcony door yourself. First, you need to take measurements of the window and door opening in order to purchase a product that is suitable in size.
Measurements are made in the following sequence:
- Remove the previous block along with the window sill.
- Clean and level the surface, all corners should be right.
- Measure the window and balcony door separately.
The height of the door is determined using measurements in the middle, right and left. The smallest result should be selected.
The thickness is determined by measuring the thickness of the wall.
When calculating the height and width of the structure, the following must be taken into account:
- the finished product must have a frame smaller than the opening; the walls must not be allowed to rest against it or touch it;
- when inserting the frame around the perimeter, equal gaps of 2 to 5 cm should be left;
- both internal and external measurements should be taken;
- The width is determined by the top, bottom edge and middle, the smallest value is taken into account.
To install the structure you will need the following tools:
- construction and assembly gun;
- screwdriver;
- electric drill;
- perforator;
- brushes of various diameters, rollers;
- putty knife;
- roulette;
- ruler;
- screws, dowels, anchor bolts;
- mounting wedges;
- mortar for plaster;
- putty;
- sealant;
- polyurethane foam.
The installation procedure takes place in several stages:
- Dismantling the previous block.
- Product assembly.
- Installation of the structure.
The order of work depends on the time of year: during the cold season, it is better to complete the assembly before installation, so as not to cool the room.
Before you begin dismantling, you should remove unnecessary things from the room to free up space, and cover what cannot be removed with film to prevent construction debris from entering.
Dismantling is carried out as follows:
- Remove the window sashes and door panel.
- If the frame is wooden, cut it with a hacksaw at the bottom, and then remove the elements from the opening using a mounting crowbar.
- Using a hammer drill, remove the plaster.
- Remove the tide, if any.
- Clean the opening from dust, plaster residues and polyurethane foam.
- If the previous block was made of metal-plastic, all fasteners and screws should be removed from the frame.
The next step is to combine the window frame with the door. They should fit together without distortions or gaps. The combination is carried out as a result of the following steps:
- Remove the glass units.
- Turn the door frame on its side.
- Drill holes for fasteners (in increments of 500-700 mm) from the inside.
- Place the connecting profile on the foam.
- Screw in nuts and screws or self-tapping screws that are suitable in length to the depth of the partition inside the profile.
- Repeat steps for one side of the window frame.
- Install L-shaped brackets to limit the mobility of the entire structure.
Construction installation procedure:
- Try on the frame adjacent to the balcony in the opening, fixing it with improvised means. It is necessary to provide gaps in order to further insulate the exit to the balcony.
- Place marks for the proposed holes on the balcony block and opening.
- If the frame is secured with anchor bolts (direct fastening), drill holes in the wooden frame and the concrete opening.
- Align the structure so that deviations remain minimal.
- Place concrete dowels into the holes and secure the structure with a screwdriver.
- If brackets are used for mounting, they are screwed onto the box and frame.
- Install double glazed windows.
- Fill the gaps between the frame and the concrete opening with foam.
If the balcony or loggia is not glazed, a drip guard should be installed above the window, which will protect the windows from rain and snow.
The canopy is attached in a horizontal position; the bend of the upper edge is screwed to the wall. If a gap occurs, it can be sealed with sealant.
The slope on the balcony can be finished with plaster mortar; for this you will need plastering tools.
The composition is applied to the leveled balcony slope in several layers: the rough layer is made with an even aluminum rule, the rest are rubbed down using a plaster trowel.
Installation without distortions and filling of all gaps ensures heat retention in the room, protects against blowing and contributes to the long service life of the product.
If the installation of a balcony block is carried out in a wooden house, it is not recommended to choose a block made in the form of a single structure, not divided into a door frame and a window frame. The walls of wooden houses are subject to shrinkage, and as a result of the displacement of the logs, a gap will form under the window sill, and the windows will be skewed.
Examples of the cost of sets of frames and windows. For DIY installation.
Let's look at prices using examples of typical balconies and their sizes, which are more common in St. Petersburg. If your dimensions are different, you can still come to a conclusion about the approximate cost of your balcony.
Price Balcony in series 137. With rounding.
Two standard balconies in houses of the 137 series
Schematic drawings of possible production of balcony frames and windows. Set
The front part is 2800mm, the sides are 500mm.
price for frames and windows with fittings and 4mm glass per set 18,000
RUB
The front part is 5000mm, the sides are 500mm.
price for frames and windows with fittings and 4mm glass per set
RUB
26,100 Window units with inward opening. With fittings, 4mm glass and glazing bead. With a wooden sheen.
Balcony price 3 meters, common size
Balcony with sides
Schematic drawings of the possible production of frames for a balcony three meters long
The front part is 3000mm, the sides are 750mm.
price for frames and windows with fittings and 4mm glass per set 17500
RUB
Window units with inward opening. With fittings, 4mm glass and glazing bead. With a wooden sheen.
Price for loggias 3 and 6 meters
Wooden loggias Three meters and Six meters.
Schematic drawings of the possible production of frames for loggias three and six meters long
Loggia 2.7 meters
price for frames and windows with fittings and 4mm glass per set 11600
RUB

