Let's look at the varieties of this material, what mixtures are used, the advantages for slopes, the disadvantages and how they are eliminated. We will describe how to plaster slopes for plastic windows, features of the work and what you should definitely pay attention to.
We will debunk or confirm myths and popular opinions about plaster for slopes near plastic windows, based on reviews from craftsmen and premises owners.
Is it possible to do?
Slopes are decorative elements around the perimeter of the window, covering the inner segment of the opening (sections of walls) from the top and sides. According to GOST 30971, it is recommended to equip them with plaster and plasterboard , but there are also options with polymer panels with insulation.
Slopes for PVC windows can be finished using all possible existing materials, including plaster. But debates precisely on the question of whether this material is the best in comparison with all the others have already become traditional.
When deciding what to choose, plaster is usually contrasted with all other methods - and especially with plastic linings and sandwich panels, which in this case would seem to be very appropriate, but are not always preferred.
Due to small but important nuances, as well as due to complexity, labor-intensiveness, painstakingness, and the need for special accuracy of calculations, the work of plastering slopes is always distinguished as a separate type from the complex of finishing manipulations.
The design of these elements is not the same as the procedures for walls and ceilings - it is more complicated, more expensive, so it is always specified in the price lists, written down on an individual line.
Requirements
Slopes must meet the following standards:
- Before plastering, the alignment of the walls from the outside and inside must be done especially well, otherwise the waviness of the finish will be noticeable, even minimal unevenness will appear through it, and this is more typical of the material in question. There should be no deviations in width/verticality that exceed the standards established in SNiP (see tables below).
- You need to make a bevel from the frame to the surface of the walls - it creates the so-called dawn of the window slopes. The angle of all such geometric shapes inside a building or at least a room should be the same.
- The surface of the base for painting coatings should be as smooth as possible, without roughness, the height/depth of which exceeds 1 mm. There should not be more than two such defects per 4 square meters. m area.
Dawn angle
In SNiPs and GOSTs there are no standards for the angles of dawn and slope reversal - there are only maximum permissible deviations, so this issue needs to be discussed in detail with the foreman or decided for yourself before work. The angles can be made different, for example, 90 or 45 degrees .
The angle of rotation of the window slope can be straight or turned, but if the opening serves for the penetration of light or this property needs to be increased, then it is better to choose the latter.
If the window acts as an element of the interior or is located between two rooms, then a direct option is more appropriate. When the angle is turned, in addition to improving the penetration of light, the doors will open more widely, reducing the risk of them hitting the walls.
Rules for dawn angles:
- usually make a turn of 90° or more;
- the amount of slope deployment is proportional to the thickness of the wall - the wider it is, the greater the value, the norm is 1:10, for example, with an edge (edge) width of 60 cm, they retreat 6 cm from the perpendicular to the bottom line of the frame;
- For the edge on top, for technical reasons, it is allowed to make the opening angle smaller than on the sides.
Window slopes
#1 *cap*
Hello dear experts. There is the following situation - window slopes are mounted from plasterboard, the slopes have different sweep angles, that is, one slope can have a sweep angle of 120 degrees, and the other 90 degrees. Please tell me which SNiP or GOST regulates the same angle of development of window slopes?
- Top
- Complaint
#2 *Guest*
Look at GOST 30971-2012 Assembly seams for connecting window blocks to wall openings. General technical conditions
- Top
- Complaint
#3 *Guest*
Look at GOST 30971-2012 Assembly seams for connecting window blocks to wall openings. General technical conditions
- Top
- Complaint
#4 *cap*
I didn’t find anything about the angle of the window slopes there
- Top
- Complaint
#5 stroyexert
- Users
- 60 messages
- Top
- Complaint
And you won’t find anything like this in the normative literature. This is a category of generally accepted knowledge and concepts. It goes without saying that the slopes should be symmetrical. That is, it’s like 2X2 = 4 or the Moon is not made of cast iron. It is generally accepted that the angle of rise of the slope panels should be within 90-100 degrees, in some cases an angle of 90 degrees is possible, but no less, but this is not standardized
Construction expert
Sukiasyants Svetlana Mikhailovna
Our official website: www.strexp.ru
#6 saransk
- City of Saransk
And you won’t find anything like this in the normative literature. This is a category of generally accepted knowledge and concepts. It goes without saying that the slopes should be symmetrical. That is, it’s like 2X2 = 4 or the Moon is not made of cast iron. It is generally accepted that the angle of rise of the slope panels should be within 90-100 degrees, in some cases an angle of 90 degrees is possible, but no less, but this is not standardized
Wait, the slopes can be rotated by 120 degrees or more. This happens and it's normal. Moreover, making 90-degree slopes on thick walls is very bad.
The standard includes the concept of “deviation from the design value.” I think that's the story.
Lashin Denis Vladimirovich
Representative of the NP "Federation of Forensic Experts" in the Republic of Mordovia
What types of plaster are suitable?
All types of plaster are suitable for window slopes near plastic windows. Mixtures for facades can also be used for interior surfaces, but this is usually done only for wet rooms. These materials have slightly worse aesthetic and technical characteristics specifically for these locations (they shrink, are heavy, take a long time to harden).
| Plaster | Options | Peculiarities |
| On plaster | A classic traditional choice for dry heated locations, for internal slopes. Layer up to 10 cm. Any subsequent finishing is acceptable. | The fastest setting time. There is a certain level of plasticity. Very unstable to moisture and corrosion. |
| With cement base | Works inside and outside (facades). Layer 0.5 - 4 cm. Often used for subsequent decorative finishing and cladding. | High or complete resistance to moisture. It is inconvenient to work, since the composition is crumbly and heavy. Aesthetics are slightly lower than those of gypsum compositions. |
| With lime | For dry indoor spaces. When adding cement, it can be used for exterior work, for facades. Thickness varies widely - depends on binding ingredients and additives. | The most universal mixture, but there are more features and disadvantages. More susceptible to destruction from moisture. High elasticity. Easy. |
| Warming | Interior and exterior works. The maximum thickness is 5 cm. The composition is used for rough finishing. | Porous. Prevents heat loss. Fireproof, completely non-flammable. |
| Polymer composition | Indoor and outdoor spaces, i.e. for dry and wet environments. The thickness of the layer is limited by the size of the solid fillers, standardly up to 5 mm. Can be used for painting or as a full pigmented finish. | Of all the types under consideration, it is the most durable, resistant to temperature changes and changes in humidity levels. Best able to withstand mechanical stress. Fully maintainable, easy restoration in case of any damage. Superb aesthetics. |
Traditionally, gypsum mixtures are chosen for interior work, and cement mixtures for exterior work. Polymer solutions are of the highest quality, but also expensive; they are used if decorativeness, aesthetics, or particularly high-quality design are required.
If the room in the house is wet with high humidity, then cement compounds can be used for interior work, but they are also often used there because of their low cost.
Most of the technical advantages of the gypsum mixture turn into disadvantages if they are used for conditions other than their own. This is not typical for cement compositions (except for minor nuances); they are more universal.
Let's look at why the cement mixture is less suitable for interior work and better for exterior (street) finishing , for aggressive conditions, with increased loads and humidity:
Completely resistant to moisture, does not absorb it, the properties remain stable. The same applies to temperature changes.- The most durable, has high adhesion to rough surfaces typical of facades.
But it does not adhere well to wood, paint, ceramics, and there is a need for an abrasive primer, notches, and reinforcing mesh. - Indispensable for aggressive conditions with heavy loads such as outdoor environments.
- Almost complete versatility when considering the conditions of use. But it shrinks, has lower aesthetic properties, and slowly gains strength (up to 4 weeks). Due to its heavy weight, it is difficult to work with: unevenness and sagging appear, lags on horizontal planes, on the upper edge of the slope (a retaining mesh is required).
- A porous, grainy surface is created - there is a need for intensive grinding, grouting, and a finishing layer of material that smoothes out these imperfections. But the listed disadvantages are not inherent in decorative varieties of cement compositions.
- It has an increased tendency to cracking due to shrinkage, and also because its ductility is lower than that of compositions for internal locations.
- Easy to make yourself from sand and cement. It dries more slowly, which is more convenient when working - there is more time to apply the mixed solution.
Cement mixtures are sometimes used for interior work, especially for rooms with high humidity. The introduction of plasticizers and lime into the composition helps improve their properties for such purposes, which is especially important for slopes - this increases plasticity, reduces shrinkage and the risk of cracking. The tendency to cracking is also reduced by applying three layers and putty.
When choosing cement compositions, you need to pay attention to frost resistance - the greater the number of freezing/thawing cycles, the better.
Why gypsum compositions are best for interior work , for dry, heated rooms and are not suitable for external (street) surfaces:
- when wet, it swells, becomes deformed, falls off, and absorbs moisture;
- there is no versatility - gypsum is definitely not suitable for the facade;
- the strength is low, there is no shrinkage, but the ductility is better (the tendency to cracks is reduced), which is especially important in our case;
- difficult to modify and improve with additives - experience is required to determine the ingredients and proportions; making the mixture yourself is more difficult;
- sets quickly. It is necessary to prepare in small portions; adding water to the dried substance will not solve the problem, since the properties of the composition will not be restored;
- quickly gains strength, even with the thickest layer the period will not exceed 1 week;
- application is easier, it is easier to create a perfectly flat surface, also due to the low weight, since sagging does not appear, it requires less experience for finishing work;
- the shades are purer, for example, if you choose white, then it will not show through under the wallpaper, paint - you can make any color with tints, and it will be of higher quality;
- smoothness, which is noticeable not only to the touch, but also visually (the impression of a more solid, clean surface is created); it is possible to bring the finishing layer to the level of putty, but only experienced craftsmen can do this;
- it’s easier to make three-dimensional patterns and decorative reliefs;
- low weight, which simplifies work and improves evenness and uniformity of the layer;
- there is no need for reinforcement if the thickness is up to 5 cm;
- vapor permeability, the walls breathe - this is another factor confirming that the disadvantage in the form of condensation is not so typical;
- due to the smaller grain size there is some sound and heat insulation;
- work is completed faster, as the solution sets and dries more intensively.
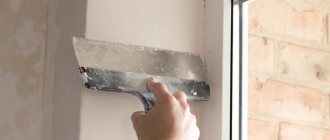
Puttying slopes: preparation taking into account the specifics of the work, the main stages of the work
Even among professionals, finishing slopes is considered a rather difficult task, which is why the prices for this type of work are quite high. Therefore, putting up slopes with your own hands will not only improve your home, but also save significant money. After all, by and large, with the proper approach and careful fulfillment of all the requirements of the technological process, the result will be no worse than that of any specialist.
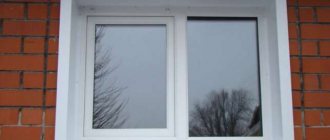
A high-quality slope transforms the appearance of a window opening
Preparation taking into account the specifics of the work
As noted above, work on puttying slopes is quite specific for a number of reasons:
- Complex geometry - many external and internal corners, narrow window space. This complicates the work and requires accuracy and attention.
- Light from the window will show any flaws in the work, so everything needs to be done with the highest quality.
- The geometry is not always absolutely even and correct, and making turned corners is much more difficult due to a number of features.
So, let's consider what materials should be purchased before work:
- Putty for slopes is the main material, the choice of which should be approached responsibly. If the layer is thick, you can use two types of mixtures - starting and finishing. But in most cases, the finishing composition is enough, and it can be any mixture for interior work.
Advice! Recently, more and more people are using latex-based compounds; they create an elastic film on the surface and are resistant to moisture, which is also important when finishing in such places.
- A perforated putty corner must also be purchased in advance. Using this element, even without experience, you can create perfectly straight corners. At the same time, the product also has a load-bearing function - with its help, the corners become much more resistant to deformation.
Corner can make any corner perfectly straight
- You will also need a deep penetration primer, which will strengthen the base and provide additional reinforcement for the finished surface. In addition, the primer protects the surface from mold, which is important, because slopes are exposed to adverse effects due to temperature changes.
Don't forget to stock up on the necessary tools:
- First of all, it is a narrow and wide spatula. They will be used to apply putty for slopes. The width of the narrow one should not exceed 8-10 cm, and the wide one is selected depending on the width of the window space. Ideally, it will cover the entire width of the slope - you can perfectly level the surface.
- A grater and sandpaper or mesh for sanding the surface will be needed to achieve perfect smoothness at the final stage of work.
- The container for mixing the solution should be convenient and not very large. For work, it is good to have a drill with a mixer, but you can get by with a simple stick, with which you can also mix the mixture well; the cooking instructions do not prohibit this method.
- If the slopes are high enough, you will need a stepladder or construction sawhorses.
A ladder will make your work much easier
Main stages of work
The work is divided into several stages, so it is unlikely that it will be possible to complete all the work in 1 day. Do not rush to the detriment of quality and reliability (see also the article “Finishing a cottage - the main stages”).
Preparation
This stage is inherent in almost all types of work and includes the following actions:
- Cleaning the surface from contamination . If the slopes are made of plasterboard, everything is quite simple, but if they are made of plaster, the entire plane should be checked, and if there are unevennesses, they need to be leveled and the sagging removed.
Plastering the slope must be done with high quality
- If, after installing the windows, there is excess foam remaining on the surface, it must be cut off with a construction knife so that it does not interfere with the work.
- Next, you need to treat the slopes with a primer , after which you can begin the main activities.
Main stage
Here the work is carried out in a certain sequence:
- First of all, all external corners are measured and parts of the corner are cut off. After this, a small amount of putty is mixed, which will serve as an adhesive, it is applied in narrow strips on both sides of the corner, after which the corner is placed on it and recessed. Next, using a level, its optimal position is set, and excess solution is removed.
In the photo: the corner is placed on a layer of putty
- Next, all problem areas are carefully sealed - the junction of the slope to the window and the internal corners; they can be further strengthened by gluing a layer of fiberglass. This work should be carried out especially carefully; as a rule, it is in these places that cracks most often form.
- The next stage is continuous putty of the window slopes. The first layer serves as a base, and with its help you should try to bring out the plane as best and evenly as possible. For this layer you can also use a starting mixture, its price is slightly lower.
- Next, the final layer is applied - the slopes are puttyed with a finishing mixture. At this stage, work should be carried out as carefully as possible - without nicks or scratches.
- And finally, the surface is ground using a special grater and sandpaper with a grain size of 150 microns.
Advice! The easiest way is to check the plane with a light bulb - it will show all the flaws and irregularities. It’s enough just to bring it to the surface and look at the coating - the light should flow evenly across the plane, without shadows.
- If small scratches remain on the surface after sanding, they should be repaired with a thin layer of compound, and the spatula should be pressed firmly so that the compound clogs into the cavity and does not remain on top.
What tools and consumables will be required?
The following materials and tools will be required:
To apply plaster:- spatula, trowel, trowel (trowel);
- falcon, corner leveler;
- rule;
- grater, grater for finishing smoothing.
- Tools required to prepare and strengthen the surface:
- polyurethane foam will be required if the window cracks were poorly sealed;
- materials for expansion and other seams, joints: sealant (silicone), special sealants, in extreme cases, tow, felt;
- reinforcing mesh for leveling if the surface is slightly curved, and for holding the mixture if necessary;
- beacons;
- corners: T-shaped for fixing beacons; perforated corner-forming, the option with reinforcing mesh will be the best; if cladding is planned, then a decorative corner for tiles will be required.
- For marking and calculations:
- a regular (bubble) level, but a laser level is better - for installing beacons and checking the evenness of surfaces;
- square with a movable bar for marking the slope and angle of dawn;
- pencil, tape measure;
- for the angle of dawn, wooden guides may be needed (shown in the diagrams above in the section “Angle of Dawn”).
- Goat, stepladder, you can use a table;
- Thick rubber gloves for hands;
- Knife for cutting foam;
- Containers for mixing the solution;
- Mixer (separate, attachment for drill/screwdriver) or tool for manual mixing (stick, iron rod);
- Polyethylene for protecting floors and surfaces;
- Mounting tape.
Materials:
moisture-resistant, antiseptic, antifungal primer - if the wall (base) is porous and weak, then use substances with enhanced penetrating and strengthening properties;- putty;
- plaster;
- paint, if the decoration will be decorated with it.
To prepare and mix the solution:
- a mixer, an electric drill with an attachment, or, as a last resort, a similar tool (stick, rod);
- measuring container for water;
- a bucket for pouring powder into it and a steelyard for weighing it
- basin, mixing bucket.
Beacons must be made of stainless, non-darkening metal or plastic.
How to prepare the mixture?
The amount of dry composition is determined taking into account differences in the height of the wall and the height of the beacons . Since a relatively small volume of substance goes to the slopes, you can take an approximate figure for the dry composition per 1 square meter. m with a layer of 10 mm.
The gypsum mixture will require about 9 kg, but you need to take it with a reserve (10%), that is, about 10 - 11 kg. The consumption is always indicated by the manufacturer on the bag. For fine-grained mixtures the figure is slightly higher than for coarse-grained mixtures. The cement mixture will require about 15 - 18 kg.
There are many proportion tables on the web for mixtures you create yourself, examples:
You need to mix the plaster with water in small portions - 3 - 4 kg of dry mixture , since it sets (hardens after 15 - 20 minutes) and you may not have time to use the entire volume. For 1 kg of gypsum composition take 600 - 700 ml of water; for cement it is much less - 150 - 170 g, or 1 liter per 5 kg. The composition should not be too thick and too thin (skinny) - it should not flow or lag behind the surface.
The water is not poured in all at once, but is topped up, so the density can be controlled. You need to stir until all the lumps disappear and homogeneity appears.
How to properly turn a plasterboard slope
When cutting a plasterboard sheet, it is better to make a margin of 1-1.5 cm, which can then be cut off. Drywall can be attached with glue or using a profile. The profile corner is attached along the entire perimeter of the window and along the outer perimeter of the slopes with self-tapping screws. When installing the profiles, the rotation angle must be observed.
When attaching drywall to the adhesive mixture, the surface is cleaned and primed. The mixture is applied in small piles with a distance of 10 cm. Pre-prepared strips of drywall are pressed down with a block along the turning line.
DIY installation features
Important nuances when plastering the slopes of PVC windows that you should pay attention to in order to be prepared for the work and costs:
It is highly advisable to prime in 2 – 3 layers.- The price of the master is set for 1 linear meter, since work on slopes is much more complicated, including the installation of beacons and sealant (damping gasket), reinforcement, corner formation, leveling, particularly accurate calculations and markings, especially for the angle of dawn.
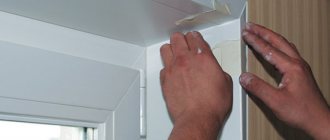
- Instead of paper mounting tape, you can use low-tack tape, as the former sometimes leaves traces of glue. Before each stage of work, such protection is changed - the tape must be removed immediately after completing a specific set of actions.
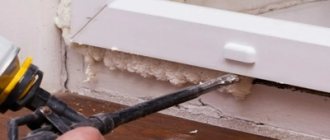
- Thermal insulation or damping gasket is required for the gaps (joints) between the opening and the window frame (frame). They use tow and felt. The ideal option is if the specified materials are used and there is complete insulation of the slope under the plaster: polystyrene foam (it will require high-quality waterproofing), expanded polystyrene or penoplex (considered the best), mineral wool (usually for external surfaces).
- Highly desirable corner strengthening:
- internal (husks) - use a reinforcing mesh, which will protect against the formation of cracks;
- external ones (crests, jibs) - not reinforced, they are easily knocked off, for strengthening they use corner profiles - counter-shoulders (plastic or stainless steel);
- It is extremely important to install the beacons correctly and evenly; the angle of dawn and the absence of an uneven slope of the final finish depend on this.
This video will show you how to properly plaster slopes on windows with your own hands:
Final stage
When one end of the slope is located at the plane of the wall, and the other is inserted into the profile at the window, we measure the distances between the wall and the slope. Insert a wooden lath or profile trim for drywall into the gap. After measuring the gap between the wall and the slope, it is removed, and a wooden strip is installed in place of the gap and secured with self-tapping screws.
Now you need to take glue and glue the mineral wool insulation to the walls of the slopes. Then we install the sheet in the designed position. We place one edge of it in the profile, and the other is adjacent to a wooden batten and screwed with self-tapping screws in increments of 250 mm. We install the other side slope in the same way. We measure the size of the window and cut out the upper slope. Just like for the side openings, you should now install insulation and slats. Now you can install the top. We join the outer corner of the plasterboard sheets. We insert the profile and putty. You can simply cover the joint with a plastic square and attach it with glue.
Possible difficulties and errors
Common miscalculations and mistakes (they can also be used to assess the complexity of the work):
- It has not been checked (with a level, a square) whether the window frame is installed symmetrically or whether it is securely fastened. It is extremely important to correct defects before finishing.
- Sealing cracks with foam as additional insulation. This substance disintegrates, crumbles, and crumbles. It is better to use natural fibrous materials treated with an antiseptic before use. The above insulation will simultaneously serve as an additional damper, reducing the risk of cracking.
- Expansion joints with special expansion strips and sealants, for example, from SDM compounds with low vapor permeability, are not installed near the gaps near the frame. An error will result in noticeable cracks appearing in these places.
- A general flaw - insufficient, careless measurements at all stages, and especially when determining the angle of dawn and installing beacons. We emphasize this separately, since accuracy is especially important for slopes.
- Do not install profiles for corners - in these places the plaster is vulnerable and over time there is a high risk of it breaking, falling behind, or chipping.
- Incorrect plastering order. First you need to make the internal, then the external slopes.
- Uneven dawn angle on the sides: the asymmetry will be noticeable. From above, this expansion can be made smaller.
- When using cement and heavy compositions, they forget to reinforce the verkhovnik, which leads to the mixture peeling off under its considerable weight.
Some more visual information about expansion joints for slopes (sealed with acrylic sealant in the last photo):
slopes for plastic windows before plastering - the dew point will shift deeper into the wall, condensation will not form on the glass and walls near the structure. This will also reduce the influence of temperature changes, which provoke uneven expansion/contraction of different materials and, accordingly, the appearance of cracks in the plaster.
The procedure for installing a window slope
In any case, excess thermal insulation must be removed. In the case of modern installation, this will be foam. It is cut with a knife flush with the frame. There is no need to remove more so as not to disturb the insulating properties of the seam:
- A starting profile is mounted around the perimeter of the window frame. It's almost like the letter P, but one leg is longer. It is recommended to place it inside.
- Under the other side of the slope, on the outer edge of the perimeter of the window opening, a wooden sheathing is installed.
- In fact, the slope itself is made of plastic. Underneath it is usually recommended to lay a sheet of foam plastic, cut to shape, or spray it from a polyurethane container.
- The slope is inserted at one end into the starting profile, and at the other end it is screwed onto the wooden bead lathing.
- The outer edge is trimmed with an F-profile corner.
All! The finishing of the window slopes is completed. If necessary, it is painted with special compounds (for example, Feyco) in the desired color, or cleaned (Cosmofen series of products) from contaminants. In fact, all this is easier than a steamed turnip, especially for someone who has at least once dismantled a finished window frame.
Pros and cons of using outside and inside
Let's consider the advantages and disadvantages of plaster so that the user can understand what to look for when decorating slopes near plastic structures with it.
| Advantages | Flaws |
| The best material for aesthetics, unlimited shades and design options. The appearance can be modified by the method of application. | The mixture itself is cheaper, but the services of craftsmen are more expensive (6 - 8 times than installing windows), as a result, the price is higher than other materials. |
| It can be restored, which is impossible to do with plastic and difficult with gypsum fiber board. | Application is complex and time-consuming. Not even all finishers know how to plaster slopes. There are masters who specialize purely in this type of work. It is easier to fix a finished gypsum fiber sheet or panel onto a minimally prepared wall than to carefully prepare and level the surface for plaster. |
| Contrary to popular belief, it does not fade or turn yellow. But it can fade and accumulate dirt if the finish is not painted. | Duration of work. The mixture is applied in layers. Each next layer is done after the previous one has dried. In addition, careful putty will be required - the work will take about 5 days. |
| There are no seams, no edging, no need to bother with sheet joints. The putty levels the surface into a perfectly flat plane. | The insulation will need to be installed separately, but if you use a sandwich panel or gypsum fiber board, this may not be necessary, since it is often already inside the product. |
| If you do it yourself, the costs will be lower, since the materials themselves are cheaper. | Often, ordinary plaster is used, so additional manipulation may be necessary - painting it. |
| Environmental friendliness. Plaster looks more natural and creates a feeling of solidity, harmony, and integrity of the interior. The walls “breathe”; the finishing itself is good thermal insulation. | Characteristic (but solvable) disadvantages that are always mentioned: cracks, the appearance of condensation. |
Two significant disadvantages of plaster - cracks at the joints near the frame and condensation - are often talked about. In fact, as real reviews indicate, these shortcomings appear only when the work is of poor quality. These disadvantages are completely eliminated by expansion joints and damper gaskets.
Debunking myths and confirming opinions about plaster:
There will be cracks along the frame and sill.
Yes, they can appear, but only with poor quality work. Condensation (the windows “cry” and freeze) and the mold it provokes can occur, since this type of slopes is “cold”, that is, it does not contain thermal insulation.These phenomena are also observed if the window is installed poorly - the slopes do not fit flush against the frame, which causes peeling. But, as already noted, these disadvantages can be eliminated completely.
- In reality, yellowing and fading are absent, since gypsum or cement with sand by themselves are not prone to this phenomenon by nature. And if you paint it (besides, this layer can be renewed), and this is usually done, then these shortcomings will be reduced to zero. Unpainted plaster tends to fade a little over time.
- Unpainted plaster is more prone to dirt accumulation and is more difficult to clean, but if it is painted, this disadvantage is eliminated.
- It is difficult to glue wallpaper, since there are no corners like, for example, plastic panels - the material in these places will peel off. This is completely untrue: there is a special adjacent profile for plastered slopes, which also serves as a beacon.
- A window sash suddenly opened wide by a strong wind will damage the finish, but it will also do the same to plastic or gypsum board, which are also more fragile. The problem can be solved by simple special devices that slow down plowing.
The reason for most of the disadvantages of plaster is poor quality work. But there are constant disadvantages: complexity, labor intensity, duration, and high cost of the services of experienced craftsmen.
New materials and technologies - plasterboard, metal-plastic panels, etc. - have not surpassed this type of finishing in terms of quality, versatility, design and reliability. Plaster is respected by professionals, as many of them say, this is the best thing that can be done with a slope.
How wide should the window sill be?
The window sill plays an aesthetic function in the window. In addition to its functional properties, for example, to sit on, to use as a shelf for flowers and various objects, and even as a table, it plays an important role in the microclimate of the room.
Advantages of plastic window sills
Plastic structures have long replaced wooden ones. They have such advantages as lightness, strength, waterproofness, resistance to UV rays, so they retain their appearance for a long time. And most importantly, plastic window sills do not rot, and also have excellent thermal insulation properties.
It is worth noting their durability and ability to withstand temperature changes (-30 - +60 degrees).
Window sills are easy to maintain. You can wash them with detergents without fear of scratching them. The color range is varied, ranging from white to a decorative pattern, which is applied in production by the manufacturer.
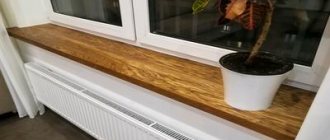
Plastic window sill decorated with wood
Wood-like window sills and natural stone are more popular. They are also divided into matte or glossy. The latter are convenient to use because dust does not clog so much in their pores, and the varnish coating can protect against mechanical damage.
How to determine the required window sill dimensions
The long service life and quality of the window depend on the correct calculation and installation of this structure.
Initially, you should cut the workpiece to the required length and width.
Many people have probably wondered how wide the window sill should be? It is measured simply.
Measure the width of the window opening and add 6-10 cm (so that on each side the window sill protrudes beyond the slopes by at least 3 cm). Because it is unacceptable for the plastic corners and F profile to protrude beyond it. For example, for a meter-wide window you need a window sill of 110 cm, of which 2 cm will be spent on the light opening of the slopes and 8 cm on the allowances on the sides.
The window sill in the balcony block cuts into the wall on one side, and at the door it should protrude by 1 cm.
This is how we calculated the length.
Calculating the width is no more complicated. To prevent the glass from fogging up, the window sill is placed 2 cm below the window, and it should protrude by 5-7 cm. This is explained by the fact that a larger protrusion will block the access of heat from the battery, preventing the circulation of warm air, and its strength will also decrease. As a result, condensation will accumulate on the window, which will cause freezing. You should also measure the depth of the opening with a tape measure. Thus, it is necessary to add up all 3 values, the sum of which will become the width.
Having received the necessary calculations, we cut out the window sill from plastic. It is better to do this with a grinder or jigsaw. You cannot press a jigsaw against PVC, as it will leave marks. A regular saw can also be used, but the edges will not be perfectly smooth. This is not very scary; the nicks will be hidden by plastic covers placed on the end of the product.
It is more difficult to take measurements for non-standard structures, for example, in rounded walls, kitchen window sills and countertops.
Detailed instructions for installing and installing a plastic window sill can be found at the link. We also recommend that you read the article on how to install plastic windows yourself, while it is preferable to take into account the rules for installing windows according to GOST.
In this case, it is necessary to make the width of the window sill uneven. A standard set of tape measure and a sheet of paper will not allow you to make an accurate template. Specialists from the company where you will place the order will help with this, but it is better to take measurements with a tacheometer - more accurate geodetic equipment.
The product is almost ready. All that remains is to fit it under the opening. To do this, cut off the excess parts.
Please note that the sides of the window sill must be recessed into the wall.
Make small recesses in the wall with a puncher, attach the workpiece to the opening and mark the cutouts taking into account the recess. Now cut out the window sill and insert it into the intended place.
Window sill installation diagram
When you install it, fill the indentations you made. You will get a monolithic window sill with a wall.
Standard width and length of plastic window sill
These structures are produced in standard fabric, and are cut to the required size at the installation site. Owners of old houses with non-standard sizes of products can order the required length and width of the profile.
What are the sizes of window sills for plastic windows?
The length of standard window sills starts from 4 and ends at 6 m. The width of a plastic window sill is from 10 cm to 1 m, increments of 5 cm. The most popular width is 11-60 cm, depending on the depth of the opening. The thickness varies from 1.8 to 2.2 cm, but usually it is 2 cm. Visually, the width of the PVC window sill increases due to the 4 cm edging of the capino.
Dimensions of a wooden window sill
A wooden window sill gives solidity, individuality and unusualness to an interior in a classic style, as well as loft, Provence, and high-tech. It cannot be replaced in old houses either.
Wood has many benefits. Coated with water-repellent compounds, it can be installed in very damp areas. It has aesthetic and functional advantages. Oak window sills are durable, do not crack and retain a presentable appearance for a long time, unlike plastic products. In addition, wooden structures can be restored.
They come in veneered and spliced lengthwise. Their thickness is 4 cm.
In veneered or solid-lamella window sills made of wood, thin plates - lamellas are glued along their length. The outside of the product is veneered with very thin wood overlays so that the wood does not curl during use. The surface can be tinted and varnished.
The standard sizes of wooden window sills are:
- from 15 cm and up to 1 m wide;
- from 70 cm and up to 3 m long.
Width of window sill on balcony
The choice of material for a window sill on a balcony is quite large. This can be wood, as the most affordable material, PVC and MDF, as well as concrete and natural stone. It all depends on the preferences and purpose of the balcony.
It is believed that wood is the least suitable for a balcony, while concrete and natural or artificial stone are difficult to work with and also have a high cost. In this regard, modern materials benefit from plastic and chipboard, which have an impact-resistant and heat-resistant coating. And the sizes of plastic window sills can be adjusted to fit any window.
Basically, small structures are installed on the balcony, with an average width of 20 cm, and the maximum width of the window sill is 60 cm. This is enough to make a winter garden, decorate the room with flowers, placing them on the window. And to make the structure reliable, it is additionally reinforced with special corners.