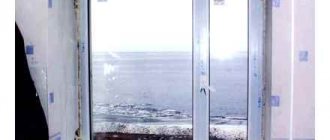
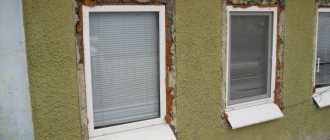
How to make warm slopes for windows with your own hands. Owners of houses or apartments who have installed new windows quite often have a desire to put everything in order, namely the surface around it.
Often this is required not only to create an aesthetically pleasing appearance of the walls, but also because when installing a new window system, the old slopes are severely damaged and cannot be restored, or they come close to the window sash, and this makes opening difficult. Moreover, if you make warm slopes, you will be able to strengthen the sound and thermal insulation of the window opening and cover it with mounting foam, which can be used to fill the gaps between the window block and the wall during installation. Very often, for this purpose, a layer of insulation is laid between the wall and the finishing material. Do-it-yourself window slopes can be made functional and neat using several popular methods, as well as using various insulating and finishing materials (or those that combine both qualities). To figure out which option is best suited for your conditions, you should consider them in more detail.
Setting the clamping mechanism
Over time, under the influence of mechanical and climatic factors, the sealing gum may lose volume. Because of this, air begins to penetrate into the room. Fortunately, to insulate plastic windows, it is not necessary to change the gasket. It is enough to adjust the clamping mechanism.
Important! If the gasket has completely deteriorated, it will have to be replaced.
To insulate plastic windows by adjusting the mechanism, you need to find protruding cylinders in the slots of the metal plugs. These are called trunnions and fit into hooks on the frame.
To insulate the frame, move the hooks to the desired position. Or adjust the trunnions. To change the position of the hook, you need to loosen the bolts. Moving towards the street increases the pressure, and towards the room decreases it. Here is a detailed video on how to insulate a plastic window yourself by adjusting the clamping mechanism:
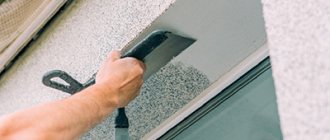
Sequence of work on external thermal insulation
The outer slope also needs to be insulated, and this process should be taken seriously. Material that is laid outdoors is constantly exposed to destructive factors such as:
- Atmospheric moisture.
- Negative air temperature.
- Ultraviolet radiation.
- Exposure to wind.
- Insects, rodents and birds love to make their nests out of insulation materials.
Therefore, unprotected material quickly becomes unusable. Insulation of external slopes is carried out according to the following points:
- Remove excess polyurethane foam.
- Cover the slope with soil with an antibacterial composition.
- If there are large differences, the surface is plastered. Select plaster for external use.
- Once again they resort to priming. The composition will protect against fungus and mold, and will also increase adhesion with the following materials. Don't skip this step.
- Start with insulation. For external treatment of slopes, a denser material is chosen, for example, penoplex. It is glued to an exterior adhesive suitable for polymer materials.
- For greater reliability, the heat insulator is fixed to the slope with dowels with a wide head. It is not necessary to do this indoors, since there is no exposure to gusts of wind.
- The corners of the slopes are covered with corner elements. They will make the edging more neat and attractive. In addition, making a beautiful corner will be much easier.
- The insulation is covered with plaster with mandatory reinforcement. If you do not use a mesh, during the first year of operation the layer may crack and crumble.
After the layer has dried, decorative finishing is performed. Sheathing materials are used only those that can withstand external load.
Heat-saving film
Film for insulating plastic windows can significantly reduce heat loss in the house. However, in order for its application to have the desired effect, it is necessary to properly prepare the surface. In this case, you will need the following tools:
- stationery knife;
- hair dryer;
- scissors;
- scotch.
First, the surface must be cleaned of dust and dirt. Wipe the glass thoroughly (a layer of dirt and dust makes it difficult for sunlight to penetrate inside). To check the quality of cleaning, take the paper and press it across the glass; you should hear a distinct squeak.
The perimeter of the box is covered with double-sided tape. The edges of the film are separated with a stationery knife. Cut it with scissors to the size of the window and stick it on the previously attached tape. Take a hairdryer and blow warm air over the film. Burst the resulting swellings with the tip of a knife. This is the easiest and most inexpensive way to insulate platinum windows.
How do you determine where it's blowing from?
Even if there is only one defect, there will be blowing from the window. You can determine where this is coming from in one of three ways:
- Run your hand along the perimeter of the window block;
- A lighter. Just like with a hand, in the place of a draft the light will change;
- Place a regular sheet of paper in the open window and close the sash. If, when you pull the tip of the sheet, it easily pulls out, this will indicate poor pressure on the seal.
Causes of condensation
Simply put, condensation forms where cold and warm air meet. Why does this happen at the edge of the glass unit, next to the slopes?
Since we are talking about metal-plastic windows, it becomes clear that metal conducts the body very well. If the window profile were entirely made of metal, it would provide virtually no protection to the room. To avoid this situation, polyamide inserts are used. By using hard plastic, the most important part of the task is achieved: getting rid of cold mystics.
A cold bridge is a section of the enclosing structure (in our case, a window profile) that has a reduced thermal resistance.
That is, in the case of the profile itself, we avoided heat leaks and cold air flow. Glass itself does not conduct heat well, so the junction of glass and frame, most often aluminum, becomes a kind of cold bridge. So it removes heat from the room and becomes a place where warm and cold air meet, falling out in the form of condensation at the edge of the window.
About the same thing happens on slopes. And the essence of the problem is connected with such a concept as an isotherm.
Isotherm (isothermal process) is a line of equal temperatures or a junction of temperatures that runs inside the wall.
Condensation occurs at the dew point. And if this indicator goes into the room, condensation forms there. In well-planned structures, of course, this does not happen, but this requires correct thermal calculations of the enclosing structures. Most often, the dew point is precisely on the slopes, because in this place the concrete layer has the smallest thickness. That is, in the case of a blank wall, the dew point is on the street, and in the case of a window opening, inside the room.
So, our task is to move the dew point in this place back to the street.
How to properly insulate the slopes of plastic windows? Most often, owners decide to insulate window slopes from the inside. But this also has its negative sides. Let's not forget that the essence of physics is that it is not cold air that rushes into the apartment, but warm air into the street.
By insulating the slope, we deprive the concrete walls of heat, which means they will freeze even more. Considering that the service life of concrete under conditions of temperature changes is limited, this situation will harm the building envelope. And yet, people often insulate the premises of apartment buildings, the safety of which is not expected to last for decades. In addition, insulating slopes from the outside will often require the involvement of hired workers. Therefore, in the previous paragraphs only the theory of the processes was described, and it’s up to you to decide how best to insulate slopes in a particular case, take into account the durability of the structure or the cost of the issue.
Why is it necessary to insulate slopes?
Often, after replacing windows, they are limited to only decorative finishing of the slopes, which is wrong and can lead to problems in the near future, because:
- The seams between the wall and the glass unit are filled with polyurethane foam. But this material is not sufficiently resistant to high humidity, ultraviolet radiation and low temperatures. Very quickly, unprotected polyurethane foam will begin to deteriorate under the influence of weather conditions, which will lead to heat loss through voids in the seams.
- Numerous cracks on untreated surfaces of slopes are a common cause of heat leakage from a room.
- Moisture can accumulate in the voids between the wall and decorative panels, which means condensation may form.
Why insulate them?
Even after a wooden frame is replaced with plastic double-glazed windows or old doors with new ones, the ideal result is not always achieved. Since during the installation process there may be voids that are not visible to the eye, through which warm air will constantly escape out.
Warm flows are not dangerous for the environment, but heating costs will constantly increase. At the same time, frost and cold wind will penetrate into the room, which is fraught with the following consequences:
- Freezing of the slope is the appearance of frost in the window opening inside the house.
- The appearance of condensation on the glass.
- Accumulation of moisture on the windowsill. Since water condenses on the glass, it has to drain.
- The formation of fungal plaque on double-glazed windows, as well as slopes.
- If there are voids that are open to the outside, then with strong gusts of wind a howling can be heard.
Causes of heat loss
The main places for blowing are: glass unit holders, rubber seal, places under the hinges and handle, around the perimeter of the frame.
There can be several reasons for cold air entering a room. The most common problem arises from improper installation of double-glazed windows, namely ignorance and non-compliance with window installation technology. Negligent attitude of the installation team towards work, poor sealing of cracks, failure to seal installation seams with sealing tape. And if the external slopes of the windows are not finished in a timely manner, then after a period of time, environmental influences will destroy the polyurethane foam.
Saving on construction foam, insulation, not using protective thermal insulation, using low-quality components during the assembly process - all these are the reasons for the necessary insulation work.
The situation of building shrinkage is relevant for those living in new buildings or a wooden house, because... this can lead to distortion of the frame. Another important reason is improper window care. Many people neglect primitive window cleaning. So, about 2 times a year, the window seal needs to be washed and lubricated with glycerin so that over time it does not begin to crack, which will naturally facilitate the transmission of heat.
Cold may enter the room if the clamping flaps are loosened. This can be solved by adjusting the fittings.
How can you seal window slopes from the outside?
From the outside, the structure can be sealed with a variety of different materials. Suitable:
- plaster mixtures;
- PVC panels;
- siding;
- metal;
- clinker tiles;
- drywall;
- sandwich panels;
- expanded polystyrene;
- wood;
- natural stone.
Slopes provide additional insulation of walls and windows.
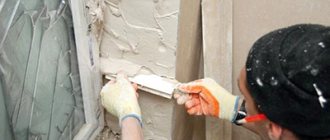
Plaster
Decorating with plaster is a traditional, most economical, easy-to-use finishing method. Dry building mixtures are used for it, but the process takes longer than other options. As a finishing decoration, additional painting is done.
Plastering is the most economical way to finish slopes.
Advice: plaster structures are not recommended to be combined with plastic windows, but are allowed with wooden ones.
Plastic
Plastic slopes are perfectly combined with metal-plastic windows; they are easy and quick to install, including with your own hands. The material is distinguished by high heat-insulating properties, resistance to “cruel” natural phenomena - it is not afraid of high humidity, and does not deteriorate in severe frost. The product improves sound insulation, is compatible with all types of insulation, and does not require leveling before starting installation work. The use of foamed PVC panels additionally insulates the room; the material does not flake when exposed to high temperatures, and does not lose shape from cold and moisture.
The use of sheet plastic allows finishing work to be carried out as quickly and accurately as possible.
Siding
Decorating with siding is one of the budget, but not very durable options. The cellular structure of the material leads to the fact that the slopes gradually become deformed, turn yellow, and swell. Since the siding is hollow, it will provide little protection from the cold; an additional heat-insulating layer is required underneath it.
The material allows you to quickly create an aesthetic coating that has a certain level of thermal insulation and soundproofing.
Advice: siding parts are most often made in private houses, the outside of which is decorated with it.
Drywall
The main disadvantage of drywall is its ability to absorb moisture, therefore, when decorating external slopes with it, the surface is additionally puttied and painted. The material is recommended for finishing windows facing glazed balconies, verandas, loggias.
It is also quite suitable for cladding external slopes if the windows overlook a glazed loggia, balcony or terrace.
Sandwich panels
Such three-layer panels, consisting of two layers of plastic and a sheet of insulation (extruded polystyrene foam), are optimally suited for decorating the sides of a window opening. Thanks to them, the opening receives something like a “thermal coat” with high sound insulation. Sandwich panels are similar in appearance to plastic panels; they do not need additional decor. Installation of such slopes requires strict adherence to the instructions, and it is better to purchase the parts ready-made.
They have low thermal conductivity and do not require additional finishing.
Styrofoam
Insulation using polystyrene foam is a simple and cheap option. This material retains heat well, it is low-flammable, lightweight, and easy to cut into any shape. For work, a product with a thickness of two cm and high density is used. Expanded polystyrene is also often used - it is much stronger than polystyrene foam in bending (about five times), has better sound insulation characteristics, and practically does not absorb water.
Slopes covered with foam plastic will save heat in the house and protect from external noise.
Metal
The option of finishing windows with metal slopes on the outside is one of the most popular. The metal here is covered with a polymer layer, performing an excellent heat-insulating function and protecting the walls from freezing and blowing by even the strongest wind. The cost of the product is high, but due to the polymer coating, the structure does not rust and lasts as long as possible.
Choosing metal as a finishing material for external window slopes is a reliable, aesthetic, and durable solution.
A natural stone
Decorating any window openings with natural stone is a labor-intensive, expensive method, but luxurious, strong, and durable. It is important to consider that stone elements create additional load on the walls and foundation. It is also permissible to use artificial stone.
Finishing from natural stone is an impeccable, stylish and sophisticated appearance of the slopes, unsurpassed durability and guaranteed strength.
Tools
- Level;
- Screwdriver;
- Primer brush;
- Container for primer;
- Knife;
- Gun for polyurethane foam.
Combined insulation
To increase the efficiency of the work done, it is necessary to combine several insulation materials with each other. As an ideal option, professional builders suggest combining mineral wool and sandwich panels. Foil insulation is also good.
The process is performed according to the following instructions:
- Cleaning the surface to be worked on. It is necessary to remove all pieces of debris, rags, etc.
- Prime the surface to improve its water resistance. You can first use a sealant to seal cracks, chips and other defects.
- Mineral wool is applied. You can use polystyrene foam or penoplex instead at the initial stage, follow the instructions for insulation using these materials.
- Reinforcement and leveling of the area where the work was done are carried out. The inner part also needs to be reinforced to consolidate the effect.
- The remaining installation seams are covered with foil materials. You need to use more material so that it extends onto adjacent walls.
- Attach a special U-shaped profile so that later you can quickly and conveniently install the panels. You can buy the profile inexpensively at any construction or hardware store.
- Cut pieces of sandwich panels to the required size.
- Attach the panels to the profile. They work on the principle of PVC panels, but the locks are a little larger.
Next, all the voids that form between the wall and the panels are filled with mineral wool. After this, it is given some time to dry thoroughly. And then you can close the structure.
Mikhail Voronov
Ask a Question
This combined option is the most difficult to install, as well as expensive. But the thermal insulation qualities are increased to the maximum, as well as sound insulation. After such insulation, there will be complete silence in the house; noises and sounds from the street will not penetrate inside.
How to properly insulate the slopes of plastic windows
Internal and external insulation of windows can be carried out using the same material. The installation technology is approximately the same, only the final finish is different.
Using such a universal, pliable material as polystyrene foam, you can easily make insulated slopes on PVC windows yourself, without turning to specialists.
How to insulate the slopes of plastic windows inside
It is recommended to begin installation of warm slopes immediately after their installation, until the construction foam collapses under the influence of moisture and loses its thermal insulation qualities. The work order is as follows:
- Trim off excess polyurethane foam remaining after installing the windows.
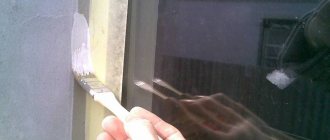
- Treat the slopes with a primer containing an antiseptic. It will prevent mold from appearing.
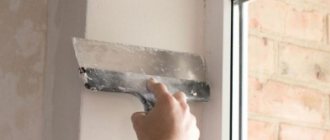
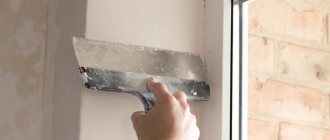
- Plaster the slopes, leveling the surfaces. This will ensure a better fit of the insulation.
- After the plasters have dried, the surfaces are primed again to improve the quality of adhesive application.
- Prepared pieces of foam are made less smooth by treating the surfaces with sandpaper. This will make it easier to glue them to the slopes.
- Cut the foam into the required pieces according to the previously measured dimensions, leaving small allowances.
- The foam parts are glued to the prepared slopes using mounting adhesive. Wait for the glue to dry completely, then trim off the excess foam.
- The corners can be puttied or decorated with decorative corners, which will make them smoother and more beautiful.
- The inside of the window openings is plastered or plasterboard is glued, then putty is applied, the surfaces are primed and painted.
- Decorate the outer parts of the slopes.
Preparatory work
Regardless of which insulation method and type of material are chosen, first of all it is necessary to conduct a visual inspection of the window structure and carefully check the condition of the installation seams. If the double-glazed window was installed a long time ago, and the installation seam was not protected, then most likely the foam has already begun to collapse and crumble. You can identify problem areas using a lighter. Run it along the entire perimeter of the window. Where the flame deflects is where the leak occurs. These areas need to be cleaned and re-foamed. After hardening, cut off excess polyurethane foam.
How to insulate the window sill of a plastic window
Over time, under the influence of mechanical loads and thermal factors, the foam becomes unusable. Cracks appear, and this sealant tends to dry out.
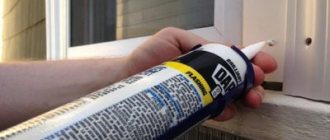
To insulate the window sill of a plastic window, you will have to buy a can of foam. Its average price is 200-300 rubles, depending on volume and quality. It is best to give preference to European brands.
Remove the old foam and run the dispenser along the entire length of the base of the frame. This insulation does not cope very well with small cracks. It is best to insulate them with silicone sealant.
The use of foam and sealant allows you to efficiently insulate the window sill, covering all problem areas. Silicone has water-repellent properties. It penetrates deep into the crack and seals it.
Useful tips
Knowledge of some of the subtleties that experts share will allow you to do the insulation of the slopes of plastic windows with your own hands more efficiently. As a result, the windows will not be damaged by the environment and will last a long time.
It is worth considering these recommendations:
- Polystyrene foam tends to expand in heat. When attaching it, it is not recommended to use a large amount of glue. Otherwise, it will quickly crack and lose its thermal insulation capabilities.
- To extend the service life of the insulation, outdoor work should be carried out only in dry times and in warm weather.
- The use of thermal liners will significantly improve heat retention in the room and protect against moisture penetration.
- When installing insulation on slopes, it is recommended to treat all wide cracks and joints with silicone sealant.
Thermal insulation of slopes on doors
The area around the entrance doors also allows heat to escape to the outside, and if you do not create a barrier, cold air will enter the house without restriction. The process of insulating door slopes is not at all different from the same work around the window. Therefore, everything is done according to the same plan:
- Cleaning the surface of excess polyurethane foam or old decorative coating.
- Application of deep penetration primer.
- Plastering if necessary.
- Primer treatment.
- Installation of insulation - fixation with an adhesive solution and several dowels with a wide head.
- Application of primer to improve adhesion.
- Installation of corner elements.
- Fastening the reinforcing mesh with the same glue.
- Plastering insulation.
- Rubbing the dried layer.
- Decorative facing of the slope.
Please note that door slopes bear the same load as window slopes. The insulation selected is hard, but it should not be too thick so as not to take up free space.
If the owner of the house knows at least something about construction, then he can make a thermal insulation layer on all slopes with his own hands. Of course, before starting work, you should familiarize yourself with several sources in order to study all the intricacies.
But a beginner in this field does not need to do everything on his own. There are professionals who will be happy to help in this matter.
What materials are suitable for thermal insulation?
In order for all the activities carried out to have a positive result, it is necessary to select the right materials. The following is used as a heat insulator for slopes:
- Mineral wool (basalt, slag or glass wool).
- Styrofoam.
- Extruded polystyrene foam.
- Polyurethane foam.
- Sandwich panels.
- Fiberglass, one side of which is covered with a layer of foil.
In the process of selecting the required material, the dimensions of the window opening and the places where the insulation will be installed are taken into account. Mineral wool, for example, performs its functions with a thickness of at least 10 cm, which is not always convenient for insulating a window from the outside.
In addition, cotton insulation requires the use of a water barrier on both sides. This is due to the fact that after getting wet the material loses its insulating properties.
An affordable and popular option is to use polystyrene foam and extruded polystyrene foam (penoplex). Moreover, the latter material is preferable because it has a higher density with a smaller thickness. It is important to protect the polymer insulation from the sun in a timely manner. When exposed to ultraviolet light, foam becomes brittle.
If polyurethane foam was used during the installation process, then there is no hope for complete thermal insulation. Of course, if the voids are densely filled, some of the heat will still be retained in the room, but if the house is located in a region with low winter temperatures, then you will have to take care of additional insulation.
A good option that solves two problems at once would be sandwich panels. The top layer is a decorative material, the bottom layer is insulation. At the same time, it is possible to choose an option for your home if the facade is already lined, but the slopes had to be insulated later. In addition, some creators of such panels offer options with different insulation materials.
A new option for insulating slopes is fiberglass with a foil base. It is difficult to install such material with your own hands, so you need to take the help of professionals. But you will be 100% sure of the result. The insulator perfectly protects against moisture and penetration of cold air currents.
Possible mistakes
- Do not cut parts exactly to your measurements if you are using foam for insulation. If they don't turn out to be the right shape, you won't have any stock left and will have to throw them away. It's not very economical.
- Mineral wool whose density is less than 75 kilograms per cubic meter cannot be used to insulate slopes. This material has too little ability to withstand loads and is not suitable for insulating windows.
- When choosing foamed polyethylene, it would be a mistake to ignore the advice on sealing joints in slopes.
- You cannot use foam whose density is less than 30-35 kg. per cubic meter.
These are all the nuances that need to be kept in mind when insulating window slopes.
Expert recommendations
The insulation procedure is characterized by its peculiarities. Knowing the subtleties, you can avoid many problems. To ensure the highest quality work, adhere to the following rules:
- If there is no insulation of the required size, you can use separate pieces. They are placed tightly to each other.
- Ideal adhesion can be achieved through a combination of glue and reinforcing mesh.
- Preparatory work includes getting rid of cracks and defects. If the hole is larger than 3 mm, sealant must be used.
- Of all insulation materials, extruded polystyrene foam has the maximum thermal insulation function. This will be a plus when performing outdoor work.
- You need to choose thermal insulation based on the dimensions of the gaps. If the free space exceeds 4 cm, use polystyrene foam or polystyrene foam. If the gap is 2-3 cm - fiberglass, less than 2 cm - polyurethane foam, mineral wool.
You cannot take foam with a density of less than 30 kg/cubic meter. m. If you prefer mineral wool, the density should exceed 75 kg/cu.m. m. Otherwise, the insulation will not withstand the load and will quickly become unusable.
Sources
- https://domsdelat.ru/okna_i_dveri/uteplenie-okon-snaruzhi-svoimi-rukami-prichiny-poteri-tepla-metody-utepleniya-otlivov-i-otkosov-instrukciya.html
- https://ebtim.com/montazh/uteplenie-otkosov-okon-snaruzhi.html
- https://balkon4life.ru/osteklenie/okna/tyoplye-otkosy/.html
- https://1pofasadu.ru/uteplenie/otkosov-snaruzhi-svoimi-rukami.html
- https://uteplix.com/obyekty/okna/uteplenie-otkosov.html
- https://okna-dom.net/utepleniye-otkosov-plastikovykh-okon/
- https://vdome.club/remont/okna-dveri/teplye-otkosy-dlya-plastikovyh-okon-kak-sdelat-svoimi-rukami.html
Why is it better to seal the outside too?
Insulation of window slopes located on the street is no less important.
This will help achieve the following results :
- increased thermal insulation;
- increased sound insulation;
- protection of polyurethane foam from destruction;
- protection of the window opening from the appearance of fungus.
Now you know why you need to additionally insulate window slopes, and what materials can be used for this. You can use the services of a specialist, or do the insulation yourself, especially if you chose polystyrene foam as a thermal insulation material.
If you decide to install window slopes yourself, then despite the apparent simplicity of this procedure, it is advisable to first study the procedure. We suggest you familiarize yourself with how to make cladding for internal and external slopes, how to install wooden or metal window slopes, as well as from siding panels.
Sequence of work on internal thermal insulation
Those who want to get a positive result from insulating slopes need to be prepared for the fact that the process is carried out both outside and inside. Both options for carrying out work have features and a certain sequence of execution. Therefore, we will consider each of them separately.
The internal slope is insulated according to the following plan:
- Leave the new window for several days so that it is well fixed in one place.
- Inspect the foamed space. If there are gaps, add foam and leave until completely hardened.
- Trim off excess areas.
- Treat the surface of the slope with an antibacterial primer composition. The solution will help resist the growth of mold and mildew, and will also increase adhesion for subsequent stages.
- Level the slope using plaster. A flat surface will make a good base for tightly fixing the insulation.
- The plastered and dried base is again covered with antibacterial primer, for the same reasons.
- Glue the insulation. To do this, use liquid nails or glue suitable for the selected material.
- The corner is covered with a plastic or metal corner and plastered together with the total area of the slope; a reinforcing mesh must be used. Fiberglass will make the plaster layer strong and reliable.
After this, they begin decorating. Painting, tiling, or another option chosen by the home owner will do.
Which slopes are better, plastic or plaster?
Plastering slopes of plastic windows has the following advantages:
- availability and low cost of material;
- the ability to plaster yourself;
- if damaged, it is easy to repair an area of any size;
- fire resistance;
- solidity of the coating;
- good vapor permeability;
- environmental friendliness;
- the ability to be given different shapes and painted in a variety of colors;
- high strength.
Minuses:
- more time is spent on execution;
- plaster finishes get dirty faster;
- cracks may appear.
Make the right choice
Slopes are an additional source through which heat flows out of the room. Also, due to the formation of condensation on them, the room may smell damp or moldy. This issue needs to be resolved immediately, but less effort will have to be made at the initial stage of window installation.
Layer-by-layer arrangement of materials
In this case, modern insulating materials are used:
- polyurethane foam;
- mineral or basalt wool;
- foam boards;
- rolls of foil fiberglass;
- sandwich panels.
It is also possible to insulate the slopes of plastic windows with isover (fiberglass). Preference is given to any method, based on technological capabilities and while maintaining an aesthetic appearance.
Izover for slope insulation
When using polyurethane foam, you will need to protect it from exposure to ultraviolet rays and moisture. Otherwise, it will collapse and turn into dust.
Treatment of joints with polyurethane foam
If you insulate the slopes of plastic windows with your own hands using polystyrene foam, you need to know that this porous material is capable of accumulating moisture, which in such a situation would be undesirable. It is preferable to choose penoplex slabs, which show increased efficiency, but have a higher cost.
Another high-quality material for such work is fiberglass. It blocks the circulation of air, moisture and is even a dielectric. However, working with her in such conditions is problematic.
It is worth considering that the result will be better if the work is carried out with slopes both on the inside, indoors, and on external surfaces located outside.
Options for slopes of PVC plastic windows
In severe frosts, without reliable insulation of the slopes of plastic windows from the inside and outside, you can even get drizzle on the walls. Therefore, such an operation should not be neglected.
Working indoors
After installing a new plastic window, the owners immediately take care of ensuring the aesthetic appearance of the part of the room being repaired. It is recommended at this stage, before finishing, to insulate problem areas using one of the types of thermal liners. They are mounted on the internal or external surface, and then plastering and cladding are carried out.
The overall parameters of thermal liners depend on climatic conditions, as well as the thermal conductivity of the building wall. The effectiveness of insulating the slopes of plastic windows with your own hands, as in the video, depends on the degree of adhesion of the thermal insulator to the wall surface. There should be no swelling or air layer allowed in this gap.
Method for sealing cracks from the inside
You can use one of the options that are doable even if you work on your own.
- After installing the window, insulation is attached to the resulting planes of the window opening, which, after fixing, must cover the seam between the frame and the wall. This creates a slight overlap on the front of the frame. If soft insulation, such as basalt wool, is used, then the surface is covered with a layer of plasterboard, then the outer part must be puttied and painted. When extruded polystyrene foam boards are used, plasterboard sheets are not installed. The horizontal part of the slopes is also insulated. After installing the slabs, a plaster mesh must be applied to the front side. Prepared cement mortar is applied on top of it. The final layer is finishing putty.
- It will be possible to achieve high-quality insulation of the slopes of plastic windows as in the video by installing sandwich panels. This material includes a thermal insulation layer. This type of work is usually called “clean”. This insulation is perfect for plastic windows in terms of its style, because similar decorative surfaces and frames are appropriately in harmony with each other. To create better contact, you can place an additional layer of mineral wool between the panel and the slope.
Please note that it is recommended to use only stone (basalt) wool as insulation. It is made from melt and is absolutely safe for indoor use. Unlike stone wool, glass wool is made from molten glass and quartz sand, which allows it to be used only for insulating rooms outside.
VIDEO: Which slopes for PVC windows are better - plastic, plaster or plasterboard
Use of polystyrene foam
One of the common options is the use of polystyrene foam due to its affordable cost and relative ease of working with it. Before using it, you will need to prepare a flat surface. This is done after installing the plastic frame. The slopes are plastered with cement mortar, including areas with polyurethane foam. After drying, we treat it with an antibacterial solution that prevents the appearance of fungus, and prepare foam plates about 5 mm thick.
Alternative options for dealing with drafts
There are times when it is not possible to replace window parts or do insulation work, but you need to get rid of drafts “quickly”. Alternative options for insulating PVC windows can come to the rescue .
Here are some of them:
- gluing an additional layer of sealant around the perimeter of the window - this can be done before the winter period, when windows are rarely opened;
- gluing mounting tape at the joints and cracks of the window frame - a method known since Soviet times;
- using heat-saving film on glass is a good option for additional window insulation and retaining heat in the room;
- filling joints and cracks with improvised materials (soaked paper, strips of fabric, cotton wool, etc.) is another method that our grandparents used;
- Using thick curtains made of “warm” fabrics will help avoid the problem of heat “leakage” from the room through the window.
Not all of the above methods give an aesthetically beautiful and durable result. But for getting rid of the problem “in a hurry,” they are quite suitable.
It is important to remember that periodically cleaning double-glazed windows from dust and dirt helps them transmit more sunlight into the room, and therefore heat it. It is also important not only to wipe the plastic frame from dirt, but also to periodically moisten the rubber seal with glycerin - this will make the material last many times longer.
Additional options
To insulate a window in your home, you can turn to time-tested methods. Here are some of them.
- Using paper. Today it is used very rarely, although, in fact, it is the simplest and cheapest option. To realize this idea, you need to tear any paper into pieces, be it newspapers or wallpaper. Then you need to twist it into strands and fill the cracks between the window and the sash with this material. For this, either a screwdriver or another sharp object can be used.
Paper can also be used to make excellent putty. To do this, you need to grind it, soak it in water and squeeze it out, add one part clay and two parts crushed chalk. This putty will do a great job with even the smallest cracks.
Another option is simple papering, which can be done using laundry soap or glue. It is created with your own hands. To do this, ordinary flour is mixed with water in equal proportions, mixed well and brought to a boil.
A more modern method is to cover windows with special tape. This method is much simpler than the previous one. However, this type of finishing does not make it possible to ventilate the room. Also, when removing paper from windows, marks remain on the frames, and sometimes even paint is removed. Therefore, in the spring we have to update the surfaces a little.
- Cotton wool. The process is very simple. Cotton wool is processed in the same way as paper. It is placed in all the cracks, and paper or tape is glued on top. The only difference from the previous option is that it will be a little easier to get the cotton wool out of the cracks.
- Clothes cord. You can fill the gaps with regular cotton cord. The method is unusual, but effective. The cord is secured with small nails or glue. Thanks to this method, the window is sealed at a high level. Of course, in the spring you will have to devote a lot of time to dismantling this insulation.
- Foam rubber and sealant. This option is very effective and modern. A tape made from foam rubber will be inexpensive, and it can be used not just for one winter, but for two full years. This option is suitable for those windows with large gaps. Installation work is not particularly difficult, but requires a lot of work. This method of finishing allows you to open the window at any time of the year.
Insulation that is carried out using sealing cords is considered more durable. They are made of rubber or polyethylene foam. The advantage of such seals is their low price. Cords come in a variety of shapes, it all depends on what kind of gaps are in the window structures.
The highest level of protection against cold can be achieved by using sponge seals. They allow you to open the window at any time and last for more than one season. The seal can even be self-adhesive.
However, when buying such material, you need to pay attention to the expiration date. If it is already coming to an end, the seal will not stick or will come off very quickly. Therefore, it is better to buy a separate sealant, and separately glue or silicone sealant. This option will increase its durability.
Having decided to insulate windows, you need to study all existing methods and only then get to work. Many options for thermal insulation can be done with your own hands, while saving significantly.
Insulation of window slopes from the street
The entire process of insulating windows from the outside consists of the following steps:
- Preparatory work;
- Cleaning slopes from dirt and foam residues;
- Applying a primer to the surface;
- Installing insulation with glue;
- Sealing cracks with glue;
- Arrangement of corners;
- Installation of polymer mesh;
- Plastering.
Important: When installing insulation, it must be laid so that it partially covers the window frame, and the installation seam is completely closed.
First you need to cut off all the remaining foam. The slopes are treated with an antibacterial primer mixture. Tiles equal to the size of the slope are cut from penoplex. They are smeared with assembly adhesive and pressed to the surface. Here you can use dowels. The corner is installed. A fiberglass mesh is placed on the tile over the applied adhesive. You need to give it time and apply glue on top again. Upon completion of the insulation work, water-based paint must be applied to the surface.
Important: Paint is applied only after the glue has completely dried.
Thanks to external insulation of windows, condensation does not form.
Insulation of ebbs To insulate ebbs of plastic windows, you need to fill all the cracks with heat-insulating material and foam them. To prevent water from getting on the insulating material, a metal strip should be installed on top of the flashing. The angle of its installation should be more than five degrees, and the horizontal edge should extend twenty to thirty millimeters beyond the facade, while the side edges should be turned up. The places where the plank is adjacent to the surface must be covered with a hermetic mixture.
Insulating windows from the inside Work on insulating a window unit from the inside of a house may include: replacing a worn rubber seal, adjusting fittings, sealing joints, replacing a double-glazed window with an energy-saving one, insulating it with film. The role of the rubber seal is quite significant, it ensures the tightness of the window. So it is extremely important to regularly inspect the seal and properly care for it. Sealing of joints is carried out by applying sealant to the blow-out areas. Today on the building materials market there is a huge selection of sealing compounds of different types - for different wall materials, for different temperature conditions, etc.
Additional methods of window insulation These methods include primitive window washing. After all, if the glass is dirty, then it does not fully transmit the sun's rays. You can use thick fabric for curtains, which will also help retain heat inside the building.
For insulation, it is possible to use available materials - foam rubber, soaked paper, window tape, etc. Energy heating of a window or double-glazed window can also be arranged. To do this, a heating cable is placed around the perimeter of the window, and a special conductive film is placed on the glass.
Using heat-saving film Insulating film for windows helps keep the house warm. To create the desired effect, you first need to properly prepare the surface. The tools we need are a hair dryer, scissors, and a knife. The surface is cleaned of dirt, the glass is well rubbed. Double-sided tape is glued around the perimeter of the glass box. The film is separated using a stationery knife, cut to the required size and pasted onto tape. The film is blasted with warm air from a hair dryer. If small swellings form, they will need to be burst with the tip of a knife. This is perhaps the most economical method of insulating plastic windows. In any case, for a high-quality result you need the right integrated approach.
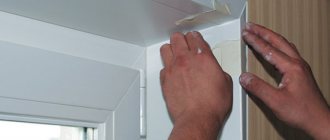
Step-by-step instructions for making plasterboard slopes with your own hands
Let's take a closer look at the process of finishing slopes with plasterboard sheets. Note that there are several ways to attach them inside the window opening:
- over wood or metal sheathing. This method is used in the case of finishing a given wall with plasterboard;
- using polyurethane foam;
- by gluing to glue or putty.
The joint between the window and the slope is glued with a stripping
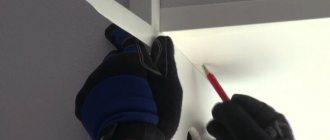
Since the gluing method is the most common, we will describe it step by step:
- preparing the surface for finishing. To do this, we remove all excess foam, cutting it off with a knife. We remove pieces of plaster and various contaminants, after which we take a vacuum cleaner and remove dust from the entire window opening. We treat the entire plane of the slopes with a primer, simultaneously filling cracks and potholes with the help of a plaster composition. Drywall sheets are treated with a moisture-resistant substance. This will make it difficult for moisture to penetrate inside and mold to form there;
- plasterboard sheets are measured strictly according to size and the blanks are cut using a sharp knife. The length and width of the slope are subject to measurements. When cutting, you should take into account the slope angle of the slope plane relative to the plane of the window. The sheet should be cut at the same angle so that the parts are fixed more securely;
Moisture-resistant plasterboard is used to construct slopes
- A plastic starting strip is attached to the window block and window sill using self-tapping screws. The width of its gap should be equal to the thickness of the sheets. Most often it is 1 cm;
- Assembly begins from the upper plane of the opening. The edges of the panel are well coated with glue. The width of the adhesive layer must be at least 2 cm. One edge of the panel is inserted into the guide strip, and the second is pressed forcefully against the slope plane. Do the same with all three panels. At the same time, the side ones are also inserted into the guides, which are screwed to the window sill. All mating parts are treated with sealant;
- the finished surface of the slopes is treated with putty twice or even three times for better quality. After it dries, the entire surface is grouted. The slopes are ready for finishing. They can be painted with any dye or covered with wallpaper.
Using drywall to install non-standard window slopes
Helpful advice! When installing plasterboard slopes with your own hands, metal perforated corners should be installed at the corners. They will ensure their durability and give evenness to the lines.
High-quality design of slopes on plastic windows with your own hands, video options for which you must watch, is crucial not only in the attractiveness of the entire window opening to the eye, but also for effective heat conservation in the apartment.
Using penoplex to insulate walls from the inside
Sometimes it is simply not possible to install a heat-saving structure on the outside of the house. In such a situation, you have to work indoors and many people choose a simple and inexpensive material for such work - penoplex. Insulating walls from the inside with penoplex is not difficult and you can easily do it yourself.
Pros - cons
Any solutions in terms of heat conservation have certain disadvantages or advantages. They are expressed in different costs, complexity of work and availability of materials. In the case of this insulation, there are also both positive and negative aspects. Let's start with the advantages of insulating walls with penoplex from inside the room:
- You can do everything yourself, without resorting to outside help. This will reduce costs and you will also have no doubt about the quality of the work.
- No weather disasters can stop you - the time of year, cold or heat, rain and snow will not have any impact on the progress of work.
- There will be no signs from the outside that a heat-saving structure has been installed. You will not have to obtain permission to change the appearance of the building's facade.
- You will determine the time required for installation yourself - if you wish, you can extend the assembly of the structure for an indefinite period of time and no one will tell you about this.
- Working with this material is very easy and you do not need any special knowledge or tools.
Necessary components and additional elements
For the external decoration of windows and window openings, in addition to the cladding material itself, various additional elements and components for plastic windows are used. Let's consider, using sandwich panels as an example, what may be required during the work process.
For outdoor work, it is most preferable to use white sandwich panels based on polystyrene foam or polystyrene foam
So, when choosing sandwich panels, it is recommended to pay attention to the following characteristics:
- White color;
- thickness – 1 cm;
- insulation – extruded polystyrene foam;
- outer sheet – hard PVC with a thickness of 0.7 mm;
- The inner sheet is rigid polystyrene.
Types of window sandwich panels
The use of plastic slopes allows you to make the window quite functional and at the same time aesthetic. There are a variety of textures and colors for sandwich panels. Models can have a classic white tint, be made to look like wood, as well as matte or glossy. How diverse the choice of models will be depends directly on the manufacturer. Based on the basic requirements, you can use warm slopes with thickness parameters from 10-24 mm. Direct installation is carried out at dawn or at a right angle. The use of platbands involves creating opportunities for convenient subsequent repairs, that is, at any time it will be possible to replace the wallpaper and make window joints invisible.
The choice of the method by which work will be carried out to create functional and warm slopes must be made before installing the main window. If during finishing work plastering will be carried out or plasterboard will be used, then you need to thoroughly prepare for lengthy construction work and the need to purchase auxiliary materials. Companies that install plastic windows very rarely use these methods. Therefore, you will need to look for such masters yourself. When choosing sandwich panels made of plastic material, they are ordered together with the general PVC design. Sandwich panels are installed together with the window.
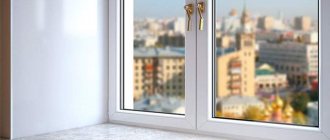
Slopes for windows - coziness and comfort in your home
Slopes for windows allow you to beautifully design the opening and significantly extend the service life of the entire window structure. As an alternative to plaster slopes, modern manufacturers offer universal and practical plastic products. Unlike plaster, plastic options are characterized by a low heat transfer coefficient. This means that the likelihood of condensation and mold growth is minimal, even when there is a significant difference in temperature between indoors and outdoors. Finishing window openings made of plastic has a number of other advantages.
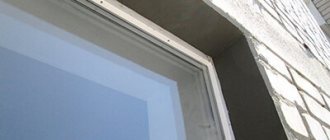
Preparation for finishing slopes
The window slopes are essentially the top and side walls of the opening. Since, when installing a window, we divide the opening into two parts - external and internal, the slopes can be divided into two types, respectively: external and internal. The quarters of the opening act as external ones.
Finishing of external slopes is most often limited to the installation of decorative corners and cosmetic repairs to the surface of the quarters (puttying, painting). Internal slopes require more serious treatment, since they are part of the interior of our home and should look, let’s say, decently, harmoniously combined with the impeccable appearance of a modern plastic window.
External slopes
The technology for installing external and internal slopes is basically the same, so only the finishing of internal slopes will be described below. Regarding external slopes, it should be said that there is no need for preliminary insulation of the walls of the opening (quarters), as is done when installing internal slopes. This simplifies the process somewhat. However, installation of external slopes is less convenient than internal ones, and on the upper floors, as you understand, it is also dangerous because you have to work halfway out of the window. When finishing the quarters with plastic panels, it may be difficult to adjust the lower edge of the side panels to the ebb, which is at an angle. But, if we turn to the topic of installing side corners, then there should be no problems here. And finally, the last thing regarding external slopes: if you plan to install them, you need to make the ebb ears large enough in advance :
to the width of the panel of future slopes, otherwise it (the panel) will unattractively protrude beyond the edges of the ebb.
Internal slopes
So, internal slopes. Based on the materials used, they can be divided into three most common types: plaster
,
plasterboard
and
plastic
.
Plaster ones are far from modern, but the cheapest. Perhaps price is their only advantage. Everything else can be attributed to disadvantages:
- long duration of finishing (several days), accompanied by a large amount of debris and dust;
- the need to then regularly tint the surface of the slopes;
- the plaster constantly cracks where it meets the plastic;
- the slope turns out to be cold and susceptible to freezing and mold.
How to reliably insulate a loggia with penoplex
The loggia has design features that make it easy to turn it into a full-fledged room.
But for this it is necessary to glaze the facade and insulate the floor, ceiling and walls. The choice of materials with thermal insulation properties is quite wide. Among the new proposals on the construction market, it is worth paying attention to penoplex, which has a number of advantages over traditional materials and is perfect for insulating a loggia. Penoplex is a material consisting of closed, air-filled cells, which are obtained by extruding polystyrene. The process takes place at high pressure and temperature, which makes it possible to obtain a homogeneous material with a cellular structure, which has not only high thermal insulation, but also mechanical strength. Freons, which are used for foaming, make penoplex a non-toxic, non-flammable, environmentally friendly substance.
This material is resistant to chemicals such as acids, alcohol, inorganic dyes, oils, alkalis, cement. Its low weight reduces transportation costs and makes installation easier.
With sudden temperature changes in the range from -50 to +75 0 C, penoplex does not lose its properties. But it should be protected from exposure to direct sunlight and the action of organic substances, for example, gasoline, kerosene, oil paints, diesel fuel.
Insulating a loggia with penoplex is convenient primarily because of its small thickness, since this room is small in size and the use of other materials will reduce the usable area. In terms of thermal insulation, a slab with a width of 20 mm corresponds to a 370 mm layer of brick or a 38 mm layer of mineral wool.
An important characteristic of penoplex for insulation is its high moisture resistance:
When immersed in water, the slab absorbs moisture in the amount of 0.4% of its volume in 24 hours.
Advice from experts on how to properly insulate a loggia begins with recommendations for selecting the type of penoplex depending on the following factors:
- the future purpose of the room - it will be a separate room or connected by a common space with the apartment, just a change house; the condition of the floors and the type of material from which they are made; the number of walls facing the street; the possibility of installing additional heating, for example, a “warm floor” system; future type of interior decoration; the need for internal and external insulation.
According to technical characteristics, there are several types of extruded polystyrene foam , produced in slabs with a thickness of 20 mm to 100 mm.
| View | Density, kg/m3 | Water absorption,% | Flammability class | Coef. thermal conductivity, W/m 0 C | Application |
| Roof | 28-33 | 0,4 | G3 | 0,03 | For any type of roof |
| Wall | 25-32 | 0,4 | G3 | 0,03 | Internal and external insulation |
| Foundation | 29-33 | 0,4 | G4 | 0,03 | Possible installation under screed |
| Comfort | 25-35 | 0,4 | G4 | 0,03 | For domestic construction |
| Type 45 | 40-47 | 0,2 | G4 | 0,03 | Men at work |
Stages of work
The technology of insulating a loggia with penoplex involves a preparatory stage. At the same time, work is carried out on glazing, surface preparation (removing dirt, dust, filling cracks and potholes, treating with antifungal impregnations), laying a layer of waterproofing.
At this stage, the method of laying penoplex slabs is determined.
There are four types of laying penoplex:
- fastening with dowel mushrooms;
- non-adhesive base;
- laying between profiles;
- installation under profiles on strip hangers.
For the first and second types of installation, slabs with a chamfer are selected for a tighter connection at the joints. Only glue the material if the partitions are very thin and there is the option of through penetration with a dowel fungus, but the surface must be perfectly flat.
The first two methods of laying insulation are well suited for plaster or putty on walls and ceilings. The loggia is insulated with penoplex foam on the profiles or under them, when the interior decoration will be made of plasterboard, PVC panels, MDF, and wooden lining. It is also recommended not to glue slabs onto , but to lay them in a timber frame.
Do-it-yourself insulation of a loggia with penoplex starts from the ceiling. The first sheet is dotted with glue, lifted and placed in a corner. Holding the stove with one hand, drill holes through the insulation and in the ceiling.
Dowel fungi are inserted into the holes and take root. To fasten one slab, 2 dowels are enough . The next one is laid in the same way, but it is necessary to correctly connect the sheets together using a tongue-and-groove system so that there are no gaps between them.
When laying under drywall, penoplex sheets are cut out in accordance with the size of the gaps between the profiles with a margin of 2-3 mm and placed in niches. But in this case it is impossible to obtain a tight connection between the plates.
To achieve maximum tightness, two methods are used:
- laid before installing the profiles on U-shaped strip hangers. To do this, small cuts are made in the slabs. Hangers are inserted into these cuts (the profile will be attached to them), which bend and hold the insulation;
- installation is carried out in two layers of insulation: the first is laid normally, and the second is staggered so as to cover the joints.
After the ceiling, they move on to insulating the floor. If a screed or “warm floor” is planned in the future, then the slabs are laid using dowel mushrooms, and the joints are sealed with polyurethane foam.
But if you plan to lay flooring, you can install insulating panels between the joists on which the decorative floor will be laid.
All gaps must be filled with foam or sealed with tile adhesive. To insulate floors under laminate or linoleum, “floating” laying technology is used , when the slabs are not specially rigidly attached, but are simply laid tightly together.
The walls are insulated in the same way as the ceiling. For external walls, two layers of penoplex are often laid, but of a smaller thickness. The surfaces of the loggia that are common with the interior rooms can be insulated with thinner slabs or finished only with foil vapor barrier.
For the parapet and external wall, the thickness of the penoplex is selected from 80 mm and the flooring is laid between the slats of the wooden frame. The best thermal insulation is achieved by laying in two layers.
After finishing installing the heat insulator on the loggia, it is important to check the tightness of all joints and, if there are doubts about their reliability, additionally glue them and blow them out with foam. Penoplex may not be specifically insulated from steam loss, but to increase heat transfer, a vapor barrier coated with aluminum foil is laid. Additionally, we recommend watching a video from the Maximus window company: