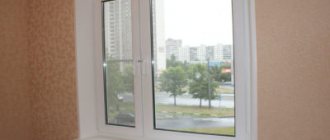
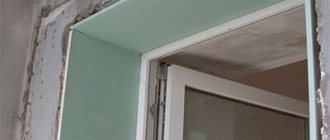
External insulation of PVC window slopes is an important procedure for maintaining heat inside the building.
It can be used to close joints in window openings or improve the appearance of your home.
Let's consider why and when external insulation of PVC windows is needed, in what ways this can be done, and also we will analyze the materials and tools that may be useful during the work process.
When is it necessary?
Most often, insulation of PVC windows may be required when :
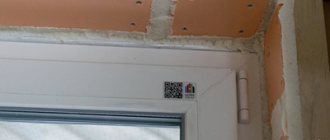
- During installation of the frame, uncovered gaps or unclosed mounting foam formed between it and the opening. If it is not insulated, it will begin to absorb moisture or dry out.
- It is necessary to protect the window frame from external influences at the joints with the opening so that water does not get into them, and also to avoid the formation of blow-out spots or cold bridges. Also, temperature changes at fastening points can lead to their destruction and subsidence of the frame.
- After the window shrinks, empty spaces appear through which the cold will pass.
- It is necessary to shift the dew point so that condensation does not form on the window, which causes dampness, mold or mildew to appear.
- It is necessary to improve the appearance of the window opening from the outside.
It is always recommended to do insulation, as this greatly reduces heat loss, but in some cases this procedure is difficult to carry out or it is not necessary :
- In wooden houses, insulation of slopes is most often carried out using wooden panels that cover the seams, since the use of insulation can negatively affect the window opening.
- If the quarter is made of brick (a special protrusion that covers the top and sides of the opening from moisture), then insulating the slope may be difficult or simply not necessary.
- If the joints are plastered and there is no heat loss, then treating the slopes from the outside can lead to the opposite effect, that is, the room will be too hot, and the dew point will also shift, which will cause mold to appear.
Why do you need to implement it?
Insulation of slopes is one of the important final stages of installing a window structure. If additional protection is not provided, problems will begin to appear during the cold season :
- Cold bridges will appear through which air from the street will begin to flow. It is the slopes that are the main conductors of cold and moisture into the room. It will be difficult to maintain a comfortable temperature in the room, and the cost of heating the room will increase.
Condensation forms and settles on the walls, window sills and glass.
Over time, a fungal infection joins it and mold appears. The fastening elements are destroyed, the window sags.This has a bad effect not only on the performance of the product, but also on people’s health.
- If the window frame does not fit tightly enough to the wall, a seam is formed. It is filled with polyurethane foam. This material is very sensitive to temperature changes and ultraviolet radiation, so without shelter it quickly collapses. It needs to be decorated and insulated.
- Voids are formed due to profile shrinkage, through which moisture and cold penetrate. Warming will help remove these manifestations.
In addition, the insulated slope gives the window a beautiful finished look.
Important! If the insulation of external slopes is carried out correctly, it is not necessary to insulate the internal ones.
Only effective insulation on the side of the cold air intake will help to avoid dew. To do this, the outer element is mounted on a warm profile (about 5 mm) with an “overlap”, then it is decorated with reliable insulating material.
There is also no need for internal insulation of slopes if the walls in the house are well insulated and laid out in several rows. Warm walls make it possible to do without insulation of slopes.
Basic methods
Methods of external insulation most often differ depending on the material chosen, but several basic ones can be distinguished :
Regular plastering .
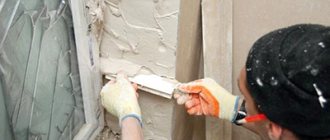
This method is simple and economical, as well as the most common. This method consists of simply covering all joints and adjacent parts of the window opening with a layer of plaster.When using a special “warm” mixture, it can reduce heat loss.
The disadvantage is that due to the lack of additional insulating materials, energy efficiency increases slightly, and in some places cold bridges may form.
- Combination of plaster and insulation .
This method involves insulating the slopes and the adjacent wall with polymer materials, which are attached to heat-insulating adhesive with self-tapping screws. A layer of glue is applied on top of the insulation, and after it dries, additional treatment is carried out with plaster. The disadvantage of this method is that the window needs to be protected from glue, and in high-rise buildings you will have to hire a special team, since such insulation is labor-intensive. Costs also increase significantly compared to simple plaster treatment. - Combination of insulation and sandwich panels. With this method of insulation, special plates are used, which consist of 2 PVC layers, between which a polymer insulation is tightly placed.
Installation of such panels is carried out using self-tapping screws, which speeds up the work compared to the previous method. With this method, an additional layer of insulation, for example, mineral wool, is laid between the sandwich panel and the wall.The disadvantage is that with this method, the part of the wall that is adjacent to the opening is not insulated, which reduces the thermal insulation effect compared to the previous method. The cost of such insulation is higher than that of plaster, but sandwich panels have an attractive appearance, and the fastening points are easy to hide behind special overlays.
Setting the clamping mechanism
Over time, under the influence of mechanical and climatic factors, the sealing gum may lose volume. Because of this, air begins to penetrate into the room. Fortunately, to insulate plastic windows, it is not necessary to change the gasket. It is enough to adjust the clamping mechanism.
Important! If the gasket has completely deteriorated, it will have to be replaced.
To insulate plastic windows by adjusting the mechanism, you need to find protruding cylinders in the slots of the metal plugs. These are called trunnions and fit into hooks on the frame.
To insulate the frame, move the hooks to the desired position. Or adjust the trunnions. To change the position of the hook, you need to loosen the bolts. Moving towards the street increases the pressure, and towards the room decreases it. Here is a detailed video on how to insulate a plastic window yourself by adjusting the clamping mechanism:
Rules and safety precautions
When insulating external slopes, you should adhere to the following rules :
If insulation of windows on the second or higher floor is required, it is recommended to involve specialists in high-rise work, since there is a high probability of doing the insulation incorrectly due to limited mobility.
Also, working at height can cause physical injury or property damage, and in the worst case scenario, you can die if you fall from a window.- When working with insulation based on mineral wool, as well as when drilling walls, you need to wear protective equipment for the eyes, hands and respiratory tract, since the dust suspension can lead to negative effects on the body.
- During work, care should be taken not to damage the window frame, insulating layer or fastenings. You also need to make sure that the insulation layer does not extend beyond the window boundary too much, as this will shift the dew point or cause deformation of the PVC layer.
Technology of installation work when designing external slopes
External slopes made of foam plastic are an equally popular option for finishing windows on the street side. For these purposes, it is better to use polystyrene foam, because its technical characteristics and density are several times higher.
Mixing glue with a drill with a mixer attachment
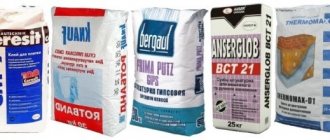
Before you start decorating the slope or platband, you need to select the most suitable glue. Any private and experienced builder will tell you that the best option is Ceresit ST-85. Before work, the glue is thoroughly kneaded until it thickens so that its structure allows it to flow over the spatula.
Now, for maximum adhesion between the surface and the foam sheet, rub the glue into the wall. Then we cover the pre-prepared product with the same glue, choosing a spatula with teeth for the work.
Advice! As a rule, they begin to fix the insulation from below, all the time checking the correct operation of the level. It is very important that the area where the window sill is planned to be installed is carefully treated with glue.
Now you can fix the side panels that are in contact with the window frame. During this work, you should not save the adhesive solution, otherwise voids may form. Even if the glue comes out to the surface somewhere, it can be easily removed with a damp sponge.
Installation of fiberglass mesh
That's all, the slopes are installed. Now, while the glue is drying, it's time to think about the curb appeal. The first step is to treat the surface with glue again and cover it with fiberglass mesh. It is equally important to fix the perforated corners at the corners.
When the surface is completely dry, it can be painted in the desired shade. Plastering external window slopes using foam plastic looks no less attractive. If you decide to plaster the slopes, you can create an imitation of different textures, add fragments of stucco molding and other decorative elements that will harmoniously complement the picture. That's all! As you can see, nothing complicated. Follow the given sequence of work and you will succeed.
How to insulate from the street?
To insulate the slopes of PVC windows, the following is used :
- Styrofoam .
This material has low thermal conductivity, but it must be isolated from the external environment with glue or plaster, since it quickly deteriorates under the influence of moisture and sun. Most often it is produced in the form of slabs 1000x1000x20 mm, which is why it may not be suitable in thickness. The density of this material should be higher than 30-35 kg/m3, since with a lower value the material will quickly be pressed through. - polystyrene and penoplex (extruded analogue) are considered the most effective polymer insulation materials.
They have a low thermal conductivity coefficient, do not absorb moisture and are highly resistant to weather conditions. These materials need to be covered with a protective layer, as they are easily pressed and crumbled. Expanded polystyrene is produced in slabs of various sizes and thicknesses, which allows you to choose the one you need according to your needs, and also has special grooves along the edges, with the help of which it is easier to attach it to each other. - Mineral wool (basalt, fiberglass) .
It is most often used in combination with sandwich panels, as it quickly loses its properties in open space. It is produced in rolls with a thickness of 50-150 mm, which allows you to choose a layer to suit your needs. This material can be used for insulating wooden houses, which is its main advantage. To insulate the window, cotton wool is used, the density of which must be at least 75 kg/m3. - Polyurethane foam (spray foam) .
A liquid sealant with low thermal conductivity that can easily seal any gap. Upon contact with air, it increases 30-40 times. In some cases, slopes are insulated by spraying this material onto the wall, followed by finishing with plaster or sandwich panels, since the material does not tolerate ultraviolet rays.
Sandwich panels .
Used for finishing slopes outside or indoors. Consists of 2 PVC plates and a layer of foam between them. It has good resistance to weather conditions and a low thermal conductivity coefficient.Such panels are produced in different thicknesses, which allows you to select the plate to the desired size.
The disadvantage is that during installation you need to carefully seal all joints and seams with sealant, since if this is not done, moisture and air will get in there. This will cause the insulation layer under the panel to collapse, as well as reduce protection from the cold and create blow-outs.
- Warm plaster has the properties of both foam and putty. Due to its liquid properties, it allows you to seal all cracks and voids, while forming a durable protective layer. The heat-insulating properties are enhanced by adding ceramic and polymer additives, as well as foam balls, to the mixture.
Dismantling
Insulation of window sills begins with removing them from under the window. The operation is carried out using one of two dismantling options.
First method
It is necessary to very carefully remove the layer of plaster located under the slab. When wallpaper is pasted on the surface, remove it after soaking it in water.
Algorithm:
- The material is knocked down to the base of the wall. This gives full access to the structure, and it becomes easy to find cracks and chips.
- Dismantling requires breaking off the plaster near the window sill and slope.
- To complete the process, you need to get rid of the foam remaining from the initial installation of the object.
Afterwards, just pull the window sill slightly towards you and down. Do not use great force when removing - damage to the “sensitive” plastic coating may occur.
Another dismantling method
It is possible to remove the window sill of a plastic window using a fine-toothed hacksaw with a long and stiff blade.
Instructions:
The hacksaw is inserted under the object, then the old foam is cut along the entire length of the window sill. On the sides of the slopes, the sealant is cut, which created reinforced fastening of the structure. Carefully and slowly, the window sill rises upward and then extends towards itself.
To complete the dismantling, you need to clean the base of the window. Any dust collector will remove debris and expose all existing chips and cracks in the space. They are first covered with new insulation.
Tools and consumables
Depending on the type of insulation chosen, the following materials and consumables may be required :
- drill or hammer drill;
- Master OK;
- putty knife;
- chisel;
- hammer;
- self-tapping screws;
- mushroom dowels;
- thermal insulation adhesive;
- silicone sealant;
- construction knife;
- roulette;
- marker;
- building level;
- vapor barrier film;
- sandpaper;
- concrete solution;
- plaster;
- antiseptics;
- individual protection means;
- construction tape;
- fiberglass reinforcing mesh;
- plastic (PVC) corners and plugs.
Heat-saving film
Film for insulating plastic windows can significantly reduce heat loss in the house. However, in order for its application to have the desired effect, it is necessary to properly prepare the surface. In this case, you will need the following tools:
- stationery knife;
- hair dryer;
- scissors;
- scotch.
First, the surface must be cleaned of dust and dirt. Wipe the glass thoroughly (a layer of dirt and dust makes it difficult for sunlight to penetrate inside). To check the quality of cleaning, take the paper and press it across the glass; you should hear a distinct squeak.
The perimeter of the box is covered with double-sided tape. The edges of the film are separated with a stationery knife. Cut it with scissors to the size of the window and stick it on the previously attached tape. Take a hairdryer and blow warm air over the film. Burst the resulting swellings with the tip of a knife. This is the easiest and most inexpensive way to insulate platinum windows.
Step-by-step instruction
Insulation instructions depend on the chosen method and material, but for all options there are mandatory preliminary works :
If insulation is carried out after plastering, then the layer of old putty must be carefully removed.- Clean the entire surface of the window opening from dirt, protruding concrete and debris.
- Large irregularities in the opening should be repaired using a concrete mixture.
- It is recommended to treat the walls with an antiseptic before starting work, since when microorganisms and fungi form, the insulation layer quickly becomes unusable.
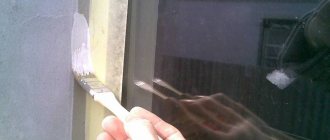
- When using liquid materials, it is recommended to cover the surface of the frame and glass with construction tape so as not to stain or damage the surface of the window during work.
If polystyrene foam or expanded polystyrene is used as insulation, then for its installation it is necessary:
- Cut the slabs into pieces of the desired size;
- Coat the surface of the insulation on one side with heat-insulating glue (a layer of 1-3 cm) and press firmly against the wall. This should be done carefully so as not to push through the polymer board;
- In some cases, in order to more reliably fix the insulation in it after the glue has dried, holes are drilled using a hammer drill, dowels with mushroom-shaped caps are inserted there and the whole thing is fixed with self-tapping screws;
- Next, you need to install corners so that the surface of the opening is more aesthetically pleasing and the insulation is not accidentally damaged;
- After drying, the surface of the plates is coated with another layer of glue, inside which the reinforcing mesh must be embedded with a trowel or spatula;
- When the external glue has dried, it needs to be leveled with sandpaper and then puttied;
- A layer of water-based paint is applied over the plaster to enhance the appearance of the window.
When using sandwich panels, the step-by-step instructions are different:
- To fill the void between the panel and the opening, you can use polyurethane foam or mineral wool.
- In both cases, the insulation must be placed outside the window frame when insulating.
- First you need to install a profile for the sandwich panel on which it will be attached and wooden slats along the outer perimeter.
- Seal the place where the joint between the opening and the frame is located with foil insulation.
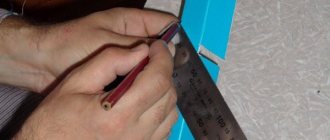
- Next, cut the sandwich panels into plates of the required size.
- After this, fill the gap between the slats and the foil with insulating material.
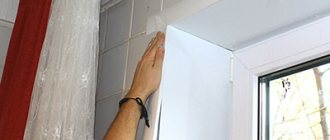
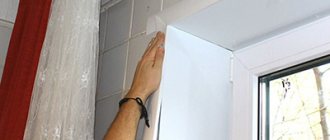
- Install the panels into the required grooves and secure with corner fasteners and self-tapping screws.
- Those places where self-tapping screws are visible in the corner joint can be covered with special overlays.
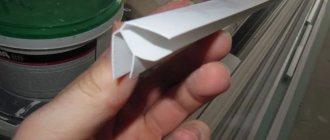
- The corners of the slopes need to be puttied, and PVC corners should be installed on top of the plaster.
Important. When using plaster as insulation, the surface of the opening is treated with an antiseptic, after which a layer of this plaster is applied, leveled, and after drying, treated with finishing materials.
Self-installation of sidewalk curbs
The sidewalk curb is easy to install, which is an undeniable advantage of this type of product. It is enough to follow this order of work:
The territory is marked taking into account the features of the landscape.
According to the markings made, pegs are driven in and the thread is pulled between them. This will be the level of the top of the curb.
Then a trench is formed along the entire length of the marked area. Depth is 1/3
from the top point of the stone, the width is
10 centimeters
greater than the size of the block.
The bottom of the trench is compacted to prevent soil subsidence.
Install the border at the level of the cord. The stones are leveled in height by placing mortar underneath.
The joints are also filled with mortar, the installed borders are left for 24 hours
so that the solution sets.
Then the free space of the trench is filled with soil, which must be thoroughly compacted. At the final stage, the sidewalk is installed.
Difficulties and errors
Some difficulties and errors may arise during operation :
- If polystyrene foam or polystyrene foam is used for insulation, when cutting into pieces, it is recommended to leave a small margin, since those pieces that were cut flush may turn out to be smaller than needed (after which you can simply throw them away).
- When insulating, it is necessary to carry out work in such a way as not to disturb the ventilation in the room, as this will lead to stagnation of air, the formation of dampness, and subsequently the appearance of mold and mildew.
- If you use unsuitable or low-quality insulating material, there is a possibility of not only worsening the microclimate in the room, but also damaging the fastenings of the window frame.
- Sealing joints is important when insulating with any material, since if it is not done, cold bridges or blow-out spots will appear, and in the worst case, the insulation will be exposed to the external environment, which will quickly deteriorate.
Thermal insulation of slopes on doors
The area around the entrance doors also allows heat to escape to the outside, and if you do not create a barrier, cold air will enter the house without restriction. The process of insulating door slopes is not at all different from the same work around the window. Therefore, everything is done according to the same plan:
- Cleaning the surface of excess polyurethane foam or old decorative coating.
- Application of deep penetration primer.
- Plastering if necessary.
- Primer treatment.
- Installation of insulation - fixation with an adhesive solution and several dowels with a wide head.
- Application of primer to improve adhesion.
- Installation of corner elements.
- Fastening the reinforcing mesh with the same glue.
- Plastering insulation.
- Rubbing the dried layer.
- Decorative facing of the slope.
Please note that door slopes bear the same load as window slopes. The insulation selected is hard, but it should not be too thick so as not to take up free space.
If the owner of the house knows at least something about construction, then he can make a thermal insulation layer on all slopes with his own hands. Of course, before starting work, you should familiarize yourself with several sources in order to study all the intricacies.
But a beginner in this field does not need to do everything on his own. There are professionals who will be happy to help in this matter.
Useful tips
Knowledge of some of the subtleties that experts share will allow you to do the insulation of the slopes of plastic windows with your own hands more efficiently. As a result, the windows will not be damaged by the environment and will last a long time.
It is worth considering these recommendations:
- Polystyrene foam tends to expand in heat. When attaching it, it is not recommended to use a large amount of glue. Otherwise, it will quickly crack and lose its thermal insulation capabilities.
- To extend the service life of the insulation, outdoor work should be carried out only in dry times and in warm weather.
- The use of thermal liners will significantly improve heat retention in the room and protect against moisture penetration.
- When installing insulation on slopes, it is recommended to treat all wide cracks and joints with silicone sealant.
