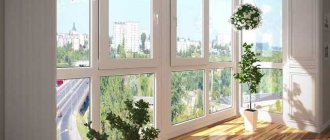
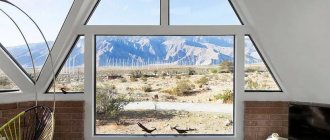
Slopes
Slopes provide windows with an attractive appearance and also prevent dampness and cold from entering the apartment or house. The connection between the frame and the wall of the room always remains the “weakest link”. This problem needs to be resolved as soon as possible.
You need to know which slopes are better.
The selection must be approached responsibly
Important Requirements
The basic requirements look like this:
- Long-term (it should be no less than the service life of the window itself). The optimal service life for modern double-glazed windows is 15-20 years;
- Maintaining the performance of windows (ideally they will improve them);
- Compliance with the general style (they should not stand out from a single ensemble, otherwise the resulting dissonance will be very noticeable).
They should allow you to “play” with colors. External ones can be made in any color. The most important thing is to match the overall style of the house, giving the building originality and brightness. Recommended color for interiors is white. This creates a great illusion that the room is brighter than it seems at first glance.
What is it for?
Carrying out such work is relevant regardless of what project is being implemented. There are internal and external factors that can have a negative impact on windows and their overall service life:
- Mold and mildew, small insects.
- Sudden changes in temperature.
- Sunlight and wind, other types of precipitation.
- High indoor humidity.
- Condensation caused by the temperature difference between the outside and inside.
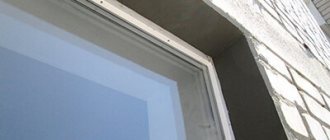
Proper finishing of internal slopes increases the overall service life of the window.
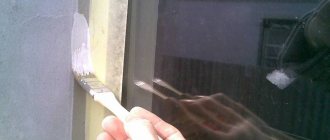
To prevent such problems, finishing of the slopes of plastic windows is necessary. With the right solution to the issue and a competent approach, resistance to environmental influences increases as much as possible.
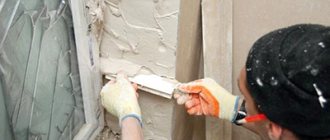
Pros and cons of plaster
The work involves the sequential application of several layers of mortar. First, a layer of plaster is applied, then putty. The last one (putty) must be painted.
Plaster finishing has the following advantages:
- ease of maintenance (when the need arises, you can easily and quickly carry out repair work);
- the ability to use the material in rooms of any type (temperature and humidity indicators can also be any; it does not respond to changes in atmospheric pressure);
- no need for additional processing of joints (this is due to the absence of seams);
- relative cheapness (you can save money by performing repairs yourself);
- strength (mechanical impacts are not scary).
The disadvantages look like this:
- The work takes a very long time and is highly labor intensive (considering that plastering must be done in several layers, each layer must dry thoroughly. Drying time in conditions of high humidity in the room takes up to several hours.
- Peeling from the frame. A strong connection becomes impossible. There are no sealants that have good adhesive properties. As a result, cracks form between the window block and the plaster layer.
- The installation process is very dusty, increasing the risk that the glass will be damaged.
- Plaster does not have good thermal insulation properties. In winter they freeze quickly and condensation appears.
Note! According to experienced builders, plaster has more disadvantages than advantages. Today it is practically not used in new houses.
Main features of plastering finishing
Is it possible to use sandwich structures?
After installing the window structure, it is recommended to design the slopes.
This procedure will avoid freezing of the window, the appearance of condensation and will increase its service life .
Among most finishing methods, installing sandwich panels is considered the most profitable option.
This is due to the technical characteristics of the material, which make it possible to use the products for interior and exterior use . This type of slope design does not require any additional measures to complete the installation. For example, painting, putty or insulation.
Panels are a multilayer board. The outer layers are dense and durable, most often PVC. The middle layer is called the core and consists of a porous material. It is he who acts as a heat and sound insulator.
Important! This option for designing slopes is suitable not only for plastic windows, but also for wooden ones.
Plasterboard
Required layers:
- foam insulation;
- vapor barrier tape (foil);
- mineral wool.
In their manufacture, gypsum plasterboard elements are used. They must be well attached to the profile frame. It is also allowed to glue them to the sides of the opening.
At the next stage, the plasterboard surface is carefully primed. Then it is puttied and painted. The space is insulated using polyurethane foam.
GKL is much more convenient than plaster. There is one drawback: after installation work, there is a need for a clean finish. This takes from 2 to 4 days.
The finishing stage can be avoided. To do this, ordinary gypsum board is replaced with laminated one. This requires closing the sheet ends with special corners.
Pros:
- undemanding when performing repair procedures (if there is a need to repaint, this can be done up to 10 times);
- reasonable prices;
- creating additional protection from the cold (due to layers such as mineral wool and foil tape);
- the ability to create a perfectly flat surface;
- ease of installation work (even a beginner with basic knowledge in construction can perform it).
Main disadvantages:
- fragility (plasterboard quickly bends and is strongly pressed);
- the impossibility of making a strong connection between drywall and PVC frames (for this reason, the joints quickly crack);
- instability to moisture (under the influence of condensation, windows can “cry.” Even a moisture-resistant type begins to deteriorate and lose its properties over time. Areas near the frame swell greatly).
Features of plasterboard finishing
Plasterboard slopes
The same disadvantages apply to plasterboard slopes, which still require good fastening. If you glue thin plastic onto a sheet of drywall, the quality will also not be up to par: this is labor-intensive work with insufficient stability of the drywall and unreliable adhesive connection, which also leads to destruction.
Thin plastic sheets are not suitable for finishing, although this is one of the simplest finishing methods. In this case, the window frames are not insulated, which leads to freezing and condensation, and the method of gluing the plastic leads to peeling due to compression/expansion of the material.
Gypsum fiber
The installation technology is almost similar to the work on plasterboard boards. Gypsum fiber does not have the disadvantages of gypsum plasterboard. It is characterized by high strength, rigidity and moisture resistance.
Important! When installed correctly, they are significantly superior in appearance and performance to other options.
Pros:
- high degree of resistance to any percentage of humidity;
- ease of installation;
- suitability for repair (if one or another element is damaged, it can be quickly tinted or a layer of putty applied);
- there is the possibility of high-quality insulation;
- long-term (lasts up to 10 years);
- has an ideal geometric shape.
If you apply high quality latex paint after installation, you can wash it without fear of spoiling it. They will need to be re-painted after 6-9 years.
Minuses:
- difficulty in cutting;
- undemocratic pricing;
- need for finishing.
Features of gypsum fiber finishing
Drywall
Installation, just like plastic, takes a couple of hours. But unlike plastic, gypsum board has a number of advantages in appearance and in further operation.
Firstly, with proper installation and painting, the slope has a noble appearance without a plastic sheen.
Secondly , its further operation is much simpler.
Even if the slopes have faded in the sun, it is enough to simply repaint them with any water-based paint.
If dents occur, we simply putty on the damaged area and paint again.
Installation of slopes from gypsum plasterboard can be done in several ways:
The first is polyurethane foam. Apply to pre-cut pieces around the perimeter. It is pressed and fixed with supports. It requires some experience from the performer, since it is necessary to apply a slightly larger layer of foam to the edge that will be adjacent to the window.
The second method is gypsum mounting adhesive. It is applied along the entire perimeter in small “heaps” and pressed against the base of the slope. The upper slope must be supported so that it does not fall during the setting of the mixture.
After installing the cardboard and the glue or foam has completely dried, you can begin finishing. Here, the damaged areas are most often puttied, then the surface is painted twice with water-based paint.
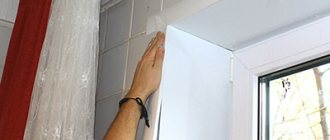
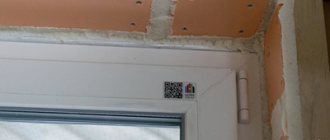
Plastic
The most popular. The main advantage is the ideal combination with the window frame. Fastening with PVC is carried out using sealed types.
Other advantages:
- reliable protection of the junction of the window opening and wallpaper (provided by a frame that covers the outer contour);
- speed and ease of installation (against this background they look more advantageous than plaster and drywall);
- resistance to repair (damaged parts can be replaced an unlimited number of times);
- ease of cladding (small amounts of dust and dirt are generated);
- moisture resistance is 100%;
- providing additional sound and thermal insulation (this is facilitated by the Isover layer).
Flaws:
- Low quality corners and other additional materials. They are made of 2-part plastic that is prone to yellowing. An ugly contrast of yellow corners and luxurious snow-white slopes arises.
- Instability to mechanical trauma.
- Inability to carry out local repairs If a breakdown occurs, it can only be repaired after replacing the entire panel.
One of the most important disadvantages, which often becomes decisive when choosing, is poor compatibility with the interior. If the room is decorated in a classic style, then glossy plastic will look unfavorable, almost caricatured.
They should not be made in other design directions that contain natural options.
Plastic
Basic rules when choosing:
- The quality of the plastic is primary.
- Optimal thickness of the PVC layer (will not deteriorate for a long time).
- Manufacturer – any one that has proven itself in the market.
Matte or glossy? The first option is preferable because they look more natural. The gloss leaves stains and fingerprints, which are perfectly visible to the naked eye in good lighting.
Step-by-step installation guide
Preparatory work
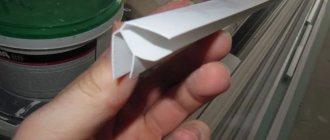
To install slopes from sandwich panels, you need to equip yourself with the necessary set of tools and materials. The following will be useful for work:
- Sandwich panel.
- P-profile, which is the starting profile.
- F-profile is the so-called device cover.
- Plastic in liquid form (preferably).
- Construction tape.
- A sharpened knife.
- Self-tapping screws measuring 2.5 * 7 mm.
- Several screwdrivers with different tips; the drill can be replaced with a screwdriver.
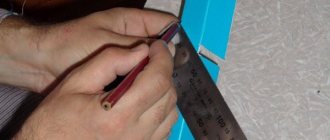
Armed with a tape measure, take measurements of the length and width of the slopes; this is the main guideline that determines the final dimensions of the sandwich panels for the slopes. Taking these values into account, cut out several strips with a knife: one will be located at the top of the window, and the remaining two will be on the sides.
Now let's talk about how to correctly cut the elements of a sandwich device:
- The width of the elements is 10 mm larger than the initial dimensions of the window, this will ensure closer contact with the frame.
- A hole should be cut around the window frame directly in the hardened foam, the depth of which is 100 mm and the width is 1 mm.
- On the edge where the sandwich panel will be located, measure 10 mm and draw a line. Cut the material strictly along the line, but only cover the upper and insulating levels. How to cut a sandwich panel for slopes? You don't need a special tool for this; you can use an ordinary kitchen knife.
- Cut from the end, remove excess layers.
If you plan to finish slopes with sandwich panels in one place, you can try to save money and buy ready-made, cut strips without purchasing a whole panel.
Main part of the work
After preparing the necessary tools and materials, we move on to the main part of the slope installation process. First we install the frame:
- We carefully process the window frame - get rid of excess polyurethane foam, go over the structure with a cloth to clean it of dust and debris.
- We distribute vapor barrier material over the entire area of the slopes. If you want to further insulate the openings, use foam strips.
- Using a brush, aerosol or directly from the tube (depending on the packaging), apply an antiseptic agent to the coating, which in the future will protect the window from mold, fungal growth and other harmful substances.
- Focusing on the inside of the device, following the perimeter, install the sheathing made of wood. The dimensions of the slatted material are 20*40 mm. The lath is secured with dowel nails. Maintain a distance of 40 mm. In the areas of the seams where the side and top battens of the sheathing meet, leave a gap of 10 mm or more - this will be needed for installing PVC elements on the slopes at the top. If the frame cannot be fixed, the sandwich panel cladding is fixed with foam.
The outer strips are overlapped.
Installation of the panels is always done from the top of the window frame, moving to the bottom. Place the protruding element into the formed groove so that the part fits snugly against the window. Fill the free space with a material that will maintain temperature and insulate the window structure from drafts; for this it is better to use isover.
The outer side is secured using self-tapping screws; check the correct position of the top trim using a building level. The finishing of the side slopes is a special edge finishing.
Which one to choose
Should you choose plastic or plasterboard windows? If plastic is used, then the slopes must be appropriate.
Important! Plastic parts were created specifically for PVC windows and are their continuation.
This combination doubles the thermal insulation. This is especially true in regions with harsh winters and strong north winds.
If the windows are wooden, then the choice should be made in favor of plasterboard products. This way you can highlight the beauty of the wooden frame. Gives a cozy classic look.
If the main criteria are practicality, ease of work and thermal insulation, then you need to choose plastic. If the room has non-standard windows or an atypical profile, then the only correct solution is plasterboard.
Which models should you choose - plastic or plaster? When making a decision, you need to pay attention to the following factors:
- plastic is more expensive and visually looks more elegant and beautiful - plaster is cheaper;
- unpretentious and very easy to care for - may crumble over time;
- looks good in offices - apartments and houses;
- easier to clean - “doesn’t like” water and takes a very long time to dry;
- never cracks and always looks very neat - cracks without getting boring.
Main criteria when choosing
Installation and performance properties of sandwich plastic
Plastic slopes are mounted from sandwich panels insulated with foam plastic. The texture of the material and plastic windows is very similar; the entire structure is visually perceived as a single system. Plastic slopes are easy to maintain, retain heat well, and do not require periodic updating of surface decor.
The positive properties of the material cannot compensate for its low vapor permeability, flammability, and difficulty of self-installation.
- In practice, this means that temperature changes under the plastic cladding create conditions for the formation of condensation moisture.
- When plastic and foam insulation burn, a large amount of choking smoke is generated.
- Working with plastic requires professional skills, so paying for invited specialists will require additional expenses. It is also difficult to install plastic slopes with a depth of more than 500 mm.