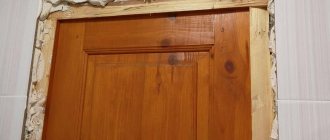
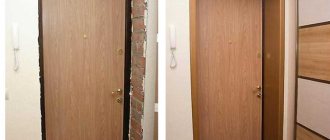
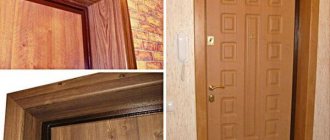
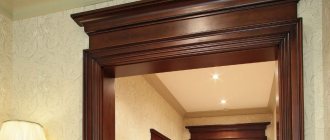
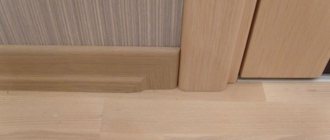
The platbands on any doors have a common important purpose - closing the mounting seams between the wall and the door frame. This design has no other purpose. Without trims, the door functions the same as with them. However, thanks to the platbands, a pleasant appearance of the structure and the room as a whole is ensured. When choosing platbands, you should take into account that not all walls are the same in thickness and you often have to come up with a way out of the situation when the walls are wider than the frame. One solution to the problem is to build up a narrow frame, but such actions significantly spoil the overall appearance. The best way out of the situation is telescopic door frames.
Kinds
To correctly install platbands on interior doors, you first need to select the appropriate elements. First of all, pay attention to the material of manufacture:
- Products made from natural wood are considered universal. The strips can be painted to match the color of the doors. The wooden elements are fastened with nails without heads. If the walls are well aligned with the door frame, the platbands are placed on an adhesive composition - “liquid nails”.
- Laminated MDF planks resemble natural wood in appearance. Decorative elements are matched to the color of the door. The platbands are secured with adhesive or nails without heads, having previously drilled blind holes.
- PVC cashing is more suitable for plastic doors. The planks are glued or mounted on the mounting profile.
- There are also aluminum and steel cash registers, but they are usually installed on entrance doors.
Most planks are given a standard flat, rounded or curly shape .
Depending on the mounting method, cash can be overhead or telescopic. The first type of elements is fixed directly to the door frame. The second one is equipped with mounting grooves.
Cashing options: what types of cash are there?
Platbands are decorative strips. They are installed around the doorway. Close the installation gap between the wall and the door frame. It depends on them what the door in the passage will look like. They give the structure a complete look. The set consists of side trim and top trim.
Before attaching platbands to interior doors and entrance doors, you need to understand what types of such products there are. This will help you choose the right version of the plank and install it correctly.
Manufacturers produce products in a wide variety. According to the material of manufacture and features of the strips for interior doors, there are:
- wooden;
- from MDF;
- plastic;
- gypsum;
- ceramic;
- telescopic;
- metal.
According to their shape, the planks are divided into flat, semicircular, teardrop-shaped, with decorative stucco molding, and figured. These features of cashing must be taken into account before attaching cashing to interior doors.
Wooden
Wooden trims are the most common for door blocks. They are characterized by attractiveness, environmental friendliness, durability and reliability. Pine is usually used to make them. In rooms with temperature changes, it is better to use oak or maple options. Decorative planks made of wood are suitable for structures made in different styles. They complement the look of the door. Available in standard and atypical designs. There are smooth, embossed, carved and semicircular products.
MDF
MDF planks are a cheaper analogue of wooden planks. They look like they are made of wood. In terms of performance characteristics, they are no worse than wooden planks, and in some respects even better than them. For example, products made from MDF are not subject to rotting. This has a beneficial effect on their service life. One of the disadvantages of such products is their low resistance to water. MDF planks absorb moisture and swell because of this. Therefore, they should not be chosen for door leaves that are installed in rooms with high humidity levels. MDF planks are mostly produced in flat form. Some products may have slight roundings.
Plastic
Plastic products can be called one of the most practical. They do not fade in the sun and are resistant to high humidity. They do not deform over time. These planks are very easy to maintain: clean with a cloth, water and soap. Plastic products withstand temperature fluctuations well. They are often chosen for finishing doorways in bathrooms and kitchens. Plastic slats are available in different colors and textures. There are options that accurately imitate wood. Plastic trims are inexpensive.
Plaster
Gypsum products are used in rooms whose design is dominated by wall and ceiling stucco. They have an attractive appearance. They are usually made to order seamless. Plaster strips can be painted in the desired color. But they are difficult to attach. Therefore, the installation of plaster door frames should only be trusted to a specialist. Not everyone knows how to install cash on interior doors correctly with their own hands and make serious mistakes. This leads to damage to the planks and inaccurate fastening. Among the disadvantages of gypsum products, it is worth highlighting the low resistance to mechanical damage and the complexity of restoration.
Ceramic
Ceramic planks look beautiful. But they are not particularly popular. This is due to the limited scope of their application. Such products are usually used to decorate doorways in rooms lined with artificial stone. They also look good in bathrooms. They are used to trim the doorway from the inside. They allow you to create an interesting composition.
Telescopic
Telescopic platbands are products with a protrusion with a locking connection. They are firmly fixed in the shared grooves of the end surface of the box. Telescopic trims must be fastened correctly. Then they will be practically invisible, and the door will take on a complete look.
Made of metal
Metal strips are usually used for finishing entrance doors. They are installed on the outside of the opening. Sometimes such planks are used for finishing interior doors and passages. They are perfect for interiors designed in loft, minimalism, and hi-tech styles. Metal products are usually made from aluminum or stainless steel. They are resistant to water and mechanical damage. Durable and fireproof.
Tools for work
To ensure that the installation of door trims is successful, the tools must be prepared in advance.
- To make accurate markings you will need a pencil, tape measure, plumb line, square and level .
- A miter box will help you cut the workpiece perfectly evenly at an angle of 45 degrees .
- It is better to cut the planks with a miter saw . If you don't have one, you can use a hacksaw . The fine teeth of the blade will not leave chips on the product.
- A hammer is used to drive nails or tap cash elements .
What are the differences between a simple and telescopic door frame?
Contrary to all misconceptions, the designs have a number of significant differences. They are as follows:
- In order to ensure perfect sliding of the trim and extensions, the telescopic box is equipped with a special mechanism. Thanks to this feature, the system can be installed on any surface, regardless of its defects.
- An ordinary door frame does not have this feature, so it is attached to the joint, and the platband is installed on it. At the same time, the structure will last a long time only if the mounting surface is perfectly flat;
- Silent operation of the Euroblock is ensured thanks to the seal. The usual design systematically produces extraneous sounds;
Don't miss: How to choose an industrial food mixer
- The telescopic box can be adjusted to any size without requiring additional equipment. In the case of a regular box, the procedure will require additional additions;
- When installing a door, the first thing you need to do is install the frame, then the additions, and the final stage is installing the trim. The telescopic design has a slightly different assembly process algorithm.
Reference! The telescopic box is also called Euroblock.
How to cut off the platband?
After marking the angle of the cut and the length of the workpiece, the trim is cut with a miter saw. A special feature of the power tool is the adjustable table, which is installed at the desired angle. In order to saw off the door frames correctly and without chipping, the side edges of the workpiece are pressed tightly against the stops on the frame. If a gap occurs, the cut will be uneven.
If you don’t have a power saw, a miter box will help you cut the edge of the casing at 45 degrees. It is better to buy a quality tool. The cheap one made of plastic has deformed thrust elements that distort the size of the angle. A hacksaw for cutting is used with fine teeth that do not leave chips.
How to cut material
Upon completion of marking and checking the obtained measurements, the master can begin trimming the parts before installing them. This action is carried out in accordance with the following steps:
- First you need to prepare a flat surface - a large table or workbench is suitable for this purpose. If there is no such surface, the procedure can be performed on a flat floor.
- Trimming is easiest done with an electric trimming machine with an adjustable bed. If it is not possible to rent or purchase a machine, you should use a miter box and a fine-tooth hacksaw.
- The bar is placed in the miter box so that the extreme marking point coincides with the slot in the tool template.
- The master holds the saw in a horizontal position, having previously installed it in the slots of the template.
- The cut is made at an angle of 90 or 45 degrees. On the seating plane, the miter box has a small recess where the saw blade is placed when cutting the element is completed.
- A similar procedure is performed with all marked parts.
Rice. 5. Trimming frame parts
After finishing the cutting work, it is necessary to assemble a template for the future frame on the floor, see how accurately the elements join, and check all the dimensions. Having made sure that the cutting is accurate, the master can begin installing the “cash out”.
How to attach platbands to interior doors?
Simple fastening of flat platbands is performed at an angle of 90 degrees. The vertical planks fit tightly at the top with the horizontal one. When installing wooden or MDF elements of complex shapes, the ends are cut at an angle of 45 degrees. There are 4 methods of fixing the planks.
Using finishing nails
Wooden or MDF door casing is easier to nail with nails with flat heads. The fastening is reliable, and if necessary, the planks can be easily dismantled. You can use nails of a different configuration, and so that the heads are not visible, they are removed with side cutters. The length of finishing nails for platbands is about 40 mm. The size can be calculated individually, taking into account the thickness of the cash. Having passed through the bar, the nail must enter at least 20 mm into the body of the door frame.
Attachment points are marked on the workpieces, maintaining the same distance. Typically, a pitch of 500 mm is maintained. Using the markings, drill through holes with a diameter corresponding to the thickness of the nail. After joining to the door frame, the platbands are carefully nailed. For aesthetics, hats are painted over with a wax pencil.
Liquid nails
To attach cash to interior doors without nails, use an adhesive - liquid nails. The advantage of this method is that there is no visible fixation site. The downside is the weak fastening, as well as inconvenience during dismantling. In addition, liquid nails are only applicable if the adjacent walls are perfectly level.
The door frames are installed after sawing and fitting of the blanks. The plank is lubricated on the back side with adhesive and pressed tightly against the wall. To glue platbands for interior doors, it is enough to hold each strip pressed for no more than a minute.
Fastening with self-tapping screws
The method is similar to fastening with finishing nails, only instead of them, wood screws 25 mm long and 6 mm thick are used. Places for holes are marked on the workpiece in increments of 500 mm. A drill of the same diameter or with a margin of 1 mm is used.
It is advisable to recess the hats into the body of the plank. On the front side of the workpiece, the hole is expanded with a drill of a larger diameter to a depth of 1–1.5 mm. Now all that remains is to attach the trim to the interior doors with self-tapping screws. You need to tighten the hardware so that the head fits into the recess. The place of fixation is painted over with a wax pencil.
Attachment by beaks
The method does not require the use of screws, nails or adhesive. The cash box is equipped with a beak-shaped lock. The connecting pin is inserted into the recess on the box and pressed until it clicks.
The advantage of this method is ease of installation and invisibility of the mounting location. A negative point is the delamination of MDF trims during dismantling. Over time, spontaneous destruction of the joints may occur, which requires additional treatment of the joints with glue.
Telescopic box assembly process
In order to install the telescopic box you do not need to make any special efforts. Step-by-step algorithm of actions regarding the assembly process:
Reference! The additional strip and telescopic box are assembled separately from each other, and then connected.
- first of all, the box itself is mounted in the opening;
- the canvas is hung on the frame. At the same stage, the presence of gaps is checked;
- the door is being installed;
- They are connected using inflatable foam.
Reference! After the foam has completely dried, its excess must be cut off with a stationery knife.
How to install platbands on interior doors?
When installing interior doors with your own hands, glue, nails or self-tapping screws are used to fasten trim made of wood or MDF. However, the evenness of the walls and the shape of the planks are taken into account. There should be no gaps at the joints. If the walls adjacent to the end of the door frame are uneven, then it is better to refuse gluing.
Installation of cashing begins from the side where the interior door opens. This is due to the presence of hinges that prevent the strip from being fixed flush with the box element. You will need to make the same indentation, and on all three sides for symmetry. Where there are no loops, there is no need for mandatory indentation.
If the door is in a corner, installation is carried out using the letter G. If desired, you can saw the element vertically and use a narrow strip.
The platband on one side is installed when the slopes on the other are decorated with tiles or other wall materials.
Docking at an angle of 45
When it is necessary to install trim on the door at an angle of 45 degrees, use a miter box for marking. This joining of elements is usually used for shaped and rounded planks. If there is no miter box, the markings can be made with a protractor.
The installation procedure consists of the following steps:
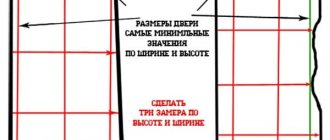
- The height of the vertical elements is measured from the floor. The planks from below are placed on the floor covering, which is why the joints of the baseboards and door frames are on the side. When installing cash on the door from the hinge side, take into account the width of the indentation. The indicators are measured on the workpiece and a mark is placed. This will be the bottom point of the 45 degree angle.
- Having inserted a bar into the miter box, mark a cutting line at an angle from the set point. The excess part is sawed off.
- First, the blanks are baited in two places so that they can bend from above. The heads of the nails are removed with pliers and hammered into the door frame: one just above the floor, the other at a distance of 1 m.
- The length of nails without heads should not be greater than the thickness of the strips. It is optimal to make the protrusion of the pins 5 mm. The platbands are attached to the door frame. At the location of the nail, a wooden beam wrapped in fabric is applied to the workpiece, and vertical strips are placed on the pins with light blows of a hammer.
- To properly make platbands for the entire door, the corner must be given an even shape. The upper unfixed parts of the cash are folded back, and a horizontal element is placed under them. At both ends of the workpiece, mark lines at an angle of 45 degrees with a pencil, after which the excess part is cut off.
Docking at an angle of 90
The platbands are fastened at 90 degrees with horizontal or vertical seams. The choice depends on the preference of the owner. When installing a door cashing with your own hands at a right angle, only flat-shaped blanks are used. The cut areas are treated with varnish or acrylic-based paint.
To install platbands on interior doors with imitation lintels, the upper element is extended. The joining is obtained at an angle of 90 degrees with horizontal seams. The top bar extends beyond the vertical.
Telescopic trims
Telescopic trims are attached to interior doors without nails. Decorative elements are equipped with a special lock consisting of a slot and groove. Fixation occurs at the end of the box. The main requirement for proper installation of platbands is the presence of a protrusion. It forms when the door frame is narrower than the thickness of the interior partition. The adjacent walls must be level, otherwise you will get an unsightly gap.
Installation instructions for plastic trims
Glue is used very rarely, the connection is unreliable. Basically, plastic trims are installed on interior doors using a profile. This installation method consists of the following steps:
- A special profile is cut to fit the dimensions of the door frame. The blanks can be made 5 mm shorter. This will not play a significant role; they will still hide under the cash.
- 4 long and 2 short elements are cut off on two sides of the interior door. The connecting ends are sawed off at an angle of 45°.
- Fix the mounting profile with self-tapping screws to the door frame. This option will not work with cheap Chinese doors. The box is made of thin metal; it is impossible to tighten the screws firmly. In this case, the mounting profile is fixed to the wall, but it must be strong, preferably without plaster.
- They begin to screw the profile with self-tapping screws from the middle, moving in both ends. Using a plumb line or level, correct any distortions.
- After installing the mounting profile, measure the height of the side cashing elements and saw off the ends at an angle of 45 degrees. The process is identical as for planks made of wood or MDF. The workpieces are inserted into the groove of the vertical mounting profiles, where they can move.
- Connectors - corner fittings - are placed in the cut of the platbands. The top bar is measured and sawed off at both ends at an angle of 45 degrees. The workpiece is joined with connectors to vertical trims, snapping into the mounting profile. Corner fittings completely hide the joint, even if there is a gap.
If the plastic cash is placed on a wall lined with clapboard, then a wooden strip is fixed around the perimeter of the doorway, and the profile is already attached to it.
Installation is possible using special nipples and screws.
Fastening the box
Installation begins with attaching the strip with canopies. It must be leveled in two planes and in alignment with the wall. When the wall is blocked and installed with telescopic platbands, the box is installed at the deepest point. You can even recess it a little more so that the taper doesn’t catch your eye. Other elements of the box are displayed with the canvas hung. If there is the correct rebate and gaps, the planks are in place.
To fix the box, a choice of hidden fasteners, direct hangers, screws or dowels screwed through the material are used. The latter are hidden behind a removable porch. If the narthex and frame are made as a single piece, for hidden installation they are placed behind the awnings and the latch striker plate. This option for arranging hardware is suitable if the opening material is not prone to cracking or there are embedded parts in suitable places.
In the installation position, the box is wedged, the gap around the perimeter is wetted and filled with polyurethane foam. The extrusion of the slats into the opening can be prevented by closing the door. To prevent the canvas from being pinched by the box, tile crosses, cardboard, matches, and the like are placed in the gap between them.
Elimination of defects
An unpleasant moment is the visibility of the nail head or screw. They are slightly recessed into the body of the cash, and sealed on top with sealant of the desired color. You can use a wax corrector.
On uneven walls, due to the curvature of wooden planks, joints diverge. During installation, the joining elements are additionally connected with a finishing nail.
Wide strips from 100 to 120 mm help to hide large defects around the door frame.
What is a telescopic box?
This device consists of several strips connected into a single whole.
Reference! That’s why the box is called “telescopic”; this definition applies to objects consisting of several parts.
The peculiarity of this design is that the main components of the box do not move, they are fastened into a single figure, allowing you to create a dense mechanism. It is because of this design that all parts can be easily adjusted, and in the end the user gets a perfect isosceles rectangle.
Telescopic boxes are usually divided into two main classes:
- when the design is a single mechanism;
- when the mechanism is represented by two connecting elements.
These are the basic definitions that can be said in relation to the telescopic box.
How to join the plinth with the platband?
There is no need to cut the door trim; it should reach the floor. Otherwise it won't look very nice.
The plinth itself is adjusted, the method depends on the material.
- The plastic ones have decorative plugs, with the help of which you can neatly and beautifully join the end of the plinth and the door casing.
- A cut is made on the wooden one at 45 degrees to align the adjacent side of the plinth with the thickness of the door casing.
Key features of telescopic platbands
The concept of “telescopic” for this type of platbands is quite arbitrary, since the platband cannot be moved forward and backward. The design can be transformed using an adjustable corner. The extension process occurs by moving the corner shelf into a special groove located in the end part of the box. During such movements of parts, the platband can be expanded or narrowed. At its core, this device is a combined type platband with the presence of an additional strip.
Dismantling
Removal of platbands is usually required when cash is replaced. There is no need to worry about their safety, but the work is done carefully. Taking an ax with a sharp blade and a hammer in their hands, they begin to dismantle:
- To remove the trim carefully, the interior door is placed in an open position. Positioned in the doorway, the tip of the ax is inserted in the upper corner between the bar and the frame.
- The hammer is used to hit the butt of the ax until the blade plunges under the cash.
- By pressing the handle on the ax, the bar is separated from the box. The further procedure consists of similar actions. They use an ax in a circle until the dismantling of the platbands is completed completely.
The procedure must be carried out carefully so that no dents are left on the door frame. Instead of an axe, homemade sharpened strips of durable metal or other similar devices are suitable.
Fastening planks with adhesive compounds
This method of fixing the frame of doorways greatly depends on the quality of the adhesive composition. Fastening with “liquid nails” has both advantages and disadvantages.
pros
- The advantage of this method is aesthetics, because after installation the fastening remains invisible.
- Can be used for elements made of any material - wood, MDF, plastic or metal.
Minuses
- If the wall surface where the elements are installed is uneven, fastening with “liquid nails” should not be done, since a loose connection can cause a loss of adhesion and the platband will fall off.
- If it is necessary to dismantle the frame, the planks installed with glue may break.
Rice. 7. Glue installation
To install platbands, you need to apply a layer of adhesive compound to the back side of the plank using a mounting gun, and then simply press it against the wall. The setting time of the glue depends on its composition and manufacturer and is usually indicated on the label.
What if there is a difference in installing platbands made of different materials?
Experienced craftsmen prefer door products made of laminated and veneered MDF or PVC. They are practically not exposed to external influences, serve for a long time and are highly reliable. At the same time, depending on the material of manufacture, the installation of door frames will vary. Wooden structures can be installed with liquid nails or mounted using thin nails without heads.
If nails with heads are used for installation, then the fasteners must be recessed a little, and their locations must be sealed with acrylic sealants to match.
Liquid nails for fastening are used only if the walls are level. Otherwise, gaps will appear. Plastic panels are usually attached using adhesive. It is advisable to glue flexible door moldings to walls with minor irregularities. As for MDF products, which are practically indistinguishable from wood in appearance, they are more difficult to install. Holes for nails are drilled in them in advance to avoid damage. Moreover, the holes are not made through, but with a diameter of approximately 1 mm.
Installation of platbands at 45 degrees - principle
This joining with cutting the ends is the simplest and most common. It involves trimming the joints of individual parts of the door set at an angle of 45 degrees. This way you can install platbands of any configuration. Finishing doorways with platband allows you to completely hide the places where cuts are made, as a result of which the design looks beautiful and harmonious.
Installing door trims at an angle of 45
Installing platbands at 90 degrees - principle
This cut is used in cases where the shape of the door cashing is flat and looks like a rectangle when cut. In this case, the location of the joining seams does not matter. The connection of the planks is made at right angles to each other, and the upper casing should be inserted between the two side ones. Thanks to this manipulation, it is much easier to trim and adjust the joints.
Installation of the structure at right angles
Installation of telescopic casing - principle
In cases where the walls are uneven, telescopic platbands will be the best solution. Such strips have a protrusion located perpendicular to the front surface. It fits snugly into the groove of the door frame or door frame. Finishing with a telescopic element consists of installing a workpiece of the required length into the groove.
Design option with telescopic panels.
Tools required for self-installation of platbands
Before you start putting cash on wooden interior doors, you need to prepare the following tools:
- A simple pencil, a square, a tape measure, a building level and a plumb line will be needed to apply markings;
- A miter box is a special tool for performing even cuts of workpieces at an angle of 45º;
- Miter saw - for cutting wooden planks. If you don’t have one at home, you can use a hacksaw. The blade should have fine teeth so that chips do not form on the cut end of the material;
- A standard hammer for driving nails and a rubber hammer for tapping trims.
Methods for cutting platbands
The appearance of the cash depends on how carefully the craftsman cuts the components of the structure. You can cut using several methods using:
- electric miter saw;
- miter boxes, hacksaws.
To ensure the cut is as smooth as possible, without chips or roughness, experts recommend using a professional electric saw. In this case, the device must be in good working order. If the saw blade is crooked, dull, or there is even a slight runout of the bearing, the result will be far from the desired one.
Using a professional saw you can get a perfectly even cut
However, you need to know that even high-tech equipment from well-known brands allows for small errors. There are certain tolerances for them: the cut angle is 0.3-0.7 degrees, the joint inaccuracy is from 0.1 to 0.5 mm.
Those who refuse to buy an electric saw can use a factory miter box. It is a tray made of metal, plastic or wood. With this tool, products are cut at different angles: 90, 45, 30 degrees.
Home craftsmen most often use a miter box
For overlay strips made of different materials, select the appropriate hacksaw. Metal and plastic frames are cut with a hacksaw for metal, wooden frames with a hacksaw for wood. The quality of the job done depends on the right tool.
Fastening the planks to mounting studs
A similar method of fixing platbands was invented relatively recently. Mounting spikes in professional jargon are called “beaks” and their use has the following features:
- A metal fastening element is fixed to the back side of the element using small self-tapping screws that do not cut right through the body of the bar.
- The extension or box, in turn, has grooves for installation.
- The craftsman carefully presses the part with the “beaks” against these indentations until a characteristic click is heard.
Rice. 9. Fixation with “beaks”
With such a connection, dismantling while maintaining the integrity of the elements is practically impossible, since the wedge of the fastener always breaks the groove in which it is fixed.
The role of platbands in the interior
If previously the gaps formed between the frame and the wall were plastered, then painted or covered with wallpaper, today all this is hidden much easier and faster using platbands.
They are installed around the perimeter of the interior door and are strips that give the opening a stylish appearance. You can install platbands on interior doors yourself, but the quality of the installation will depend on the type of door itself, so this matter must be approached with full responsibility. If everything was done beautifully and smoothly, then the platbands will allow:
- Visually make the box smoother, especially if mistakes were made during its installation;
- Beautifully hide all the gaps formed during the installation of the structure;
- Complement the style of the room;
- Hide wires or cables.
Arrangement of telescopic frame elements
The simplest and most technologically advanced way to frame a doorway is to use a telescopic “cashing”. Each plank has a special ridge of a complex profile, and the end of the extension has a groove of the same shape.
To install the platband, its ridge is aligned with the groove and snaps into place mechanically according to the principle of the designer. As a rule, such elements come from the factory complete with interior door parts.
Rice. 10. Arrangement of telescopic platbands
Material of manufacture
The telescopic frame of the interior door is made of solid wood, glued sawdust (MDF) or metal. The bulk of components are sold by linear meters. Therefore, it is recommended to purchase both the box and the canvas in the same place or from the same manufacturer.
There are two options for choosing a color:
- Classical. The block and the canvas are made in the same tone and texture;
- Contrasting. The euroframe and the door are painted in contrasting shades, for example, a light door in a dark frame.
The latter option is increasingly found in the latest issues of interior magazines; it looks quite stylish and fresh.
Installation instructions for wooden trims
You can finish the door not only with the help of a master, but also with your own hands. To avoid mistakes, strictly follow the algorithm.
Stage 1. Preparatory work.
Using a construction knife, clean the surface of the doorway from protruding polyurethane foam. Then walk with an even strip along its entire perimeter, look at the position of the wall and the box. Existing problems will be resolved during installation of the frame.
Step 2: Mark the location of the trim strips.
Overlay strips are installed in such a way that the rounded corners of the door frame remain visible.
Platband installation
And the straight lines from the side of the extension should coincide with the corners of the decorative element.
Pay special attention to ensure that the platbands do not interfere with the operation of the hinges and the door lock screwdriver. Attach the strips and use a pencil to make marks above the box above the joint angle at a distance of approximately 3 mm. The marked places show the height of the vertical and width of the horizontal decorative elements at the lower connecting corners.
Sometimes during installation, the extensions receive numerous damages. To hide them, experts advise placing marks on the door elements two millimeters below the corner. If there are no defects, then install the planks flush with them.
Stage 3. Attach vertical strips to the marks and place marks on them at the desired height.
Markings for installation of platbands
After measuring the platbands, number them and put the numbers on the wall in the appropriate place. This will prevent them from being mixed up during the work process.
Step 4. Trim the vertical parts of the structure at a 45˚ angle.
The cut should be smooth, without chips. When cutting, consider the width of the cut, as in some tools it can be up to 3 mm. Therefore, make an appropriate indent from the label.
Vertical planks are trimmed taking into account the width of the cut
Step 5. Attach the vertical and then horizontal elements.
The vertical strips are fixed first, and then the horizontal ones.