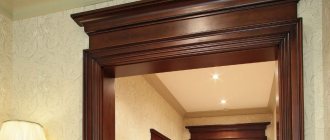
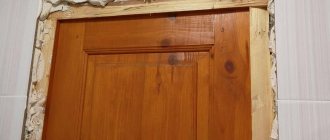
As a rule, the frame of an interior door ideally matches the thickness of the internal partition. But even the most massive external door structure will not completely cover the thickness of the outer wall. There are gaps left that spoil the appearance. After all, from this side you can see lonely trims on the wall, which without contact with the door frame will look very ridiculous. In such a situation, the problem will be solved by additions to the entrance doors. They will visually increase the depth of the hole.
Methods for finishing slopes
You can trim slopes in different ways:
- Cement and carefully putty;
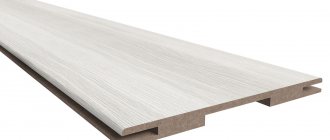
- Install slopes from a sandwich panel. This is an inexpensive type of finishing. But sandwich panels are fragile and short-lived.
- Install MDF slopes. This is a more expensive and at the same time reliable method of finishing. MDF slopes are more durable. In addition, they can be matched to the color of the door. Torex produces slopes that fully match the selected door model in color and texture.
You can perform any of these options either independently or with the help of professionals. You can order the installation of MDF slopes from a certified Torex team. In this case, we guarantee high quality of work performed. Since installing MDF slopes is the most complex and time-consuming, you need to know a number of nuances. If you decide to do this yourself, use our instructions.
What will be needed to install slopes?
To install MDF slopes you will need the following tools:
Photo 1. Set of tools for installing slopes
- 1 – miter saw;
- 2 – roulette;
- 3 – pencil;
- 4 – angle;
- 5 – knife;
- 6 – hammer;
- 7 – masking tape;
- 8 – fastening elements;
- 9 – screwdriver;
- 10 – polyurethane foam;
- 11 – drill.
Preparation for installation
Preparation of the opening depends on its condition. If the slopes are plastered and the plaster is in good condition, the preparatory stage consists of removing dust and dirt and treating with an antiseptic primer. If the plaster is cracked in places, it is worth repairing cracks and chips and leveling the surface.
Tools and materials
To install you will need the following:
- additions, pieces of MDF, long-length chipboard scraps, plastic;
- saw or jigsaw;
- plane, hammer, knife;
- level, tape measure and pencil;
- fasteners - galvanized self-tapping screws, usually nails and glue - “liquid nails” are better;
- polyurethane foam.
Installation of elements does not pose a danger to others and the performer himself. However, it is recommended to wear gloves and an apron to protect your clothing and skin.
Stage 1. Control measurement of the opening after door installation
We make accurate measurements of the actual dimensions after installing the door - even if we know the exact factory dimensions. It is necessary to measure the width, height of the vertical and length of the horizontal extension.
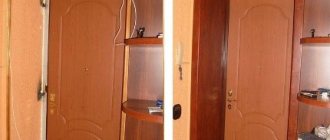
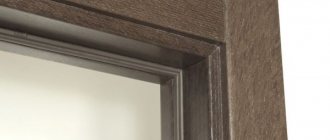
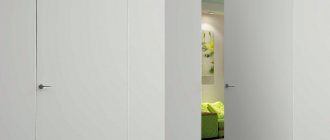
Door trims are decorative strips that cover the walls of a doorway. They are installed if the opening is wider than the door frame. Most often, MDF panels are used for this.
Photo 2. Measuring the width of the extension
It is necessary to measure at three points vertically on each side and at two points horizontally (from above).
Photo 3. Measuring the length of the horizontal extension
The additional element must necessarily be adjacent to the door frame, so we measure the length along the width of the door.
Types of products
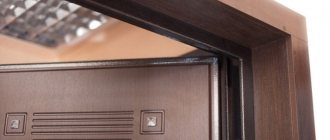
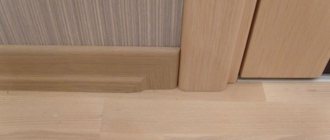
Door extensions are additional strips that cover the wall in the opening, “adding up” its thickness, which is lacking in the width of the frame.
Reducing the doorway
The main types of additional payments are presented in the table:
| Type of addition | Peculiarities |
| Plain without edge | This is a strip of laminate or MDF that does not have a facing edge. In this case, the installation of doors with extensions by yourself must be done with special care. A deviation of even two millimeters will reveal the gray raw edge of the part. |
| Simple with edge | The end of the part is pre-closed with an edging tape matched to its tone, which will make minor flaws invisible. The price of the edge is very small, it is glued quickly using a regular iron. This method protects MDF boards from swelling under the influence of moisture, which is especially important for door blocks installed in bathrooms and kitchens. |
| Telescopic | This is the most complex construction of the extension. Its peculiarity is the presence of special grooves that allow installation without the use of screws and nails. In this case, the extension fits perfectly with the door frame and trim. The width of the element is adjusted by the depth of the groove. |
| Combined | The peculiarity of the combined design is the addition + platband. In appearance, the product is a decorative corner with deep grooves. Doors with extensions of this type are installed only when facing a small amount, up to 45 mm. |
The advantages of installing extensions are:
- High speed of finishing process of doorway.
- The room can quickly be given an aesthetically complete look.
- The absence of exposure to moisture on wood and MDF protects the structure from deformation and peeling of the outer layer of the finishing coating.
- The planks hide the joints between the wall and the frame.
- When the sash moves, vibration on the frame leads to cracks in the plaster or wallpaper. The extensions camouflage this area, as in the photo.
Adding a box when installing a door
Materials for additions
In the manufacture of elements, the following are most often used:
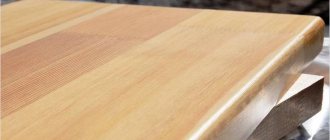
- Tree. This is an environmentally friendly material, but its disadvantage is that it can deteriorate due to unfavorable conditions encountered during operation, which requires additional processing.
Additional wooden element
- Plastic. But for arranging extensions, ordinary cheap material will not work; you need to choose high-strength plastic, preferably reinforced with metal.
Plastic extensions reinforced with metal
- MDF. Due to low mechanical strength and instability to moisture, such materials are most often used for arranging interior openings. During installation, cracking of the planks is possible, for example, when driving nails. Therefore, it is first necessary to drill a mounting hole to install the fastener.
MDF additions
- Chipboard. It is of lower quality, but can be used to decorate the interior entrance door of a house and has a low cost.
Chipboard addition
Stage 2. Setting aside and marking the required dimensions of the extensions
Photo 4. Preliminary markings
After we have measured the required dimensions of the additions, we set them aside on the blanks of the additional elements. We make preliminary markings directly on the panel.
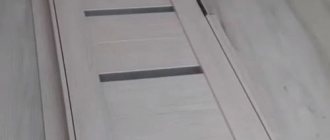
Photo 5. Gluing future cutting areas with masking tape
Using masking tape, mark future cutting lines.
On one blank for additional elements, you can put two parts - the threshold and the upper part of the additional elements.
In the same way, we set aside the dimensions of the second part, make preliminary markings on the workpiece and glue it with masking tape.
Photo 6. Re-mark
We re-mark the length of the extension directly on the masking tape.
If you do not glue the edge of the additional element with masking tape, chips may appear on it during sawing.
Photo 7. Checking dimensions
Once again we check the correctness of the markings.
Photo 8. Postponing the cutting angle
Use a miter angle to mark a cutting line perpendicular to the edge of the panel.
Stage 3. Trimming the extensions to the required sizes
Photo 9. Sawing blanks
Using a miter saw, we cut blanks for additional elements exactly along the marks.
Photo 10. Sawing the second workpiece
We saw off the first and then the second horizontal parts of the extension.
We repeat the procedure for the vertical parts.
Stage 4. Assembling the accessory box
Before installation, we assemble the extensions into a solid, rigid box.
Photo 11. Drilling holes for self-tapping screws
Using a drill, we drill holes for self-tapping screws - for fastening from the inside. This is a mandatory step so that when screwing in the screw does not split the MDF panel.
Photo 12. Drilling holes for self-tapping screws
We make several holes at a distance of 10–15 cm from each other.
Stage 5. Installation of the extension box
Photo 13. Installation of extensions
We install the extension box in the opening. We set it relative to the door so that the gaps between the door and the frame are the same on all sides.
Photo 14. Preparation of spacer elements
Spacer elements are needed to fix the extension box in the opening. We cut them out of a wooden block. The thickness of the spacer element is selected according to the size of the gap.
Photo 15. Preparation of spacer elements
A total of 10–12 spacer elements are required. 3-4 pieces for each vertical extension. Top and bottom – 2 pieces each.
Photo 16. Hammering spacers
Since in the future we will need to install platbands and close the gap, it is important that the spacer element does not protrude beyond the trim and the wall.
Photo 17. Installation of spacers
In the same way we hammer in all the spacer elements.
Material of manufacture
The facing element of the entrance door group is made of the following materials:
- MDF;
- tree;
- metal;
- PVC.
The most common are extensions and trim made from MDF. Next in popularity are wooden and metal products. The cost of facing materials may vary. The most expensive are special planks made from natural wood.
Stage 6. Installation of platbands
Photo 18. Measuring the length of the casing
We attach the casing and mark the required length. The size is set according to the angle of the internal intersection of the horizontal and vertical extensions.
Photo 19. Measuring the length of the casing
Similarly, we set aside the length of the second casher.
Photo 20. Measuring the length of the casing
We mark the length along the inner corner of the extensions.
Photo 21. Trimming the platband
We cut the trim using a miter saw at an angle of 45 degrees.
Photo 22. Filling the gap with foam
Polyurethane foam is used to fix the extension box. Gives the structure rigidity and additional sound and heat insulation.
Photo 23. Filling the gap with foam
It is important not to overdo it with the volume of foam, so as not to deform the extension.
At the same time, if there is too little foam, the opening will be leaky and not rigid enough.
To remove excess foam, you need to wait for it to cool and cut it off with a knife.
Try to avoid getting polyurethane foam on the boards, walls and flooring.
Photo 24. Installation of vertical trims
First we install vertical extensions, then horizontal ones.
We attach the casing to the trim using decorative nails.
Photo 25. Installation of vertical trims
To install the trim you will need about 20 decorative nails. They are clogged at a distance of 20–30 cm from each other.
On average, each vertical trim will require 7 decorative nails, and each horizontal trim will require 3–4.
Photo 26. Installation of horizontal trim
We measure the size of the horizontal platband.
Starting from the larger size, we cut at 45 degrees to reduce it.
The horizontal casing is fixed to the extension box and the vertical casing.
Photo 27. The final stage of installing slopes
We press the structure against the door frame and fix it with masking tape until the mounting foam hardens - for 1–2 hours. The exact time depends on the drying time of the foam, which can be found on the packaging.
After this, you can remove the masking tape. Your front door is ready!
Useful tips
Installing extensions on entrance doors using one mounting foam is the easiest way. This will be cheaper than using fasteners. In addition, the final strength of the structure will be no worse than that assembled with self-tapping screws. After all, such complex methods were used until construction sealant appeared.
When the junction of vertical and horizontal planks has a gap, the same mounting foam will correct the situation. When it expands, the gap will disappear by itself.
You should not assemble the U-shaped structure from the extensions in advance. During installation, the elements will still be warped and each will need to be fine-tuned on site. It will take more time and effort.