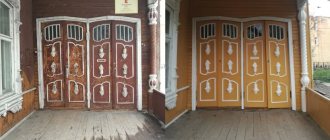
Time can make things unusable. Doors are also among those objects that sooner or later will have to be restored with your own hands. Scuffs, blisters and serious household damage all require attention. Restoration of veneer doors is carried out in several ways. If the owners of the house have an old, damaged door leaf at their disposal, it can be easily restored.
What to do if the coating is swollen?
The first step in restoring veneered doors should be a thorough inspection of them. After all, you need to assess the upcoming amount of work, prepare all the necessary materials and tools, and it is better to eliminate all visible defects at once. It is much easier to work if the sash is removed from its hinges and placed on the floor or chairs.
Blistering of veneered doors appears when the sheets of finishing material were poorly or incorrectly glued. This can also happen if the structure is operated in conditions of high humidity, the door is washed with a too-wet rag, or if the room is flooded.
There are two effective methods for eliminating this defect:
- Ironing. Before restoring a veneered door, you need to moisten a piece of cloth, wring it out well and place it on the swollen area for about 10-15 minutes. Moisture will make the veneer layer softer. Then you should heat the iron, but not too much (minimum or medium temperature). All that remains is to iron the swollen fabric.
- Gluing. If the first method does not help, then you will have to glue a layer of finishing. Before repairing a veneer door in this way, you will need to buy PVA glue and a regular medical syringe, which makes it easier to inject the glue under the coating. After a sufficient amount of glue has been applied under the veneer layer, you need to press the coating well and rub it on top with a dry cloth so that the glue is evenly distributed. The gluing area must be pressed with a weight for at least a few hours, and preferably overnight or a day. After this, the canvas can be hung in place.
The veneer sheets have a small thickness, so PVA sticks quite well. It is suitable for the restoration of artificial and natural coatings.
The veneer begins to swell at the joints of the panels; it must be fixed with glue or an iron immediately, otherwise the “bubble” will increase over time.
Preparation
First, you need to thoughtfully, without haste, examine the door and assess the scale of the work ahead. The type and nature of the damage will determine what tools and materials you will need to make the restoration process successful.
Many people who are not satisfied with the appearance of a veneered door do not have a sufficient theoretical basis for carrying out restoration work.
A person sees damage, but does not know that it can be easily fixed, or does not know where to start and in what sequence to carry out the work. So, for example, in order to paint a door efficiently, you will have to use wood putty, which must first be used to level the surface. If paint is applied without using putty, it is unlikely that a good result will be achieved.
Masking scratches
Veneered doors can be scratched by pets or children playing with their claws. They also suffer when moving furniture, from bicycles and strollers. Scratches are noticeable and spoil the appearance. Wax for veneer doors for minor damage is the best option. To do this, it is worth acquiring a material that matches the color of the finish.
Damage can be repaired in the following ways:
- If the scratch is small, then before restoring a veneered door, you need to cut off a small piece, literally a pinch, from a wax pencil, hold it in your hand for half a minute, so that the material becomes soft and begins to melt. After this, the wax needs to be rubbed into the scratched area, and then the veneer door should be polished. To add shine, it is worth using polishes; they also contain wax.
- If the scratch is significant, it must first be cleaned. This must be done carefully so as not to damage the top protective coating (varnish). Minimum grit sandpaper is suitable. After this, wipe off any dust and lightly degrease the well-protected scratch. Then you need to drip melted wax into the grooves. Immediately, before it hardens completely, its excess should be removed.
Restoring veneer doors using wax has one caveat. If there were a lot of scratches and they were filled with wax, then such a door will not be able to be painted or coated with any varnish. Paint and varnish compositions do not “stick” well to such material, and the wax itself will gradually begin to spill out of scratches.
Problems and their solutions
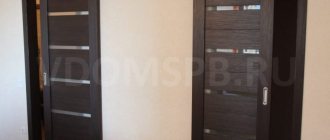
Before proceeding with the restoration of an entrance or interior door covered with veneer obtained from various types of wood: oak, birch, maple, cherry, beech, walnut, wenge, and so on, it is necessary to carefully examine it and identify all defects. Since the repair technology, tools and materials required depend on their type. In this regard, when examining a box or canvas, they look for scratches, swelling, cracks and the level of depreciation of the coating.
Severe damage will need to be repaired using specialized paint intended for veneer. It is most comfortable to repair the door leaf after dismantling it from the awnings. Damage that is not too severe can be removed without removing the door.
Blistering of material
Blistering of doors lined with veneer occurs because the sheets of facing material were unsatisfactorily and incorrectly glued.
There are 2 productive ways to remove such a defect.
Ironing. Before you begin restoring a veneered door in this way, you need to wet a piece of material, carefully squeeze it out and place it on the swollen area for approximately 10-15 minutes. Moisture will make the veneer layer more pliable. After this, you should heat the iron, but not very much (lowest or medium temperature). All that remains is to iron the swollen fabric.
Veneer sheets are not very thick, so they can be glued with PVA glue without any problems.
When the veneer just begins to swell and peels off in the areas where the sheets join, it must be immediately secured with an iron or adhesive, otherwise the “bubble” will subsequently become even larger.
Minor defects
If you notice minor damage to your own door, you really shouldn’t be upset. Restoring veneer with such trivial defects as scratches and chips is carried out using the following methods.
To apply a special layer of wax coating, clean up minor damage.
You just need to be extremely careful when working with tools and materials. In the process of eliminating small cracks and abrasions, you can harm the canvas.
It happens that the owners use sandpaper too diligently and the varnished surface becomes unpresentable.
After this, thoroughly clean the door from dirt and dust. Each section of the entire door leaf must be thoroughly degreased. This will make it possible to apply the wax at the proper level, and it will remain in place for quite a long time. You need to heat the wax and carefully seal the scratches with it.
Filling wax stick is also suitable for surface regeneration. It will be possible to update veneered doors using a specialized pencil only if you use very little material. You need to take a small piece of wax and mash it for a while. When heated, it will acquire the necessary texture, and you can rub it to make it absorb into the surface of the coating. Remove excess using a rag.
Since the wax will sooner or later begin to crumble, the product takes on a disgusting appearance.
Serious damage
Restoring doors lined with veneer in the presence of severe chips, holes and broken areas requires a larger intervention, and sometimes the need to completely change the cladding. In order not to completely replace the door leaf coating, you can make a patch from a material of a similar color. To restore doors with severe dents, the following measures must be taken.
- Take measurements of the deficient area. Mark it with a regular rectangle. Record the information received.
- Trim the covering from the door leaf, clean the base and treat it with special compounds. Fill the recess with wood putty, sand and prime the surface.
- Align the patch with the hole. After precise adjustment, coat both components with adhesive and accurately connect. Fill the cracks with squeezed out glue and remove excess.
- Uneven edges should be smoothed out using fine-grain sandpaper. To avoid visible traces of processing, it is necessary to cover the edges with water-dispersed polyacrylate-based paint. You should grab a few centimeters from both sides of the joints so that the veneer layer is absolutely uniform.
Veneer patches
If the coating has deep, serious damage, then such an area needs to be replaced. To restore veneered interior doors, you should prepare PVA glue, a sharp utility knife or scalpel, as well as pieces of veneer. It should completely replicate the color and texture of the old material.
The restoration scheme consists of the following stages:
- Before restoring a veneer door, the panel must be removed from the awnings and placed horizontally.
- Cut out “windows” from the canvas - one or more in places of noticeable damage. If there are depressions under them, then they need to be well puttied and the putty allowed to dry completely. Veneer will not stick to wet putty.
- Cut suitable patches from the new veneer. They should not only match perfectly in size, but also in the direction of the pattern. Therefore, before gluing it is worth applying the patch, looking at it from different distances, from different angles. It should not stand out against the background of the canvas.
- Lubricate the door leaf and pieces of veneer with PVA glue, apply a patch, and press it well. Wipe off any excess glue immediately.
- For better fixation, you can press the new veneer with a small weight and leave it there for a day.
Do-it-yourself veneer door repairs are completed with varnish. It will help even out the tone of the coating, hide minor scuffs, and add shine.
Repair of serious damage
If the damage is serious, restoration will necessarily include the installation of patches.
Repairing a veneer door is divided into several steps:
- The problem area must be cut out of a small section of the top layer. It is necessary to carefully remove this cut and see if others are needed.
- After this, take a piece of veneered material and apply it to the surface of the door. Before proceeding to the next step, you need to choose such a location for the patch so that the pattern of the entire canvas is not disturbed.
- The next stage of restoration of interior doors with veneer is cutting out patches. To do this, take a scalpel or sharp knife and cut out a certain shape of the material. In this case, experts advise making cuts across the texture of the canvas.
- The cut parts are placed in prepared places and glued securely.
- After this, you can treat the entire surface with a special veneer varnish.
How to varnish or paint a veneer door?
If you need to completely renew veneer interior doors, you can coat the door leaf and frame with varnish or paint. In the first case, both shellac varnish and cellulose polish will be useful. There are few differences between them. Painting is more suitable for doors covered with natural veneer.
It is carried out according to this scheme:
- Remove the canvas from the awnings. Before updating a veneered door, you need to prepare paint, brushes for the frame and the end of the door, as well as a roller for painting the main area. It is better not to use brushes on large surfaces, otherwise streaks will be visible.
- If there are deep scratches on the canvas, they need to be cleaned and puttied. If the canvas is repainted in a completely different color, you need to cover it with a layer of primer. If primer coating is not intended, then the surface must be sanded and degreased.
- After the primer has dried, you can begin painting. Only nitro paints are not suitable for veneer; this composition results in a spotty coating. Water-dispersed, hyphthalic or polyurethane can be safely used.
- Painting can be done in one or two layers, but the paint must be completely dry. Depending on its composition, this may take from several hours to 2 days. If you paint in two layers, then one of them is done in a horizontal direction, and the other in a vertical direction. This approach will ensure an even coating without gaps or sagging.
Only after this can the veneered door be hung and used. The finish can be matte or glossy. Painting is an opportunity to completely renew a very old, shabby product and transform the interior beyond recognition. The cost of restoring veneered interior doors using paint is the most affordable option.
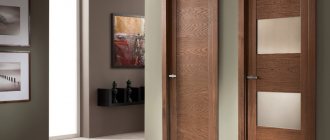
Restoration of interior doors - traditional and alternative options
Conflicting attitudes towards interior items and differences in the financial capabilities of some owners lead to the purchase of a new item, while others lead to the need for restoration. Most owners prefer to store and repair exclusive and antique products ad infinitum, passing them on by inheritance. Not everyone is ready to update modern furniture or doors, although it’s worth thinking about. After all, a small chip or scratch can be easily removed, but it is simply necessary to restore objects that are still durable but have lost their appearance. They can acquire a completely different look, style and become unique.
How to extend the life of the coating?
To ensure that veneer doors last longer and remain like new, they must be properly cared for. Veneer should not be cleaned with abrasive compounds, otherwise micro-scratches will remain on the surface and it will quickly lose its shine. It is not recommended to install veneered doors so that they are constantly exposed to direct sunlight. This will cause the coating to fade; veneer doors will need to be renewed quite often: varnished or painted.
You can wipe the veneer with a damp cloth, but it must be wrung out well. This material cannot be literally washed with water or used in high humidity conditions. You also need to be careful when washing floors, since this can cause damage to the lower part of the sash and frame. Periodically, to add shine, it is good to polish the structure with wax-based products (polishes). They repel dust and mask minimal defects.
Veneered doors, if properly cared for, will last for a decade. But even in this case, minor scratches and damage cannot be avoided. Therefore, you need to know how to update a veneer door with your own hands. This is easy to do with inexpensive materials and simple tools.
Frequent defects in veneer surfaces
Scratches Cracks and chips Bulges and cracks
The decorative layer of veneer may swell and crack. Why does this happen, and what can be done to prevent defects from occurring and eliminate them? Let's consider the nature of the most common damage to veneer surfaces and the reasons why they occur.
- Areas of scuffs and scratches on doors appear, most often, due to improper hygienic care of the doors. It is unacceptable to clean the surface using products containing abrasive particles or dissolving chemicals.
- Cracks and chips are the result of careless handling. Veneered doors should not be slammed too hard. If you need to carry a large object through the door, you need to protect the door from damage, or even better, temporarily remove it from its hinges. Another reason why the veneer layer can crack is sudden changes in temperature and humidity.
- Swelling of the decorative coating can occur from high humidity. The lower part of the sash often swells and gets wet when washing the floors.
The reason for the appearance of defects on the surface can also be the dishonesty of the manufacturer - the use of low-grade material, violation of technology. It’s good if the product has a warranty and you can replace it. If the warranty has already expired, then the choice is small: buy a new door or make repairs.
News
In which direction should interior doors open in an apartment?
There are standards according to which interior doors must open in a certain direction. This is connected not only with comfort, but also with safety precautions: so that in an unusual situation the door does not become blocked. This article contains some tips on the rules for installing interior doors.
In public buildings, the doors of all rooms must open towards the exit, otherwise problems will arise with the fire inspection. But no one inspects private housing, so the owners themselves decide in which direction the interior doors in their apartment should open.
There are only four options:
- In a room with right-hand opening (door hinges on the right)
- In rooms with left-hand opening (door hinges on the left)
- From a room with right-hand opening
- From a room with a left-hand opening.
Often, residents are guided not by safety rules, but by the convenience of placing furniture, especially in cramped apartments. Comfort is important, but some rules for installing interior doors must be followed. By the way, building codes also take into account comfortable operation.
Rule No. 1: According to building standards, doors should open towards a larger room. This is provided for cases where a person suddenly becomes ill and falls. In a small room - bathroom, toilet, dressing room - there is not enough space, and the door will be blocked. But if it swings outwards, it will not be difficult to open it, even if the lock is locked.
Rule No. 2. Adjacent doors should not touch each other. It is necessary to plan the location so that when one door opens at the same time, it does not block the other. Otherwise people may get hurt.
Rule No. 3. According to fire safety rules, doors open outward so that in the event of a fire you can easily leave the room. The kitchen door, as the most dangerous room, should always open into the corridor.
Rule No. 4. When the child is small, it is better that the door to the children's room opens inward. If it closes accidentally, the door will be easier to open.
Rule No. 5. In cramped apartments, it is convenient to use opening limiters so as not to damage the furniture or door leaf - especially if it has a glass insert.
Rule No. 6. The interior door should open in the direction opposite to the switch, so as not to look for it later behind the door leaf.
Rule No. 7. When opening the door to a room, we should see most of it with a window.
Rule No. 8. Doors with satin glass inserts are installed according to the principle: matte glass surface on the corridor side, glossy glass on the room side.
Is it possible to do this kind of work yourself?
Inexpensive interior doors on the market today have a fairly short service life. Therefore, homeowners think about their transformation most often.
In addition, those who still actively use old, “Sovdepov” copies also dream of changing the appearance of the doors. They are very difficult to fit into a modern interior, so they try to get rid of these products as quickly as possible.
But if replacing outdated doors or doors that have lost their former “attractiveness” is not included in your immediate plans, then you can try to modify them using:
- paints;
- self-adhesive film;
- hand painted;
- decoupage
Advice
In this case, the choice of renovation method is directly related to the level of professionalism of the person who will be engaged in such “restoration”. After all, the less experience he has, the easier it is recommended to start with such home renovations.
Plastic
A plastic door can lose its aesthetic appeal as a result of careless handling. Its restoration is not possible in all cases, but there is always hope. You should choose one of the following methods:
- carefully stick the vinyl film onto the surface;
- veneer;
- paint with special polyurethane paint without solvents.
Each of the options requires preliminary cleaning of the reconstructed plastic surface, and applying paint requires filtering the composition used and the presence of a spray gun.
The most interesting and simpler solution when updating a plastic door would be to use film. A wide variety of colors and patterns will help you quickly change the interior and style of the room. For this:
- plastic is degreased;
- the required film elements are cut to size;
- A soap solution is applied to the surface of the canvas to help the film take the correct position with the possibility of adjusting individual areas.
It is recommended that two people apply the film to a plastic interior door only if the surface has a large area. Small pieces are easier to handle alone.
It is reasonable to perform veneering or painting of plastic in a production environment. The quality of a restored door will be much higher, although the prices of professionals may be higher than purchasing a new door.