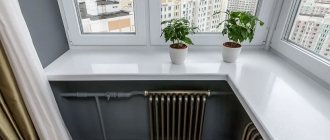
It is better to organize heating in the lower part of the cellar, so the temperature in the room will be distributed more evenly.
- Among other things, lighting is installed in the cellar under the balcony, which can be used as needed, which can be an ordinary light bulb.
Storage conditions for vegetables and fruits
To store vegetables and fruits, it is important to maintain a constant low temperature
How to make such a storage facility so that food can lie in it throughout the entire winter period without spoiling? To do this, first of all, you need to know at what temperature conditions products can be stored for the longest time.
The table below shows what temperature is needed inside the refrigerator for storing food:
| № | Product name | Temperature |
| 1 | Potato | +2 to +3 °C |
| 2 | Carrots, beets, turnips | From 0 to +2 °C |
| 3 | Garlic | -1 to +3 °C |
| 4 | Onion | From 0 to +1 °C |
| 5 | Cabbage | -1 to +2 °C |
| 6 | Pears | -1 to +5°C |
| 7 | Apples | +1 to +2°C |
Causes of frost damage to plant products. Analyzing these data, we can conclude that the optimal condition for all of the above products will be a temperature range from 0°C to + 3°C. Based on this, they decide on how to make a refrigerator on the balcony with their own hands for storing vegetables and fruits in the winter.
The fact is that under the influence of negative temperatures in the structure of plant fruits, frozen cells expand. This disrupts the integrity of tissue fiber, and irreversible chemical processes occur inside the fruit.
Thawed potatoes, like other vegetables, “sweat”, their tissue becomes soft and blurry.
Such a product becomes completely unsuitable for human consumption.
Convenient thermal cellar for the balcony: reviews
City residents do not have the opportunity to equip a cellar in a residential building and store food there. That is why many people use alternative options. A quite interesting option is a thermal cellar, which can easily be placed in the most ordinary city apartment. This is a fairly convenient and functional device that has earned the most positive reviews and is distinguished by its reliability and high quality.
Such a household electric cellar is installed on a loggia and maintains the temperature within 0 ᵒC. The design is a convenient thermal container that allows you to store food throughout the entire autumn-winter period.
A similar device has:
- Thermostat;
- Thermometer;
- Electronic temperature controller;
- Temperature sensor.
Such a cabinet is very convenient and functional, since the user can independently optimize the temperature indicators in the heating cabinet and set them in the range from 0 to 19 ᵒC. The design is electrically safe, which is why you can use it completely freely, without the slightest fear.
Important! To equip a heating system for a balcony cellar, you can purchase special electric air heaters. They will maintain a constant required temperature. In particular, electric hair dryers have proven themselves well.
To monitor temperature indicators, you need to install an electronic or alcohol thermometer inside the box. To equip the heating system, incandescent lamps are used, located in the corners of the box, since it is in this part that the greatest freezing occurs. When the apartment is on the ground floor, you can arrange a mini-basement, which also needs to be insulated and sensors installed to measure temperature. If you need to equip a loggia, you can use the underground as a cellar, which also needs to be insulated so that the food does not freeze.
Types and arrangement of storage for vegetables and fruits on the balcony
Any insulated storage on an open balcony or loggia at very low air temperatures will not be able to protect food from freezing. Therefore, we will consider the types and design of storage facilities inside glazed, unheated rooms.
Flexible cellar
This name refers to large thermostatic bags. The secret of storing food in such “cellars” is that the bags are made of three-layer moisture-proof fabric. If the outside temperature drops, the thermostat turns on electric heating. The container is powered by electricity.
Box made of polymer material
Drawers for vegetables and fruits must have holes for ventilation
Plastic containers are placed at a height of 150 mm from the floor on lattice racks. This is done to ensure that the contents of the boxes are constantly ventilated. When it gets very cold on the loggia, the boxes are insulated with old blankets or other things.
Plastic boxes of a wide variety of sizes can always be found and purchased in the retail chain. But how to make shelves for containers on the balcony with your own hands is not difficult for an experienced home owner.
Wooden refrigerated container
Sprinkle the bottom of the drawers with sawdust
This design is a kind of wooden thermos. You need to select two wooden or plywood boxes so that one container can fit inside the other box.
If you couldn’t find such containers, you can make them on the balcony with your own hands. The bottom of a large box is covered with dry sawdust in a layer 100 mm thick. The space between the sides must be at least 100 mm wide.
The side space is also filled with dry sawdust. Before installing the inner container, ventilation holes with a diameter of 10 mm are made in its walls. The number of holes in the wall of the box should not affect the load-bearing capacity of the side.
The lid of a wooden refrigerated container needs to be “lined” with foam plastic. This refrigerator is able to preserve food even at a temperature of –17 °C.
Heated container
Only home handymen can make such a cabinet with their own hands. We will not go into details of its manufacture.
In this regard, in the media, including on the Internet, there is a lot of advice and drawings for making a ventilated insulated cabinet with electric heating.
Only an experienced worker versed in electrical engineering can undertake the manufacture of such a device.
Old refrigerator
The evaporator grill and compressor are removed from the back of the refrigerator. The cabinet is placed with the doors up and used as a chest - a thermos. To learn how to make a cellar on the balcony, watch this video:
Thermostat cabinet
This cabinet allows you to set the desired temperature
The cabinet, made at a specialized enterprise, resembles in its design a freezer container for street sale of ice cream. You can buy it at a store that sells household refrigerators.
The heating cabinet is equipped with an internal ventilation system. A thermostat device ensures a constant desired temperature inside the cabinet. Products placed in the cabinet compartments are always in a cool and dry state. The disadvantage of such a container is its high cost.
What kind of damage can occur if operating conditions are not followed?
A number of factors can impair the functionality of the refrigerator: power failure, moisture, short circuit. The refrigerator on the balcony is subject to the same breakdowns as any other refrigeration equipment.
The most common breakdowns can be:
- Compressor out of order. This is one of the most expensive breakdowns. Repairing an engine is just as expensive as replacing it with a new one.
- Failure in the control module department. Such a malfunction may be indicated by sound and light malfunctions in the general operation of the equipment; the control module also requires repair if one or both compartments of the refrigeration unit do not work. The most common cause of breakdown is high humidity in the room.
- Temperature sensor malfunction. If this device does not work, the refrigerant will not function productively, and the compartments will build up ice. Otherwise, the device simply will not work.
- Defrost sensor failure. In No Frost system refrigerators, such devices are fragile and are more often replaced than repaired.
- Door seal. If it has dried out, then it needs to be changed. This damage seems minor, but depressurization can lead to engine failure.
A box for storing vegetables on the balcony - how to make a cellar with microclimate control
In the absence of a garage or cellar near your home, storing vegetables becomes a real problem. It’s especially disappointing if in the fall, due to lack of space, you have to give away or throw away your own harvest, and later buy the same products at a high price. Some people completely abandon the idea of storing supplies for the winter, while others decide to build a balcony cellar for storing vegetables (a cabinet/box with thermal protection). The idea is simple at first glance, but how to implement it so that the cellar on the balcony is effective?
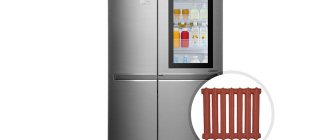
If there is nowhere else to put the refrigerator...
...and you decide to install it on the balcony, know that you do this at your own peril and risk. When choosing a balcony or loggia as a “place of location” for a refrigerator or chest freezer, you must approach this issue from two points of view: rationality and safety precautions.
To ensure that your refrigerator serves you for as long as possible, try to follow these rules :
How to choose the right thermal box design
Some post-Soviet countries, producing millions of tons of fruits and vegetables, are forced to import more than 50% of fruits and vegetables in the winter-spring period. This is because their losses due to outdated storage technologies exceed 30%, and the remaining part has low nutritional value and unattractive appearance. To avoid repeating this mistake, decide in advance on the design of your home cellar.
Mini cellar on the balcony
Conditions for long-term storage of vegetables
Before you make a box for storing vegetables in winter or a year-round cellar on your balcony, study what temperature and humidity parameters need to be observed for successful storage of root vegetables.
Regime and shelf life of basic vegetable crops
Using the tables, it is easy to determine the optimal temperature range for all vegetables that needs to be maintained in the cellar - from 0 to 5 °C. It is equally important to control humidity - the drier the air, the faster the fruits wither. Therefore, for most types of vegetables it is necessary to ensure a fairly high relative humidity - 90-95%. And to prevent stocks from rotting, good ventilation should be considered in the design of the balcony cellar.
What other requirements are recommended to be met? There are several of them:
- darkness - the thermal box for storing vegetables on the balcony must be closed, and it is also not allowed for the light to be constantly on in it, otherwise useful substances will be destroyed;
- minimal gas exchange - it is better if products are stored in special soft packaging (bags) with a given permeability, since in a gas environment with a low oxygen content their storage period increases;
- compatibility of vegetables according to the principles of commodity proximity - you cannot store carrots and onions, potatoes and apples, tomatoes and cucumbers next to each other, otherwise they will change consistency, smell, color, and spoil faster.
Perforated materials are used to make thermal boxes
Choosing the right mini storage option
In search of the optimal way to set up a balcony cellar, it is useful to study the assortment of specialized stores. All models presented in them can be classified into groups:
- flexible thermal container bags - moisture and heat insulation are provided by two layers of dense textile impregnated with a waterproof compound and padding polyester sewn between them;
- plastic or plywood thermos boxes - the rigid structure can be reinforced with a metal frame, and the air space between the two containers ensures heat retention inside the storage;
- an automatically adjustable cabinet for storing vegetables on the balcony - it’s not easy to make one with your own hands, since they involve forced ventilation systems and maintaining a stable temperature.
Volume of soft cellars on sale – 95–300 l
If you want to stock up on, for example, potatoes, carrots and cabbage at the same time, you must take into account: they need to be distributed in different boxes or at least separated by a partition. In this case, an old refrigerator of suitable volume or a thermally insulated cabinet will suit you.
For a cold balcony, the air in which in winter cools to –5 °C and below, a heated structure is needed. The energy consumption for it is minimal, but the device itself requires increased attention both during installation and operation, since it will operate from a 220 V network. Incandescent lamps can be used as heating elements, but it is important that they do not come into contact with flammable surfaces and the entire volume was heated evenly.
Year-round chest-cellar with cooling and heating
What types of boxes are there?
Heated
This type is suitable for a cold loggia (glazed with single glass). The box is equipped with electric heating. In order to save money, you can opt for a budget version and, instead of a flexible ribbon heating element, use products that are always at hand - a regular hair dryer or incandescent lamps. Two lamps are placed in a tin cylinder, having previously been painted with dark paint. Incandescent lamps do not consume much electricity, unlike a noisy hair dryer.
Without heating
On a warm balcony, heating the box is not needed. It is enough to cover its walls with insulation. The manufacturing process of such a design is simple and does not require large investments:
- Two rectangular containers are made from timber and slats so that one can fit into the other. The gap between the walls should be 8 cm. The bottom of the boxes is made of moisture-resistant plywood 8-10 mm thick.
- The surface of the products is coated with an antifungal composition for wood (“Snezh” or “Snezh Bio”).
- The space between the walls is filled with insulation - penoplex, sawdust, polystyrene foam or old batting. Experienced builders have recognized penoplex as the best insulation material. It does not absorb moisture at all and will reliably protect the potatoes from the cold.
In addition to the usual homemade box, there are alternative solutions that you can use.
Refrigerated storage chamber
An old, used refrigerator is suitable as a winter cabinet for potatoes. It is freed from the refrigeration equipment (compressor and heat exchanger) and placed in a horizontal position with the door up.
The manufacturer provides sealed and warm walls in the refrigerator compartment. In them, between the plastic casing and the metal body, the entire space is filled with thermal insulation. The only thing that remains is to tidy up the appearance: paint it, cover it with plastic panels or beautiful thick fabric. This storage chest can be unheated or heated.
Factory thermobox
The factory thermobox is a metal box in which heating elements are installed that can maintain a temperature of +2...+10°C. The heating cabinet remains operational when the temperature drops to -35…-40°C. Some models have a manual temperature control system.
Flexible containers
Made of two-layer dense fabric, between the layers of which flexible heating elements are mounted. The maximum capacity of the “miracle bag” is 300 liters. A soft thermal container is an economical solution for an unheated balcony.
Storage conditions for vegetables and fruits
How to make such a storage facility so that food can lie in it throughout the entire winter period without spoiling? To do this, first of all, you need to know at what temperature conditions products can be stored for the longest time.
The table below shows what temperature is needed inside the refrigerator for storing food:
| № | Product name | Temperature |
| 1 | Potato | +2 to +3 °C |
| 2 | Carrots, beets, turnips | From 0 to +2 °C |
| 3 | Garlic | -1 to +3 °C |
| 4 | Onion | From 0 to +1 °C |
| 5 | Cabbage | -1 to +2 °C |
| 6 | Pears | -1 to +5°C |
| 7 | Apples | +1 to +2°C |
Causes of frost damage to plant products. Analyzing these data, we can conclude that the optimal condition for all of the above products will be a temperature range from 0°C to + 3°C. Based on this, they decide on how to make a refrigerator on the balcony with their own hands for storing vegetables and fruits in the winter.
The fact is that under the influence of negative temperatures in the structure of plant fruits, frozen cells expand. This disrupts the integrity of tissue fiber, and irreversible chemical processes occur inside the fruit.
Thawed potatoes, like other vegetables, “sweat”, their tissue becomes soft and blurry.
Such a product becomes completely unsuitable for human consumption.
Tips and Tricks for Extending the Shelf Life of Potatoes
People's experience, accumulated over many years of practice of storing potatoes on the balcony, can suggest several life hacks on this topic:
- Boxes, if they are not new or were built by hand, should be carefully treated before use. You can wash the wood with a mixture of soap, hot water and soda, and after the box has dried, treat it with a solution of lime and copper sulfate;
- Hay scattered at the bottom of a box or even on the floor of a balcony will help create the right microclimate in the storage;
- Potatoes will not begin to rot if finely ground garlic is scattered among its tubers or rowan leaves are spread between them;
- When storing several different varieties of potatoes, it is better to arrange them in separate boxes;
- Rusting leaves or straw will help scare away rodents from the vegetable storage area;
- Foil insulation inside the box will help create the effect of a thermos. This means that the potatoes inside the storage will remain the same temperature as the air inside;
- The box and the root vegetables themselves should under no circumstances touch the concrete floor - soft and warm material should be laid between them, the same insulation or blanket, coat or any unnecessary clothing, corrugated cardboard.
In addition to all this, you should remember that even dried and whole potatoes need to be sorted from time to time, looking for and separating sprouted or rotten tubers. This will not only allow the vegetables in the box to be ventilated, but will also protect the entire batch from the spread of rot and fungus.
Types and arrangement of storage for vegetables and fruits on the balcony
Any insulated storage on an open balcony or loggia at very low air temperatures will not be able to protect food from freezing. Therefore, we will consider the types and design of storage facilities inside glazed, unheated rooms.
Flexible cellar
This name refers to large thermostatic bags. The secret of storing food in such “cellars” is that the bags are made of three-layer moisture-proof fabric. If the outside temperature drops, the thermostat turns on electric heating. The container is powered by electricity.
Box made of polymer material
Plastic containers are placed at a height of 150 mm from the floor on lattice racks. This is done to ensure that the contents of the boxes are constantly ventilated. When it gets very cold on the loggia, the boxes are insulated with old blankets or other things.
Plastic boxes of a wide variety of sizes can always be found and purchased in the retail chain. But how to make shelves for containers on the balcony with your own hands is not difficult for an experienced home owner.
Wooden refrigerated container
This design is a kind of wooden thermos. You need to select two wooden or plywood boxes so that one container can fit inside the other box.
If you couldn’t find such containers, you can make them on the balcony with your own hands. The bottom of a large box is covered with dry sawdust in a layer 100 mm thick. The space between the sides must be at least 100 mm wide.
The side space is also filled with dry sawdust. Before installing the inner container, ventilation holes with a diameter of 10 mm are made in its walls. The number of holes in the wall of the box should not affect the load-bearing capacity of the side.
The lid of a wooden refrigerated container needs to be “lined” with foam plastic. This refrigerator is able to preserve food even at a temperature of –17 °C.
Heated container
Only home handymen can make such a cabinet with their own hands. We will not go into details of its manufacture.
In this regard, in the media, including on the Internet, there is a lot of advice and drawings for making a ventilated insulated cabinet with electric heating.
Only an experienced worker versed in electrical engineering can undertake the manufacture of such a device.
Old refrigerator
The evaporator grill and compressor are removed from the back of the refrigerator. The cabinet is placed with the doors up and used as a chest - a thermos. To learn how to make a cellar on the balcony, watch this video:
Thermostat cabinet
The cabinet, made at a specialized enterprise, resembles in its design a freezer container for street sale of ice cream. You can buy it at a store that sells household refrigerators.
The heating cabinet is equipped with an internal ventilation system. A thermostat device ensures a constant desired temperature inside the cabinet. Products placed in the cabinet compartments are always in a cool and dry state. The disadvantage of such a container is its high cost.
The principle of operation of the refrigerator
Let's remember what the refrigerant used in refrigeration units is and how it cools products:
- This is a special liquid filled into the system;
- Its boiling point lies in the range below 0 degrees;
- Boiling in the evaporator, the refrigerant takes heat from the interior of the refrigerator, due to which the food is cooled;
- As the refrigerant passes through the compressor, it turns back into a liquid;
- The accumulated heat is dissipated throughout the room thanks to a heat exchanger on the back wall of the refrigerator.
Refrigerator operation diagram
And since the room temperature is almost always above 0 degrees, accordingly, the refrigerant parameters are selected to work precisely in such conditions. Those. Household models of refrigerators are almost always filled with refrigerant designed for use inside heated rooms and warm balconies.
In practice, manufacturers refer to the operating range of a refrigerant as a climate class. Accordingly, for southern latitudes and subtropics the refrigerant is selected with some parameters that can be activated during positive fluctuations, and for our Russian latitudes - with others.
Caution: at negative temperatures, the process of refrigerant transition from gaseous to liquid state will begin much earlier, which will lead to the inability of the compressor to operate.
Operating a household refrigerator in a room with sub-zero temperatures will inevitably lead to its breakdown.
Refrigerator thermostats
Do not forget about the electronic unit of the refrigerator, namely the thermostat (thermostat), which is responsible for turning on the compressor.
In modern refrigeration units, thermostats react:
- When the temperature rises above +4.5 degrees, which is the lower temperature limit;
- To achieve the set temperature inside the refrigerator.
Accordingly, if the temperature on the balcony is negative, the thermostat will not give a command to either turn on or turn off the compressor, and the refrigerator will simply never turn on.
For reference: the refrigerator will still work for one cycle, provided that the oil in the compressor does not increase its viscosity under the influence of low temperatures.
However, after working for some time, the refrigerator will refuse to work (turn on).
Second refrigerator with take-out to the balcony
Attached balcony
Let's look at the situation and answer the question of whether it is possible to place a refrigerator on a balcony attached to the living room.
Naturally, subject to the following conditions:
- When the balcony or loggia is insulated;
- When its temperature is equal to the thermal regime of the remaining rooms in the apartment;
Accordingly, installing a refrigerator anywhere, including a balcony, is acceptable. The only thing that needs to be taken into account is the method of connecting it to the electrical network, since it is prohibited to move sockets onto the balcony in many high-rise buildings. But this problem is easily solved with the help of a carrying unit (extension cord).
Balcony attached to the kitchen
Glazed balcony
The traditional question of whether it is possible to place a refrigerator on a balcony that is not heated cannot be unambiguous (yes/no) for several reasons:
- To operate a household refrigerator, a refrigerant with operating parameters at sub-zero temperatures is required;
- The type of oil that is poured into the compressor also depends on this, since the ability of the compressor to operate at subzero temperatures depends on its viscosity.
Both of these parameters are dependent on each other for the following reasons:
- The use of freon type R-22 (old models of refrigerators) allows the use of only mineral oil in the compressor, the viscosity of which increases sharply as the temperature drops.
- The use of 134 freon allows the use of synthetic semi-ester oils in compressors, which do not change viscosity when the temperature drops to minus 3-5 degrees.
- The new generation of refrigerants works with semi-vinyl ester oils that can withstand low temperatures.
For reference: most outdoor refrigerator models (for selling drinks and ice cream) operate on semi-essential oils, so they can operate at temperatures as low as minus 3-5 degrees.
A further decrease in temperature also triggers the automation – they do not turn on.
Refrigerator on the open balcony
Before moving a refrigerator cabinet onto a balcony without glazing, it is worth assessing the risks that such an act carries:
- Exposure to atmospheric precipitation will lead to rusting and deformation of the device body, cracking of the seals.
- Under the influence of direct sunlight, the refrigerant overheats, leading to malfunctions of the refrigerator or freezer on the balcony.
- Low air temperatures in the winter lead to the transformation of the refrigerant into liquid, while in order for the device to function it must be in a gaseous state. This situation leads to breakdown of the freezer standing on the balcony in winter. Therefore, you need to understand to what temperature a freezer on a balcony can operate in winter. This indicator varies for different equipment models, but often ranges from +10 to +32.
- Increased pressure leads to increased pressure in the cooling system, which creates the risk of refrigerant leakage and temperature controller failure.
Based on the above, the question of whether it is possible to place a freezer on a balcony in winter if it is not possible to comply with operating conditions has a clear answer. You should not do this if you do not want to damage the equipment.
What do manufacturers recommend?
One of the important characteristics of a refrigerator is the climate class, which shows at what ambient temperature the normal operation of the unit is guaranteed . Manufacturers prescribe operating refrigerators in the temperature range from +16 to +32°C (normal climate class N). Some models can operate at temperatures from +10 to +43°C (universal climate class SN-T).
Failure to comply with these requirements may result in unstable operation of the unit . Moreover, if a breakdown occurs due to non-compliance with the recommended operating conditions, the manufacturer has every right to refuse you warranty repairs.
Important! Operating a refrigerator on an unheated balcony or loggia (even if it is glazed) will most likely lead to a violation of the temperature regime recommended by the manufacturer (in autumn, winter and spring the temperature may well be below 10 °C, and in summer it may exceed 40 °C above zero).
The main reasons why to use a refrigerator or freezer on the balcony :
Refrigeration chambers on a glazed loggia
If you want to place a freezer for storing all kinds of frozen foods on a balcony protected by glass, it is worth considering the degree of its heating. There may be several options here.
Insulated loggia
On the insulated balcony, the temperature is maintained at the same level as the apartment. It will fall below normal after the onset of winter cold. Therefore, you can safely install a freezer and refrigeration equipment on a balcony that has been previously insulated. When the air temperature drops to 0 degrees, it is recommended to turn on the heating. A heater model with a thermostat will help maintain the optimal temperature range without constant control.
Please note: a heater with an open coil must not be used near the cooling system to avoid causing irreparable damage to the device.
Uninsulated loggia
If you want to move the refrigeration equipment onto a glazed balcony without additional insulation, you should understand that this is possible. However, you will have to comply with some requirements.
You can place a refrigerator on a balcony without insulation if it uses a special refrigerant. Its feature is the ability to work at sub-zero temperatures. Another requirement is compressor oil, which allows the equipment to function under the influence of negative temperatures. Otherwise, a working refrigerator on the balcony in winter will stop turning on at low temperatures.
With the question of whether it is possible to put a freezer on the balcony in winter, the situation is somewhat different. The technical characteristics of the freezer suggest the possibility of its trouble-free operation at subzero temperatures. Therefore, a freezer on a glazed balcony can be used in the absence of moisture and direct sunlight.
We can conclude that a refrigerator or freezer can easily function on the balcony in winter. The main thing is to follow the rules of their use.
However, it would be useful to study the technical characteristics of a particular device. They display the critical operating temperatures of the equipment. Only after this should you decide whether it is possible to place a freezer or refrigeration equipment on the balcony, especially in winter.
Some features of room insulation are outlined in our article about how to make a refrigerator with your own hands.
Rules for installing and connecting the device
In addition to the temperature, humidity and strength of the balcony slab, the uninterrupted operation of the device is affected by proper installation and connection. These rules will help extend the life of the equipment and make the operating process safe:
- The base must be level and stable.
- The distance from the rear and side walls to the surfaces of the balcony must be at least 4-5 cm. This is necessary for sufficient air ventilation and to prevent overcooling of the device.
- It is not recommended to connect the device to the network through a carrying case. The outlet must meet all standards and be grounded.
- The device should not be located near batteries or heaters.
Wardrobe with built-in freezer for a heated balcony:
You can install the refrigerator on a glazed and well-insulated balcony. It would be good if it would be possible to additionally heat it in cold weather, as well as cool it in hot weather.
The technologies used in the latest models allow the device to operate even at ambient temperatures up to +5℃. At the same time, the load on all systems will be increased, which can lead to early wear of the equipment. Repair under warranty in this case is impossible, since the operating conditions were violated. If you have an old device, for which the warranty has long expired and you don’t mind parting with it if it breaks, then you can try placing it on the balcony. In any case, it is important to ensure fire safety and ensure the stability of the balcony base.
Video - DIY refrigerator on the balcony:
DIY cellar on the balcony
Stocking vegetables for future use in our country is a normal practice, allowing us to survive almost the entire cold season, essentially without restrictions on vitamins. And if the owners of private houses do not have the problem of storing vegetables, then for residents of city apartments there is nothing else left but to make a cellar on the balcony - with their own hands or purchase a ready-made one.
Indeed, achieving optimal storage conditions for vegetables is not so easy, considering that they remain fresh the longest at a temperature of +1..+5 degrees and a relative humidity of about 90%.
Exotic option for installing a refrigerator
In the most difficult situations, when the refrigerator does not fit in the kitchen, and it is technically impossible to insulate the balcony, then, armed with ingenuity and electric heating elements, you can create a climate zone with a positive temperature in the area of the back wall and the compressor of the refrigerator with your own hands.
Caution: Most often, for this, craftsmen use electric heating elements or special quartz incandescent lamps, the heat transfer of which is selected experimentally.
But this method is quite dangerous from a fire safety point of view, and we mentioned it only as an example.
Construction of a balcony cellar container
As already mentioned, there are two types of balcony container cellars:
- built with your own hands;
- ready-made, which can be purchased.
Let's look at the features of each of them in more detail.
Organizing a cellar on the balcony with your own hands
Such a cellar, as a rule, is a stationary, insulated box of dimensions specified by the master, in which a slightly positive temperature is artificially maintained (only heating is carried out when the temperature on the balcony drops to 0 or below) from autumn to spring.
Let's look at how to make this type of cellar on the balcony:
- The inner box of the container is constructed from boards, slats and beams, after pre-impregnating the wooden materials with machine oil to avoid rotting. Diesel fuel can also be used.
- The walls of the box are lined with polystyrene foam boards. The final thickness of the insulation of the balcony box should be 5-10 cm, depending on the climate. It is better to use slabs in 2 layers and lay them staggered to avoid heat leakage through the joints.
- In the corners and at the joints the insulation is sealed with polyurethane foam.
- A door is made and adjusted to the dimensions and configuration of the container opening so that the side edges of the door are beveled for a density of 3 cm per 10 cm thickness. The door is insulated with mineral wool and covered with moisture-resistant plywood on top. The lid is installed with an overlap for more convenient gripping and lifting.
- The lid is secured to the box using metal hinges.
- The bottom of the box is made in the same way as the walls - from boards and insulation for the balcony. after which it is connected to the common frame.
Scheme of a homemade balcony cellar
- On top of the insulation, all outer planes of the cellar are also finished with wooden material, which serves as an additional means of insulation from moisture and cold and at the same time gives the structure a normal appearance.
It is better to place vegetables inside the container in boxes, such as plastic ones for apples.
This will ensure normal air circulation and uniform temperature distribution in the box.
- At the bottom inside the cellar there is a socket with a 75-watt light bulb, which, in fact, will serve as a means of heating, maintaining the temperature in the container above zero. A protective casing is arranged for it so that the light does not scatter inside the container and to avoid accidental damage to the lamp. The cartridge is “powered” from a regular outlet.
This method requires personal monitoring of the temperature on the balcony and manually turning on the lamp if necessary. If desired, you can organize automatic control of the temperature and on/off the light bulb by installing a temperature sensor with a relay system in the cellar, but this will slightly increase the cost of the design.
Features of the finished cellar for the balcony
It won’t be difficult to purchase a balcony cellar of this type today.
Features of the finished balcony storage for vegetables are as follows:
- It usually consists of multi-layer waterproof fabric. inside which there is usually a synthetic winterizer thermal insulation layer.
- The entire fabric is penetrated with small heating electrodes. through which the temperature inside the cellar increases if it drops to a given level.
Using a ready-made cellar for a balcony
- In addition, finished products are equipped with a thermostat with an external screen. The sensor sets temperature limits suitable for storing food. When the temperature drops below the lower threshold, the heating of the cellar is automatically turned on; when the upper threshold is reached, the heating stops.
- The energy consumption of such products is quite low and, depending on their volume and temperature conditions, is up to 1.5 kW per day.
- Containers are available in various volumes and color variations, making it easier to select a product for specific needs.
Construction of a cellar under the first floor balcony
Only residents of the first floors, whose balcony they built themselves and has a foundation, can afford to build a full-fledged cellar under the balcony.
Let's look at how you can organize such a cellar:
- Typically, a cellar is installed in the basement space of a balcony between the lower level of the foundation and the lower floor of the balcony.
- The descent into the cellar is organized through a hole in the balcony ceiling, which is made independently in the slab, usually in the shape of a 70*70 cm square.
- For a more convenient descent, a ladder is rigidly attached to the hole in the ceiling, the length from the descent hole to the bottom of the cellar.
- The inside of the cellar is carefully waterproofed with rolled mastic materials or a penetrating waterproofing solution. The floor and walls of the cellar are subject to treatment.
Organization of the basement under the balcony
Cellar container
The easiest way to organize a cellar on the balcony is to buy a plastic shelf from a store, which will be equipped with drawers. But in this case, the boxes will have to be kept open, and when exposed to direct light, the potatoes turn green and the onions sprout. That is why this option for constructing a cellar is unlikely to suit most interested parties.
Wooden container for an insulated balcony.
If you have a heated balcony, then it is recommended to make a cellar container for storing vegetables from plywood, chipboard or any other similar material. To set up such a vegetable storage box you will need the following:
- A drawing of the future cellar, which must be made in accordance with the dimensions of the loggia, as well as the personal needs of the owner.
- Building materials for constructing a cellar: wooden block (with a cross-section of 2.5x5 cm), cutting boards, slats, door hinges, nails.
- Necessary tools for work.
The work takes place in several stages:
- First of all, according to the drawn drawing, you need to cut the lumber for the future container. From the block we make 8 short sidewalls and the same number of long crossbars. In addition, you will need boards of the same length (equal to the width of the balcony), from which the front wall, bottom and top of the container will be made.
- Next, using a building level, you need to outline the places where the frame for the future cellar will be fixed. First you need to screw the bars that form the outline of the rear wall, after which the side bars are secured. Cross members are screwed onto the ends of the side planks.
- Then boards are placed on the bottom of the container frame, but at some distance (a few centimeters for ventilation). If there are no boards, then you can use a sheet of chipboard instead, in which you need to make holes in advance.
- Then, using boards, you need to sew up the entire front wall of the container, and leave a hole on top necessary for installing the lid. The boards are attached using self-tapping screws or nails.
- The boards that were previously prepared for the cellar lid must be fastened with bars, which must be installed across the boards. The length of the bars should not overlap the outer boards. It is necessary to retreat 5-10 cm from the edges.
- Next, the hinges are screwed onto the container body, after which we calmly place the lid on them.
After this, we can say that the cellar for home use on the balcony is ready. In such a cellar a relatively constant temperature will be maintained. Additional partitions can be installed inside the container for convenient storage of vegetables. A wooden box is much more spacious than a plastic refrigerator, cheaper, takes up less space, however, it can only be used on an insulated balcony, where the temperature does not drop below zero degrees.