Floor insulation is necessary to reduce heat loss both after laying a heated floor system and during installation of the finishing coating. Now there are many types of this useful material on the market, but foil floor insulation is recognized as the leader among them. How to choose the right foil insulation? What are the nuances during installation? We will answer these questions in our article.
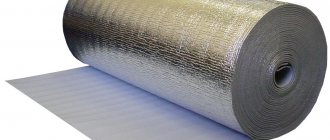
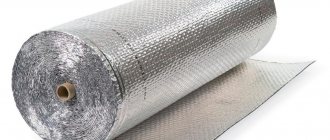
Foil insulation for floors
Foil insulation
What is foil insulation
Foil insulation is a combined material consisting of heat-insulating raw materials and a metallized layer. The reflective coating is installed on 1 or 2 sides at once.
Foil reflects thermal energy back into the room, which is why this insulation is thinner than other materials.
Aluminum film has increased reflectivity, and metallized film has good resistance to alkali.
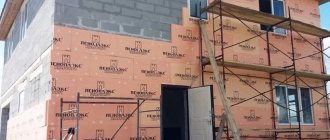
Floor insulation
Floor insulation is carried out in buildings with both wooden and concrete floors. Technology for laying material for wooden floors:
- Surface cleaning.
- Coating with impregnation and primer.
- End-to-end laying of thermal insulation.
- Sealing seams with tape.
- Installation of sheathing for air gap.
- Flooring with plywood or boards.
In areas with a harsh climate, the insulating “pie” is made multi-layered: double-sided insulation, sheathing with ordinary material, one-sided insulation, gap bars, flooring. At the same time, we must not forget which side to lay the insulation with foil - the metallized layer inside the room.
Characteristics and cost
The performance characteristics of thermal insulation with foil coating are significantly higher than materials without foil:
- better tolerates humidity and temperature changes;
- reflects up to 97% of heat into the room;
- reduces the vapor permeability index to 0.001 mg/m*K;
- extends the operational period of the foundation by 2 times;
- increases the noise insulation rate to 68%.
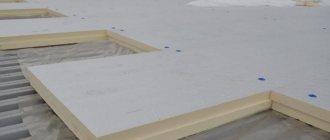
The cost of insulation depends on the material used and its size. For example, a set of 6 LOGICPIR slabs measuring 1190x590x40 mm (to cover an area of 4.16 m²) will cost from 1900 rubles.
Properties
The materials used in production are most often environmentally friendly, safe for health and the environment.
Related article: Interior design of a small house - ideas for your own small cottage (52 photos)
Advantages:
- light weight;
- durability;
- resistance to loads;
- protection against moisture penetration;
- high rates of heat saving and sound insulation;
- resistance to temperature changes;
- ease of installation;
- high reflective properties.
Such insulation can be used in any premises. In addition to the described qualities, it is capable of reflecting radiation.
Types of insulation
Products are made of different thicknesses, from different materials, with different heat-reflecting coatings.
Penofol
This is a universal material, which is also called ecofol or isolon. Thermal insulation is produced in rolls. One or both sides can be covered with foil.
There are insulators that have a foil coating on one side and a self-adhesive coating on the other. Some types of insulator are additionally equipped with reinforcing mesh.
Main characteristics:
- thermal conductivity - 0.038 W/(mK);
- vapor permeability - 0.001 mg/m*K;
- moisture absorption - 0.35-0.7%.
Most often, such products are used to insulate pipelines, floors and roofs.
Penofol with thermal conductivity - 0.038 W/(mK).
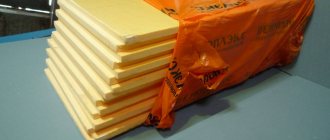
Expanded polystyrene
Sufficiently thick volumetric insulating coatings are made from expanded polystyrene, foil-coated on one side.
Advantages of the material:
- not afraid of mold and mildew;
- does not rot;
- withstands temperature changes -180…+180ºC.
Disadvantage: the possibility of using polystyrene foam only for insulating floor bases.
Expanded polystyrene does not rot.
Styrofoam
Polystyrene foam is made by fusing polystyrene granules. It is used in conjunction with the “warm floor” system.
Main characteristics:
- thermal conductivity - 0.035 W/m²;
- insulator thickness - 0.3-0.5 cm;
- density - no more than 45 kg/m³;
- possibility of using the material in the temperature range -180…+180ºC.
Foam plastic is used to cover areas with increased mechanical loads and humidity.
Foam plastic for underfloor heating systems.
Aluf
Alufom (bestizol) is cellular polyethylene covered with aluminum foil. The product absorbs shocks and sounds well. The main advantage is low thermal conductivity.
Alufom has a small thickness, so it is often used to insulate pipeline communications and ventilation systems. It does not lose its qualities in either heat or cold.
Alufom is a fairly thin material.
Mineral wool
Fiberglass is used to produce the product. The thickness of the finished rolls (mats) can be from 5 to 10 cm. Thanks to aluminum film, insulation is used for buildings with high humidity (baths, showers).
Basalt wool can withstand temperatures of -200…+300ºC. Its thermal conductivity is up to 0.07 W/(mK).
Mineral wool is not susceptible to mold and damage by rodents. The insulating coating is resistant to fire, so it is often used for finishing wooden buildings.
Mineral wool is recommended for wooden buildings.
Fiberglass wool
The industry produces fiberglass insulation materials, for example, Izover insulation with foil. Its production is similar to the process of producing stone wool. Basalt rocks and remains of the glass industry are used here. When purchasing, you should pay attention to the direction of the fibers. The best option is a material with a chaotic arrangement.
Good performance characteristics allow this type of wool to be used for various purposes: internal and external thermal insulation of walls, insulation of floors, roofs. Due to its heat resistance, it is widely used in the construction of baths.
The disadvantage is the moisture permeability of the material, so insulation from steam and water is necessary.
Advantages and disadvantages
Advantages of foil thermal insulation:
- retains heat in the building, does not let in warm air from the street in summer and cold air in winter;
- characterized by increased wear resistance;
- in some cases it can be used as waterproofing;
- resistant to mold and mildew;
- has good soundproofing characteristics;
- does not release toxic components.
The only drawback: the insulation itself cannot be covered with finishing.
Basic functions of the substrate
The laminate is laid on a pre-prepared, flat and dry base, on a layer of substrate spread under the laminate.
The quality of installation and the duration of use of the laminated coating largely depend on professional installation and correctly selected and laid underlay material. The importance of the lining under the laminate can hardly be overestimated; its choice and the quality of the material largely determines how long and faithfully the laminated coating will serve you, whether it will be cozy and comfortable for you in your apartment in the winter.
In some types of laminated panels, the backing layer is attached to the reverse side, most often these are coatings with strength class 33. Basically, the underlay is laid separately, before laying the laminate. It performs several necessary functions at once:
Today there are many varieties of substrate materials, both natural and synthetic.
The most common substrate materials:
Application area
Foil-coated thermal insulation products are often used for heating equipment (heaters, oil radiators, boilers).
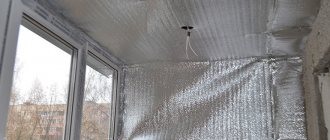
In addition, wall surfaces and floor bases are covered with such insulation with foil towards the room. The reflective layer retains maximum heat in the room and does not let it out.
Since the product is small in thickness, it is often used to insulate small areas. It is used for thermal insulation of saunas, garage cooperatives, outbuildings, pipeline communications, wells and boreholes.
Penofol for floor insulation.
Preparing tools before work
a layer of vapor barrier must be laid between the insulation itself and the wall .
If one-sided foil insulation was chosen, that is, the foil is on only one side, the main layer will come into contact with the wooden wall, and this is unacceptable, especially if the insulation is based on basalt wool. If the choice was made in favor of double-sided foil insulation, then a vapor barrier is not needed.
It is necessary to ensure air flow between the wall and the insulator so that the walls can be ventilated and moisture does not accumulate. To do this, you need to attach 20 mm thick slats to the wall. It would be enough.
Tools for work:
- construction stapler;
- foil adhesive tape;
- dowels and screws;
- screwdriver;
- insulation;
- vapor barrier.
If a product with a self-adhesive side is chosen as insulation, then a stapler will not be needed. The adhesive side adheres well to slats and other surfaces. In this case, you will need a degreaser, such as a solvent.
Which side should the vapor barrier be laid on?
Depending on the base to be insulated, insulation material can be laid in different ways.
For external walls
The rough side of the product is placed against the insulation, the smooth side towards the street. Insulation of rough floor subfloors is carried out in a similar way.
Correct installation of insulation.
For under-roof space
The dark side of the product is laid outwards, the light side is placed towards the insulation.
On the basement floor inside the house
The product is placed on a rough surface towards the heat insulator.
For ceilings, external walls and partitions
The smooth surface of the film is placed towards the insulator.
Rules for laying on floors, external walls and partitions.
Polyethylene foam mounting side with foil
Foamed polyethylene is applied to the wall, another heat insulator.
Let's sum it up
So, we found out that there are several types of foil insulation:
- polystyrene foam in sheets for flooring;
- mineral wool in sheets and rolls;
- penofol;
- shells for insulating pipes made of foam plastic and mineral wool.
All types of insulation, except shells, with a reflective layer are intended for internal insulation. The foil should be placed in the middle of the room. Such materials are suitable for external insulation, since the concept of reflecting IR radiation is reduced to nothing. Therefore, there is no point in paying for something that will not bring results.
Foam and mineral wool slabs must be glued using a special plaster-adhesive mixture from trusted manufacturers. The latter include the same Knauf or Ceresit. Laying on the walls is carried out from the bottom up, the sheets are additionally secured with dowels. And the most important thing is the presence of a ventilated gap in front of the reflective surface. If it is not there, then instead of reflecting heat you will get even more heat leakage and, in addition, mold on the finish.
Features of insulation technology
When using self-adhesive material for insulation work, lathing is not used. In this case, the base is thoroughly cleaned of old finishing material, and all recesses are sealed with putty. Then the surface is primed and insulation boards are applied, after removing the protective film.
Foil insulation without a self-adhesive coating is fixed between 2 layers of sheathing.
What tools and materials are needed for the job?
When performing installation work, you need to have the following tools and materials:
- reinforced tape;
- wood slats for making sheathing;
- insulating material;
- hammer drill (drill);
- stairs;
- screws for wood, concrete and dowels;
- tape measure, building level, pencil for taking measurements and marking the base;
- hacksaw;
- primer mixture;
- putty;
- roller;
- mounting stapler with staples;
- putty knife;
- container for preparing the solution;
- stationery knife for trimming excess insulation material.
The list of tools and materials may vary slightly depending on the area of insulation work and the method of fixing the insulation.
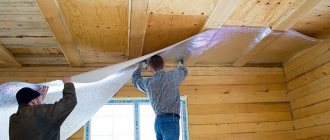
Indoor wall insulation stage
The sequence of performing insulation work indoors:
- Preparation of wall surfaces - removal of old coating, cleaning, puttying of the base.
- Fastening insulation boards to a self-adhesive coating or using lathing, additionally fixing them with staples.
- Sealing cracks with mounting tape.
- Fastening the slats to form ventilation between the insulation and the facing material.
If you plan to completely insulate the room, it is recommended to start installing the insulation from the ceiling. Next, the material needs to be mounted on the walls. Work on the floor is being completed.
Insulation of walls inside the house.
External wall insulation stage
For external insulation of buildings, it is recommended to use foil insulation made on the basis of fiberglass.
Isolation algorithm:
- Installation of metal sheathing on insulated bases. The structure is fixed to the walls with dowels.
- Fixing heat-insulating boards on the sheathing.
- Leveling and polishing the surface.
- Attaching windproof film.
- Laying waterproofing material, which is fixed with a stapler. You can use small nails with large heads, but be careful not to damage the insulation.
To install the finishing coating, additional sheathing is installed to form a ventilation space.
Insulation of the walls of the house from the outside.
Installation work on the ceiling
The sequence of insulating ceiling surfaces with foil penofol:
- Preparing the base: cleaning, removing old coating, sealing cracks and crevices.
- Surface priming.
- Laying a thin layer of insulation, fixing it with wooden slats in 0.5 m increments. The joints are taped with construction tape.
- Laying the main thermal insulation boards. They need to be attached to the slats using a mounting stapler and staples. The joints are sealed with tape.
- A sheathing of slats is also installed on the main insulation layer.
Next, you can perform the finishing cladding of the ceiling surface.
Attaching insulation to the ceiling.
Installation of penofol for attic insulation
For thermal insulation of attic spaces, mineral wool, ecowool or penoizol are most often used.
Work order:
- A vapor barrier film is laid on the outside of the rafters. Fastening is carried out using a stapler. The joints are sealed with metallized tape.
- A lath for the finishing coating is installed above the vapor barrier.
- The roof is being installed.
- Next, the selected insulation material is laid between the rafters, leaving a gap of 10 mm between the vapor barrier film. Penofol must be laid with the foil down. To fix the canvases, you can use wooden planks or staples.
- All joints are taped with reinforced tape.
It is not recommended to insulate the floor in the attic, because... it will be heated from the premises of the building.
Insulation of the attic.
The stage of gluing the insulation to the gable
The sequence of attaching the insulation to the pediment:
- The loose coating is removed from the plastered base.
- Fungus and mold are removed. Then the problem areas are dried with a hair dryer and treated with an antiseptic.
- Use a solvent to remove all oil stains.
- All irregularities that could damage the insulation are smoothed out.
- Cracks and holes are sealed with concrete mortar. If the pediment is made of wood, the cracks are caulked, large potholes are sealed with tow and foam. The wood is additionally treated with fire retardants and antiseptics.
- Next, the pediment is primed and insulating material is laid, having previously covered the working side (without foil) with a solution. The insulation panels are laid end to end.
It is quite difficult to make high-quality attic insulation yourself. And if there are even small gaps, there will be significant heat loss. Therefore, it is better to entrust work in such a room to experienced craftsmen.
Covering the pediment with insulation.
Laying insulation on pipes
To insulate pipelines, a specially shaped “cocoon” coating is used. Most often this is moisture-resistant polystyrene foam or mineral wool that can withstand high temperatures.
There are also main insulation and special ones for chimneys. Materials may vary in diameter and temperature rating.
The installation technology is simple - an insulating cocoon is placed on the pipes, which does not require additional fastening.
Insulation of pipes.
Concrete floor insulation stage
The thermal insulation coating is placed on the concrete base of the floor with the foil down. Often a roll insulator is used for this. To fix it to concrete, glue made from rubber is used.
The procedure for performing thermal insulation work:
- Preparing the subfloor. All cracks in the concrete slab are sealed with mortar. If the surface has significant differences in height, it is leveled.
- After the base has dried, a roll of insulation is spread on it with the foil facing up and cut to the required size. The floor is smeared with glue, the prepared piece of insulation is placed on it with the foil down and pressed well. The remaining strips are glued similarly and pressed tightly against each other.
- After the installation of thermal insulation is completed, all joints are sealed with special foil tape.
If the floors are cold enough, you can additionally lay wood logs in 2 layers on top of the insulation layer, and heat-insulating boards between them.
Floor insulation.
Wooden floor insulation stage
To insulate wooden bases, it is better to use foil materials with a self-adhesive surface. Other insulators are attached to the floor surface using 2-sided tape or staples using a mounting stapler.
Sequence of work:
- All skirting boards in the room are removed, and the floor base is thoroughly cleaned of various contaminants.
- If there are irregularities on the wooden surface, they need to be sanded (scraping is performed if necessary).
- The cracks and cracks are filled with putty.
- Next, the base is primed with special antiseptics.
- Then you need to spread a roll of thermal insulation on the floor, cut the pieces to size and leave them to straighten for a day.
- The next day, the material must be glued to a wooden surface with a self-adhesive coating or glue (2-sided tape).
- The joints are sealed with foil tape.
Afterwards you can lay the finishing coating on the floor.
We insulate a wooden floor.
Foil insulator for heated floors
When installing a “warm floor” system, the heat insulator must be mounted with the foil facing up. The base must be level, without any defects or deviations in height.
Installation order:
- The insulator is placed on the base of the floor with prepared strips end-to-end, the joints are sealed with mounting tape.
- A “warm floor” system is laid on top of the insulation.
- Next, a layer of hydro- and vapor barrier is installed.
- A floor screed 3-5 cm thick is poured.
You can connect the electric heating system after about a month, when the solution is completely dry.
Installation of heated floors.
Insulator for floating screed
It is recommended to use 2-layer insulation under a floating screed.
Work order:
- Dirt is removed from the floor base and defects are eliminated.
- The lower part of the wall surfaces is being plastered.
- A damper tape is glued along the perimeter of the walls, the height of which must correspond to the thickness of the floor.
- The base is coated with a primer in 2 layers.
- The product is placed with the foil facing up, the seams are sealed with construction tape.
- Next, the screed is poured.
Due to its high performance characteristics, foil-coated thermal insulation material is very popular among both consumers and professional builders.
The seams are sealed with construction tape.
Ceiling
Work on thermal insulation of the ceiling does not take much time, but the effect is noticeable. Everyone knows that warm air moves upward. In the absence of an insulator, it heats the ceiling and gradually goes into the attic. Foil material turned out to be especially effective for the ceiling. You now know which side to lay the insulation with foil, so you will do everything correctly. In this case, the ceiling will reflect heat waves towards the room, preventing them from passing outside.
For houses with a wooden floor, which is the ceiling for the first floor and the floor for the attic, everything is done simply. It is enough to lay a roll of thermal insulation under the subfloor of the attic. Which side should I lay insulation with foil on? Answer: metal film down.
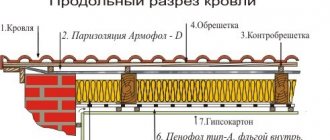
When insulating concrete ceilings you need:
- Clean the surface.
- Apply antifungal agent and primer.
- Glue the insulation with foil to the ceiling and seal the seams.
- Additionally secure with special dowels.
- Make a wooden sheathing.
- Screw the drywall.
- Seal the cracks with sickle tape.
If necessary, you can use foil insulation in combination with regular insulation. The material without foil is attached to the ceiling, and roll insulation with foil is laid on it.
Insulating a house or apartment with two-layer insulation makes staying there more comfortable and significantly saves heating costs. You just need to carefully consider the selection of material according to technical characteristics and purpose and avoid mistakes during the installation process.
Laying underlay under laminate with foil
Sometimes substrates for laminate with foil are made with an applied adhesive layer. If you don’t have it, you need to prepare foil tape to fasten the backing material to be laid together.
Video: how to lay foil underlay under laminate
Now you know why you need a backing for a laminate flooring, what kind of backing materials there are, what a foil backing is for a laminate flooring, and how to install it. We hope that this knowledge will be useful when choosing materials and designing a laminate floor in your home on your own.
Source