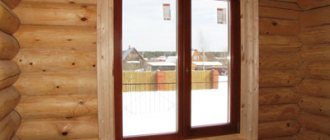
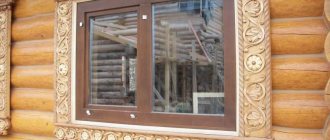
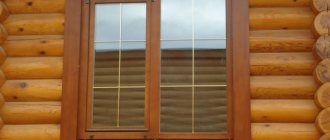
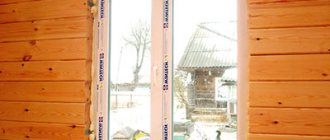
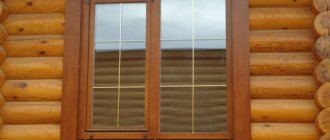
Installing windows is not the final stage of decorating the outside of a private house. After all, there are still slopes that must be closed. And there are good reasons for this. Therefore, in this article we will consider the topic of finishing windows in a wooden house with slopes and window sills. Namely, how to do it correctly and what materials are used for this.
Finishing a window opening in a wooden house Source kak-peresadit.ru
The need to finish slopes from the outside
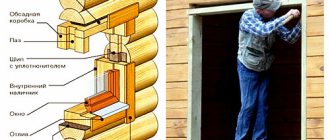
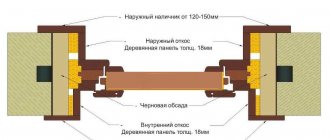
So, for everyone it seems that finishing window slopes is, first of all, decorating the facade of the house. Of course, not without this, but there are other overriding goals. One of them is the gap between the walls of the house and the outer planes of the window frames. This gap is a mandatory attribute that compensates for shrinkage of the house or its other movements.
If you don't leave it, the window will warp over time, the glass will squeeze out, which means it will have to be replaced. Nobody needs unexpected expenses. Moreover, windows are not cheap.
But what is a gap? This is a cold bridge through which cold air will penetrate into the rooms of a private house in winter. To avoid this, the opening between the window frame and the walls of the house is filled with thermal insulation material. And although today the market is filled with modern insulation materials, it is still necessary to create protection from natural precipitation, which reduces the service life of any building material.
The gap between the window frame and the wall of the house is filled with polyurethane foam Source homemasters.ru
And this primarily concerns insulation materials with their porous structure. Moisture quickly penetrates inside, reducing their thermal insulation characteristics. That is, over time, the thermal insulation layer becomes unusable and has to be replaced with a new one. Even foamed polyurethane in the form of polyurethane foam, which today is used more often than other insulation materials in the process of thermal insulation of installed windows, does not withstand sunlight. Under their influence, it darkens, crumbles and peels off.
All this requires the creation of a special barrier that would become a barrier to these natural loads. That is, a building material that is more resistant to these loads should be used. In this case, the material used will in any case have thermal insulation properties. That is, the resistance of the joint between the frame and the walls to low temperatures increases.
But man is always drawn to beauty. Therefore, the finishing of window slopes gives an attractive appearance. It turns out that with one finishing operation two of the most important problems are solved at once: increasing the decorativeness of the facade of a wooden house and protecting the insulation from the negative effects of natural loads.
The window must be aesthetically pleasing Source kak-peresadit.ru
How to fix
First, you will have to remove the outer slopes, then the inner ones, and fill the cleaned areas with new foam. Next, you need to clean off excess growths and inclusions from the slopes, as well as foam all other cracks and cracks. Then everything depends on the choice of material and method of finishing the outside. Whatever you choose: putty or stripping, do everything in such a way that not a piece or edge of the mounting foam peeks out, since it is not entirely resistant to environmental influences.
If you choose sandwich panels, take into account their properties and characteristics: thickness - up to one centimeter; polystyrene (extruded) acts as insulation; the outer sheet of the panel is a dense grade of polyvinyl chloride with a thickness of approximately 0.7 millimeters; internal – hard grade polystyrene.
To give the appearance perfection, so-called “additional” materials or elements may be required. Among them are ordinary corners, profiles C, CL, J. The first two differ in size, and the third acts as a retainer for the first two.
External cladding may sometimes need to be supplemented with P or PZ profiles.
Materials and methods of finishing external slopes
More recently, slopes were finished with plaster and then painted (whitewashed). This was done if the house was built of stone. If it was a wooden building, then the slopes were made of wood. There were no other options. Today, manufacturers offer a huge range of finished products: slopes and window sills, as well as building materials from which these window elements can be made.
But it should be noted that cement-based plaster remains the main component, which is still used today for leveling slopes, even under other finishing materials.
Now about the materials that are used today for cladding window slopes:
- Moisture-resistant drywall . An excellent option with which you can level the surface of slopes . The only downside to drywall is that it is not a final finish . That is, its surface will have to be additionally leveled and finished, for example, painted or tiled with ceramic tiles .
Slopes made of extruded polystyrene foam Source kak-peresadit.ru
- Extruded polystyrene foam panels . An excellent option, easy to install and does not require large investments. At the same time, polystyrene foam is an excellent heat insulator , so it is an additional layer of insulation. They are presented on the market in white form , that is, without texture and textured like wood . The latest products are covered with a special film that imitates the structure of wood. As for the first type, the white surface of the slope is simply painted in the required color in accordance with the color of the building facade.
- Plastic slopes . These are finished products that are available on the market in a huge variety of colors and textures. Since the topic of the article is finishing a window on the outside of a wooden house, the ideal option is plastic slopes that imitate the structure of wood.
Plastic ready-made slopes Source remlandia.ru
See also: Catalog of companies that specialize in finishing materials.
- Another option for plastic slopes is plastic panels , which are used to line ceilings and walls . There is a technology for installing them on window slopes.
- Wooden lining . Everything is clear here. The main task of the work manufacturer is to find the width of the material so that it completely covers the width of the slope.
- Vinyl lining . Everything here is the same as in the previous case. It should be noted that vinyl products are more widely represented on the market, both in terms of standard sizes and in terms of decorative filling.
- Sandwich panels . Another artificial material, consisting of insulation , covered on both sides with plastic panels of small thickness. Excellent thermal insulation material with excellent various decorative characteristics .
Since the story is about a wooden house, other building materials will not be suitable here. Although there are many more of them than indicated above. But it should be noted that most often a wooden house, or rather its window slopes, is finished with products made of wood. They can be purchased ready-made, since this type of product is present in large volume and variety in all construction stores and markets. You can order production exactly for the facade design of the house and dimensions.
Ready-made wooden slopes and platbands Source rosmontag-okna.ru
But one should not discount plastic, which today is increasingly used both in construction and finishing. At the same time, both internal and external. Therefore, first we will talk about the plastic finishing of window slopes, and then we will move on to the wooden one.
The essence of difficulty
The fact is that moisture appears where it is not expected at all. Many people tend to believe that a wooden house gets wet from the outside. This is the biggest mistake. For example, if slanting rain starts, the walls will, of course, get wet. However, they dry out quite quickly. Thanks to a properly equipped roof, the house will not be afraid of rain. In reality, the wood structure is saturated with moisture from the inside. In most cases, this happens during cool periods. For example, the weather is dry and frosty. Under such criteria, the air contains less than 2 mg of water per 1 cubic meter. m. Immediately inside the house itself, this figure can reach up to 26 mg. At the same time, air humidity is up to 50%. Accordingly, we are talking about recommended parameters. Almost always in almost all houses they are within these boundaries. Thus, moisture seeps into where it is least. The walls begin to become saturated with it. After which it will try to leak further out.
Plastic trim
Let's start by identifying the advantages of plastic slopes:
- a huge variety of design ;
- this material does not allow moisture or air , which means the insulation is 100% protected;
- plastic is easy to clean with household liquid or gel detergents;
- The service life of this material is practically unlimited ;
- low price of the product, which does not greatly affect the construction budget, and when replacing or repairing it will not greatly affect the wallet of the owner of a wooden house;
- it is environmentally friendly material;
- good frost-resistant characteristics .
Plastic slopes for outdoor installation Source kak-peresadit.ru
Technology for installing plastic slopes
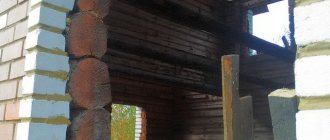
Let’s immediately make a reservation that the window opening in a wooden house is made quite accurate in terms of size. Because the more defects, differences and irregularities, the more difficult it is to install the window, and even more so to finish it. In addition, the gap is also a small opening in width.
The plastic slope includes: a panel, which is the main decorative element, a starting strip and decorative corners. First of all, a starting strip is installed and secured with wood screws to the wall of the house in the opening near the installed window frame. It is mounted in sections along the entire perimeter of the opening. The main thing is that the slats create one plane, that is, they are aligned exactly horizontally and vertically.
Now ready-made plastic slopes cut to the required dimensions are inserted into the groove of the starting strip. They can be attached to the surface of the opening with adhesive or polyurethane foam. Some craftsmen fasten the panels along the outer edge with self-tapping screws. And the opposite edge is held by the starting bar.
Plastic window with plastic slopes and a window sill in a wooden house Source vw-saratov.ru
Then they move on to installing decorative corners. In fact, they cover the end of the slope and part of the surface of the external wall of the house. That is, the joint between the plastic strip and the wall is closed. Pay attention when choosing a corner. It must be of a certain width in order to form a platband on the facade of a wooden house. But here, as they say, you won’t find a friend to suit your tastes and colors. Therefore, the designer must take this into account in the building design. And one moment. It concerns the method of attaching the corners. To do this, use a special silicone-based glue.
As for the window sill, it is chosen to match the color of the slopes. It also fits into the starting bar. But they attach it with sealant or mounting foam to the horizontal plane of the window opening. No screws or nails.
There are slopes on the market, which are a corner with shelves of different widths. The small one is the editing room. It is pressed against the window frame, where it is secured with self-tapping screws. The large one is the slope itself and covers the plane of the opening.
Preparatory work
Preparation for the external finishing of a window opening
This question of how to finish the slopes of windows from the outside is significant, but first of all you should study the basics of preparatory work. Since exterior finishing is a required procedure for all methods. Preparatory work includes a number of points:
- All protruding elements are removed from the coating.
- Checking the reliability of the surface, eliminating defects.
- Slots and cracks should be treated with a primer.
- After this, the surface should be coated with putty.
- Exterior finishing requires additional sealing. The sealant must be applied to the entire surface of the installation joint and part of the adjacent wall.
Do-it-yourself external slope (video)
Wood finish
I would like to note that if you choose wooden window trim on the outside of a wooden house, then you should pay attention to the finished slopes and window sills. There is a huge variety of products in width and thickness. So choosing the necessary element for the required parameters will not be difficult.
Typically, finished products are installed very simply, for which different methods are used. For example, one of the simplest is fastening with nails with small heads. The latter simply will not be visible. Especially after coating the wooden elements with varnish.
Even if self-tapping screws are used, their caps are covered with special plastic caps in the color of the wood or puttied, and then stained or varnished. And they won't be visible either. Under wooden slopes, they usually try to level the planes of the window opening to the maximum. This is how the problem of a tight fit of the finish to the ends of the walls is solved, and, accordingly, a presentable appearance is achieved.
Main options
The owners’ zeal to protect their home is very laudable. But almost always the exterior finishing of a timber house is done incorrectly. It is natural that this will not bring the desired result. In addition, the structure itself may be seriously damaged. Currently, the exterior decoration of wooden houses (the photo will be presented below) involves a huge number of different options. Further in the article the most popular of them will be examined:
- siding;
- brick.
The choice of these two options is not accidental. As mentioned earlier, they are becoming more popular these days. Both materials provide reliable protection of the structure from atmospheric causes.
Step-by-step installation of windows
This procedure should be divided into several stages. Each of them must be performed correctly. Then we can say that everything will work out as it should.
Preparatory work
Any work requires preparation. Thus, it is possible to reduce operating time and ensure the highest quality installation. In general, if you plan to install a double-glazed window, then measuring the required size can be freely carried out without removing the old opening.
- The old window is being dismantled.
- All unnecessary fragments, debris and dirt are removed from the opening.
- Additional measurements are being taken.
- If required, the contours of the sides are corrected or the window opening is expanded.
- Once again everything is cleaned, if necessary, finishing is done with putty, and the casing is installed.
On a note! Work can only be carried out at temperatures above 5 degrees C. There should be no strong wind.
The glass unit is installed according to the following principle:
- The window block is inserted into the prepared opening.
- Gaps are made between the casing and the frame: 40 mm at the top and bottom; on the sides 30 mm.
- To secure these indicators, wedges are installed.
- Using a level, the frame is leveled.
- The structure foams a little around the perimeter.
- Now you can secure the frame thoroughly; for this, special fasteners are used or this is done directly through the profile. First, the accuracy of the level is checked again.
- You can foam the remaining areas and begin finishing the exterior and interior (installation of platbands, slopes).
If you are not confident in your abilities, then it is better to turn to specialists who do this professionally. In addition, if problems arise, you can always ask for corrections.
