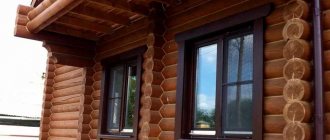
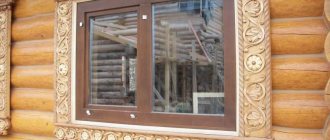
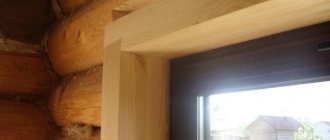
The installation of windows during the construction of a wooden house has always been and remains one of the most important and difficult tasks. The specifics of installing windows in a log house are such that attaching them to the walls of the log house is not recommended.
Technology for installing windows in a log house.
In the log house, over the course of 5-8 years, settlement occurs, caused by the process of natural drying of the wood, and compaction of the inter-crown filling under the load of the house’s own weight. Only during the first year, the shrinkage of the house can be 3-5 cm. Therefore, in the old days, our ancestors allowed a wooden house to stand without doors or windows for at least a year until its walls settled. And only then did they begin to fill the window and door openings.
Today, few people agree to wait for a finished log house to settle down. Therefore, the installation of windows in a log house must be done so that the subsidence of the house does not in any way affect the structures filling these openings: it does not deform the double-glazed windows or jam them. This can be avoided by installing special joints for connecting door and window frames to the frame, which do not prevent their free movement relative to each other.
The walls of a log house and the window and door frames are two independent structures, each of which works in its own way. Installing windows in a log house requires proper preparation of the opening. To compensate for the shrinkage phenomena of wooden wall structures, window and door openings must be made with larger dimensions than the dimensions of the window and door frames.
Window as an important power unit at home
Deformation of logs in a log house
A log house, despite its external solidity, is a rather unstable structure. The reason for this is the round shape of the logs and the change in their geometric dimensions during shrinkage and shrinkage.
Under the influence of the weight of the roof and attic in a log house, distortion of the walls in the vertical plane often occurs. If the crowns were laid without additional fixation, the lower logs can be squeezed out either inside the room or outside. In practice, such displacements from the vertical axis can reach up to 3-5 cm, while the entire wall is under significant stress.
If you cut openings for windows and doors in such a wall without installing casing frames, it will simply collapse. Therefore, the entire structure of the window openings is not only a place for installing double-glazed windows, but also a power unit that gives the frame additional rigidity.
Note that this feature is inherent in all wooden buildings, including houses made of profiled timber.
A few expert recommendations
An experienced craftsman must be able not only to correctly install a metal-plastic or wooden window, but also know the technology of constructing wooden houses. This will allow him to determine whether it is possible to install a window in a log house in a particular case, and, if necessary, install a casing.
If the casing in a log house is an old box from a previous window, then when installing a metal-plastic window, you can use one of the following methods:
- Convert the window opening into a frame.
- Reduce the size of the window due to the fact that the thickness of the frame, frame and gap for foaming will be added to the existing window structure.
Wood is a “living”, “breathing” material, so shrinkage of the house can occur throughout its entire lifespan; therefore, it is undesirable to install windows without installing frames.
Features of installing windows in wooden houses
Taking into account the factors listed in the previous section, an additional strength structure is almost always installed between the window and the frame - a casing frame assembled in such a way as to counteract both vertical compressive forces and longitudinal ones.
There are three main types of casing frames:
- spiked socket (T-shaped);
- casing into a deck (U-shaped);
- pigtail in the embedded block.
How to properly make and install a casing is described in our other articles; here we note that a T-shaped pattern is most often used to arrange a window opening in a wooden house.
Please note that any casing option should not have rigid connections to the frame (nails, screws, etc.). The casing frame is connected to the opening using a sliding pattern through a tongue-and-groove connection.
Unlike stone houses, a window opening in a wooden building is cut out after the frame has been assembled, which immediately determines an extensive list of problems:
- the need to coordinate all sizes with the characteristics of a particular log house;
- change in the size of the opening due to changes in the structure of the log house during shrinkage;
- when calculating the size of the opening, it is necessary to take into account a large number of indirect factors (type of casing, type of seal, “age” of the log house, type of window, etc.).
It should be separately noted that the assembly of the log house and the installation of windows is carried out by different teams of builders, which very often leads to inconsistency in the technology of laying logs and preparing window openings. This is expressed in the fact that in those places where windows should be installed, when cutting an opening, power fastenings (for example, dowels) are found.
In view of this, it is advisable to study all the information on the issue of how to make door and window openings at the design stage.
How to choose the type of casing?
Casing in a rough deck with external finishing
Currently, three main designs of casing frames (“casing frames”) are actively used:
- casing into a deck (or “U-shaped”);
- spiked socket (or “T-shaped”);
- pigtail in the embedded block.
Let us recall that any casing frame is a frame for mounting a window or door that does not have a rigid connection with the log house. If you formulate in one phrase what a socket is needed for, it will sound like this: “the logs in the log house move, the frame remains motionless.”
Please note that when installing the casing, it is necessary to constantly monitor the absence of fixed connections between the frame and the frame!
The coupling of the casing and the frame in the vertical plane is sliding, of the tongue-and-groove type. Depending on the type of frame, the spike can be located either on the vertical riser or at the end of the opening.
Taking this into account, between the top crossbar of the casing frame and the frame there should always be a compensation gap filled with a fibrous sealant. The dimensions of this gap depend on the climatic conditions in the region and range from 60 to 100 mm.
Each of the above casing options has several modifications, but, nevertheless, several general recommendations can be formulated for choosing the optimal scheme.
Window casing
T-shape with selected quarter
The casing for plastic windows in a wooden house is most often made of the T-shaped type. Its design includes four elements:
- Two vertical posts (“jambs”), the task of which is to provide a movable interface between the casing frame and the frame.
- Top crossbar (“top”).
- The lower crossbar, which in casing frames for plastic windows is also a window sill.
Considering that this type of frame is used very often when installing windows, let us consider in more detail its two basic modifications: monolithic and prefabricated.
From the point of view of reliability, durability and quality of thermal insulation, the best option is a monolithic T-shaped casing. The term “monolithic” in this case means that the frame board and the tenon are one piece and made from one block of wood (board).
But at the same time, this is also the most expensive option, since the thickness of the workpiece must include the height of the tenon.
Casing in a tenon with the tenon placed on glue
To reduce the cost of the casing, a prefabricated version is sometimes used, in which the embedded block (tenon) and the inner board of the frame are made of different boards. In this case, the tenon can either be placed in the groove on both sides, or glued with stable compounds that are used in houses made of laminated veneer lumber.
Please note that it is highly not recommended to connect the board and tenon with self-tapping screws, since over time such a connection will become the main bridge of cold in the window opening. Casing in a deck (U-shaped) when installing PVC windows is used quite rarely and most often in cases where there is a partition made of short-length logs between large windows. In this case, the casing not only protects the window, but also frames the logs, preventing them from moving in the horizontal plane
In this case, the casing not only protects the window, but also frames the logs, preventing them from moving in the horizontal plane
Casing in a deck (U-shaped) when installing PVC windows is used quite rarely and most often in cases where there is a partition made of short-length logs between large windows. In this case, the casing not only protects the window, but also frames the logs, preventing them from moving in the horizontal plane.
Door frame
The choice of door frame design depends on the type of door.
For wooden external doors, the most durable version of the casing is used - a casing in a deck.
In cases where a metal door is installed in a log house, it is sufficient to mount only the vertical guides according to the “into the embedded beam” scheme.
As a rule, they save money on interior doorways and the doors are mounted in a “mortgage beam” frame without a bottom crossbar. Fixation of the lower frame size in this case is ensured by the floor boards.
Concluding the section with recommendations for choosing the type of frame, we note that when installing plastic windows in a log house, an additional factor in favor of the T-shaped structure is the presence of ready-made grooves for tenons at the ends of the openings, since many manufacturers of laminated veneer lumber perform milling and sawing according to customer drawings .
Construction of a window opening in a log house
Construction of a window opening in a log house.
- First you need to decide on the height of the window sill. As a rule, it is 80-90 cm. This height is optimal for comfortably leaning on the windowsill. The window opening is cut approximately 5 cm below the expected height of the future window sill, since the thickness of the polyurethane foam layer is 1-2 cm, and the thickness of the window sill itself is 3-4 cm.
- Next, you need to place the horizontal and vertical lines of the window opening. A building level and plumb line will help with this.
- The lower line of the window opening is placed according to the level, and then the upper one. In this case, the height of the window opening should be at least 14 cm greater than the window itself, since the distance from the bottom edge of the window opening to the window should be left 4 cm for the window sill and foaming, on top - 2 cm for foaming, and for shrinkage of the house - 4-5 cm .
- When marking the vertical lines of a window opening, it is also necessary to take into account that it must be at least 14 cm wider than the window itself, of which 2 cm each goes for foaming, and 10 cm for the casing (jam).
- The window opening is cut according to the markings.
Complexity and pitfalls
Wood is a living material that constantly breathes. After installation on the foundation, the log house must stand from several months to several years before it is subjected to subsequent finishing. Shrinkage can reach 15% of the height of the frame. Even after shrinkage, in a house that has already been completed, the wood will still continue to breathe. Wood absorbs moisture and releases it depending on the state of the environment and air humidity. The permissible values for changing parameters are 1 centimeter per 1 meter of wall height, that is, a one-story log house will move by 2-2.5 cm, a house or bathhouse with two floors will be up to 5 cm.
When a house breathes, the geometry of the object may be disrupted. The weakest points are window and door openings, since the size of the metal door leaf, window frame and glass does not change
During construction, shrinkage and operation, it is important to ensure the rigid and unchanging shape of these elements
Shrinkage
But the most important difference between houses made of wood (does not apply to frame-panel houses) is the ability to shrink as a result of drying of the wall material (logs, timber). And this point is decisive in installing plastic windows in a wooden house, because if you install a window, as usual, in a bare opening, it will inevitably be crushed and deformed by the shrinkage process.
There is an opinion that the first two are the most active period of wood drying. But that's not true. After the construction of the house, the shrinkage of the walls continues for decades. But that is not all. Wood not only gives off moisture, but also absorbs it. Therefore, rigid fastening when installing windows in a wooden house is impossible in principle!
- Shrinkage in a log house is about 10 – 15 mm per log D = 250-300 mm
- Shrinkage in a house made of timber is about 7 – 10 mm per beam with a section of 150x150 mm
- Glued laminated timber - unknown.
There are other ways to calculate the shrinkage height of log houses as a percentage: approximately 10-15% of the original height. But in fact, the shrinkage of houses made of timber and logs depends on many factors:
- on the material (log, rounded log, timber, laminated timber);
- on the time of material procurement (winter procurement or summer);
- depending on the time of day (morning, evening) Yes-Yes!!! Don’t be surprised – we explored this too!
- from where the forest grew (swamp, field); on the degree of resinity and density of the tree;
- on the size of the material - both its length and thickness;
- from the moisture content of the material;
- on the size of the building; on construction technology (dowel, type of felling, etc.);
- from the material of inter-crown insulation; from the type of wood;
- depending on the time of year when construction is carried out.
The most severe shrinkage occurs in log houses made of ordinary logs, then rounded logs, profiled beams, timber, laminated timber go to a lesser extent. Even if the house is more than a dozen years old, it is still necessary when installing windows in a wooden house to take into account the vertical movements of the walls as a result of the increase and or a decrease in air humidity and temperature at different times of the year.
Please note: a large gap is specially left above the jamb, the size of which is designed for the maximum possible amount of shrinkage of the logs (beams). During the first years after the construction of the house, this compensation gap will gradually decrease to a minimum, but the upper log (timber) of the opening, if calculated correctly, will not press down or deform the frame. Thus, the shrinkage of the house will not in any way affect the size and shape of the window frame, and, accordingly, will not damage the plastic window located inside it.
If you decide to install windows in an old wooden house that has long gone through the process of shrinkage, then, when disassembling the window blocks, you will probably notice: they are made according to the same principle as the casing design described here, i.e. are not nailed to the logs of the opening, but are fixed in it using a simple “mortise and tenon” system on the sides.
This suggests that the technology of installing windows and doors in a wooden house in frames was invented a very long time ago, and is used successfully to this day. We will not invent anything new and will follow the same path.
Common Mistakes
If mistakes were made during installation, then certain problems will soon arise. Below are common mistakes made and their consequences.
- Windows are installed in a wooden building without the use of casing - the frame may be deformed, and the glass will most likely crack.
- The measurements were made inaccurately, that is, without taking into account thermal expansion - the frame will be deformed, and the doors will close tightly.
- If the fastening is too tight, wave-like distortions of the window frame will occur.
- The window is not positioned horizontally/vertically correctly - the sashes will skew, will close tightly, and the mechanisms will quickly become unusable.
Wooden window in the bathhouse
Where to start?
When expanding an existing opening or cutting out a new opening, you should begin by calculating the size of the opening.
As a rule, the initial dimensions are taken as the dimensions of the future window, to which are added:
- thickness of the socket (taking into account the tongue-and-groove joint);
- thickness of the sealant layer (increase the size by 5 mm);
- compensation gap (additional 60-100 mm when determining the total height of the opening).
Please note that the bottom casing strip in windows is often a window sill, the thickness of which may be greater than the thickness of the boards used to make the casing frame.
What is casing
Next, they begin to mark the contours of the openings on the walls of the log house. During this operation, we recommend that you adhere to the following rules:
- the upper and lower edges of the opening should pass through the center of the log (or cover 1/3). This is necessary for the normal operation of the casing and to prevent problems with insulation;
- It is advisable to mark horizontal lines using precise level gauges;
- Make vertical markings only along a plumb line.
If you plan to do the work yourself, you should take care in advance to prepare the appropriate equipment.
The main tool used when arranging window and door openings is a chain saw (or its electric version).
If there are many windows, and you plan to chamfer for installation of platbands, we recommend making a special device based on an angle grinder, with the help of which the time spent on this operation will be reduced significantly.
Creating and preparing a window opening
How to properly install a plastic window in a wooden house? The success of the work depends, first of all, on a well-prepared opening: most often in a wooden house it is cut after the frame has been assembled, but sometimes it is done during the construction stage. In the first case, you can proceed to the preparation of openings only after the completion of the main shrinkage, that is, a year and a half after construction. The contours of the hole are drawn using a plumb line and level, and then very carefully cut with a chainsaw.
It is advisable to apply the markings at the stage of assembling the house, so that there are no dowels in the openings. The calculation is made so that the upper and lower logs are cut in half: this will allow you to easily install the casing on flat horizontal surfaces. When preparing the opening, it is necessary to take into account the size of the casing. Therefore, the width should be 14 cm larger than the frame dimensions, at least 12–14 cm larger at the top, and 7 cm larger at the bottom for installing a window sill and a layer of polyurethane foam.
Before inserting plastic windows into a wooden house, you should carefully treat all the end parts of the logs and cover them with an antiseptic to protect them from rotting. In addition, the wood needs to be sanded to ensure a smooth surface. Often it has to be leveled in height: wooden houses rarely remain perfectly level after shrinkage. To ensure the frame fits correctly, use a laser level and a plumb line to level the hole.
Equipment and tools
When preparing to install a plastic window yourself, you should pay special attention to the preparation of tools and materials. Considering that in most cases, the installation of windows in wooden houses is carried out on-site (dacha, country house, etc.), the lack of one specific key or device can create considerable problems.
Let's look at the main groups of tools that are needed to properly install a window structure.
Mechanics
From a mechanical point of view, plastic windows have a far from standard design, so the usual kit of a home craftsman will clearly not be enough.
Tools
Below is a list of mechanical tools required to effectively work with PVC profiles:
- iron and rubber hammer (an elastic striker is used to position the frame);
- universal screwdriver;
- set of hex keys;
- handle for removing pins (with hexagonal tip);
- electric drill;
- drills for concrete and metal (diameters from 3 to 10 mm);
- mounting wedges and gaskets;
- universal adjusting key;
- measuring kit (tape measure, square, building level, plumb line);
- device for gripping double-glazed windows (“glass jacks”).
Please note that a regular hacksaw may not be enough for cutting expansion profiles, since some types of extensions can be reinforced with metal. Of course, it is possible to cut such a profile with a hand saw, but you will have to spend much more time on each detail.
Taking into account the above, it would be useful to supplement the above list with a mechanized version of the saw (a jigsaw or a circular saw), as well as devices for fixation (clamps).
It is advisable to take a clamp with a wide grip, since they may be needed not only for securing materials during cutting, but also for attaching expansion profiles.
Sealing
Sealing Tools
An integral part of the technology for assembling metal-plastic windows is sealing using sealing tapes and polymerizable substances.
When installing PVC profiles with your own hands, you can use sprayers supplied with cylinders of polyurethane foam, but for professional work it is advisable to purchase a separate device that will significantly reduce the cost of consumables.
We would like to separately emphasize that, in addition to polyurethane foam, when installing windows made of polyvinyl chloride, silicone is often used, which is extremely difficult to squeeze out of the tube without a special “gun”.
Waterproofing
Any polymer sealant - and polyurethane foam is no exception - in the case of constant contact with outside air and moisture is destroyed quite quickly. To slow down this process, the internal and external surfaces of the installation gaps must be protected with waterproofing (installed on the internal surfaces, such protection is called a “vapor barrier”).
This can be done either using special tape or through the application of special pastes (putties).
Depending on what type of waterproofing is preferred, the basic list of tools must be supplemented with scissors or a set of spatulas.
Installation technology
Regardless of how the window will be inserted into the casing (in the direct or reverse quarter), it must be correctly positioned before fixing. Therefore, before you start installing the window, it is recommended to dismantle the movable frames.
Please note that, unlike PVC windows, double-glazed windows in wooden windows are not designed for quick removal. Therefore, unloading dismantling should be performed by removing the clamps from the rotary fittings
Wooden window installation diagram
Considering that the weight of a wooden frame can be quite significant, further operations should not be performed independently, but you need to involve at least one assistant for this.
Installation of the frame in the casing is carried out in the following sequence:
- installation of anchor plates;
- frame positioning in all planes, including vertical. The installation gap should not exceed 20 mm, and the vertical line of the window should exactly correspond to the plumb line or level;
- fixing the window in the correct position;
- installation of movable frames and fixing them in the closed position;
- blowing in the installation gap with foam;
- organization of vapor and waterproofing;
- installation of internal and external platbands.
If the frame is installed according to the “blind window” scheme, the assembly will have to be carried out without dismantling the double-glazed windows.
Installing windows in a log house: choosing materials
The natural movement of logs leads to a reduction in the window opening. In a few years, this figure can reach a value of 10 cm. Geometric deformation can be avoided by using a special design - casing (casing). It takes on the load of the structure and allows the wooden box to move freely in the vertical direction.
Immediately after the construction and processing of a wooden house, it is recommended to install wooden window installations that have a more dynamic design. After shrinkage is completed, they can be replaced with metal-plastic, laminated ones. They are more familiar to many people and have good thermal and waterproofing properties.
If the house will not be lived in for the first few years, you can install simple wooden frames covered with transparent film. They prevent moisture from getting inside and promote free shrinkage. Installation of the frame is mandatory; it ensures that the correct proportions of the opening are maintained.
Features of installing windows in a log house
It is recommended to place the opening at a height of 80-90 cm (slightly higher than the height of the tabletop). Installation of the socket involves the use of one of three main technologies: tenon, groove, block. Installing windows in a log house has the following features:
- To install wooden structures, a “groove” casing is used, while for metal-plastic structures, a “tenon” casing is used.
- It is recommended to install window frames with anchor plates, since through drilling breaks their tightness.
- The opening should have the following dimensions: window width: +3-4 cm, height: +6-8 cm. These gaps are filled with polyurethane foam, allowing the frame to lower freely.
- The technology for installing plastic windows does not differ from the generally accepted one. It involves fixing the frame, filling the holes with foam, installing sills, window sills, and adjusting the mechanisms.
Wood-look laminated metal-plastic window openings have high performance characteristics and represent an interesting design solution.
Installing windows in a log house: the cost of a mistake
Only professionals with experience in performing such work can take into account all the features of installation and preparatory stages. The cost of error is quite high:
- violation of the tightness of the structure - holes are formed that allow moisture, drafts, and cold to pass through at low temperatures outside;
- violation of the geometry of the opening - the window stops closing normally, the mechanisms are deformed, and cracks may appear in the frames;
- the need to replace the window due to premature physical wear.
First working stage: cutting out the opening
Alignment of walls
After the marking is completed, cutting out the opening begins. During this seemingly simple operation, the following rules must be observed:
- the cutting plane must be strictly perpendicular to the longitudinal axis of the logs;
- The cutting line should run in such a way that there are no distortions and spontaneous falling out of the logs.
After cutting the opening, it is necessary to check the condition of the end of the frame to ensure that the vertical axis is maintained. If deviations are noticed, then the next stage of work is leveling the wall.
This is done with the help of special devices that pull the logs into one line.
This screed is temporary and is dismantled after installation of the casing.
Please note that in cases where an increase in wall distortions is detected, it is advisable to install a U-shaped version of the frame.
Casing: purpose and types
Casing diagram.
The casing is a wooden frame, for the manufacture of which 4 boards 60-80 mm thick are used. The bottom board is a window sill, the other three are slopes. A longitudinal slot 20 mm deep and 60 mm wide is made in the side elements. This slot is necessary in order to create a pliable joint between the casing and the wall. It includes a ridge made at the end of the opening, or a specially made cranial block that forms a keyed connection between the casing and the wall. This joint, when the frame settles, allows the timber or logs to deform, thus reducing the size of the gap above the windows and moving along the groove in the casing, without transferring the load to the double-glazed windows. A block is attached to the lower plane of the window opening, but its functions are different - it is necessary to prevent blowing through the junction of the wall and the window sill.
All plane joints must be sealed with insulation - tow or some other natural material. For these purposes, it is not recommended to use polyurethane foam, since during the process of settling the log house, the foam may come off the surface and cracks will appear.
Installation of the casing begins with the installation of the window sill at a level. After this, the side parts of the box are mounted and covered with the top block.
Checking the package before installation
Professional builders consider this point to be the most important, because if you don’t pay enough attention to it, then all further work will be inappropriate.
First of all, you should check the dimensions of the opening for the window and the arrived glass unit. If the size of the opening is 184 cm, then the size of the frame itself should be 180 cm. The difference between the values is needed for the gap between the side posts and the wall itself.
If the height of the opening is 120 cm, then the normal height of the frame is about 116 cm, so that the plastic support profile - the clover - is completely inserted at the bottom. It must be included in the initial package of the double-glazed window, and it is mandatory to install it. The clover is used to correctly install the window sill indoors and screw the ebb from the outside.
For windows with mosquito nets, make sure that the fasteners are suitable. There are situations when pens or small parts are lost.
It is recommended to check the entire structure for minor damage and cracks. Recalculate the number of arrived linings and drainage holes.
The window sill will often need to be ordered separately. Also, for proper installation, you need to order glass linings.
Types of flashing (casing)
In order for the window to move freely during the shrinkage process, you can make a 50x50 rectangular groove at the ends of the logs of the window opening into which to insert the bars, and fasten the windows to the bars. This is a fairly simple method that is ideal for wooden windows. They are attached to the bars with nails or foam. However, this method is not suitable for plastic windows.
It is better to install plastic windows in a special carriage, which is a 150x100 beam with a 50x50 groove selected along its length, which is mounted on a ridge formed at the ends of the window opening logs. The ridge is a rectangular protrusion 50x50, that is, exactly the size of the groove.
What such a comb looks like is shown in the figure below:
Casing installation
The casing (edging) is carried out after the window opening is prepared. First you need to prepare a 150x40 board for the top of the window opening. You need to take the board along the width of the opening and cut out two rectangular recesses at both ends, which will help install the board so that the previously formed ridge fits into these grooves.
This is what the board looks like:
The board is installed on top of the carriage bars and attached to them with self-tapping screws. The height of the opening should be 3-5 cm greater than the height of the window being mounted to allow it to be foamed.
The distance between the log above the window and the board of the window opening formed using the flashing must also be at least 5 cm to allow shrinkage of the log house logs. This space should be filled with insulation.
After inserting the window and securing it with nails or mounting foam, the frame can be covered with platbands on top to give a beautiful appearance.
The diagram for installing a window in a log house is shown in the figure below:
You can also watch a video that shows the process of installing a U-shaped frame with your own hands (click triangle to play):
Now you know how to properly install windows in a log house. In the following articles we will learn how to sand logs after caulking and shrinkage, and we will also talk about how to carry out interior finishing and how to choose the right doors for a bathhouse.
Window
0 votes
+
Vote for!
—
Vote against!
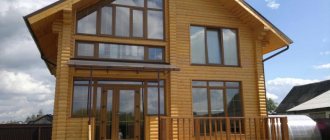
Wooden houses, baths, saunas and cottages have an important advantage - they are completely environmentally friendly, since they are made from natural materials. A wooden frame is “living”, it “breathes”, shrinks and ages, that is, it lives its own life. A house made of natural wood allows air to circulate, simultaneously purifies it and imparts healing properties, thanks to the phytoncides and resinous substances of natural solid pine. These same features of buildings made of lightly treated wood create some difficulties. For example, when it is necessary to install windows in a log house and doorways, as well as when finishing sagging walls, but if the installation technology is followed, all these problems can be solved.
Table of contents:
- Which windows are suitable for wooden walls?
- What is important to know about installation technology
- Basic conditions for using casing
- The main problems when installing doors and windows in a log house
- Instructions for processing a window opening
- Step-by-step installation of windows
- The process of installing plastic windows in a log house
Which windows are suitable for wooden walls?
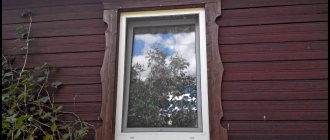
The walls of solid wood houses tend to be in some movement. This is influenced by the time of year, seasonal changes, air and environmental humidity - the log house swells or shrinks, shrinking. Some of the usual standards for installing windows and doors are acceptable for a log frame, so this requires a different design of the recess for the frame, known as casing. It makes it possible to minimize the movement of wooden walls of houses, bathhouses and other residential buildings made of logs.
However, not everything is so complicated, since the main shrinkage occurs during the first 3 years - under its own weight, the space between the logs is compacted and natural drying of the wood occurs. Sometimes during this time the log house sags by 10-15 cm, and the window and door openings decrease accordingly. Therefore, it is natural that for a new building made of natural wood, wooden windows in a log frame are more suitable, and for older houses - plastic ones, then they will be less susceptible to excess pressure and deformation.
If the construction of a house takes more than one year, stage by stage, then even unprepared “living” wood will shrink during this time, and installing windows in a log house made of wood will not be a problem. As a last resort, you can install temporary frames with film to prevent precipitation from penetrating into the window opening. And after a while, double-glazed window frames can be installed in a wooden frame to protect against adverse weather factors. These can be frames made of specially prepared dry wood, or from plastic, which is familiar to city dwellers.
Modern plastic windows laminated to look like natural wood will organically fit into the design of the log house, increasing the thermal insulation of the house. The experience of installers from Finland shows that a plastic window in a log house or double wooden frames can be inserted into a frame without any problems, and it is possible to combine different materials for window frames.
What is important to know about installation technology
Today, prestigious two-story houses of various types are made from timber. They are built in eco-style according to the traditions of their ancestors and according to the designs of modern architects and designers. Increasingly, they began to offer wooden houses and saunas similar to Finnish ones, and stylizing country houses as Russian towers is also in fashion. No less interesting are large manors in the Scandinavian style - made of wood and glass. It doesn’t matter whether it’s a pompous building or a small do-it-yourself cottage made of wood – the technology for installing wooden windows in a log house is approximately the same.
Of course, damp wood is not very suitable for building the walls of a wooden house. The Finns use only dried and specially prepared wood for export houses, and also develop special technology for houses that are quickly assembled. According to the technology, window frames are not placed in a log house for at least six months after the prepared structures are assembled, and in “living” wood – even later. But even in this case, some shrinkage is taken into account - do not leave the building without windows.
The holding time is required for the shrinkage of the log house and the final formation of wooden walls, and after about a year the log house will reach values close to maximum shrinkage parameters. However, it is impossible to accurately name the technical characteristics of shrinkage (in percentage or in millimeters), since everything depends on the type of wood and the degree of its moisture content.
Today, several options for installing windows in a log house have been worked out:
1. The most reliable method is to install a casing (casing) into which the window is inserted. The casing is a solid rectangular structure made of solid wood up to 40 mm thick, in which the lower strip forms a window sill, and platbands are attached to the ends. For a long time they were made from solid wood, given the required shape, where the grooves for the window frame were formed. Today, casing is made much more technologically advanced and looks more aesthetically pleasing, and glue beams are used to make it. The finished casing design is quite expensive, so they often use a more affordable technology for installing a window in a log house, that is, attaching it to the cranial bars.
2. There is another option - the window frame is attached directly to the beam with special fastening strips. Simple methods are used, most often, in log houses for baths and saunas, and in residential buildings they are more complex and reliable. Using a building level, the window frame is aligned to maintain distances and foamed with sealant. However, the method of installation with sealing in new walls of houses is not used. Foam is recommended to be used to seal the lower part of the frame and window sill - this plane is less susceptible to deformation when a wooden window shrinks in a log house.
3. Special (skull) strips are often used, inserted into grooves that move freely at the ends of the window opening. This prevents jamming during shrinkage without creating cracks. The skull strips are able to slide in the grooves, thanks to the design, so the window will not experience pressure when shrinking. The difference between the method is that the casing is attached to the skull block, and not directly into the opening.
Advice: Remember that even after the initial shrinkage of the frame, the compaction of wooden walls will continue for some time. With significant precipitation and in a climate with a high level of air humidity, the base of the log house will continue to absorb water, increasing the volume of the log house. In hot and dry summers, the tree gives up moisture, causing significant shrinkage. That is, natural changes in the size of a log house, for example, made of pine, will be noticeable up to 5 cm, but this figure also changes depending on the time of the log house. Installing windows using special technology reduces the likelihood of skewing, base displacement and jamming of the sashes and reduces heat loss.
Basic conditions for using casing
1. The casing of the log house makes it possible to prepare the installation of the window in a formed box, which minimizes the pressure of the log frame on the window frame through the natural process of drying the wood.
2. Properly manufactured casing of a log house prevents distortions in the form of the consequences of shrinkage.
3. There should be a small gap above the frame, approximately 50 mm, and this is insulated along with the side gaps.
4. A simplified casing can be made from boards of a smaller thickness of about 20 mm, where the forming slopes will be attached, and the bottom board forms the window sill.
5. The casing is secured with self-tapping screws to the skull beam, and the gap is insulated under the platbands.
6. From the outside, the casing looks quite compact and neat, and you can put another frame inside.
7. Proper use of casing installation technology allows you to counteract window depressurization.
8. Fastening of external platbands allows the use of synthetic seals, including rubber, to prevent the penetration of moisture into the window space.
9. If difficulties or questions arise about how to insert windows into a log house, it is recommended to contact specialists.
The main problems when installing doors and windows in a log house
1. According to the experience of installing houses made of natural wood, even a structure made of specially prepared and well-dried material will shrink up to 5 cm in the first year. In persistently rainy weather, the house will swell again. “Live” or undried wood with a high percentage of moisture gives a much larger amplitude per year.
2. Installation of windows or doors in a wooden frame is a technologically simple process, and specialists do not have any problems. However, difficulties and problems with an unprofessional approach arise much later, when the windows in a bathhouse or in a house begin to warp due to pressure from the natural drying of wood. That is, it is much worse when problems arise during the operation of the building.
3. Increased air humidity can lead to the fact that window sashes or vents do not open due to swelling of the wood with increased pressure from shrinking logs. Sometimes it is enough to slightly trim the adjacent planes of the sashes, and it is worse if the window cannot be opened during its entire service life. This is why a small gap in the casing or the correct sliding structure is important - in order to avoid such troubles.
Tip: It is important to use dry and high-quality timber, preferably from softwood. Before cutting out window openings, it is important to strengthen the boards to its sides so that they do not move apart.
Instructions for processing a window opening
To complete the work, you will need a chain saw, nails, studs, timber, edged board, square, plumb line and polyurethane foam.
1. On the wall of the log house, mark the contours of the window (door) opening using 4 strips. In this case, it is important to correctly mark the bottom of the window - approximately 80 cm from the floor.
2. The boards are selected slightly larger than the height of the opening to secure the studs with washers.
3. We make holes in the uncut crowns at the corners of the planned opening, similarly in the fastening boards.
4. Mark the vertical with a level and place boards along it, which we connect to the logs using pins and tighten the boards.
5. We place metal washers under the nuts to prevent the nuts from cutting into the boards; we secure the boards on both sides of the markings.
6. Next, you can proceed directly to the process of cutting the opening with a chainsaw, starting from the top log. You can also use another tool.
7. We proceed to processing the sawn logs and fasten the edges together with jumpers.
8. We form a window block from lintels and jambs in pairs, and on the outside we form grooves to the size of the tenons.
9. We begin to form the window block by installing the jambs, using nails to connect the lintels with the holding of the logs.
10. To check the right angles, we use a square, which can be formed before the block is finally secured.
Tip: To dispel doubts, it is advisable to watch a video about installing the pigtail, and only after that proceed to installation.
Step-by-step installation of windows
Today there are several ways to install window frames in a log house, but we will look at a very simple example.
First, you need to visually imagine in a cut what a window looks like in a log house - the diagram for installing a window in a log house is shown in the figure below.
This is a casing with grooves, a shrinkage gap with a seal, an external and internal platband, a tenon with a seal, a window with a drip, and a lower inter-crown seal.
The edging is done after the opening is formed:
- prepare a 150x40 beam for the top of the window opening, it should be the width of the opening, cut 2 rectangular cutouts at both ends for a pre-formed ridge;
- Place the board on top of the gun carriage, securing it with self-tapping screws;
- we make an opening 3-5 cm larger than the height of the inserted window, for filling with sealant or foaming from below;
- the gap between the log and the flashing board in the window opening should be about 5 cm (for shrinkage), which is filled with insulation;
- when the window is inserted and secured, a casing is attached to the frame so that the structure has an aesthetic appearance;
- do not forget to check before installing the trim and final installation both vertical lines of the window frame in a plumb line and horizontal lines in a level, since it will be impossible to correct this later;
- It is necessary to impregnate all wooden surfaces with an antiseptic to prevent the destruction of wood.
The process of installing plastic windows in a log house
The step-by-step process of installing PVC windows looks approximately the same as in the example with natural wood:
- we form a window opening;
- install the pigtail;
- We are completing the installation of a plastic window in a frame using technology.
The optimal distance of the window sill from the floor is 80-90 cm, and if the interior design plans to use a window sill in the form of a tabletop, for example in the kitchen or in a teenager’s room, then it is better to think through its design and installation in advance.
Advice: Remember that wooden frames are also characterized by partial shrinkage, and PVC windows have a rigid and stable base - they cannot be installed in a fresh log house, and it is necessary to use a frame. It will make it possible to maintain sufficient autonomy of the double-glazed window from the log house, so installation on foam and without a jamb is unacceptable in this case!
Two types of pigtail:
1. Simple design - a 50x50 mm groove is formed at the end of the opening for a block (not suitable for installing a PVC window).
2. A more reliable option is when a ridge is formed in the end logs on the window openings, on which a frame with a groove, otherwise called a “carriage,” is subsequently placed, and here, during shrinkage, movement along the guides without deformation will be ensured. This is a structure made of timber 100x150 mm, which exceeds the size of the window by 5-6 cm, in the center of which a groove of 50x50 mm is selected, the carriage is attached to the ridge.
Next, we assemble the frame from a 150x40 board, as described above, respectively, cut out grooves in it that fit onto the ridge - this is the upper part of the opening where we place the PVC window. Be sure to cover the slats with tow (in rolls) and secure the carriages, and secure the top strip of the frame with self-tapping screws to the carriage.
After the right angles, vertical and horizontal lines in the openings have been verified, and the frame has been framed, we proceed to the installation of plastic windows. Monitor the quality of fastening and tightness so as not to damage the thermal insulation of the windows in the log house. Follow all steps according to the instructions included with the PVC windows. When purchasing plastic windows, pay attention to the fasteners that are mounted at the end. The frame is leveled and mounted with fasteners to the frame; do not forget about the space for mounting foam under the window sill. All that remains is to hang the doors and cash out.
Tip: Pay attention to how the window is screwed to the board - in no case to the ridge, otherwise the point of movably fastening the window to counteract shrinkage is lost.
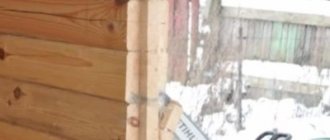
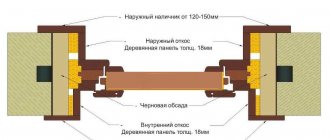
Installation of metal-plastic windows in a log house
Image 4. Installation of a window with a quarter casing.
Installation of a metal-plastic window in a wooden frame is carried out in the same way as in any other opening.
- Preparing the window opening (removing the old double-glazed window).
- Leveling using bars.
- Attaching the frame to anchors. To do this, you need to drill holes in the opening and frame, 30 cm away from the corners. Next, insert dowels with self-tapping screws. The holes for the dowels must be made so that the self-tapping screw fits completely into the dowel and is in the same plane as the frame.
- Installation of double-glazed windows and fastening of glazing beads. The beads are inserted into the grooves of the frame and lightly tapped until a characteristic click is heard.
- Installation of sashes and adjustment of fittings.
- Foaming the gaps between the opening and the window frame. The space under the window sill is also foamed or sealed with silicone.
- Installation of ebb tides using self-tapping screws and foaming it in several places.
It is not recommended to install plastic windows in a log house close to the outside of the opening, but to place it closer to the middle.
Tools:
- mounting gun for foaming cracks and seams;
- electric drill;
- screwdriver;
- building level;
- plumb line;
- hydraulic level at least 7 m long;
- set of chisels;
- rubber hammer;
- water spray;
- construction stapler;
- metal scissors for making castings.
Scheme of actions for marking and cutting a window opening into a log house.
Materials:
- polyurethane foam - for foaming the installation joint;
- water vapor barrier tape - protects the installation seam from moisture that can get from the room;
- hydro-vapour-permeable tape – protecting the installation seam from moisture entering from the street and removing it from the seam;
- self-tapping screws with anti-corrosion coating 6x120 mm - for fastening the window;
- hydro-vapor-moisture-proof tape with foil - protection of the installation seam on the window sill side;
- mounting wedges;
- steam-moisture-soundproofing roll material;
- metal castings or galvanized iron sheets for their own production.
Removing old windows
When dismantling windows in houses made of timber and logs, special attention should be paid to the safety of the frame, since making a new one will not be cheap.
In cases where the previous installation was carried out correctly, and the frames were fastened using self-tapping screws, the dismantling sequence consists of only three operations: removing the fasteners, removing the window block and cleaning the casing from the remains of the mounting foam.
Some problems may arise if the old window was nailed, to remove which you may need an additional tool - a nail puller.
It is important to consider that before installing a new window, it is necessary to inspect the casing frame. Namely: it is necessary to check for cracks, chips, as well as the absence of signs of rotting or woodworm damage. If any of the listed factors are detected, the pigtail should be replaced with a new one.
Let us note that regarding the replacement of the frame, you can find many conflicting recommendations on the Internet, among which there are those that claim that when renovating old houses, windows with metal-plastic frames can be installed without the frame. We consider this approach to be incorrect, since even an old frame with seasonal changes in humidity can create a displacement sufficient to jam or even destroy the window.
Purpose of the pigtail
A pigtail in a wooden house allows you to simultaneously solve several problems, including:
- Strengthen the walls in the openings. Correct distortions.
- Protect from moisture, seal window and door openings.
- Thermal insulation. High-quality casing prevents heat from escaping outside and perfectly retains it in the room.
- Protect from shrinkage, squeezing, and deformation.
- Give the structure a beautiful look. Moreover, there are ready-made elements for casing doors and windows on sale.
Photo: preparing window openings
In log and frame houses, casing is mandatory. You cannot save on it, otherwise the doors or windows will warp or bend.
What else you need to know:
- How to make a blind area correctly
- Gas holder for a private home
Preparing the opening for installing a window in a wooden house
Before cutting, we mark the window opening using a level, because the plastic window will be installed strictly level in all planes, therefore the frame must also be installed in the opening as accurately as possible according to the level initially.
The lower crown in the opening needs to be sawed through so that a flat horizontal platform is obtained.
We determine the dimensions of the opening based on the size of the plastic window, the thickness of the casing bars and the size of the required gaps.
Accordingly, we take a beam with a cross-section of 100x150 mm and cut out a T-shaped profile.
For a U-shaped window frame, we cut out a U-shaped profile from solid timber.
The size of the shrinkage gap (H shrinkage) is not easy to determine, since the amount of shrinkage of the house, as mentioned above, depends on many factors. If we, for example, roughly calculate, taking everything to the maximum, then for a window with a standard height of 1400 mm (plus the thickness of the casing crossbars, plus installation gaps ~ 245 mm) with 15 percent shrinkage, the top gap will be 24.5 cm - a huge hole , the height of which will most likely end up being too large.
• if you are building a new house, then start installing windows in it no earlier than a year after the construction of the log house in order to wait out the period of the most active shrinkage. Then, when manufacturing and installing the frame, the size of the shrinkage gap (H shrinkage) can be safely made 60-50 mm for a log house, 50-40 mm for a timber house and 40 mm for a house made of laminated veneer lumber;
• if your house has stood for more than five years, then the shrinkage gap (H shrinkage) can be made minimal - 40 millimeters, just to compensate for possible seasonal changes in the geometric dimensions of the opening;
So, we calculated the size of the opening, marked it and cut it out. Now you need to cut out a tenon at the ends of the logs (beams) on the sides of the opening. The tenon is also marked using a level in the center of the log (beam).
We make the tenon size 60 mm - width and 40 mm height.
We cover the sides and bottom of the opening with linen or jute using a stapler.
How to make a pigtail with your own hands - basic types and drawings
One of the features of wood buildings is their susceptibility to shrinkage, periodic (seasonal) changes in the geometry of the building under the influence of external factors (temperature, humidity). Visually this is not noticeable, but installing door and window blocks in openings with rigid fixation leads to their deformation; or the walls remain in one position (as they say, “hanging”), that is, when the material shrinks, they do not settle, which causes the building to skew.
Casing in a wooden house eliminates such problems; it is not connected to the main structure, but is held in it only by friction. It is often called differently - okosyachka. It is a box installed in openings. Its purpose is to prevent the destruction of window frames, door jambs, and incorrect operation of the sashes.
Pipe design
Regardless of the manufacturing method, the main parts of the frame are.
- Vershnik. Its purpose is to hold the upper ends of the sidewalls in a static position. Essentially, this is a horizontal casing strut. At the same time, it provides a shrinkage gap into which the sealing material is placed.
- Threshold. The lower part of the pigtail. In window openings this is the window sill. It solves a problem similar to that for the apex, but it is this element that bears the maximum load, and therefore great importance is attached to its strength.
- Sidewalls (carriages). Vertical casing elements installed on the sides of the opening. The function is to ensure the “sliding” of the walls of the house (up/down) when the wood shrinks.
Window frame
Work on the trim of window openings must be carried out in several stages:
- As usual, you need to start with preparation. It is worth taking all the necessary measurements, preparing the necessary tools and materials.
- Next, you need to decide on the type of installation of the pigtail. By and large there are two of them. They can be called U-shaped and T-shaped. The first option is simpler, so it is offered for consideration.
- First, the window sill element is installed. It is secured with self-tapping screws to the crown of the house located below.
- After this, the side logs are cut down using a chainsaw so that a vertical spike is obtained. This must be done on both sides of the opening. If there is no chainsaw, then the work can be done with a chisel and hammer, but this will take much longer.
- Next, grooves are selected in the component elements of the socket that correspond in depth to the previously obtained tenons.
- After this, tow is placed on the tenon, which will act as a seal.
- Then the component of the pigtail is put on the spike.
- The final stage of installation of the pigtail is the installation of its upper part or, as it is called, the top. This structural element is inserted by surprise and fixed to the side supports with self-tapping screws.
As a result of the work, a frame is obtained that will protect the window frame from distortion that occurs during the shrinkage of the logs.
As for the process of installing casing elements using T-shaped technology, it must be said that this option is not much different from what has already been described. The difference lies mainly in the fact that the grooves are made in the wall, and the tenons are made in the structural elements.