Buying ripe, juicy watermelon in a store or market is not difficult. But some plant lovers, closer to spring, have a desire to grow this wonderful berry themselves. But is it really possible to do this if you don’t even have a plot of several hundred square meters at your disposal, but only a balcony?
How to grow a watermelon on the balcony, because in order for it to grow and ripen in a field or garden, you need space and a lot of sun. Let's see what conditions are necessary for this and whether it is realistic to provide them in the apartment.
Conditions for growing melons and melons at home
The homeland of watermelon is hot Africa. Therefore, to successfully grow watermelons on the balcony, you need to provide them with high temperature and sufficient light, and the soil in which it grows must be well heated.
It is best to grow watermelons on a balcony on a south or west window.
As a last resort, you can try to grow in the east or north, but here you cannot do without intense lighting.
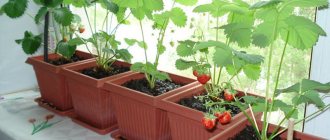
Melons are plants with long vines that are located horizontally on the ground, covering the entire space with leaves and shoots. On the balcony they will have to be grown in one or two stems, as in a greenhouse. You need to direct the shoots vertically, using a support, and remove excess shoots.
It is better to install a trellis to support plants at a certain distance from the wall. This will improve ventilation of the bush and prevent the occurrence of diseases. They usually occur where stale air collects.
The larger the container in which the watermelon is grown, the better for it. After all, the root of the plant reaches a length of 1 m, and the lateral ones - 4-5 m. The volume of the entire root system of an adult watermelon in the city is 7-10 m3. It’s good if you have a tub of 100 liters.
You can put together a box 50 cm wide and 70 cm high. It is possible to grow a watermelon in a smaller pot, but its fruits will be more like apples, and the taste will be very different from the field one.
Holes are made at the bottom of the dish for ventilation. Excess water will run into the pan, which also needs to be prepared in advance.
In the southern regions, glazing of the balcony is not necessary. Here it is important to pay attention to how early frosts come in the fall. If in the spring you can protect a young watermelon plant from frost and cold by installing it on a windowsill, then in August this will not work: moving a huge vine with fruits tied to a trellis is unrealistic.
Successful cultivation of watermelon at home is possible at a temperature of 25°C. Some deviation in both directions is allowed, but at a temperature of 15°C its growth stops, and at 10°C it may die.
Which varieties to choose
Watermelon is a plant of the southern regions; for full growth it needs a sufficient amount of heat and light; if the first is easy to provide, then short daylight hours are a problem. When growing watermelons at home, it is better to give preference to selected species that are tolerant of low light. The second point worth paying attention to is early maturity. The seed turns into a flowering, well-developed plant within a month; about two more months should pass before the fruits fully ripen. The following varieties are well suited for cultivating watermelon at home:
- A gift from the sun;
- Siberian;
- Ogonyok;
- Ultra early;
- Sugar baby.
For planting, large, even, undamaged seeds are selected that are potentially capable of producing strong seedlings.
How to grow watermelon on the balcony
To grow a watermelon on the balcony, you need to take all stages responsibly:
- selection, preparation, germination of seeds;
- growing seedlings;
- caring for plants on the balcony.
Seed preparation
In many ways, the success of growing watermelon on the balcony depends on the correct choice of seeds. Select the variety that is optimal for the growing region.
The Ogonyok variety performs well in almost all regions. Its weight is from 2.5 to 5 kg, the skin is thin, the shape of the fruit is round.
Watermelon variety "Ogonyok"
In the middle zone and northern regions, greenhouse varieties are well suited for this:
- “Sibiryak 97” with fruits weighing up to 4 kg, sweet aromatic pulp and a thin green crust. Not affected by root rot and other diseases. Can withstand short frosts.
- “ Lezheboka honey” is an early ripening hybrid with round, sweet fruits weighing 3-5 kg and small seeds. The skin color is green, with dark stripes.
- The Arizona variety can be chosen if you expect to get pods weighing up to 8 kg. The time from sowing seeds to ripening is 85 days. Oval shape, medium thick peel. The variety is resistant to fungal diseases fusarium and anthracnose, which can destroy plants at high humidity and temperature.
Watermelon variety "Arizona"
It is unlikely that you will be able to get a fruit weighing 8 kg on the balcony, but with good care it will grow larger than the same “Ogonyok”.
When choosing a variety, take into account that sometimes it is better to get several small but tasty fruits than one large but unripe one. Therefore, it is better to start with varieties with small, round, thin-skinned fruits of early ripening.
You cannot take seeds of an unknown variety for cultivation from berries previously purchased at the market. There is a high probability that this is a hybrid, and its seeds do not convey the varietal characteristics of the mother plant.
Seed preparation
They inspect the seeds and immediately discard damaged and unripe ones. The rest are wrapped in gauze or cotton cloth and immersed in a pink solution of potassium permanganate for 20 minutes.
Remove, lightly dry and place in the same cloth in a warm place. Periodically check to see if the seeds are dry and slightly moisten the fabric.
Seeds of watermelon
When the seeds have hatched, they are sown in previously prepared containers. Don't wait for the sprouts to get big. In this case, they will become brittle and easily break during sowing.
First, you can sow the seeds in ordinary 0.5 liter plastic cups, filling them with peat or universal soil from the store. A hole is made in the bottom to drain excess water. Any loose soil will do. Pour soil into cups, make a hole and immerse the sprouted seeds to a depth of 2 cm. Sprinkle with soil and compact. If the soil is dry, water it.
Place the cups in a tray and cover with a plastic bag. Place in a warm place. It turns out to be a mini-greenhouse in which sufficient humidity and temperature are maintained. It is important here not to over-moisten the soil, because the seeds may rot. The soil should be crumbly and not clump together. The temperature is maintained within 25 degrees.
You can skip the germination stage in tissue by immediately sowing several seeds into glasses. If several of them sprout, the strongest sprout is left, the rest are torn off. It is more advisable to use this method if the number of seeds is sufficient. Instead of plucking the extra plants, you can replant them, but they do not take root well.
When the sprouts appear above the ground, remove the film and transfer the cups to a cooler place, you can go straight to the balcony. If the sprouts are too warm, but not enough light, they will stretch upward, become frail and thin.
To successfully grow watermelon on the balcony, you need to have at least 12-14 hours of daylight. If natural light is not enough, turn on special phytolamps. They provide light with characteristics similar to that of the sun. If there are a lot of cloudy days, you can turn on the lamp all day.
Installing reflective screens has a good effect. They will help increase the amount of light the watermelon receives. The area of each of them must be at least 1 m2. Install the screen so that the sun's rays hit it evenly throughout the day.
Soil preparation
When the seedlings have 4 true leaves, they are transplanted to a permanent place in large tubs or pots. You can buy soil at a gardening store or prepare it yourself. To do this, take sandy loam and mix it in equal parts with humus. Add a handful of crushed wood ash. It will serve as a source of potassium for the plant. If there is no sandy loam, take turf soil and sand in equal parts. The acidity of the resulting composition should be within 6-6.5 pH.
The prepared soil is disinfected by pouring boiling water over it, soaking it in the microwave for up to 20 minutes, or steaming it in a water bath for at least 1.5 hours. Once cooled, pour into prepared dishes. If it was used to grow plants last year, it also needs to be disinfected: pour boiling water on it or wash it thoroughly with special products. A drainage layer consisting of gravel, broken ceramics and brick is laid at the bottom.
Half an hour before planting the seedlings, you can water them. But sometimes this leads to the earthen lump crumbling and the roots being exposed. Such a plant will not tolerate transplantation well and will lag behind in growth and development. Therefore, sometimes it is more advisable not to water it before planting, but to lightly crush the body of the glass with your hands so that the soil moves away from it, but the lump of earth does not collapse.
Prepare a hole in the ground. Carefully remove the seedling from the glass and place it in a tub. It’s not scary if it is not located vertically, but slightly at an angle to the surface. Sprinkle with earth and water.
Caring for watermelons on the balcony
Watermelon does not like waterlogging, but it can die from drought. In the field, its root penetrates deep into the ground, extracting moisture from it. On the balcony he does not have such an opportunity. Therefore, periodically water the soil in the tub, but so that it is not wet and does not stagnate. Remaining moisture goes into the pan through holes made in the bottom.
Form a plant, leaving one of the strongest stems. They tie it to the trellis with fabric strips.
Maintain a daytime temperature of 25-30°C. At night it should not drop beyond 18°C. It is especially important to observe these conditions during the formation of the ovary.
When plants bloom, they need pollinators. If possible, open the balcony to attract insects. If natural pollination cannot be ensured, artificial pollination is carried out.
Watermelon flowers are unisexual, male and female. They can be distinguished by their appearance; the male ones have a thinner petiole, while the female ones have the rudiments of a small watermelon at the base. They pick the male flower, tear off the petals and pollinate the female flower. You can perform the procedure with a soft brush.
When the ovaries are formed and reach the size of an apple, they are placed in nets and suspended from a support. They will hold the fruits, reducing the load on the stem.
Remove excess leaves, leaving no more than two fruits on each vine. The number of leaves should not exceed 11 pieces. Pinch the top. From this moment on, all the forces of the plant will be used for fruit growth.
Water the watermelon once a week, pouring out one and a half liters of water at a time. Carefully loosen the soil to improve air access to the roots.
Flowering and fruit formation
After about two months, the indoor watermelon begins to bloom: first the male flowers appear, then the female ones (they can be distinguished by their rounded stalk). Since there are no natural pollinators indoors, fertilization can be done by simply touching flower to flower or using a soft brush. Before this, female flowers can be treated with a special stimulant.
When the watermelons begin to grow, you should select 1-2 and remove the rest. To prevent the plant from breaking under its own weight, the fruits must be placed in a net and tied to a trellis or placed on the ground, having previously placed boards under them (otherwise they may rot). For the fruit to ripen, it needs 11 leaves; it is advisable to remove all the rest, as well as the top of the vine. It takes about a month from fertilization to maturity. A ripe watermelon can be identified by its dried stalk; when tapped, it makes a ringing sound. As you can see, growing watermelons on a windowsill is not that difficult!
Feeding watermelon
Watermelon does not need to be fed. But then its fruits will certainly be small. When choosing fertilizers, everyone decides for themselves whether they should be organic or chemical.
When choosing chemicals, the main thing is not to add substances in doses greater than the norm indicated on the package. This is harmful to both the plant and the owners. You can use Kemira complex mineral fertilizer.
The first feeding is carried out in cups. If you don’t have time before replanting, wait at least a week for the plant to take root and the root system to get stronger. In the first stages of development, watermelon needs to receive more nitrogen, and during the formation of the ovary - phosphorus and potassium.
Fertilize again after 3 weeks. During this period, nitrogen is not needed; they are limited to a mixture of potassium and phosphorus fertilizers.
For those who are afraid to use mineral fertilizers, you can apply organic ones. They are easy to prepare yourself. To do this, collect the above-ground part of the weeds and grass mowed with a lawn mower. Place it in a jar and close the lid.
Install on the balcony or outside the apartment, because the smell during fermentation will not be very pleasant. But the resulting composition contains a sufficient amount of nitrogen and potassium. There are also organic acids that promote plant growth, and antibiotics that suppress the development of fungal diseases.
There will be little phosphorus in such fertilizer. Therefore, it is advisable to add superphosphate to the infusion, 50 g for every 10 liters of infusion.
Fertilizing with humus infusion will be useful for watermelons on the balcony. It can be purchased at the store or pre-prepared from organic waste.
Disease and pest control
If gray or brown spots appear on the leaves and stem of the watermelon, this means that a fungal disease has occurred: powdery mildew, anthracnose, fusarium. It is better to fight fungi on the balcony without using chemicals. It is recommended to spray the plants with a solution of Fitosporin.
Biofungicide for plant protection
Before planting, for prevention, the soil is watered and the plants are treated with HOM or the same Fitosporin.
Sometimes plants are affected by pests. These can be gnawing cutworms, whiteflies, melon aphids, and spider mites. To control pests, it is best to use the biological product Fitoverm.
When the watermelon grows to a decent size on your balcony and its tail begins to dry out, pick the fruits. They can be eaten immediately or stored for no longer than 2 months in a cool, dry place.
Diseases and pests
Watermelons are susceptible to a number of diseases, which especially often develop due to errors in care. When growing crops at home, the following pathologies are common:
- Fusarium wilt is a fungal disease that leads to intoxication and death of the plant. For preventive purposes, the soil is disinfected and dried lashes are removed in a timely manner.
- Anthracnose occurs when there is high air humidity. The rind of the watermelon becomes covered with yellow spots, which merge with each other over time. Keep equipment clean, disinfect the soil, and treat planting material with Fundazol.
- Root rot - occurs when overwatering. The disease destroys the root system and appears as black-brown spots on the lower part of the stem. Copper sulfate and wood ash are used for treatment in the initial stages. In advanced cases, the diseased plant is destroyed.
- Powdery mildew develops when the soil is infected with a fungus. The leaf blades become covered with white spots, the berries become deformed and become tasteless. Powdery mildew is combated using a 25% karatan solution.
- Bacterial spotting - spots appear first on the leaves, and then on the peel of the fruit. There is no effective drug against this disease yet, so the affected parts of the crop are cut off.
Pests enter the pot from the street or from untreated soil. Watermelon is damaged by the following insects:
- melon aphid;
- germ fly larvae;
- spider mite;
- wireworm;
- thrips;
- root-knot nematode;
- cutworm butterflies;
- locusts
To get rid of pests, plants are sprayed with chemicals (BI-58, Fitoverm, etc.). Among the folk remedies, an infusion of wormwood, a solution of wood ash and laundry soap, as well as a chamomile decoction are effective.
How to grow melon on the balcony
Melon, beloved by many, also belongs to the Bakhchev family. To grow successfully, it needs the same conditions as a watermelon. But before you grow melon on the balcony, you need to choose the right varieties.
Varieties of melons for the balcony:
- “Altaiskaya” is an early ripening variety with an average number of shoots. The fruits are orange or yellow, oval, weighing about 1 kg. Ripen 70 days after sprouts appear. The variety is resistant to diseases.
- “Rime” is an early ripening variety with long vines. The ripening period is about 90 days after the sprouts appear. The fruits are round or oval, yellow, orange, with a mesh pattern on the thin bark. The pulp is white, very sweet. Needs fertilizer and watering. Disease resistance is average.
- “Kolkhoznitsa 749-753” is a mid-season self-fertile variety. The fruits are small, spherical, yellow-orange in color with dense, sweet pulp. The variety is resistant to anthracnose and angular spot.
Features of growing melon on the balcony
The ripening period of melon, depending on the variety, ranges from 2 to 6 months. The root system of the plant is superficial. It weakly absorbs moisture and evaporates it twice as fast as a watermelon. Therefore, the melon needs water much more than the watermelon. But you don't need to fill it up.
Add water at a temperature of at least 22°C only when the top layer of soil dries out. When it is absorbed, lightly loosen the soil to provide air access to the roots.
To grow a melon on the balcony and get the fruits, you need to know what it doesn’t like:
- dense soil with high acidity;
- stagnant air;
- temperature below 20°C;
- watering with cold tap water;
- applying fresh manure;
- frequent feeding.
Preparing Melon Seeds
It is better to sow melon seeds collected independently in the second or third year. Then the plant will have more female flowers.
It is better to sow in February. Then the melons will have time to ripen before the cold weather, and the seedlings will receive a sufficient amount of light. If you sow the seeds earlier, you will have to supplement it with a phytolamp, because the daylight hours in January are too short.
Disinfect the seeds in a solution of potassium permanganate. Then soak in clean water for 12 hours, remove and ventilate every 4 hours.
The stratification procedure (keeping in the refrigerator for 2-3 days at a temperature of 1-3 degrees below zero) will make the plants more resistant to cold.
The further process of germination of melon is the same as for watermelon. The minimum volume of containers in which seedlings are planted on the balcony is 45 liters.
Caring for melons on the balcony
Before fruit formation, it is recommended to limit watering so as not to provoke rapid growth of stepsons, and there will be few fruits and their weight will be small.
You need to feed the melon; it is better to alternate organic matter and mineral fertilizers. But an excess of nutrients will be destructive; a lot of nitrates will accumulate in the fruits.
Melon is more often affected by fungal diseases than watermelon. They appear as gray, brown spots on leaves, stems and fruits.
The most common diseases are:
- Powdery mildew.
- Anthracnose.
- Fusarium.
It’s easy to tell when a melon is ripe. It will change color and emit a pleasant aroma. They pick it and eat it.
How to grow Torpedo melon:
Soil preparation
How to grow a watermelon at home. conditions? Properly selected soil is the key to a good harvest. Since the birthplace of this berry is desert areas, black soil is not needed to grow it. It is enough to use sandy loam soil. Wood ash and humus are added to it in equal proportions. The resulting soil should be light. This will provide oxygen access to the roots. Before planting seeds, add 15 g of potassium sulfate, superphosphate, azophosphate per 1 cubic meter to the soil. m. Soil acidity should not be less than 6-6.5 pH.
Soil can be purchased in specialized stores.
How to grow pumpkin on the balcony
To understand how to grow a pumpkin on the balcony, you need to know the conditions under which it grows in the garden.
- The soil should be nutritious, pH 6.0. You can make it yourself by mixing 2 parts of garden soil, 1 part each of compost or humus, peat and sand.
- The problem with growing pumpkin is its rapid growth and huge leaves.
Pumpkin varieties for the balcony
You should not sow pumpkin seeds grown in your garden on your balcony. They usually have a very long growing season. In addition, it will not be possible to provide the plant with the volume of soil necessary for normal development. It is better to buy special varieties for balconies, or, as a last resort, hybrids or early ripening varieties.
They take up less space and do not require the formation and regulation of the bush.
- “Amazon” is an early ripening bush variety. It takes about 8 days from sowing to ripening. The shape of the fruit is spherical, the color is bright orange, weight up to 1.5 kg.
- “Ambar” is a medium-ripening variety. The weight of the fruit is up to 3 kg, the skin is bright, dark green, with black spots. The pulp is orange, sweet. Stored until spring in a dry place.
- “Smile” is an early variety with short vines. Fruit weight is up to 1.5 kg, the pulp is sweet, with a melon aroma.
- “Medicinal” is an early ripening variety. Fruit weight is 4-5 kg, the flesh is orange.
- Varieties of decorative pumpkins of various shapes and colors have been created. Their fruits are inedible, but they will help decorate your balcony in the fall. And in winter, they decorate the apartment with beautiful small pumpkins, creating original compositions from dried flowers, stones, and branches.
Decorative pumpkin
Seeds need to be sown 2-3 weeks before planting in a permanent place. At this point, the seedlings should have 1-2 true leaves.
Pour soil into peat pots. There is no need to remove seedlings from them, so the plants will better tolerate transplantation. Place the seeds flat in holes up to 2 cm deep. Sprinkle with soil. Cover with film and wait for the seeds to germinate. After this, cut the film and leave it on the pot. This will maintain moisture and constant temperature.
Sowing seeds
You need to choose large ones without damage or defects. To prepare for planting, soak them in a 5% solution of table salt - this will reveal empty seeds. It is also recommended to immerse the seeds for 10–15 minutes in a weak solution of potassium permanganate. After this, the seeds can be soaked in a damp cloth or sand until they hatch.
Seeds can be planted in seedling cups. It is also possible to plant them immediately in the container in which they will grow constantly, but in this case you will need to carefully monitor watering: the soil, which has not yet been covered by the root system, may turn sour, which will subsequently cause disease and death of the plant. Seeds should be planted approximately 2 cm deep, 2–3 per pot. After the first leaves appear, weak plants should be discarded, and strong ones should be transplanted to a permanent place - in a special planting box, bucket, basin or large flower pot (it is only important to choose an opaque one, otherwise the roots may dry out). The container volume should be 10–15 liters or more.