Often, housewives are faced with a problem when the purchased curtains do not match the height of the cornice. This happens because ready-made curtains are usually produced with standard parameters. Not everyone knows how to hem them and adjust the length, without a machine or sewing equipment. Don't be upset and take the curtains back to the store. Using a special tape, you can make the required length at home. You can see what curtains hemmed with tape look like from photos and videos in the online catalogue.
How to hem curtains at home: without a machine, with tape
Often, housewives are faced with a problem when the purchased curtains do not match the height of the cornice. This happens because ready-made curtains are usually produced with standard parameters. Not everyone knows how to hem them and adjust the length, without a machine or sewing equipment. Don't be upset and take the curtains back to the store. Using a special tape, you can make the required length at home. You can see what curtains hemmed with tape look like from photos and videos in the online catalogue.
How to fix awkward curtain lengths
Regardless of the style of the interior, decorating the window opening is considered an important point, since it is the curtains that complete and emphasize the concept of the decor. Incorrectly chosen length and width of curtains can significantly spoil the overall perception of the interior. In addition to the main parameters, the external qualities of window decoration can be affected by:
- Saturation of drapery;
- The presence of decorative elements in the form of ribbons, lambrequins, etc.;
- Drawing style.
Many companies produce curtain fabrics of a certain length with an allowance to allow the height to be adjusted to suit specific operating conditions. In such cases, you cannot do without adjusting the length. One option to solve the problem is to contact a studio. For those who need to adjust the height at home, you can use special tapes, sewing accessories or a machine.
Some subtleties of hemming curtains
There are several ways to shorten the length of curtains:
- Blind stitch stitching. Suitable for experienced craftswomen who know the basics of sewing;
- Machine stitching. A universal method, but requires a sewing machine;
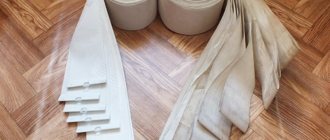
- A special adhesive-based tape – “gossamer”. The simplest option, but not suitable for all fabrics.
After obtaining the desired length, seams may need to be processed. The volume and complexity of the work will depend on the thickness of the fabric and the use of lining. Curtains made of thin material are usually hemmed using the double hem method. Thick curtains are shortened with a single fold to avoid the appearance of rough protruding seams.
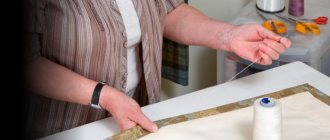
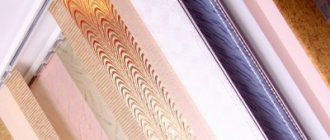
Hemming curtains using bias tape or edging is the easiest way to hem curtains if a sewing machine is not available. The tape can be homemade or purchased, with a self-adhesive base. The prepared tape is bent in half on both sides, then the edges of the curtain are secured with an adhesive base. You can also make a homemade ribbon, secure it with pins, and do hand stitching.
How to make it without cutting or hemming, the secret of housewives is how to make the required length.
There are times in life when you don’t have a machine, but you really, really don’t want to sew by hand. Don’t worry, housewives, there are several simple ways for you “for the lazy” that definitely won’t require additional costs or a lot of effort and time from you.
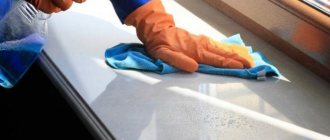
It is more convenient to carry out work on adjusting the bottom by hanging it, having first hung the curtain in the place intended for it.
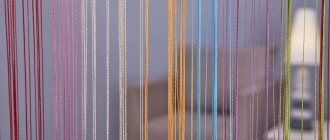
For housewives who do not particularly want to form draperies and folds on the tulle, there is one very simple and effective way to shorten curtains. It is worth understanding that this method is only suitable for thin, flowing fabrics. This number will not work with thick curtains. It is worth warning that this method is very extravagant and is not suitable for every interior.
Best used in children's and playrooms.
The algorithm of actions is as follows:
- Place the tulle on the curtain rod and leave it overnight or for a day so that the fabric takes the desired shape.
- Thread a thick thread made of wool or nylon into a gypsy needle with a wide eye, preferably so that it differs minimally from the color of the curtain.
- Using a thread, roll the tulle into a medium-density roll, starting from the middle of the fabric, smoothly approaching the edges.
- Secure the resulting tulle roll with threads tied into knots. They can be any color.
But here is an option that is universal and will suit any interior - shortening curtains using curtain magnets.
They are relatively inexpensive and allow you to shorten the length of the tulle without hemming or trimming. There is a large selection of magnets for curtains on sale; they can be in the form of butterflies, animals, flowers, or they can be ordinary and almost invisible. But housewives who decide to use this method may encounter a problem. Some magnets may be too weak to hold the curtains. So be careful and always check magnets before purchasing. This will save you from unnecessary expenses.
They are very easy to use: pick up the edges of the tulle with magnets and pin them in several places.
As a result, you will get beautiful and unusual draperies and folds.
If you couldn’t find magnets for curtains in your city, then use bobby pins, crabs, pins and needles instead. But be careful, they can easily damage the fabric or prick you.
On sale you will find a large selection of magnets, both almost invisible, which will not stand out and attract attention, as well as bright and original.
Hemming of curtains without hemming
One of the new ways of shortening curtains is worth considering in more detail. Modern housewives rarely have the time and skills to hem curtains using sewing devices. It is very convenient to reduce the length of the curtains by gluing the tape with double-sided adhesive. The web tape is prepared in the following way: the material is carefully tucked to the required distance, the seam is ironed. The curtain fabric is placed between layers of tape and glued using an iron. To ensure everything works out right the first time, you should first try it on a small piece of fabric. Some types of material will additionally require an ironing iron.
Attention! If you need to bend heavy curtain material, it is recommended to use adhesive tape in two rows to ensure its holding power. When using tape to hem the curtain, it is worth keeping in mind that it may begin to peel off during intensive washing. But this drawback can be easily eliminated. You can reuse the tape and your curtains will look like new again!
In addition to tape, specialized clips are used to shorten curtains. They make it easy to model fabric and create waves to lift the material to the desired height. This method will require some skill, since it will not be possible to achieve symmetry right away. Clips are not suitable for hemming heavy and dense fabrics. Hemming curtains using tape is one of the most affordable methods to achieve the required length. First, the length and width of the tape are selected, and excess material is cut off. A double hem will help make the edges neater, but only if the material is unlined. The resulting seam is ironed and sealed.
Without special expenses: a needle in your hand
Not everyone knows how to hem curtains by hand. Although there are specially created instructions for this. It is as follows - shortened like this:
- you need to prepare the necessary tools in advance: a needle, thread, scissors, a metal or plastic thimble (useful with thick curtains);
- First, measure the curtains. To do this, take a sewing meter or tape measure, chalk or a piece of white soap to make marks, and begin the procedure. It would be good to lay the curtains on a hard, flat surface, press them down in the corners with something heavy and stretch them, avoiding bends and creases. Excess - cut off;
- When the marks are made, you need to carefully bend the edge of the curtain. In the case of thick fabric, only one fold is made. On tulle or organza - 2-3, no more, otherwise it will turn out too bulky;
- the resulting bend is secured with pins or needles so that it does not come apart during the sewing process;
- for thick synthetics, use thin needles, try not to pierce the product right through, as unattractive holes will form that will remain forever. The same goes for organza;
- take your time, the main thing is to make the seam as evenly as possible, any twitching of the hand will be too noticeable - this will not add beauty and style to the curtains;
- at the beginning and end of the line, leave the ends of the threads (at least 2 centimeters each), they are simply tied together, but not pulled together too tightly, otherwise you will get an ugly break. The ends after the knots can be trimmed, they are not necessary.
Hemming curtains by hand can be very beautiful if you are not in a hurry
Video on the topic:
Useful tips for hemming curtains
Regardless of the chosen method of folding the curtains, you first need to let them hang freely for several days. This will help the fabric take its natural shape vertically and horizontally. After completing the work of hemming the curtain, do not immediately cut off the excess material. It’s better not to be lazy and sew on the remaining fabric using a hidden seam. This trick will help you adjust the length of the curtains as accurately as possible after washing, since there is a risk that the material may shrink slightly.
After washing, the curtains will finally take their shape, and the hemmed excess can be safely cut off. Professional seamstresses measure the required height from the cornice, securing the material with a basting stitch or using sewing pins. Next, the curtain is removed and the excess fabric strip is cut off from it. It is recommended to iron the seam area well, and only then proceed to hemming.
Manual binding
Many people are faced with the need to hem things or textiles for the interior very rarely - only when necessary to adjust the length of clothing for themselves or their family. In such cases, it is unlikely that there is a sewing machine in the house. However, it is a mistake to think that without it you cannot cope with the task.
Progress
When you start sewing, you need to measure the correct length. To do this, take into account that the canvas, when it hangs and takes its final shape, may become longer. Shrinkage may occur when washed.
Therefore, before hemming the bottom of the curtain, you need to do the following:
- It is advisable to decate the fabric - perform a wet-heat treatment with an iron in order to immediately ensure shrinkage during the sewing process, and not end up with shortened curtains after the first wash;
- hang the curtain on the cornice with an uncut edge;
- wait until the fabric sags and reaches the correct length;
- pin the intended hem from the bottom and sides with pins; it is better to do this by weight due to possible unevenness of the floor or cornice;
- fix the correct length and remove for further work;
- hem along the entire hem line with a blind seam using one thread to match the curtain.
Trim the curtains yourself! With adhesive tape from Ikea it's easy!
Good day!
I wanted new curtains for the room, but the ceiling height turned out to be not the standard 2.20 m. Curtains in Ikea are either 2.50 m or 3.00 m.
Shortening in a workshop is expensive and troublesome. Luckily I found out about this tape! And that you can shorten the curtains yourself!
Place of purchase: IKEA.
The principle of operation is simple - the tape is a solid glue that melts under the influence of a hot iron and glues the fabric together.
Instructions:
Shrinkage : I tried to make a gap for shrinkage, but my curtain was still on the floor. I didn’t like it, and it’s not convenient to walk near the window. I decided, at my own peril and risk, to shorten it to length, without taking into account shrinkage.
How to shorten tulle
It happens that the tulle also has to be shortened. This is especially true for kitchens, where it is customary to cover the windows with short curtains, and in houses with low ceilings. You don’t always want to cut the curtains, leaving ugly raw edges, but there is a way out! Curtains can always be shortened without trimming, just use your imagination, because this activity is quite creative and very interesting.
This section presents some secrets and recommendations on how to shorten curtains.
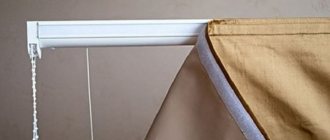
Velcro curtains, description, fastening features, design options
Velcro - that's what it's officially called - has proven its effectiveness. With its help, you can install curtains without cornices on plastic and wooden windows. They are especially convenient to use in small rooms, where the cornice may look bulky, and a curtain that does not fit closely to the wall makes the room visually even smaller.
Using Velcro for small windows allows you to get rid of bulky curtain rods
What is Velcro
This type of fastening is used quite widely: in the manufacture of garments, shoes, accessories and other goods. It consists of two tape elements: on one there are microhooks, and on the other there are the same small loops. When both tapes touch, the hooks cling to the loops, sticking tightly to each other.
Self-adhesive Velcro tape or Velcro
Product advantages
The convenience of Velcro is that they can be mounted on windows even if there is no cornice, which saves space and money. Other advantages include:
- long service life and preservation of technical characteristics;
- ease of installation and maintenance: they are easy to remove, wash, dry and iron.
- Velcro curtains can be used for any interior and style direction.
Velcro fastening to a plastic window does not violate the integrity of the window
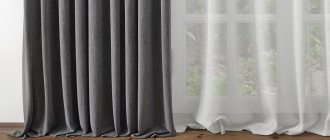
How to hem double-sided curtains
The difficulty of shortening such curtains is that you don’t always want to make a hem in order to spoil the appearance of the curtain with a different, contrasting color on the back side. But as we have already found out, there is always a way out, and this situation is no exception. First, the curtains need to hang down on the curtain rod to take the desired shape. Then, remove them from the curtain rod and hem them to the desired length using the hem method. And after that, sew braid, ribbon or lace to the edges, which will match all two sides of the curtain in color.
Many curtain fabrics are offered with embossed edges. For this material, the side seams are not processed.
First, measure the braid, lace or ribbon to the required length. The tape is folded over the curtain and ironed through paper or thin fabric so that the fold is as smooth and neat as possible. Then the braid, ribbon or lace is secured with needles and stitched for convenience. It's simple!
The method depends on the type of fabric and the presence of lining.
How to install curtains on a window without drilling
Traditionally, to hang a curtain, you first need to install the curtain rod by first drilling holes in the wall. Then install the holders for it and secure them securely.
Fastening individual sheets of Japanese curtains with Velcro
However, many novice home craftsmen are interested in how to attach a curtain to a plastic window, but avoid drilling. This can be done by taking advantage of the Velcro fastening options for curtains. This fastening method can be used when installing:
- Roman blinds, including roller blinds;
- curtains made in the oriental style, in its broadest sense;
Japanese Velcro curtains will look good in a small living room
Curtains with Velcro loops are similar to regular curtains; to remove them, just undo the Velcro
Installing curtains with Velcro yourself
Before you start decorating the curtain with Velcro, you need to decide where to attach it: to a wall, a plastic or wooden window, and then:
- cut a strip of fabric from 5 to 12 cm wide, depending on the purpose and density of the curtain;
We take measurements of the window with allowance for Velcro and seams at the top and bottom
We cut out the curtains according to size, fold the sides of the curtain, then the bottom of the curtain using the soft part of the Velcro on the wrong side
For each curtain we sew 4 ties from the same or a different fabric
To the top of the curtain from the front side, pin soft Velcro, measure 7 cm from the edge of the curtain, place one tie under the Velcro from below, stitch
We bend the Velcro to the wrong side and sew it, adding 1 more tie.
We glue the hard part of the Velcro to the wall and fasten our curtain
You can use the ties to lower and raise the curtains
After this, the front side of the fabric is covered with a strip, which also needs to be sewn.
The rigid part of the fastener is attached to the cornice and glued.
To fix the bottom of the curtain, use rigid Velcro along the edges
Attention! If the curtain is light and is intended to be installed on a plastic window, additional use of adhesive will not be required.
How to hang a Roman blind without drilling
The nuances of securing a Roman blind with Velcro
For a long time, one of the most popular types of curtains has been the so-called Roman blinds. Today they are flat sheets of fabric with which you can quickly and beautifully decorate a room. At the same time, another advantage of these products is their style versatility: they fit perfectly into any interior.
On the wrong side of the fabric, using chalk or a piece of dry soap, mark the installation locations of the rings, fold lines and hems
They are usually mounted on cornices; To do this, drill holes into which fasteners are inserted and secured. However, today, in order to hang a curtain of this type, it is not necessary to drill out the wall - you can use Velcro adhesive tape.
We process the side edges and the top cut of the fabric, sew Velcro to the top cut, onto which the curtain will be attached
For this, in addition to the fabric itself, you will need:
- Velcro (soft part);
- strips made of plastic or metal that will imitate a cornice;
- a weight bar, which is strengthened along the bottom of the product;
- an even number of curtain rings.
Installing a wooden beam on the window frame
Using nails or a furniture stapler, attach Velcro to the bottom of the wooden beam
The work is performed as described in the previous section. In addition, original pockets are sewn on the inside, into which a “cornice” is inserted on top, and a weight at the bottom.
We fold the lower part of the curtain to form a place for the weight strip, sew a finishing border along the wrong side of the curtain, insert slats into the resulting “pockets”
A cord is pulled through the rings fixed at the level of the pockets, and the entire structure is attached with the hard side of the Velcro to a plastic or wooden base.
We sew on the rings, use Velcro to secure the curtain to a wooden beam, then thread the cord to the top edge of the curtain through all the rings, secure the cords using ribbons
We remove the ribbons that secured the folds; when the curtain falls, we equalize the tension of all the cords, the installation of the curtain is completed
Additional Information. Weighting the bottom of the product allows you to keep the surface from folds and creases.
How to hang tulle on a window with Velcro
Without complications and the use of drilling tools, you can fasten a light muslin curtain or tulle with Velcro to a plastic or wooden curtain rod using this type of fastening.
The main condition for fastening with Velcro is that the fabric should not be heavy
Housewives' tricks: how to shorten, trim and hem curtains
A few tips from experienced craftswomen will help you avoid unpleasant mistakes and get the job done as quickly, efficiently and beautifully as possible.
The seam can be single or double hemmed.
- Before working with curtains, treat them, that is, decate them.
- For thin fabrics, the cobweb method is not always suitable, so it is better to stitch them or secure them with magnets.
- Tulle and organza often come with weight at the bottom, so this material is usually shortened at the top.
- It's not always a good idea to cut curtains. Pin them 10-14 centimeters from the bottom and see from a distance how they look. If it's good, it's better to put them on adhesive tape or stitch them.
- Thick curtains should be folded once, otherwise unnecessary heaviness will be created at the bottom, which will spoil the draperies and the entire appearance, and light curtains can be safely folded two or three times.
Every housewife or craftswoman is able to come up with something of her own.
Loggia or balcony: how to attach curtains with Velcro
Today it is customary to use a balcony or loggia as a living space, which often turns into another makeshift room. In addition to other fastening methods, loggia curtains can be installed with Velcro.
Velcro curtains are often used to cover windows on balconies and loggias.
However, their use requires compliance with additional conditions that will ensure the strength and reliability of the curtains.
Do-it-yourself Velcro curtains for the balcony have a certain difficulty in installation, since the windows installed here reach the very top, and they can be strengthened with great difficulty. It is impossible to install a cornice, curtains on nails are not aesthetically pleasing, and the most effective and aesthetic way would be to use Velcro.
An excellent option is to use Roman blinds. They have a number of advantages:
- do not interfere with opening windows;
- do not flutter from gusts of wind;
- do not require significant material costs;
- used in various colors.
Attention! Do not forget that the design features of balconies and loggias require significant air movement, so heavy fabrics are inappropriate here.
The best choice for balcony curtains would be tulle, muslin, organza, silk, cambric, curtain fabric.
The fabric can be attached to a block with Velcro, then installed on the window frame and secured with fasteners.
Adhesive tape is attached to the wooden slats using glue or a stapler, and the slats are attached to the wall with self-tapping screws
Design options for balconies and loggias can be found on websites where color photos are posted.
How to hem with a sewing machine
Using a similar course of action as with manual blind hemming, it is necessary to carry out preparatory work .
This hemming method is best used if the fabric after washing is expected to begin to fray and needs to be hemmed. In this case, the tape will be a weak retainer, and manual work will be very labor-intensive. These types of fabrics require frequent stitch spacing, which complicates the process.
If you have a machine at home, then you can easily perform all types of sewing work, and even a not very experienced craftswoman will be able to figure out how to sew bias tape to tulle if necessary. With even, beautiful stitching, you can make decorative seams, which distinguish the product by its strength and reliability.
Suction cups for curtains, scope of application and installation
Another way to attach curtains is to use suction cups. Most often, they are used to secure curtains in the bathroom, shower, or combined toilet. It has its advantages:
- simplicity;
- cheapness;
- saving time;
- no need to drill into walls.
However, such products are not always pleasing: after a short period of use they lose strength and fall along with the curtains.
When purchasing, you need to pay attention to the integrity and smoothness of the surface of the suction cup. If they are broken, then the period of use will be short.
But even absolutely high-quality products will not adhere tightly if the wall has defects: potholes, cracks, remnants of the previous coating. It will be difficult to strengthen them on the embossed surface of the facing tiles.
To securely fasten them, you must use:
- degreasing agents;
- petroleum jelly and petroleum jelly-based preparations;
- lining made of self-adhesive PVC film;
- silicone sealant.
We have a curtain that needs hemming, and two ways to do it without a sewing machine
The first method is suitable for heavy, opaque material, and today designers, using Velcro, offer not only to decorate attic curtains and gather the bottom of heavy curtains, but also to radically change the height of the curtain.
Many people know that in harsh climates it is good when the curtain is higher than the level of the radiator; this helps save energy and seriously increases the air temperature in the room. And almost everyone knows that when it’s hot and sunny, a thick curtain helps keep the room cool.
It is Velcro that helps adjust the height of the curtain from the floor level to the window sill level, and you shouldn’t think that this is a crazy idea. The Velcro fastener is not visible from the outside, and with the help of this tape you can assemble the curtains into a very beautiful window frame.
However, there are several problems with this tape:
- Self-adhesive bases constantly experience “tension stress”, and after a dozen washes the tape may fail.
- The open part of the belt will quickly become dusty, which will significantly reduce the adhesion properties of the belt.
- Cleaning this fastener is quite a labor-intensive operation.
Solving this problem is quite simple:
- Apply excess tape (it is sold in a roll and always with a reserve) to the free area. When you need it, “re-stick” (excuse the word) the excess onto the vacant section of the tape;
- To clean the dirty part of the tape, use ordinary office tape with a small width. It is enough to glue it, press it lightly with your finger, heat it a little (for example, with a hairdryer) and peel it off. After such an operation, Velcro will work like new;
- For heavy fabrics, a radical solution is needed - stitching. Here you need to understand that the total thickness of the Velcro fastener should be greater than the thickness of the curtain. Otherwise, the adhesive layer simply will not withstand the loads.
In other words, “Velcro” is a great way to decorate a window exactly the way you want, but it is worth considering that such Velcro is designed for a small pull-off force that is accessible to a child. And children are precisely the factor that can ruin any interior. But there is a second method, more labor-intensive, but more reliable.
Web tape, iron, curtain and 5 minutes per linear meter
This is roughly what an advertisement for the second way to shorten a curtain without a sewing machine sounds like using self-adhesive “gossamer” tape.
Let's see how to use the “cobweb” correctly if we don’t want to cut the curtain, brush off the dust from the sewing machine, and in general we have a day off, and only three hours for my husband to finally help decorate the window. So:
- Rule one: in addition to the “cobweb”, curtains, iron and five minutes you will need an assistant, two pins, an ironing board (ideally a thin blanket on a flat board), several sheets of A4 paper, a damp sponge, good lighting and patience;
- Rule two: you need to remember that the iron heats up unevenly across the soleplate, fabric without a basting cannot be laid out evenly, and it is almost impossible to iron a fold evenly on fabric without a pattern.
- Rule three: the folded curtain must hang on the curtain rod for several days to take shape. To smooth it out, straighten it and spray the bottom with clean water. The wet bottom of the curtain will become a “weight”, which will flatten the curtain. As it dries, use regular clothespins to determine the floor level. In two days you will know exactly the length of the curtain you need. All that remains is to prepare everything so that the curtains you found in the store become the curtains of your dreams.
Take a fabric that matches the curtains in density, check at what temperature the “cobweb” will stick. A piece of 20x20 cm is enough, making sure that the “web” is stuck, sharply pull the edges. If at least part comes off, use two layers of “cobweb”.
Prepare a dry towel, sheets of paper, a damp cloth and empty the water from the steam iron.
If you have a regular ironing board, put something flat on it (a board), cover it with a blanket and don’t throw away the hooks that are now included in curtain sets.
Now let's shorten our curtain.
How to shorten curtains without cutting them
Before starting work, ask yourself one most important question: “Do you need to shorten the curtains at all?” More often than not, the answer is positive – “yes”. This is understandable; no housewife would want a large amount of dust to accumulate in the lower part of her beautiful curtains, which is in contact with the floor, which stains the curtains and can cause severe allergies in small children. Another most popular question: “Why can’t you just cut the canvas with scissors? Why bother and come up with ways to shorten them without trimming?”
Before starting the sewing process, the purchased fabric should be decatted so that the finished curtains do not “shrink” when washed.
The answer is very simple. If you cut the fabric, the fabric will no longer be intact and there will be no way to return to the length that it was originally, but in the opposite case, this possibility remains, which is very convenient and profitable. In addition, after cutting with scissors, an unsightly edge remains, which can not only spoil the appearance, but also begin to crumble. Let's look at some options for shortening curtains without using scissors.
It is advisable to allow the curtain material to hang on the curtain rod for 2-3 days. Only after this can you start sewing curtains.
For all types of hemming and shortening curtains, there are several general rules.
- Select the thread exactly to match the fabric. On many materials, straight stitching will be almost invisible.
- For those materials that fray a lot, it is worth processing the edges before shortening. This is easy to do; sew the edges on a sewing machine using a zigzag stitch.
- Double hem fabric can be used for almost all occasions. But it is not suitable for hemming or shortening lined curtains.
- Hemming the fabric requires a mandatory basting. You can also do this manually. Make long stitches using additional pins.
- After basting the fabric, iron the hem as carefully as possible to avoid distortions and unnecessary folds.
To make the window curtain look beautiful and not form unnecessary horizontal folds, it is better to weight its bottom with weights.