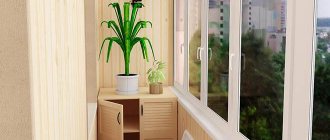
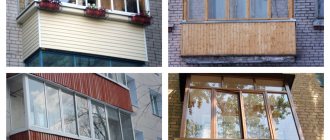
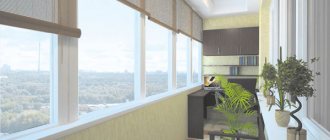
The design of a balcony or loggia in the Provence style is becoming fashionable among our compatriots. They are attracted by discreet elegance, French simplicity, natural finishing materials and the presence of vintage elements.
Balcony in Provence style
There are no special restrictions on the color scheme, although preference is given to light natural tones. The most commonly used colors are white, terracotta, lavender and olive. Any color must be diluted with white; designers do not use monochromatic saturated shades.
Color scheme in Provence style
Surface preparation
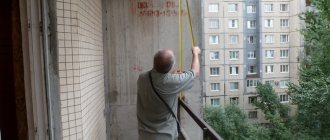
Due to the fact that finishing with lumber is done only on the sheathing, there is no need to level the surfaces of the balcony. The only caveat is to check the condition of the reinforced concrete slab. The fact is that the load on it will increase significantly and you need to be confident in its load-bearing capabilities.
The balcony slab must be in good condition
And one more important condition - be sure to cover all visible areas of the reinforcement with plaster. This must be done on all surfaces of the slab. Strengthening the parapets should be done during preparation for glazing; this stage does not need to be considered.
A color scheme
| Main color | Additional |
| light mint |
|
| pale yellow |
|
| azure |
|
| lavender |
|
| terracotta |
|
| blue |
|
Counting materials and selecting tools
Calculate the area of the ceiling, floor and side surfaces.
Scheme for calculating the square footage of a rectangular floor and walls
An example of calculating a room of complex shape
Floor with round wall
You need to buy slats measuring approximately 20x30 mm, mounted at a distance of approximately 50 cm. This parameter is needed when calculating linear meters of material. The floor requires stronger logs, size approximately 30x40 mm.
Edged rail
Buy lining and boards with a margin of about 5–8%, there will not be a lot of waste. Be sure to take into account the length of the lumber; a wide selection of sizes will make it possible to select them in such a way that the amount of unproductive waste will tend to zero.
We strongly recommend impregnating boards, lining and slats with antiseptics.
Antiseptic impregnation
For finishing you will need varnish; the floor is covered with especially durable grades.
Floor varnish
The boards can be fastened with nails or self-tapping screws approximately 2 cm long; the sheathing is fixed with dowels of appropriate sizes.
Do not use hardware that is rusty or prone to corrosion. The best choice is stainless steel or galvanized hardware
Insulation can be done with pressed mineral wool; if this is an expensive option for you, then use polystyrene foam. Just be sure to buy one that is non-flammable and approved for indoor use.
Insulation materials
From tools, prepare a drill with a hammer drill, an electric hand saw, a level, a tape measure, a hammer, and a pencil. Marking the boards is done with a square. As you can see, this is a common set of tools available to most apartment owners.
You need to start work from the ceiling, then the walls and finally the floors. It is in this sequence that the description of the work will be given.
Prices for different types of bars
Bar
MDF
MDF boards resemble fiberboard, but are processed differently thanks to modern technologies.
Glossy MDF boards with marble texture. For the renovation, two pastel shades were used.
Pros of MDF:
- High strength (not inferior to ordinary wood);
- Elasticity of plates. Thanks to this property, the slabs make it possible to mask differences in the sheathing structure (up to 50-70 mm);
- Practicality (long service life);
- Affordable price;
- Installation does not require much time and effort;
- Wide range of sizes;
- Large selection of textures and colors of MDF panels. The collections of different manufacturers present natural textures - marble, wood, etc.;
- There are several coating options - MDF can be matte, glossy or textured.
Wood texture MDF boards.
Minuses:
- MDF boards are fire hazardous;
- Affected by moisture.
Ceiling finishing
To reduce heat loss, we recommend insulating the ceiling. Although this is not necessary if the balcony above is already insulated and connected to the living quarters.
Step 1. Surface preparation. There is no need to level anything, you just need to pay attention to the waterproofing. If your neighbor’s insulated or glazed balcony is located above you, then there is no need to take any action. And if the upper balcony is open, then waterproofing must be done. Today there is a large selection of different materials; for a beginner it is quite difficult to choose the best option. Let's dwell a little on this topic.
To protect structural elements from moisture, waterproofing that is pasted, painted, coated, plastered, penetrating, sprayed, and rolled with nonwoven materials is used. We recommend using mastics based on modified bitumen : cheap, fast and reliable. To make your choice easier, we offer a list of the most used ones.
| Name | Characteristics | Price |
Bitumast | The jar contains 5 liters, which is enough to waterproof all concrete surfaces of the balcony. The composition includes a plasticizer, bitumen, filler, herbicide additives and white spirit. Consumption 0.5 l/m2, drying time 24 hours. | 426 rub. |
| TechnoNIKOL | Consumption up to 0.35 l/m2, drying time 12 hours. Universal use. | About 100 rub./l |
These are examples of cheap and high-quality waterproofing materials from domestic manufacturers; in terms of their performance indicators, they fully satisfy existing requirements. If you wish, you can purchase foreign mastics, but practitioners say that the effectiveness will be the same, but the costs will be noticeably higher.
Seal all cracks before finishing work begins.
Step 2. Marking the sheathing. Measure the length and width of the ceiling. It is recommended to place individual lathing slats at a distance of approximately 50 cm; from this calculation, calculate the number of slats.
Important. If necessary, insulate the bottom of the balcony slab above you. For insulation, you can use polystyrene foam or mineral wool. There is no practical difference in terms of heat saving; in terms of performance characteristics and cost, foam is preferable. Why?
- Foam is easier to work with, especially on ceilings. It has better rigidity and requires fewer dowels for fastening.
- Polystyrene foam is not afraid of moisture and direct contact with water. For mineral wool, moisture is a big problem. Even a slight increase in relative humidity increases thermal conductivity several times. In addition, mineral wool takes a long time to dry, which means that wooden structures will be used for a long time in difficult conditions. The negative consequences are obvious.
Differences between high-quality and low-quality polystyrene foam
Practical recommendation. It is much better to attach foam and mineral wool slabs to ceilings not with special dowels with wide heads, but with ordinary slats.
The slats support the material along its entire length, which completely eliminates the risk of sagging insulation. Another plus is that you need to drill much fewer holes in reinforced concrete. And this is quite hard work, there is a risk of getting into metal fittings, which further complicates the fixation process.
Advice. Before you start drilling the upper balcony slab, talk to your neighbors. This will help prevent unpleasant situations.
Step 3. If you decide to insulate the balcony ceiling with slabs, then along the perimeter you should attach wooden slats to metal corners, and the ceiling boards will be nailed to them. The height of the slats is 1–2 cm greater than the thickness of the insulation. Fasten the insulation with thin slats or special dowels. Select the distance between the fixation points in such a way as to prevent sagging of the material.
Trying on a polystyrene foam board. Insulation of a small-width balcony is being carried out
Drilling a hole for a dowel
Dowel installation
The joints are sealed with polyurethane foam
Penofol was used for vapor barrier. The material is secured with self-tapping screws with a wide head, the joints are sealed with sealant
Fastening the sheathing beams along the perimeter of the ceiling
Installation and fixation of transverse lathing strips
The following strips are attached at right angles
Step 4: Cut the boards to size. Due to the fact that in our case they will be fixed only at the ends, they should be laid not along the length, but along the width of the balcony. The standard width of balcony slabs is no more than 1.0 meters; use boards approximately 20 mm thick, they will not sag. The boards must be tongue and groove.
The principle of attaching boards to sheathing
Hidden fastening of boards with self-tapping screws at 45 degrees
Important. If in the case of ordinary floors and ceilings made of boards, building codes recommend pressing them tightly together using special devices or wedges, then when decorating a balcony in the Provence style, the opposite is true. Do not press the boards down; let there be small gaps between them. This is exactly what ancient living quarters in the French province looked like.
"Provence" in translation means a province, and not a city or historical region, as is sometimes thought. Although a city with this name exists, it has nothing to do with the style described. The Provence style has many similarities in materials with the country style. The main difference is that the French made their premises, even in villages, more comfortable and beautiful than the Americans.
We do not recommend laying electrical cables under the balcony ceiling; it is much more convenient to mount lighting fixtures on the walls. But if you really want it or the final furniture requires it, then lay the cables after insulation. Accordingly, you need to drill a hole in the boards to bring them out. Electrical wiring should be installed in strict accordance with the PUE; if knowledge is not enough, then it is better to involve professional electricians to help.
Wood ceiling trim
Step 5. Clean the surfaces of the boards from dust and varnish. In most cases, one coat is enough; if this is not enough, apply a second coat.
At this point, the work on the Provence style balcony ceiling is completed; you can begin finishing the walls.
Prices for expanded polystyrene
Expanded polystyrene
Balcony lighting in Provence style
Rustic style involves simple lamps without excessive decoration. The material is again natural: wood, metal, porcelain. Since the aging effect is often used in Provence, metal forging can be covered with a patina, as if it has been serving for centuries.
The lighting should be dimmed and cozy. You can place a lamp with a textile lampshade on a shelf or table, and a similar floor lamp near the rocking chair. Textiles will be made of natural fabric and with plant or natural patterns. By the way, the lampshades often depict scenes from rural life in France.
In the evenings, you can place a candle in a candlestick on the table, and if there are pets in the house that can knock the candle onto the floor, you should buy a lamp in the form of a retro candelabra.
You can hang sconces on the walls for secondary lighting. It is worth paying attention to the double sconce of the “Makey” collection: the curved metal frame and fabric lampshades personify Provençal harmony.
Wall decoration
Provence style is a maximum of natural materials. For the walls we will use wooden lining.
Step 1. Fix the side slats to the walls. Due to the fact that the surfaces of the balcony walls are small, the installation of the slats is greatly simplified. There are quite rare cases when it is necessary to level the position of the sheathing due to large deviations. You can check the position of the sheathing using an ordinary level. Install slats carefully around doorways and windows.
Drill holes with a drill with Pobedit drill bits, recess the dowel heads completely into the wood, otherwise they will create obstacles when fixing the lining. There is no need to drill special holes for the caps, just tighten them tighter.
Step 2. Check the condition of the sheathing; if problems are identified, correct them immediately. There is no need to lay thermal insulation on the walls between the balcony and the room, but you will definitely have to insulate the parapet. The thickness of the insulation is within 10 cm, no more is needed, the balcony has too little free space.
Parapet insulation
The slabs are fixed with dowels on the side walls
Penofol vapor barrier
Drilling a hole in the sheathing strip
Sheathing slats
The cable is routed through a hole in the sheathing
Step 3. Start covering from the parapet, this plane is the most noticeable. The lining is laid from bottom to top, carefully check the first board horizontally. It is better to fasten with small nails in the groove; using self-tapping screws takes a long time and is difficult.
Cutting lining with a jigsaw
Installation of the first board, fastening with a clamp
Installing a second board
Fastening the lining
Fastening the lining above the opening with nails all the way through
Fastening panels with nails
Important. Leave a small gap between the tongue and groove to compensate for linear expansion. Otherwise, the casing may swell and you will have to redo everything.
Step 4 . Carefully sheathe the walls near the windows and doors, do not forget to close the corners and make slopes. For these purposes, it is better to use wooden corners. If they are not available, then it is allowed to use plastic elements that do not differ in tone from wooden ones.
Wooden plinth
Corners
Step 5. Nail the ceiling plinths, be sure to cut them at 45° in the corners. But there are cases when the angle is not straight, then you will have to make individual measurements for an even cut. How it's done?
- Place one plinth tightly in the corner until it stops against the opposite wall. Lean the second one against the second corner so that its end lies on the first ceiling plinth.
- Place dots on both elements at the intersection with a sharp pencil.
- Take away the baseboards and connect the marked points with lines.
- Carefully cut the ends of the baseboards along the lines.
Cutting skirting boards at an angle
If you do not have any practice, we strongly advise you to first try to find the angle on unnecessary segments. It is not necessary to take a plinth; practice on sections of laths for sheathing. We're done with the side surfaces - let's move on to the floor.
Fake diamond
A combination of decorative stone and plaster.
Balcony design using artificial material that imitates natural stone.
Brick effect in modern design.
Advantages of decorative stone:
- Affordable price;
- Variety of textures, colors and sizes;
- There are straight and corner elements, so the installation process is extremely simple (no special experience is required for installation);
- Good resistance to rotting processes;
- Prevents the occurrence and spread of fire;
- Not subject to corrosion;
- High wear resistance;
- Service life comparable to brick and concrete;
- Does not accumulate radiation, harmless to humans;
- Eco-friendly;
- The low weight allows the stone to be installed immediately, without prior reinforcement of the walls.
Artificial slate for interior decoration.
Decorative brick in a modern interior.
Faux brick goes well with wood texture and modern pieces of furniture.
Floor finishing
When decorating a balcony in Provence style, the floors can be made of wood (the best option) or ceramic tiles. Let's consider the option of floors made of tongue-and-groove boards 20–25 mm thick, logs made of beams 30×40 mm.
Step 1. Calculate the required amount of material. It is recommended to lay boards on the floor along the balcony, this improves the appearance of the room. For insulation, take foam boards or mineral wool (can be rolled or pressed).
Practical advice. To avoid waterproofing between the joists and the concrete slab, you can fix them on metal angles. With their help, by the way, it is easy to align the horizontal position of all the logs - the angles have special technological longitudinal slots.
Step 2. Mark the location of the joists, drill holes in the slab and secure the angles. Make sure that they are all located on the same line.
Step 3. Secure the two outermost logs and align them horizontally.
Step 4. Fix all other logs along the marked lines. Linearity can be controlled with a long, level staff. Make sure that there is a gap of several millimeters between the bottom surface of the lumber and the concrete slab.
Lag mounting option
Step 5. Install insulation between the joists. Again we recommend using foam. No one spends much time on the balcony, so there is no need to be afraid of harmful fumes, especially since there are modern brands of completely safe polystyrene foam available. If you are afraid, insulate the floor with mineral wool. But it must be covered with a waterproofing layer. You can use non-woven materials, but ordinary polyethylene film will also work.
Penofol flooring
Step 6: Start laying the boards. In order not to damage the insulation layer, we recommend laying a subfloor on the joists using scraps of plywood, OSB or boards. As the finished floor is completed, the rough floor is removed. As soon as the new floor becomes large enough in area, move on to it and completely remove the subfloor. We have already mentioned that there is no need to pull the floor boards tightly; this is “required” by the Provence style.
Laying floor boards
Flooring installation
Balcony floor finishing
Step 7: Once the perimeter floorboards are installed, nail the baseboards.
Step 8. Thoroughly clean the floor from dust and cover it with high-quality wear-resistant varnish. It is better to apply the varnish with a brush; a roller does not provide the necessary rubbing. The more layers, the smoother the floor surface, but the layers must be made thin.
Applying varnish to a wooden floor
Each subsequent layer is applied after the previous one has dried in a perpendicular direction. It is not recommended to impregnate lumber with stains before varnishing; the boards should have a natural color and texture.
Prices for various types of wood varnishes
Wood varnish
Curtains
Provence is an airy, light style, so the curtains should match it. Ideally, you could do without curtains altogether, but on the balcony you can’t live without them. Designers advise choosing lightweight white or milky textiles. At a time when the sun does not interfere, the ends of the curtains can be tied with ribbons - just like in the canonical village.
You can hang shorter curtains on the balcony, but their style will be the same
If the balcony is very small, you can install blinds or roller blinds. The color should also be white or milky and avoid any decor.
Ceramic tile floors
Tiles on the balcony
Ceramic tile floors
This option is also used when decorating a balcony in the Provence style, but is not considered the optimal solution. Besides the fact that it slightly distracts attention from natural materials, a ceramic floor is much cooler than a wooden one. But it is impossible to do multi-layer insulation due to the large thickness of the pie. The fact is that the floor level of the balcony should be slightly lower than the floor level in the room, or at least be at the same height. The large thickness of effective thermal insulation of concrete tiles does not allow such conditions to be met. And making thin insulation is a waste of time and money.
As for the technology of laying tiles, it is conventional.
Step 1. Check the surface of the slab, eliminate large differences in height. In most cases, its characteristics are satisfactory and no additional leveling is required.
Step 2. Purchase the appropriate amount of materials. You will need ceramic tiles and glue. To grout the joints, use ordinary glue; the floor should have as simple a rustic look as possible.
Step 3. Make markings. Building regulations require that the tile joint be positioned exactly in the center of the front door. Taking into account the dimensions of the tiles and the width of the gap, calculate the position of the first row of tiles. If it is difficult for you to make such calculations, then you can start work from the center and move towards the edge. In the future, work will have to be stopped for one day to allow the glue to harden. After this, you can stand on fresh tiles and continue laying.
Glue consistency
Applying adhesive and gluing tiles
If the surface of the reinforced concrete slab is smooth, then the glue can be applied with a notched trowel; if there are problems, then apply it with a flat trowel on four sides and in the center. The thickness of the glue is approximately a centimeter or two; during leveling, the gluing area will increase. Don’t worry that small voids will remain, there is no big load on the balcony floor. In addition, the floor tiles themselves have fairly high levels of physical strength.
Laying tiles on the floor
Step 4. To grout joints, use ordinary glue; Provence style does not allow bright colors on floor coverings.
Applying grout
Removing excess
Seams after grouting
At this point, all construction work on finishing the balcony in Provence style is completed, you can start creating the interior of the room.
Prices for various types of ceramic floor tiles
Ceramic floor tiles
Drywall sheets
The walls are covered with gypsum plasterboard, the top layer is wallpaper.
Wallpaper in room decoration.
Paintable wallpaper. The walls are leveled using plasterboard sheets.
The interior is in light green shades. Painted sheets of drywall in the loggia space.
GKLV is often used in the repair of loggias, despite the fact that the material is fragile, and sheets without finishing cladding quickly lose their original appearance.
The final finishing layer is two types of wallpaper (light gray and stone imitation).
Painted wall surface (at the base of a plasterboard slab).
The reason for its popularity is explained by a number of the following features:
- Drywall sheets are quite easy to install;
- Due to the properties of the material, it is possible to implement various ideas in the interior of the loggia;
- Low price GKLV.
The niches in the room are made using plasterboard, the top layer is paint.
Sheets of plasterboard are used as a basis to create a flat surface - then the surface is decorated with wallpaper or painted.
Drywall covered with wallpaper for painting.
Mini bedroom. Facing the room with gypsum boards, finishing layer – paint.
To install gypsum boards, you must first organize high-quality hydro- and thermal insulation. Thus, fragility will not cause trouble during operation.
The walls of a small nursery are leveled using gypsum boards. The finishing layer is paper wallpaper.
Living room
Curtains in the Provence living room allow your imagination to unfold. You can hang both classic and French curtains or choose priscilla curtains. Lambrequins, tiebacks, and tassels can be used as decoration.
Which fabric to choose?
Natural textiles with expressive textures suit Provence, but there are nuances. When choosing curtains, consider where exactly they will be used, because the conditions in the bedroom, children's room and living room are fundamentally different. Let's look at the main features of each type!
Natural fabrics
Cotton, linen, wool and even silk are something you can’t go wrong with in Provence. They are absolutely environmentally friendly, beautiful and breathable, and a healthy microclimate reigns in such a room. But natural textiles are always more difficult to care for: they tolerate constant washing less well, wrinkle, and wear out faster. Although now there are special impregnations that compensate for at least some of the problems.
Synthetic fabrics
Synthetics are always of artificial origin, so it is more difficult to talk about naturalness and ecology. Basically these are different types of polyester in different processing. It is stronger, much more unpretentious, easy to wash, does not wrinkle, does not absorb odors, is better painted in any color and can withstand intensive use. But synthetics are less breathable, become electrified and can easily catch fire.
Blended fabrics
Manufacturers have managed to combine the advantages of natural fabrics with the strength of synthetic fibers. Blended textiles include almost all popular types of interior textiles - modern velvet, artificial silk, organza, jacquard. The characteristics of a particular fabric are determined by its composition and weaving, so be sure to study the label.
Curtains for the kitchen (65 photos): types, beautiful ideas
Furniture
Even an old box can become part of the interior
Furniture, like everything in the Provençal style, bears the visible imprint of time and is a true monument of antiquity. Find a place on the balcony for a table with wrought-iron legs, a wicker chair or a sofa.
If you choose wooden furniture, be sure to paint it white, leaving parts with chips and peeling paint. This effect can be easily achieved using craquelure varnishes.
Aging effect by brushing
Low tables and chests of drawers from “great-grandmother’s times” are an integral part of the interior. Carvings with floral motifs painted in pastel green, blue or orange are used as decoration.
Bedroom
Here you should choose curtains with blackout lining. These may be Roman or Italian models. The main thing is that the fabric from which they are made is environmentally friendly and natural.
Children's
When decorating a window in a nursery, do not overuse decorative details. The baby should not be able to climb up the curtains or bring down the cornice. It is preferable to opt for a roll, French or Austrian model.
Kitchen
Curtains for the kitchen should not be massive and voluminous. The ideal solution would be Roman curtains and cafe curtains made of synthetic or mixed fabric.
Note!
Modern curtain styles - TOP 170 photos and video reviews of modern curtain styles. Characteristics of styles, types of curtainsCurtains in the Hi-Tech style: characteristics of the Hi-Tech style, a variety of colors and materials and curtain designs (photo + video)
Roman curtains
An ideal choice for a small space. Advantages: tight fit to the glass, high-quality protection from sunlight, compactness.

