No matter the size of the loggia or balcony, without furniture they look boring and uncomfortable. If you don’t want to clutter this room with oversized furniture, try a solution such as a cabinet for the balcony. It will solve two problems at once: it will “revive” the room and provide additional storage space. Depending on the chosen design and materials, the cabinets will fit into any room: from a storage room to a recreation area. We invite you to learn more about the types of this piece of furniture and how to implement your favorite idea.
Advantages of installing a cabinet on the balcony
There are various options for storing things: wardrobes, shelves, racks. But unlike them, the bedside table for the balcony is a more compact and versatile design. Let's list its main advantages:
- Doesn't take up much space. Bollards can be low or high, usually they do not exceed the height of the parapet. Unlike cabinets up to the ceiling, bedside tables do not visually reduce the size of the balcony.
- The ability to “fit” into a room of any geometry. Often they are installed in the corner of a loggia of a non-standard shape, where no other furniture would fit. As a result, instead of useless space, you get a spacious niche for storing things.
- Multifunctionality. The top of the cabinet does not need to be covered with a table top. If the height allows, you can equip a soft sofa there.
- Allows you to store things both inside and on top. Behind the cabinet doors on the balcony you can hide unsightly objects or those that require protection from sunlight (cans with blanks, paint, shoes). And on top there is space for decorative elements: vases, flower pots, a mirror or a painting.
- Can be placed in any part of the loggia. Bedside tables for the balcony are installed on the sides, along the wall bordering the room, as well as under the window sill near the parapet.
Constructions
All balcony cabinets are divided according to design features into:
- stationary;
- built-in;
- corner;
- with or without doors;
- with a hinged top cover instead of doors.
In a small space, you can make corner furniture, which will visually hide the boundaries of the space and make the room less cluttered.
If the balcony space is very tiny, it is better to install a cabinet with three doors. They turn out to be shorter in length.
For mobility of the product, it is recommended to supplement it with furniture wheels. This way you can always pull the cabinet out of the corner and gain access to the window sill.
Tip : for spacious balconies you can install a cabinet-chest, a cabinet-bench and other interesting options.
What materials can be used to create a cabinet for a balcony?
The choice of materials depends on the availability and type of glazing. For open balconies, metal coated with anti-corrosion agents is suitable. This design will have a lot of weight; before installation, the strength of the balcony slab must be checked.
For glazed balconies the choice is more extensive:
- MDF, chipboard, chipboard. They are distinguished by relatively high strength, availability, and attractive appearance. Working with these materials is not difficult, so they are suitable for making a bedside table for a balcony with your own hands. You can cut the sheets into parts of the required size using a jigsaw at home or contact specialized companies. Some large construction supermarkets also provide a similar service.
- Plastic panels. Plastic is a practical material, but cannot withstand heavy loads. The advantage is the low price and resistance to moisture.
- Wood and lining. Furniture made from high-quality wood looks respectable and homely. Those who are not bothered by the high cost of the material, as well as owners of an insulated loggia, can opt for it. A more economical option is wooden lining.
Installation
The frame of the balcony cabinet is made of wood boards or timber. To make the structure lighter, you can use racks made of MDF or laminated chipboard with a width of 15 cm. The material is cut at home or at the place of sale according to specified dimensions. Many construction hypermarkets offer such services.
Installation of a built-in cabinet with a frame made of MDF panels
First you need to cut the parts for the furniture. We process the edges and glue the laminated tape with a hot iron. The side panels are attached to the walls with self-tapping screws. The upper part of the cabinet on the balcony is installed on birch dowels. The connections should be coated with PVA wood glue. For greater strength, you can use metal corners.
The shelves are installed on any convenient fastener: birch dowel, euroscrews, eccentric tie, metal corners. Holes for the hinges should be made in the doors; for this, use a Forstner drill (crown). We complete the installation of the bedside table on the balcony by installing the doors and handles on them.
Built-in chest of drawers under the window sill
We install 2 slats of the chipboard frame on the side opposite to the wall; doors will subsequently be attached to them. We use a level so that all parts are strictly horizontal and vertical. We attach the shelf to the walls. We install the hinges on the doors and attach them to the frame slats.
If you plan to make a cabinet that spans the entire width of the window sill, you will need to make internal dividers. In this case, the shelves are attached to the partitions in any convenient way.
Mobile cabinet for balcony with seat
We install frames made of timber, forming two side planes. The parts are connected with corners and self-tapping screws. We attach beams made of timber to the frames. We screw the plywood sheets to the frame on all sides. Place the lid on top. The window sill may interfere with opening, in which case the design will have to be improved.
The cover can be made of furniture board; a pillow of the same size is placed on top of it. But you can also make a soft opening seat. To do this, foam rubber is placed on a furniture board of the required size, the cake is wrapped in furniture fabric, which is secured to the wood with staples.
A finished bedside table for a balcony with an open lid should not exceed the distance from the floor to the window sill. If the windows are low, we complicate the design of the lid. To do this, the upper part is divided into two. The smaller part will be located by the window; its width is made equal to the window sill. The rest of the space will be taken up by the lid.
The second option for reducing the lid is to place a fixed strip at the back of the chest of drawers. Its width should not exceed 1/3 of the width of the top. Next, the lid is attached to the strip of plywood.
A cabinet for a balcony with a seat may have a different design. If you attach furniture wheels to the bottom, it will be easy to move not only around the loggia, but throughout the entire apartment. Hinged or sliding doors can be installed on the front part.
After assembling the cabinet, it is necessary to ensure that sunlight does not fall on the front facades - it will cause the wood boards to fade. For these purposes, you can hang curtains on the windows. You should also not allow moisture to get on the structure, then furniture made by yourself will serve you for many years.
Making your own cabinet for a balcony
Before you begin the process of making a balcony cabinet with your own hands, you need to find out what criteria it must meet:
- Do not interfere with free movement inside the balcony, as well as the entrance to it.
- Do not interfere with the opening and closing of window frames.
- Parts of the cabinet or the entire product must fit freely into the doorway.
- The material must match the humidity level of the room.
The first step is taking measurements of the space for the future cabinet. Ease of use and appearance depend on their accuracy. You will need to decide on the following parameters:
- width, height and depth of the product;
- the number of shelves and the presence of a jumper between them;
- presence and number of drawers;
- the method of opening the doors and how many there will be.
There are many ways to make a cabinet on the balcony. A product on a frame with hinged doors is the simplest and most affordable option. Let's take a closer look at the manufacturing process.
In addition to the main material (MDF, chipboard, lining) for the cabinet you need to purchase the following:
- wooden beam 40×40;
- furniture edge;
- metal corners;
- hinges for doors;
- fittings for the functioning of doors.
To work you will need tools:
- roulette;
- level;
- screwdriver;
- drill (if necessary);
- construction or stationery knife;
- pencil or marker;
- jigsaw
Sequential process of creating a balcony cabinet:
- Cut the timber into pieces of the desired size using a jigsaw.
- Build a frame in place of the cabinet, fastening the beams with metal corners. The lower bars are attached to the floor of the balcony. If it is cement, then use a hammer drill to first drill holes of the required size. The beams are attached to the floor using dowels.
- If the sheets were not cut into the required parts, this should be done using a jigsaw.
- Cover the outer parts of the cuts with furniture edges for a more aesthetic appearance.
- Attach the required number of shelves to the corners or install drawers.
- Apply markings to the front side beams for the door hinges and screw them in place.
- Hang the doors on their hinges and screw in the handles.
- Install magnets so that the doors are securely adjacent to the frame when closed.
- Place the lid on top and secure it.
How to make blinds for cabinet cladding
Decorating cabinet doors under blinds looks original and aesthetically pleasing. To make such a cladding yourself will require a lot of effort, but the result is worth it. The instructions given below are relevant not only for cabinet doors, but also for windows on the balcony.
To make blinds, you need:
- Prepare the overall frame. In its side parts it is necessary to make recesses for inserting lamellas - the components of the blinds.
- Prepare the slats.
- Assemble the blinds.
Typically, the grooves for the lamellas are made 6 mm deep using a milling cutter. To make the lamellas themselves, you need to cut the timber into strips, the thickness of which is 6 mm (according to the size of the groove). For better fixation, the strips are glued in the grooves using wood glue.
When calculating the number of stripes, you need to round all numbers to whole numbers
In which direction - more or less - it doesn’t matter. The length of the grooves for the lamellas should be slightly less than the thickness of the frame (it is necessary to make a margin of 2 mm on each side)
Once all the parts are cut out, you need to sand all the slats and frame parts with fine grit sandpaper. After processing, you need to begin assembly using wood glue.
The final stage of creating blinds is painting. If the frame and cabinet are made of natural wood, then it is enough to varnish them. If the closet is made of one material, and the shutter doors are made of another, you need to bring all the furniture to a single color scheme or a single style.
Buy or make it yourself
Everyone chooses to make a cabinet themselves, to order, or buy a ready-made one, depending on their budget, availability of free time and personal preferences. Making it yourself will require a little effort and time, but it will be cheaper. If the money issue is not acute, then you can choose a suitable option in the store.
Important! Before you go looking for a finished bedside table, you need to measure the space on the balcony and decide on the size of the furniture.
The price of a cabinet depends on the materials and fittings. Wooden bedside tables with two hinged doors will cost 8500-9000 rubles. The same model, made of aluminum, costs 13,500-14,000 rubles.
Where to begin
To make a cabinet yourself, you need to make a drawing. First of all, it must be simple and understandable to the master.
- When drawing up a drawing, it is important to take into account the dimensional parameters of the room and the location of the cabinet, and think about what will be stored in it.
- Due to this, it will become clear how many shelves will be needed and at what distance from each other they will need to be placed.
- Having a drawing can greatly simplify the task of assembling the cabinet.
For high-quality processing of elements, you can use a manual electric milling cutter. Then all the work on assembling the cabinet will be done efficiently.
Photo ideas for cabinet design and placement
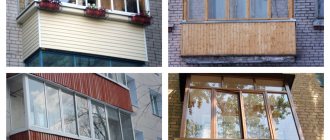
A balcony in an apartment can have different functions. Increasingly, they are trying to use it as much as possible, and not just use it as a place to store things or for smoking breaks. On the loggias they dry clothes, read books, drink morning coffee, and set up an office or workshop there. Whatever the purpose of the room, it is unlikely to be complete without a convenient locker. You can build a simple structure from scrap materials in a few hours, and its benefits will last for many years.
Interesting balcony ideas
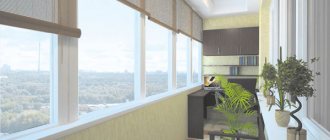
A cabinet can become not only storage for you, but also a highlight of the interior. Today, a balcony cannot be called a warehouse of unnecessary rubbish; such times are a thing of the past. Even when planning to place furniture there, you need to remember to make it in the same style as the decoration of the balcony. Storage can be combined with other useful functionality.
Interesting options for using the cabinet:
- flower lovers will appreciate the possibility of placing their collection on the top of the cabinet in the summer;
- by placing a beautiful tabletop lid and placing a stylish vase on top, you get a stylish decor;
- you can put chairs nearby, then the cabinet turns into a table, where in the warm season you can drink tea and read books;
- if the top cover is made with soft upholstery, and the structure itself is low, you will get a resting place - a mini-chair or ottoman;
- adding bright pillows, a carpet and decorative elements to the previous solution, you will get a luxurious oriental-style balcony.
In this list you will find the answer to why it is better to choose a cabinet rather than a cabinet up to the ceiling. The closet is a massive structure and can visually reduce an already modest space. In this sense, a cabinet would be a more acceptable option. In addition, it is easier to do it yourself due to its small size.