It has long been known that a balcony is an important part of any apartment. It’s not for nothing that every owner strives to ennoble it. As a rule, finishing of a balcony is carried out at the final stage of its renovation.
There are many building materials that give the balcony room an attractive look. Unfortunately, many of them are afraid of high and low temperatures, absorb moisture, and wear out quickly. Tiles have great advantages.
Let's take a closer look at all the issues related to the use of tiles for the balcony.
Features of tiling
Some basic tips:
- When choosing tile products, you should take into account the size of the internal balcony space. For example, if the loggia has small dimensions and glazing in the form of massive double-glazed windows, the finishing material should have minimal weight and not large shapes to avoid additional load.
- On narrow and long loggias it is not advisable to use tiles that are too large; here small or medium cladding will look much more appropriate.
- For dark balconies located on the north side with limited natural light, it is better to use finishes in lighter shades.
- When arranging a loggia, which is a continuation of an adjacent room, it is recommended to choose cladding in the same style or harmoniously combined with the overall design of the room.
Taking into account all the design and architectural nuances of the balcony space, it is possible to achieve a competent approach to finishing and translate all decorative ideas into reality.
Look at examples of balcony decoration in Khrushchev.
Plastic sheathing
Plastic panels are a budget option for finishing a balcony. They do not need careful care. There is a wide range of such finishing materials on the market, which allows each owner to choose the most suitable option for himself. The use of plastic panels makes it easy to level the walls without carrying out complex work.
When using plastic panels, you need to be aware that they can become deformed at high or low temperatures. Therefore, the fastening must be non-rigid, which will prevent the destruction of the material.
The work includes the following steps:
1. First of all, the sheathing is made from wooden blocks.
We build the sheathing
2. Before starting the sheathing, it is necessary to insulate the walls. Mineral wool, polystyrene foam, isolon or ordinary polystyrene are used as thermal insulation materials.
We insulate the walls
3. Plastic panels are mounted on top of the sheathing. Nails, glue or dowels are used as fastening elements. The panels are connected to each other by grooves. Every half meter you need to strengthen the sheathing with nails. This will give it strength and reliability.
Installation of plastic panels
The most convenient option is to mount PVC panels using a mounting profile. Slats are attached along the perimeter of the balcony. In this case, the panels will fit into the grooves and snap onto the rail itself. The use of such a profile will significantly reduce the time of cladding. Under such a coating, electrical cables can be laid unhindered.
In the video: the technology of covering a balcony with plastic panels.
Advantages and disadvantages
Advantages and disadvantages of tiled finishing.
| pros | Minuses |
| It is hygienic, easy to care for and is not susceptible to household chemicals. | This facing material has poor thermal conductivity and is always quite cold to the touch. |
| It has good strength, frost resistance, moisture resistance, durability and environmental safety. | |
| Thanks to a huge variety of colors, designs and aesthetic appearance, it has high decorative properties. | It can be very slippery, which is especially dangerous. |
In what cases is polycarbonate useful?
In city houses of standard construction, it often happens that the balcony of the upper floor has neither walls nor a roof. You have to do everything at once.
Polycarbonate balcony roof
There are two types of roofs, dependent and independent:
- the dependent one is installed together with the glazing and together with it represents a single structure. The entire load from it falls on the parapet;
- the independent one is mounted on brackets and corners to the facade wall, and whether you glaze the balcony or not is up to you.
In an independent version, you can make the roof and walls from corrugated sheets (it is not advisable to use slate, it is heavy), and then sheathe the walls from the inside with any panels.
Polycarbonate canopy over the balcony
For dependent roofs, a popular manufacturing material is cellular polycarbonate. When installing the frame, plasterboard profiles, simple and arched, are used. A single structure is created, walls + roof + glazing. It does not require additional processing or cladding.
Polycarbonate roof of a balcony in a private house
The advantages of this material:
- it is lighter than glass;
- strong and durable;
- good light fastness and UV resistance;
- water resistance;
- does not rot, does not corrode, does not become infected with fungus;
- low thermal conductivity: from polycarbonate, depending on the brand, you can make both a semi-warm and a warm balcony;
- plastic, allows a large bending radius;
- easy to process;
- There are types with different light transmission, there are many colors.
The downside is, like all synthetic materials: it doesn’t breathe. When constructing any sealed polycarbonate structures, you need to take care of the ventilation system or provide for the possibility of ventilation.
What type of tiles should I choose to decorate the inside of the balcony?
The following types are used for internal cladding:
- Porcelain tiles. It is very strong, durable, able to withstand heavy loads and has an anti-slip effect.
- Tile (ceramic). Contains clay, sand and water. Has a huge variety of colors and patterns.
- Quartz vinyl. It is based on quartz vinyl sand and PVC components. These products may have an additional protective and decorative polyurethane film, which can significantly improve the mechanical properties of the finish.
- Plaster. It is a unique material that is made from environmentally friendly gypsum and cement that does not contain harmful additives.
- Wooden. It is a very high-quality and reliable cladding, with which you can create a truly beautiful design.
- Clinker room. It has properties in no way inferior to porcelain stoneware. Clinker tiles are not afraid of temperature changes, high humidity and can come in a variety of shapes.
The photo shows brown porcelain tiles on the floor in the balcony interior.
When decorating a balcony, ceramics are most often preferred, as it has a huge number of advantages, such as exclusive design, aesthetic appearance and versatility, and also becomes an excellent finishing coating for heated floors.
The final stage of work
The arrangement of the balcony with tiles is almost complete. The tile should now be completely dry. And this requires a lot of time. Especially in the case of designing a “cold” balcony, and not designing the interior decoration.
When the glue is completely dry, you need to deal with the seams. There is a special grout for this.
A variety of design projects today include a balcony in the interior. Here you can set up a study, a relaxation area, or simply a small French balcony with your favorite flowers. An important role will be played by what flooring you choose.
Finished balcony surface
Balcony tiles remain the most popular floor finishing today, which is not surprising. Firstly, it is a durable material that will withstand any load. Secondly, if the balcony is not glazed, the tiles are not afraid of any atmospheric barriers: sun, rain, snow. Thirdly, ease of cleaning adds its advantages, which is important on balconies that are susceptible to pollution from the street. Fourthly, the aesthetic appeal of this material will not leave anyone indifferent.
Ceramic floor tiles
The advantages of such balcony flooring compared to other materials are obvious. Lay down a traditional concrete screed and it will not withstand either temperature changes or constant use. Its surface will begin to deteriorate over time. And there is no need to talk about perfect cleaning or a cozy atmosphere. Lining, linoleum, laminate, porcelain stoneware or regular floor painting are susceptible to moisture and are more suitable for glazed balconies.
Location of tiles on the loggia
Options for placement of tile finishes.
On the floor
Tiling the floor is the best solution for any type of balcony, since this coating has high strength characteristics.
The photo shows the floor on the loggia, lined with multi-colored square tiles.
On the walls
Thanks to the huge range of colors, it is possible to apply various design experiments and create a beautiful, yet universal and functional loggia design.
Threshold
This area can be decorated in the same style as the floor, using residual materials, or using finishes with different colors and textures or mosaics. The main thing is that it is not desirable for the surfaces to be glossy, since they are quite slippery.
Windowsill
A tiled window sill is particularly aesthetically pleasing and functional and fits harmoniously into any interior design for a balcony space.
The photo shows a balcony window sill finished in the form of black clinker tiles.
Slopes
The finishing of slopes has not only a decorative function, but also a practical one. Often there are door or window slopes decorated with mosaic, small metlakh tiles, ceramics, products with imitation artificial stone and other decorations.
Solving possible problems
If you strictly follow the recommendations for laying tiles, difficulties are rare. The problem often becomes the presence of round sockets or other holes on the balcony. The hole is made with special nippers or a drill. Another problem that you may encounter when finishing a balcony is that the tiles do not lie evenly. The error is usually hidden in improper surface preparation. It is worth making sure that the walls and floor are perfectly level, using a level. It is important to completely remove dust using a damp cloth. Even a few grains of sand can disrupt the ideal plane.
Difficulties often arise when decorating corners or window sills. The use of plastic corners is unacceptable. The recommended option for decorating the corners is to use only tiles, carefully measuring every millimeter before arming yourself with a tile cutter and removing the excess.
Balcony color scheme
Due to a well-chosen shade, which should be used taking into account the comfortable stay in the room, it is possible not only to create a beautiful design, but also to radically change the geometry of the space.
For example, white color imparts lightness to the atmosphere and significantly increases the area of the loggia, aristocratic gray shades can simultaneously look modest, sophisticated, elegant and very original, the brown range is particularly natural, and green and yellow tones undoubtedly bring extraordinary freshness, naturalness and brightness to the atmosphere .
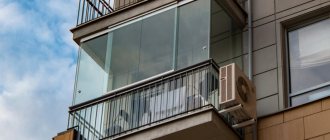
The photo shows a panoramic closed balcony with a floor decorated with gray tiles.
For small balconies, the traditional solution is light colors that visually expand the space and their pastel shades.
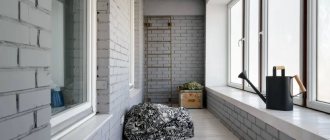
The photo shows partial finishing of the walls and parapet using brown brick-like tiles on the loggia.
Leveling the surface
Tiles can only be laid on a flat surface. Large differences in height (more than 5 mm) are not allowed. The glue tends to shrink during the setting process. The adhesion force is enough to either disrupt the geometry of the surface, part of the tile will go down, or break the tile.
There are several ways to level the surface of the slab:
- wet screed. In this case, you need to carefully calculate the load on the balcony. It can be critical. The nuances of leveling a slab with a wet screed can be found here;
- self-leveling mixtures - the most effective option if the task is not to raise the floor level (features of the technology are described in the work “Self-leveling floor on the balcony”);
- using lag - instructions are given here;
- tile adhesive - the fastest and cheapest option. Used on open balconies with a flat base.
Tile layout options
There is also a fairly large selection of types of installation, with the help of which it is possible to create an even more non-standard interior on the loggia and solve some spatial shortcomings.
For example, a diagonal layout allows you to visually expand the balcony; this solution is considered quite labor-intensive and, due to trimming, requires additional consumption of tiles. The staggered option is laid with an offset like brickwork; it can have a horizontal, vertical and even diagonal arrangement.
The photo shows rectangular wall and floor tiles with a staggered layout in the interior of the balcony.
To place tiles in a checkerboard pattern, they mainly choose products of two colors; this option is the most classic. The kaleidoscope layout consists of coatings of different shades and textures that create a single composition on the surface in the form of a pattern or panel.
Laying rules
Before decorating your balcony, it is recommended that you carefully read the rules and recommendations for finishing. There are several installation options, each of which has certain features.
Calculations
Before going to the store, it is recommended to carefully carry out the calculation: measure the walls, floor, calculate the number of square meters (subtract doors, window openings). You should purchase the material with a small reserve. It is recommended to give preference to medium-sized tiles - too large squares or rectangles are not used for finishing the balcony.
Selecting a laying scheme
There are several options for laying tiles. The simplest is the standard one, which is usually used by beginners. More complex - diagonal, requires experience and strict calculations. Taking a run is another method of laying, which will require certain skills.
Standard
Tiles are laid in a row or vertically. The tile is located longitudinally. Thanks to this installation scheme, it is easy to visually increase the space of the room. Trimming of slabs is minimal. For standard installation, rectangular or square tiles are used.
See also
How to properly lay tiles on the floor with your own hands, installation methods and technology
Diagonal
The plates are arranged diagonally. When laying, you will need to trim the tiles to form the selected pattern. The scheme is used for large or medium-sized balconies - installation slightly reduces the room. A diagonal arrangement of tiles is recommended for square tiles.
Taking a running start
Reminds me of laying parquet. The first row is laid longitudinally, the next rows are shifted by about a fifth. It is allowed to shift the row even by a sixth of the tile. Typically, staggered laying is used when choosing rectangular tiles.
Preparation of materials
Before finishing the balcony, in addition to purchasing tiles, it is recommended to prepare the materials and tools necessary for the work. You will need:
- hammer (it is recommended to take a special tool made of hard rubber);
- roller;
- tile cutting tool;
- plastic crosses for leveling the surface;
- roulette, level;
- putty knife.
It is also recommended to purchase putty, primer and special glue.
How to properly prepare the surface
Seal the entire surface and go over the cracks with putty. The next step is applying a primer. If the balcony is characterized by high humidity, it is additionally recommended to evenly distribute an insulating layer over the surface. If the balcony has a warm floor, first apply a layer of elastic adhesive.
Operating Instructions
Laying the tiles begins with the first row, which should overlap the floor cladding. Be sure to leave seams that will protect against wall deformation, which happens when exposed to moisture or frost. Use crosses to help make the seams even and neat. The optimal seam width is 3-4 mm, although much depends on the chosen design solution.
It is better not to rush with installation - it is recommended to cover no more than 1.5 square meters in one go. m area, allowing the glue to set. Fix each tile with a hammer. It is especially important to allow the glue to set when decorating the walls, otherwise there is a risk of deformation of the finish and sliding of the tiles. The only way to remove the “wavy” row is to completely remove the material and repeat all the processes - leveling, priming and laying.
After completing the work, let the glue dry thoroughly (1-2 days). To make the appearance of the finish look neat, it is recommended to seal the seams with a special putty. The solution will have to be selected to match the color of the tile, although, as an option, it is allowed to use contrasting shades.
See also
How to properly glue mosaic tiles, the choice of method and the best compositions
Balcony design
Thanks to a variety of design solutions, the result is a truly unusual and aesthetically beautiful design of the loggia.
The photo shows a spacious loggia with floors and walls tiled to resemble wood.
Finishing with stone looks very impressive and gives the atmosphere a special piquancy, while facing with brick can give the interior a certain carelessness and at the same time picturesqueness. Porcelain tiles or wood-look ceramics are not only distinguished by their exquisite appearance and believable imitation of natural wood texture, but are also very simple and easy to clean.
The photo shows white marble floor tiles in the interior of a modern balcony.
A tiled covering for laminate or parquet most often has a rectangular shape, which makes it possible to create a design that is as similar as possible to these coverings; products in the patchwork style are similar in appearance to a motley patchwork multi-colored blanket; with the help of this design it is possible to fill the space with a riot of colors and endow it with a positive energy. With the use of mosaics, you can add a stylish twist to the interior of the loggia and give it an expensive look.
The photo shows a small glazed balcony with patchwork floor tiles.
What you need to know
Weight
The permissible load on a cantilever (hung) balcony is 12 kN, which is approximately 1170 kg. For attached balconies (with a slab supported on the sides by pylons) and loggias (they do not protrude beyond the outline of the building), the load can be 18 kN (1766 kg). But all the same, if you subtract the weight of the glazing and insulation, there is very little left for finishing, and its weight has to be calculated with aviation precision. Therefore, when choosing balcony finishing options yourself, be sure to find out the density or specific gravity of the materials used, taking into account moisture absorption DURING A LONG STAY IN WATER. For mixtures mixed with water, their density in a ready-to-use state. Of course, when calculating the weight of the coating, its area per wall does not need to be taken into account.
Advertising deception #1
For fibrous and porous materials with a modified front side (MDF, laminate, etc.), company catalogs indicate that the moisture absorption is very negligible, and this is true. But it is often said that this is moisture absorption from the face with a single wetting or spilling. Those who are more conscientious honestly admit that water absorption from the inside out is not standardized, and data from independent studies (which you can conduct yourself at home) give values characteristic of the base material; for wood – up to 200% (!) However, we’ll talk about water absorption later.
Examples for different shapes and types of balconies
When facing a certain balcony space, all its features should be taken into account.
Open
For an open-type balcony, a frost-resistant, moisture-resistant and weather-resistant tile finish is suitable, when laying it a special adhesive and grout for seams resistant to temperature changes were used. The surface of the floor covering must be rough or embossed to avoid slipping and injury.
The photo shows an open balcony with brown rectangular tiles on the floor.
Closed
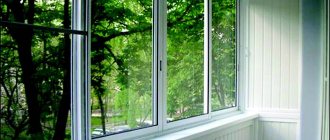
Any type of tile can be used in the cladding of a closed loggia, which provides unlimited design possibilities, especially if the room is insulated.
Semicircle
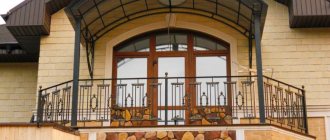
A large loggia or a small French balcony in a semicircle has a beautiful appearance not only from the outside, but also from the inside. Despite the fact that such a non-standard shape and curved parapet may have some difficulties in finishing, with a competent approach to the design of such a semicircular space, it is possible to create a unique design. For example, for floor coverings, you can choose tiles of either a standard square or rectangular shape, or use diamond-shaped, hexagonal, trapezoidal or round products.
Recommendations
When decorating the interior of a balcony, you must consider the following:
- If you want to visually increase the area of the room, use materials, furniture and decorations in light colors.
- The best furniture for a balcony is compact. Therefore, use folding or transformable furniture. The theme will include pull-out or built-in cabinets, tables and chairs.
- Flowers will add grace and comfort to any balcony. You can place them in elegant flower pots or on special shelves. Plants need maximum sunlight to grow and bloom, and therefore a balcony is an ideal place for them.
- If your balcony is very small, do not clutter it with massive chandeliers and lamps. Spot ceiling lights will be more relevant here.
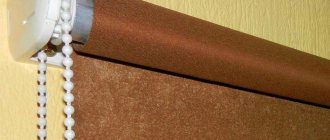
- Blinds, Roman blinds in light colors or nice roller shutters would be very appropriate on the balcony.
- Glossy surface design also visually expands the space due to its reflective ability.
Heating is important
After completing the main aspects of insulation, it is time to take care of the heating. Due to the spacious windows along the entire length of the wall, even such a small room needs heating in cold weather.
Builders advise installing heated floors. A special design is located under the tile. You can install a compact heater. It takes up little space, but provides sufficient temperature for a comfortable stay in the office. It would be a good idea to have a humidifier - the heater significantly dries the air.
But the most optimal solution is to install a heating radiator, like in an apartment, if possible and with special permission.
Moisture absorption
Moisture absorption is calculated as a percentage by weight of dry material. If we are talking about volumetric moisture absorption, then this is specially stipulated. In manufacturers' specifications, marketers and advertisers state what is beneficial to them, without explanation. Throughout this article, the moisture absorption by weight is indicated throughout.
In this paragraph we will solve the question: what moisture absorption is acceptable for materials used for finishing the balcony?
Let's take a total finishing area (including the wall) of 25 square meters. m; This is a medium sized balcony. Then its volume (insulated) is about 10 cubic meters. If the thickness of the cladding is 10 mm (this is the minimum, plastic lining with glue directly on the wall), then the volume of the cladding is 0.25 cubic meters or 250 liters. A lot has happened, hasn't it?
Further, let us assume that during one light day of the breakthrough of spring, 12 hours, the casing releases the moisture it has pulled during the winter until the air is saturated. If evaporation slows down, the warm dew on the balcony will linger for several days.
Let’s take the maximum permissible weight moisture content in the air for health – 18 g/cub.m. For 10 cubic meters it will then be 180 g at a time, and in 12 hours - p = 2.16 kg.
Now - the weight of the inner lining. For most finishing materials (except for stone, but it absorbs little moisture) the specific gravity ranges from 500-1500 kg/cub.m. We obtain the weight of the lining of the above volume (0.25 cubic meters) P=(125-375) kg. Now let's divide small p by big P and multiply by 100%; we get h (humidity) – the saturation humidity of the material as a percentage by weight, which is its moisture absorption:
h = p/P*100% = 2.16/(125-375)*100% = (0.576-1.76)%,
The values obtained are only general guidelines. When calculating the finishing of a specific balcony with specific materials, one must proceed from the permissible weight content of water vapor in its volume.
Advertising deception No. 2
In advertising materials, water absorption is often replaced by water permeability W, which is obscure to the average consumer, but sounds impressive. Well, let’s explain.
W is the ability of a layer of material 15 cm thick to withstand water pressure in kg/sq.cm without seepage. Taking advantage of general ignorance, the same advertisers and marketers give completely unreasonable values. For PVC panels you can find values of W=100 and even W=200. Okay, even if their super-lining is 8 mm thick and can hold 5 or even 10 atmospheres (1 atm = 1 kg/sq.cm), but what does water absorption have to do with it?
Specifications you need
The overwhelming majority of buyers are interested in how long ceramic tiles will last them, and this is quite reasonable. In such cases, an experienced seller, usually relying on the international standard ISO 105-45-7, indicates abrasion, which can be of five classes - from PEI-I to PEI-V (the higher the number, the higher the wear resistance). In this case, he copes excellently with the function of a trader, but does not fit the role of a consultant.
Of course, floor tiles must have high wear resistance, although for an open balcony this is not the main requirement, since there is low traffic there. Here, frost resistance is in the foreground and is determined by three classes of ceramic porosity.
- B-III is the most porous tile, it is flexible when cutting and breaking, but its increased moisture absorption makes it absolutely unsuitable for outdoor use;
- B-II – here the pores are of medium size, which increases the density of the ceramic and makes it suitable for flooring. But it is undesirable to consider it as a frost-resistant floor tile for a balcony - it is more suitable for enclosed spaces;
- BI is the densest option and, thanks to this quality of water, no more than 1-6% of the total mass can be absorbed here. That is why such tiles are frost-resistant - the frozen structure of the ceramic is minimally destroyed.
The choice of floor ceramics for a balcony can also be based on the thickness of the material, which ranges from 8 mm to 12 mm. But, given the fact that the load on the balcony floor is usually minimal, the thinnest tiles are chosen. The perimeter may vary, although most often it is 300x300 mm.
It is undesirable to use ceramics with a glazed and polished surface. In the event of icy conditions, such a floor will be dangerous, since the balcony is open and freezing is quite possible.
