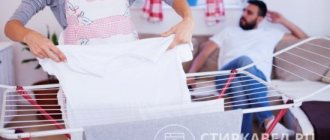
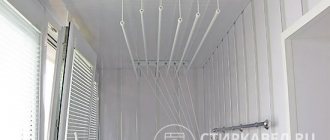
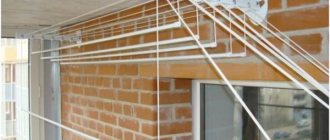
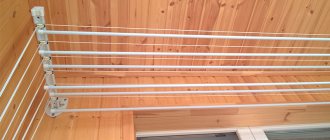
Lines for drying clothes on the balcony are a popular solution to the problem of saving space in the apartment and its functional arrangement. No one wants to stumble across a floor dryer in the middle of the room, which takes up a lot of space. To dry clothes, special devices are currently used that can be mounted on the wall, ceiling, or even on the street side.
The option with conventional ropes is used less and less
Types of clotheslines
What is important when choosing ropes? Firstly, strength. They must be able to withstand the weight of wet laundry. Secondly, minimal stretching and sagging. You can choose from the following options:
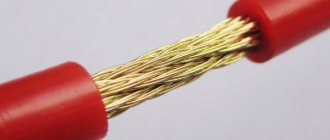
- Metal cable sheathed in polyvinyl chloride. The most durable, long lasting product. It is not afraid of moisture, practically does not deform, and does not stain laundry. The disadvantage is the high price.
- Plastic cord. Moisture-resistant, does not stain clothes, comes in several colors, inexpensive. Disadvantage: soon after the start of use, it sag noticeably under the weight of the laundry.
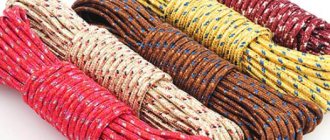
- Polypropylene rope. Wear-resistant, difficult to deform. A good option at a good price.
- Jute cord. Durable, environmentally friendly, not electrified.
- Cotton rope. Durable, environmentally friendly, but moisture often causes dark spots to appear on it. They may leave marks on clothing.
Steel cable in PVC braid
Polypropylene laundry cord
Tip: Before choosing a more expensive option, evaluate your needs. Why do you need an expensive metal cable if you wash things in small parts?
How to pull ropes from the street side
The only way to string clotheslines at balcony level but beyond the parapet is to use metal brackets.
It is better to buy a prefabricated kit in a store. It consists of brackets, rope, rollers for moving it along with laundry, and fasteners.
It is easy to install such a device for drying clothes. Sequence of work:
- On the sides of the balcony parapet, mark the mounting locations for brackets with rollers.
- Make holes there.
- Secure the brackets with anchor bolts and wide washers.
- Stretch between the rollers and secure the clothesline so that it can be moved along with the clothes.
Instead of a ready-made kit, you can use scraps of steel pipes and metal corners. Just make holes in them for the rope.
Drying clothes outdoors is convenient. Under the sun's rays, laundry dries quickly. The balcony is not cluttered, the insolation of the adjacent room does not deteriorate. However, laundry may suffer from external influences. This is dust, bird feces, cigarette butts and debris from the upper floors, and other troubles.
Preparing for work
Of course, before stretching the clothesline on the balcony, it is advisable to carry out a series of preparatory works, namely, prepare the holding brackets and install them in a given place.
Moreover, if we talk in more detail about the first part of the work, then it is more justified to use rolled metal (angle, U-shaped profile, etc.) as brackets for securing the clothesline, although in some cases (with a light load) they can be used as such elements alternative materials can also be used, be it a wooden beam, a metal pipe, or a perforated lath.
As for the preparation of the elements holding the rope, it consists in simply drilling holes in the body of the material in increments of 120 - 200 mm. Moreover, taking into account the purpose of these holes (a rope is threaded through them), they should be located strictly symmetrically on both opposite brackets. If we talk about the diameter of the holes, then it should be larger than the size of the rope in order to ensure free insertion of the material.
In addition to making perforations for fixing the clothesline, at the preparation stage you should drill holes to directly attach the brackets to the fence structures. And of course, open the resulting paintwork structures for exterior work (rust will not stain the laundry).
The installation of holding profiles should be carried out in such a way that it is convenient to dry the laundry in the future. That is, based on individual factors (type of structure, physiological characteristics of the user, etc.), it is necessary to select the most suitable location and install the brackets. Moreover, if these structures are planned to be fixed to the wall, then it is advisable to use anchor bolts or dowels with screws (with a diameter of at least 6 mm). When the brackets are located on the outside of the balcony or loggia, it is more justified to fix the material using hardware (M8, M10), using at least two on each side.
How to secure ropes on a balcony
The method of drying clothes on the balcony, known for many decades, involves bent nails hammered onto a board, through which a rope is pulled. An alternative is special hooks. They look more aesthetically pleasing and more reliable.
Wall hooks for tightening rope
Another option is metal brackets with holes. This is truly something that will last for several generations, you just need to change the ropes in time.
This is not difficult to do, but it is better to use a whole piece rather than short pieces. Tie the rope into a knot not only at the beginning and end, but also at each of the fasteners (nails, hook). This will reduce its sagging under the weight of things and ensure greater reliability of the entire structure.
A knot for securely connecting two ends of a rope
Drying washed clothes on a glazed balcony protects them from bad weather, unpleasant odors, cigarette butts from neighbors above, and birds flying past. But this is also a occupied area, and it is inconvenient to move around the balcony. Therefore, you need to prioritize in advance between the ease of use of the room and drying clothes.
Fishing: how to make a self-tightening knot
Oddly enough, to secure the end of the fishing line (cord) to the reel, in principle, you can use the same simple scheme, especially if you additionally reinforce it with two or more “half-pins”, and in addition, put a layer of adhesive tape on top. However, fishermen usually use a different scheme for this - with a tightening loop.
For the convenience of such fastening, the spool is removed from the reel. At the end of the fishing line, a loop is knitted in any convenient way. It is best to do this with a figure eight, but this is not important. After this, at some distance (15-20 cm) from the knot formed, the main line is grabbed, folded in half and threaded through the eye.
The new loop thus formed is pulled to a sufficient distance so that the diameter of the circle allows it to be put on the spool. Self-tightening knots on the reel with a sealing loop, on the one hand, will keep the fishing line from slipping, and on the other, allow it to be removed and changed if necessary, without cutting the connection. If the loop still slips, it means that it was placed on the wrong side when putting it on the spool, and it should be turned 180 degrees.
How to stretch a clothesline on a balcony? It would seem that it could be simpler: I chose the most suitable material and secured it in the required place. However, even such a simple operation requires a scrupulous approach and certain knowledge from the performer.
The evolution of clotheslines – “Liana” dryer
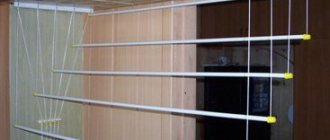
There is a convenient, easy-to-install design on the household goods market - the Liana dryer. It consists of two functional units. One of them is attached to the wall, the other to the ceiling. A frame with rods on ropes is mounted on the ceiling. A holder for these cords is fixed on the wall. By moving them, you can raise and lower the clothes drying rods.
Wall-ceiling mount “Liana”
Note! The wall holder must be able to withstand the load of all the drying clothes, otherwise you simply will not be able to fix the rods in the desired position. The holder must be securely fastened.
The advantage of drying vines is the cascade arrangement of the rods. This allows clothes to dry quickly and evenly.
You can do the installation yourself. For this:
- Mark the location for attaching the brackets to the ceiling.
- Drill holes in these places using a hammer drill.
- Secure the brackets with self-tapping screws.
- In a position convenient for use, fix the cord holder on the wall with self-tapping screws.
- Take one barbell. Secure it in the structure by pulling a long cord through the left roller, and a long and short cord through the right one.
- Place height clamps (caps) on the ends of the cords.
Fastening element for installing a wall unit
The kit includes detailed installation instructions. Consider its provisions. After installation, check the operation of each rod.
How to choose a clothes dryer
When choosing, pay attention to:
- Room area. The smaller the balcony, the less bulky the product should be. Mobile, sliding structures will help out.
- Interior Design. If your balcony is a comfortable room in a certain style, then the appearance of the dryer should correspond to it. You can find original stylized products on sale. For example, treated wooden beams suspended on chains.
- Quality of walls and ceilings. If there are significant defects, they may not withstand the weight of the structure with wet things. Do not choose wall-mounted models if the top of the end walls is made of plastic.
- Manufacturer. Well-known brands produce high-quality and safe products: Leifheit, Melicone, Gimi, Foppapedretti.
- Permissible load on ropes, rods, cables. Some of them can withstand only 5 kg, while others – all 30 kg.
- The material from which the dryer is made. It determines its durability, safety, and the absence of marks on drying clothes.
- Installation method: floor, wall, ceiling.
- Extension and folding of the structure.
Folding wall model
How to make such a design
The main feature of such a loop is that it will be reliable if there is a load on the running end. At the same time, it must be on a permanent basis, otherwise such a nodal structure will come undone without any problems. The sequence of actions to create such a node:
- We select a support to secure the knot, for example, a tree trunk, a pole or other support. We make a half ring around the base,
- Next, we pass the end under the main rope and insert it into the created loop,
- Pull the running end and tighten the node connection.
The result is a truly high-quality knot that will press the running end to the base, preventing it from coming undone.
What are clothes dryers made of?
Clothes dryers are made of steel, plastic, aluminum, and rarely of wood. The same materials are used for rods and cables. Sometimes thick nylon threads or synthetic ropes are pulled instead.
Plastic structures are easy to maintain, fit into almost any modern interior, do not corrode, and are affordable. But with regular exposure to high temperatures or direct sunlight, they can become deformed. The strength indicator is low.
Plastic work unit housing
Aluminum dryers are fragile and prone to deformation. They can oxidize and leave stains on laundry. Among the advantages are low price and lightness.
Aluminum tube construction is not an option for every day
The most durable are stainless steel models. They can withstand a lot of weight and leave your laundry clean. The polymer coating is not afraid of moisture, which means it does not oxidize.
Please note! A polymer coating and a layer of paint are two different things. The paint quickly cracks and chips.
Wood products can be found rarely. Despite impregnations and upper protective layers, wood remains wood. It is sensitive to moisture, from which it becomes deformed and loses its attractiveness. However, if only the body (not the rods!) is made of wood, it will last for more than one year.
Floor structure with wooden frame Foppapedretti Stendipiu
What to do with the hatch on the loggia
Our regulatory documents are an endless number of various SNiPs, GOSTs, SPs, etc., according to which residential buildings and other structures are erected. Their main goal is to make the future structure as safe and comfortable as possible for people to live in. But it happens that, in accordance with them, safety can come at the expense of comfort. This, for example, happens with fire hatches in multi-story buildings, which are located on balconies or loggias above the 5th floor.
The purpose of these hatches is quite clear - they are installed so that people living on the 6th floor and above can evacuate in the event of a fire, bypassing the staircase. After all, most fire trucks have ladders that only reach the 5th floor. And the likelihood of a person getting into a rescue trampoline and maintaining his health at the same time decreases with each new mark. And at the height of the 17th floor it is practically zero.
So, we figured out that it is impossible to get rid of this additional entrance and the stairs leading to it. Then the question immediately arises: “ What then should we do with the hatch on the loggia? “The only way out here is to decorate this structure so that it does not interfere with or spoil the appearance of the balcony (loggia). We will talk about how to bring this to life in this article.
Option for decorating the hatch on the loggia No. 1
A fire hatch on a loggia or balcony can be hidden by finishing it with materials that were used here to cover the floor and ceiling. So, if laminate, linoleum or ceramic tiles are provided for the floor, then one or another floor covering can also be placed on the hatch. True, this must be done in such a way that it can open, i.e. There should be a gap around the perimeter of the hatch.
But before you apply the finishing touch, as you know, the surface needs to be prepared. This is done by removing old paint and rust from the metal. After this, the surface is primed and, if necessary, painted.
The next stage includes leveling using cement-sand screed . To do this, you must first make formwork along the edges of the hatch and put a steel mesh on the bottom (it is advisable to secure it by welding). The formwork here will prevent the solution from spreading beyond boundaries we do not need, and the mesh will prevent cracking of the screed and help increase its adhesion to the surface of the hatch.
Next, ceramic tiles, laminate or linoleum are glued using a special adhesive composition. Moreover, this can be done either directly on the screed or through a layer of insulation. By the way, extruded polystyrene foam is usually used as the latter. After all, it has not only good thermal insulation properties, but also relative fire safety, as well as increased rigidity, which is especially important for using the material on the floor.
Before you begin to carry out the work described above, it is necessary to calculate the thickness of all materials in the “pie”. This should be done so that the floor on the hatch ends up flush with the floor on the balcony, and does not extend beyond it.
As for the ceiling, everything is simpler here. Since it is not necessary to make a screed in this place. It will be enough to paint the hatch and stick on it the material that is used on the balcony to finish the ceiling. In this case, the rules for preparing the surface and gluing the finishing material are the same as for the floor.
Additional functions - from lighting to disinfection
Modern clothes dryers provide additional functions for maximum convenient use.
- Backlight. It is located above the strings and is usually represented by bright LED lamps. They illuminate the workspace in the dark, making it easier to hang laundry.
- Wind drying. Built-in powerful fans blow air over wet clothes for a preset time.
- Disinfection with built-in ultraviolet lamp.
- Heating of rods with electric cable.
- Remote control. Using the remote control, you can set the operating time of individual mechanisms, lower and raise the laundry beams.
Multifunctional dryer model
“Smart” dryers are produced mainly by Japanese companies, for example, SensPa. Their Chinese colleagues are not lagging behind, presenting such worthy examples on the market as the Alcona models.
The price of automatic devices with the functionality discussed above ranges from 23-46 thousand rubles.
Much more affordable are standard options with a rod heating function. The price starts from 2.5 thousand rubles. They are easy to install and connect to the electrical network. Heating can be smoothly adjusted within the temperature range specified by the manufacturer. Electricity costs will increase slightly.
Electric dryer Sharndy
Types of clothes drying devices
Depending on the working mechanism and method of fastening, there are several types of dryers. Each has its own advantages and disadvantages.
Sliding and folding models
If a private house has a spacious balcony where a stationary dryer can fit without any problems, there is no question about its working mechanism. The area of similar premises in typical high-rise buildings is modest. Therefore, when purchasing dryers, close attention is paid to their dimensions and folding capabilities.
Some of the most compact options are sliding ones. This can be a closed stationary block with strings that are wound inside on rollers. It is mounted on one wall, and the counter plate with hooks is mounted on the opposite wall.
When you need to dry clothes, the strings are pulled out in the manner of a construction tape and secured. Their tension can be adjusted manually (with a lever) or automatically.
Option with retractable strings
Advantages of sliding models:
- Compact.
- Thanks to the fastening to the walls, they do not take up useful floor space.
- They do not interfere with moving around the balcony when you are not drying clothes.
- Affordable.
Disadvantages: fragility of the plastic block, sagging strings, cannot withstand more than 8 kg of laundry.
Sliding products also include products with a stationary block and rods folded in the manner of an accordion bellows. To put them into working condition, they need to be pulled towards you. They are durable but short, making them suitable for small balconies and small families.
Top shelf and hooks provide additional storage and drying space for clothes
Folding models are floor-mounted, wall-mounted, and rarely ceiling-mounted. They usually take the form of guides with strings or rods. When not in use, they are compact - folded or simply fixed on the wall. If necessary, they are folded out or folded back.
Folding floor drying rack
Ceiling mounted
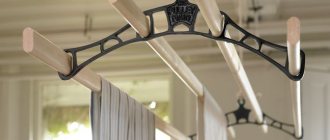
Mounting the dryer to the ceiling is convenient for small or complex balconies. If it is possible to adjust the height, when not in use they do not occupy any useful space and are almost invisible. The control can be automatic (remote control) or mechanical. In the second case, the dryer is equipped with a lever or a chain that performs its function, like on blinds.
Ceiling mounting option
All multifunctional models are attached to the ceiling for more efficient operation of fans and ultraviolet lamps.
Wall systems
Most sliding and folding drying racks are mounted to the walls. This is appropriate if the floor of the balcony is occupied by furniture or other objects. Assess the possibility of drilling into walls in advance. In old residential buildings they can crumble literally under your hands.
Wall-mounted clothes dryers are presented:
- Blocks with strings or ropes stretched between them.
- Blocks with retractable rods.
- Barbells with hangers.
- Folding, stationary nets on brackets.
- Brackets with fastenings for hangers.
- Platforms with hooks.
Compact tilt-up dryer
The greatest weight is supported by stationary structures on steel brackets.
Floor clothes dryers
Floor dryers are convenient for spacious balconies. Their advantages are as follows:
- Withstands heavy loads.
- Stable, safe.
- Allows efficient use of vertical space (products in the form of racks).
- They do not require fastening to the walls and, accordingly, damage to their finishing, or the use of special tools.
The lineup is impressive.
A variant familiar to many is a “clamshell” with strings. Its main part can be supplemented with folding or retractable side elements. Models with heated strings are usually made on the basis of these particular dryers.
For all its advantages, this design is unstable
Racks with horizontal or inclined “shelves”. For greater functionality and ease of use, manufacturers equip them with additional hooks, hangers, and wheels.
Multi-tiered design on wheels with hanger holders
Tall drying racks with a durable wooden frame, more reminiscent of a cabinet. Height can reach 180 cm.
Peter-Panni Foppapedretti for a large family
An original solution is a floor-standing electrical appliance with fans and a cover. The principle of its operation is simple: you hang out the laundry, cover it with a cover, and turn it on. The device operates from the mains. Hot air circulated by fans dries clothes many times faster than in natural conditions.
Simplified version of the drying cabinet
Outdoor systems
We consciously put external clothes drying systems at the very beginning of our story, since the requirements for them are quite high and have a number of features.
Advantages of external systems:
- space saving - the drying structure is located outside the balcony room and significantly saves usable space, which can be used for other purposes;
- higher quality of drying clothes - this is especially noticeable in the warm season, when in a short period of time you can easily dry bed linen and numerous belongings of a large family;
- disruption of daylight in the room and balcony - due to the large amount of drying laundry in the room and on the balcony, a feeling of twilight is created and a load on the space, there is a need to use additional lighting.
Source: Disadvantages of external systems:
- there is a possibility that clean items will be exposed to rain or other precipitation, become contaminated with dust, or the laundry will absorb harmful or toxic emissions from a nearby road;
- the likelihood of things falling to the ground;
- if your balcony is adjacent to other rooms or windows, then clean things can absorb the smell of tobacco and cooking;
- openness of the process - all your neighbors (and not only) will see the process of drying clothes.
The design of a clothes dryer is visually quite simple, but it requires you to fulfill the following requirements:
- choose a design, reliable brackets, steel corners: the stronger your drying system, the less likely it is for your laundry to fall;
- give preference to ropes made of synthetic fibers that are not subject to stretching, are not afraid of temperature changes, seasonal precipitation and do not rot.
Source: You can achieve reliability and maximum functionality using the following recommendations:
- brackets are installed and secured with anchors and nuts with a diameter of up to 10 mm;
- the maximum distance between the brackets can reach 4 meters, but experienced craftsmen insist on additional fastenings for the stability of the structure. For the same purpose, spacers are installed that will prevent the structure from deforming from the load;
To facilitate the process of hanging laundry, the corners of the structure are placed not perpendicular, but at an angle.
- We attach steel corners to the installed brackets. Please note when purchasing corners that they must be equipped with holes for further fixation of the clothesline.
Now you can find a ready-made design that combines a bracket and a corner, and also has rollers for tensioning the rope - this will make installation as easy as possible.
Source:
If you are the owner of a miniature French balcony, then you can get out of the situation as follows: fasten the steel plates to the railings on both sides and tension the clotheslines.
DIY ideas for making a dryer
Those who like to craft from scrap materials can make a dryer themselves.
A hacksaw, an electric drill with a set of drills and wooden blanks provide a lot of possibilities. Example: a compact dryer that hinges from the wall and is secured with chains. The working part consists of only two side and several cross bars. The crossbars can be replaced with thick synthetic rope. Just make sure it is securely fastened.
The wood must be sanded and impregnated with an antiseptic composition
The ceiling version has a similar design.
The wood must be sanded and impregnated with an antiseptic composition
For a compact product you will need a minimum of materials
Take a look around, maybe your future dryer is nearby, and you haven’t even thought about it! Its function can be taken over by one of the sides of the crib or part of the “Swedish” wall.
A simple solution is to make a rod for drying clothes on hangers. The material can be metal pipes and fittings. Eco-style lovers can use a thick tree branch as a barbell.
