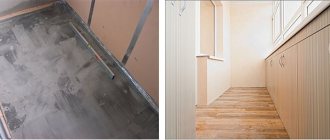
Structures for drying clothes are sold everywhere. Installation instructions are usually included with the Liana ceiling dryer. But this document does not always clearly explain how to correctly install a dryer (hereinafter also referred to as a dryer), especially if the design is made in China.
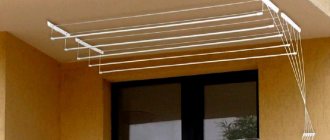
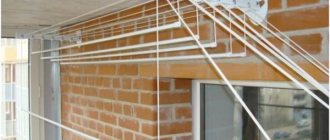
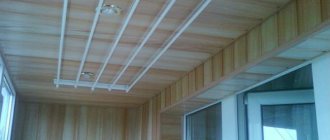
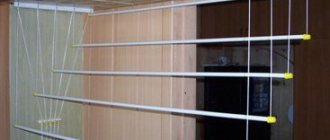
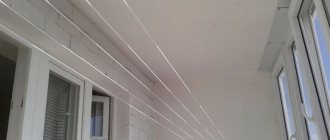
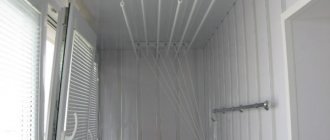
Liana type ceiling drayer installed on the balcony
In this article we will describe in detail the process of installing drying structures of this type.
Balcony “liana”: design features
On sale you can find ceiling-mounted “liana” dryers for clothes on the balcony and wall-mounted models of various sizes.
Wall mount option
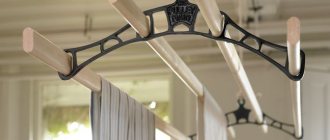
The design is simple and is a combination of crossbars located horizontally and strong laces with which control is performed. Crossbars are hollow rods made of metal with anti-corrosion coating or plastic. Their length varies from 0.5 m to 2 m, but models of sizes 1.5 m, 1.9 m, 2 m are more common on the market.
Plastic is good because it is light weight, but its strength is not always confirmed. Over time, the rods may become cracked, deformed and turn yellow. Aluminum crossbars are a little heavier, but stronger. The most reliable and wear-resistant are steel rods, but they create additional stress on the cords, which wear out faster.
Photo of working nodes of the “liana” on the balcony
The main load falls on two steel brackets, fixed with self-tapping screws to the ceiling or wall. Rollers are inserted into the brackets, making it easier to adjust the cords. Strong nylon laces, on which the rods are strung, are collected and fixed in one place - on a wall block (“comb”).
Scheme of “vines” with crossbars lowered down
Manual control. To lower the horizontal bar down, loosen the lock and lengthen the operating cord. The rod is lowered to a height convenient for hanging laundry. Then the cord is pulled and fixed - the crossbar along with the things rises to the ceiling. As a result, items of clothing or sheets do not create obstacles to movement, as they are located in a favorable, usually unused area.
One of the main advantages of the “liana” clothes dryer is that it can be hung on a balcony, terrace, hallway or even in the bathroom. In the city, almost every apartment (with rare exceptions) has a balcony or loggia, which is often used as a drying space. Thanks to freely circulating air, laundry dries faster, does not dry out and remains fresh.
“Liana” in working position - with the crossbar lowered
Advantages:
- Comfortable use and safety. To hang things, you don't need benches or stepladders - just lower the crossbars down and then return them to their place.
- Convenient device, attractive design. The installed “liana” does not clutter up the space and looks more elegant than a stretched wire or rope.
- Ability to withstand heavy loads. The maximum weight recommended by the manufacturer is indicated in the instructions. For plastic products - 5-7 kg, for metal products on average - up to 12 kg. If the washing machine is designed for a load of 5 kg, then the entire set of laundry can be easily placed and dried in one go.
- Easy installation. The simple design and clear installation instructions allow you to install it yourself, without specialists. A minimum of tools are required, and the mounting hardware is included.
Another advantage that suits thrifty owners is its low cost. Online stores and hardware stores offer a large selection of domestic models, from simple ones for 400-450 rubles. to more comfortable and durable ones for 1100-1500 rubles. Imported analogues are more expensive - up to 2,400 rubles, but the high price is often not justified and is dictated by the brand.
“Liana” block type - crossbars are fixed to the frame
Do not forget about the maintainability of the device. If the rod breaks or the cord frays, they can be replaced with products that match the characteristics.
Buyers usually have no questions about how to hang a “liana” on a balcony or in a bathroom, since the installation kit is provided with detailed instructions describing the steps and diagrams. But in order for the device to last a long time and be convenient to use, you must follow the rules, which are also recommended by the manufacturer or your own experience.
If the bathroom space allows, a clothes dryer can be installed there too. However, indoor spaces often suffer from insufficient ventilation and the drying process will not occur quickly enough. In bathrooms, the level of humidity is already exceeded; the constant presence of wet laundry can provoke the growth of mold.
A popular, but not the best solution is a “liana” over the bathtub
Traditional places for installing a Liana dryer are a balcony or loggia. Outside the city, they can be successfully replaced by a terrace, veranda or even a gazebo - places where the laundry is partially in the fresh air, but protected from the rain.
When choosing an installation location, you need to check the reliability of the walls or ceiling - the surfaces where the brackets will be attached. If the ceiling is covered with plastic panels, you will have to remove them and install embedded wooden blocks. Wooden trim can easily withstand the weight of a product with hanging laundry, but it can also be strengthened if necessary.
When choosing a “liana”, pay attention to the strength of the rods, cords, fasteners and rollers. It is better to give preference to manufacturers who have been manufacturing dryers for a long time and have several models in their arsenal.
It is better to refuse cheap Chinese offers. According to user reviews, the crossbars and “comb” made of low-quality plastic quickly become deformed, and the rollers fly out of the grooves.
Bad purchase - the holders quickly broke down
In addition to the new product, you will need tools. If the walls on the balcony are brick or concrete, a hammer drill or drill will be useful. The rest of the set is universal for any surface:
- screwdriver, screwdriver;
- tape measure, pencil, square for marking;
- construction knife or scissors;
- pliers, hammer.
You need a stepladder or a stable stool, since the brackets are mounted at a great height, on the ceiling or on the wall (under the very ceiling).
A set of improvised tools from the owner’s storerooms
Before installation, check the dryer contents. If any elements look unreliable, they must be replaced immediately. Instead of short screws, you can use longer ones if the holders will be attached with dowels to concrete or brick.
Fastening load-bearing elements
Installing a dryer on a balcony traditionally begins with studying the instructions. This will help you understand the purpose of the main parts of the structure and the features of their installation. The main elements that make up the dryer are as follows:
- two supporting brackets;
- control side bracket;
- set of laundry rods;
- two cords to each of the rods.
The main elements of the ceiling dryer “Liana”.
Then you should decide on the locations for attaching the structural elements. Two brackets with rollers will be attached to the ceiling, parallel to the short walls of the balcony. The control bracket can be located anywhere, but it is most convenient to attach it to one of the side walls at a height just above the waist. Then it will be easier to adjust the height of the rods to hang laundry on them.
The distance between the supporting brackets should correspond to the length of the tubular rods on which the laundry will be hung. Of course, it is desirable to achieve a parallel arrangement of the brackets, although a slight misalignment will not significantly affect use.
When selecting fasteners for fixing the brackets to the ceiling, do not forget that they will have to withstand the entire load - the weight of the dryer and the wet clothes hung on it. Therefore, the dowels must be strong enough and securely fastened to the ceiling
. It would be justified to use a few additional dowels. The side control bracket is attached in a similar way, but the strength requirements there are not as strict.
Return to contents
More about this device
The problem of drying clothes in apartments has always been solved differently, but now it has acquired not just functionality and simplicity, but also aesthetics. If we consider a dryer such as a liana, then it is this one that today meets all these requirements and receives only positive reviews.
Advantages of such dryers:
- can withstand heavy loads - the design and durable cord can withstand a lot of weight;
- easy to use - even a child can use it;
- neat appearance - modern and quite aesthetic;
- easy to assemble and install - does not require special skills or tools.
Ceiling and wall-ceiling vines
The clothes dryer for the balcony Liana is a structure in the form of ropes with tubes attached to the ceiling frame. In this case, the tubes serve as a device on which wet things are hung. The ropes that hold them are passed through the ceiling frame and brought to a special holder on the wall. It is thanks to this holder that in this type of dryer the height of the tubes can be easily adjusted, which greatly simplifies the hanging process.
There is no longer any need to reach high clotheslines or carry a stool with you. You just need to lower the device to a comfortable level, and then raise it back so that hanging things are not in the way.
The positive aspect of this invention is that each tube can be installed at a different height, which allows the laundry to dry faster, ensuring unhindered air flow.
You can adjust the suspension to different heights.
It is worth noting that such a ceiling-mounted clothes dryer for a balcony has a very attractive appearance; the tubes are mostly painted white and coated with anti-corrosion agents to protect them from rapid wear due to exposure to moisture. Unlike a regular floor dryer, you don’t need to find a place in your apartment for storage for the liana. Simply raise the tubes to the ceiling and you're done.
To all this it should be added that the installation instructions for this invention are quite simple and unpretentious. Although questions may arise from girls and young people who are far from using a hammer and pliers.
DIY clothes dryer for the balcony: technology and manufacturing process
Ready-made structures for drying clothes on the balcony are much more convenient to use. They provide for all the nuances and little things that are important for the installation of the product. The kit includes not only brackets, cords, but also all the necessary mounting material.
To solve the problem of drying clothes, you don’t have to buy a dryer - you can do it yourself. Next, we’ll take a look at several simple options for making clothes dryers on the balcony with your own hands. They are so simple that anyone can make them.
An equal number of holes should be drilled inside the frame bars
Let's look at how to make the simplest model that can withstand a large amount of wet laundry. This design is suitable for balconies with two opposite walls. A small wooden strip needs to be installed on one of them, and a guy wire is attached to the other. Self-tapping screws in the form of rings are mounted at the same distance from each other on both sides. It is through these rings that string or other material suitable for drying clothes is pulled.
The use of self-tapping screws in the form of rings is very convenient, since ropes tend to sag over time, and this option allows you to easily adjust their tension.
To create an improved design with your own hands you will need:
- drill;
- special iron loops that are screwed in;
- plastic-coated wires with hooks at both ends;
- 4 large hooks, 2 of which should be on wheels;
- rope;
- wooden frame.
To make a dryer, you can use a ready-made frame or make it yourself
For manufacturing, it is recommended to use a ready-made frame, and if you don’t have one, you can make it yourself. For this, 4 screws and 4 wooden beams are useful, two of which should be twice as long. It is necessary to fold the wooden beams like a frame and connect them with screws. To make the structure stronger and more stable, you can use iron corners.
An equal number of holes should be drilled inside the horizontal bars of the frame. You need to screw the loops into these holes. The wires are fixed with hooks and loops on the frame. They need to be stretched along the entire length inside the frame so that they do not sag.
Holes are drilled in the four corners of the dryer frame through which a short rope should be inserted and secured with knots. Knots with loops are tied in the middle, to which a long rope is attached and threaded through hooks with wheels so that they smoothly lower and rise.
The third hook is fixed to the ceiling at some distance from the clothes dryer frame. 2 fixed ropes are threaded through it. The last (fourth) hook must be placed on the wall below the lowered level. Ropes are attached to it. Hooks and ropes placed in this way will make it possible to adjust the height of the dryer.
It is necessary to fold the wooden beams of the structure like a frame and connect them with nails
There is an even simpler option for making a ceiling dryer, which is perfect for people who have no skills in working with wood or don’t have the time for it. This method of constructing a hanging dryer takes no more than 5 minutes.
To do this, you need to take two plastic or wire hangers, and fasten wooden rods between them or simply pull a strong cord. Next, we fix the structure to the ceiling.
As you can see, creating clothes hangers for the balcony is quite simple. The main thing is to decide on the option that is best suited for you, and you also want the product to be easy to use and not bulky.
Helpful advice! Anyone who is not confident in their abilities can find a lot of different videos on the Internet demonstrating the process of creating a clothes dryer for the balcony.
The ropes are fixed with hooks on loops that need to be pulled along the entire length inside the frame so that they do not sag
Features and Benefits
To dry things in multi-story city buildings, previously, ropes were mainly used, which were attached to iron structures on the outside of the balcony. This option certainly saves space in the apartment. However, clean clothes on such a dryer can easily become dirty from dust or even fall off the line. Ordinary clotheslines can also be attached indoors. However, it is quite difficult to position them optimally. If the rope weighs too high, it will complicate the process of hanging and removing laundry. When positioned low, clothes may get in the way or get dirty when they come into contact with other objects in the room or on the balcony. In addition, dust accumulates on the ropes quite quickly and it will not be possible to completely remove it with a simple damp cloth.
The Liana drying design is compact and functional, which allows it to be installed in bathrooms, loggias and balconies almost right up to the ceiling. The main feature of the operation of such a system is that the small slats on which things are placed can change their position (lower or higher).
Among the advantages of the Liana dryer, the following can be noted.
- After drying, there are no traces left on the laundry, like thin ropes or fishing lines that would be difficult to smooth out with an iron.
- Easy to care for. The structure is easy to clean from dust and dirt. To do this, you need to wipe it with a damp cloth. When drying clothes, you can be sure that there will be no dirty marks left on the fabric from the dryer.
- Compactness. The device can be installed quite high, thanks to which “Liana” will be almost invisible.
- Resistant to heavy loads. One tube can hold up to 2.5 kilograms of clothing. If you comply with this requirement and do not hang too much clothing on the tubes, then the structure will never break or bend from the weight of the laundry.
Conclusion
Ceiling dryers have replaced conventional clotheslines due to their convenience and ease of installation, since the work can be carried out by anyone. The video in this article will clearly show the process, and if you have any questions, ask in the comments.
The Liana ceiling clothes dryer is an interesting and practical solution to one of your everyday problems. This design allows you to get rid of clotheslines, which are such a nuisance on the loggia. A wall-mounted dryer, which is good in the bathroom, does not fit well into the interior of the balcony. The clothes dryer “Liana” is optimal in location and aesthetic in appearance.
Ceiling dryer Liana
Until recently, the only option for a drying device was a wall-mounted system. The ceiling clothes dryer “Liana” is distinguished by its originality. It can be installed in any room without taking up much space or interfering with the passage.
The principle of operation of the device is very simple: a number of elements that can withstand wet laundry and are adjustable in height using cords.
This makes it possible to ensure an important condition: the suspended elements in the normal state are pressed against the ceiling, and they are brought into operating mode only as needed.
The main advantages of the device include:
- the ability to withstand heavy weight and accommodate a significant amount of laundry of different sizes;
- neat appearance that does not interfere with the interior design; no interference for residents when not in use;
- ease of installation and commissioning.
Those shortcomings that are noted in the difficulty of adjustment are associated only with violations of installation rules - the instructions must be strictly followed during installation and operation.
Kinds
The Liana dryer is available in two versions: ceiling-mounted and wall-mounted. When choosing a model, it is worth considering on which surface the main load will be created. Ceiling options imply a load on the ceiling covering. Tensile and suspended structures may not withstand heavy weight.
In this case, a metal support in the form of special corners must be installed on the ceiling. However, such a support is installed before finishing the ceiling.
When the type of facing material is not able to withstand heavy loads, and there are no metal corners for fastening the structure, it is best to use a wall-mounted model.
The wall-mounted “Liana” differs from the ceiling model only in the method of fastening. The consoles on which the entire system will be supported will in this case be attached to the wall.
Preparatory process
Selecting a location
Fungus on the ceiling: control and prevention" href=»https://potolokspec.ru/remont-i-operacii/gribok-plesen/gribok-na-potolke-387″>how to eliminate fungus on the ceiling. Tip: the dryer should not interfere opening windows and doors down. If the washing machine does not wring out the laundry well, it may drip onto the carpet or laminate: place a disposable diaper or regular oilcloth under the dryer.
Tool
- Drill or hammer drill
- a tape measure
or
a long ruler
are required. - Self-tapping screws and dowels
(to the size of the drill). - Screwdriver
or
screwdrivers
.
Drying assembly
article about ceiling heaters.
Tool
In order to install the structure, you must use the following tool:
- Drill or hammer drill
. The drill can only cope with wooden floors; in other cases it is better to use a hammer drill and drills: 6 mm and 8 mm. - A ceiling hanger for drying clothes requires precise dimensions, so a tape measure
or
a long ruler
is necessary. - Self-tapping screws and dowels
(to the size of the drill). - Screwdriver
or
screwdrivers
.
Description of species
The “liana” type dryer is a structure with a tubular frame and an adjusting twine, the tension of which determines the lifting height of the horizontal elements. Depending on which layout option is chosen, there are 2 main types of such devices.
- Ceiling dryer. The most common design. Its load-bearing part is fixed on the ceiling, and its adjusting part is fixed on the wall surface. “Vines” of this type have the longest length and are easily adjustable at different heights.
- Wall dryer. It is used in cases where the ceiling decoration is not capable of bearing significant loads. The base and the adjusting element are fixed to the same surface. The bracket in this case often has a scissor shape, and the dryer itself looks like a cobweb or an umbrella without a stretched cover.
The length of the tubes used in the dryer varies from 50 to 200 cm. Each element has hangers on the sides made of cord rope or twine.
Ceiling options are considered optimal for balconies, since they allow you not to take up too much free space when placing them.
There are also dryers with a stationary or removable mount. The first group is installed in one place on a permanent basis. The second one can be moved or dismantled with just one touch.
And also “vines” are usually divided into categories according to the material of their manufacture. Depending on the type of dryer base, several types of dryers can be classified.
- Plastic. They are well suited for use under light loads. Such dryers do not deteriorate over time, but may turn yellow in the sun. The load on such structures should not be exceeded. Polymer rods become deformed and sometimes break under the heavy weight of laundry and are not suitable for open balconies.
- Steel with painting. This version of the product is durable, aesthetic, and can withstand significant loads. If the paint coating is damaged, the metal is subject to corrosion and can quickly collapse under the influence of a humid environment. This type of dryer can be called a compromise between price and quality.
- Aluminum. Non-ferrous metal is not subject to corrosion and has less weight than steel. But when making horizontal slats from this material, the linen can become dirty with traces of metal oxidation. The most common choice is steel dryers with aluminum brackets.
- Stainless steel. A high-quality product option that combines corrosion resistance, aesthetics and durability. Such dryers can withstand maximum loads. Caring for a stainless steel “liana” is also as simplified as possible and does not cause any difficulties.
This is the main classification used by dryer manufacturers. Depending on the type of design, they have different functionality and service life.
Tips for choosing
Today there are various models of the “Liana” design on sale. Before choosing one or another model, you need to take into account many nuances.
First of all, it is necessary to take into account the parameters of the balcony or loggia, since dryers vary in size. In order to understand whether the front strip will interfere with the opening of the windows, it is advisable to make markings. It will help you understand at what distance from the window the first bar should be located not only in the upper position, but also in the lower position.
In addition to the dimensions of the dryer, it is also necessary to pay attention to the material of manufacture. Although plastic models are much cheaper than metal ones, they are inferior to the latter in strength. Therefore, if the family is large and the volume of laundry washed is quite significant, then it is better to opt for metal products.
But there are also pitfalls here. Aluminum rods are less reliable than stainless steel strips. In addition, peeling of paint from aluminum tubes, and sometimes this happens during long-term use, can lead to contamination of the laundry. But the stainless steel slats, even if the surface layer of paint is lost, do not stain the laundry, and do not become deformed in case of overload.
When purchasing, you should take into account the thickness of the ropes. The more tightly they are woven, the longer they will last. As a rule, well-made products have ropes that last a long time, and the fasteners are made of durable plastic or metal.
Install without errors
Installation of the vine can be done even by an ordinary person without a higher engineering education. Each box contains detailed installation instructions, following which the result is sure to be satisfactory.
Tools and accessories:
- A hammer drill or a good drill.
- Tape measure, marker, pencil.
- Fasteners - it is advisable to use the one that comes with the kit.
- A screwdriver, or just a screwdriver.
- "Shoe" or pocket knife
An example of assembly and installation is in the video below.
When carrying out installation, it is advisable to use exactly those fasteners that come with the kit, if they match your finish, while carefully checking the quality of their fastening in the wall and ceiling, so as not to get a surprise in the form of a torn dryer after you hang things on it .
You should also take into account the material from which the ceiling and walls are made, on which the vine components will be attached. After all, there is a big difference between mounting on a wooden surface and a concrete wall. If the person doing the installation cannot cope with this issue himself, you can ask the sales consultant, he will always tell you which option is better.
Typical errors:
- making incorrect calculations - you can make a mistake with the length and tension of the vine;
- incorrect choice of mounting location - windows or furnishings may interfere;
- incorrect choice of fastening elements - length and diameter of screws;
- using dowel-nails - they become loose too quickly;
- incorrect use of the tool - inaccurate selection of the diameter of the drill or drill.
Some difficulties may arise when installing the dryer on plastic lining, suspended ceiling or foam. Video below.
If you strictly follow the instructions and treat the process with all responsibility and care, then installation will not bring any difficulties, and further use of the new thing will delight you for many years.
Where do residents of apartment buildings dry their clothes? In most cases - on your own balcony or loggia. To do this, you have to pull ropes, which spoil the appearance of the balcony and are not always convenient to use, and hanging laundry takes up a lot of space and often gets dirty. Today this problem can be solved much easier, with the help of compact and easy-to-use dryers.
Installation instructions
The dryer is installed in several stages.
First you need to prepare tools such as a screwdriver, screwdrivers, tape measure, pencil, ruler (square) and knife. You will also need a stepladder or a stable stool - after all, the brackets will have to be fixed quite high, and there is no way to do without a convenient device.
After preparing the tools, it is necessary to mark the mounting locations for the brackets. Everything needs to be taken into account: the distance between the brackets, their location relative to the windows, and, of course, strict perpendicular orientation relative to the wall.
Drill the marks marked with a pencil, then insert dowels into the holes. Then use self-tapping screws to fasten the brackets and make sure they are correctly positioned on the surface. Fix the comb on the wall in the same way.
Now you can start hanging the rods. To do this, you need to cut the rope into equal sections and fasten them to the end of the rods on one side for now. The free end of the rope must be passed through the roller mechanism of the left bracket, fasten the cord to the other end of the rod, and pull a loop of two cords through the right bracket. Then you should attach the clamps to the rope and, having measured the required length, trim the unnecessary edge.
Installation subtleties
If the dryer is installed incorrectly, certain problems may arise. As a rule, inaccuracies arise for the following reasons:
- Insufficient or excessive suspension height of the rods: appears when the mounting height of the bracket is incorrectly calculated: before installing it, it is necessary to measure the length of the cords and check with the required height of the rods in working condition.
- Inability to withstand the planned load: caused by poor fastening of the brackets to the ceiling, usually occurs when the diameter of the drilled hole does not match the size of the dowels or the incorrect choice of the length of the screws.
The Liana ceiling dryer is a very convenient system that allows you to get rid of all kinds of clotheslines. It fits perfectly into the interior of any room.
For compact and convenient placement of washed laundry, the “Liana” ceiling dryer is very helpful. The simple, convenient, lightweight design of this dryer allows you to hang it in any suitable room. Thanks to the well-thought-out layout of the control elements, drying clothes will be accessible even to children.
The ceiling dryer “Liana” has a simple, convenient, lightweight design.
Installing “Liana” on the balcony is not a complicated procedure at all, but still some points should be taken into account in advance, so that later you do not have to carry out the installation again.
In order to hang the dryer, prepare the necessary tools: a pencil, a tape measure, a drill, a screwdriver, and a sufficient number of reliable dowels.
Types of dryers
There are two types of dryers, differing in the structure of the ropes. In the simplest design, all the crossbars are interconnected and are lowered only at the same time. Dryers are more convenient in which you can put each rope separately, since there is not always a need to use them all. Each of the crossbars has its own suspension and lifting system, thanks to which only part of the rods can be used.
Advice. If you are doing a big wash and you need to hang the laundry on all the lines, the bars in the foreground are lowered to the lowest position, and the rest are arranged in a cascade. With this arrangement, the sun hits all the hanging things, and they will dry faster.
Dryers also differ in size and material used. The dimensions of the dryer depend on the length of the rods and their number. The shortest models are 50 cm long and are designed for a small number of things. The longest dryers are 200 cm long; they can accommodate a lot of laundry and are convenient for use in families with children.
The quality of the product mainly depends on the material from which the crossbars are made. They can be made of plastic, aluminum and stainless steel. The most reliable dryers are made of thin-walled stainless steel, since it does not bend under the weight of wet laundry, does not rust, and does not leave stains on things. Plastic tubes also do not spoil laundry and are aesthetically pleasing, but they can sag when using the dryer, so they are only suitable for small-sized vines that will not be subject to heavy loads. Aluminum rods also sag under the weight, and if the coating is rubbed off the metal, it will stain things.
Operating rules
The lifespan of the dryer will help prolong its proper use. Experts recommend regularly using the following tips:
- In a timely manner, monitor fraying cords and wear of other parts.
- Wipe plastic tubes after each use of the dryer.
- As the bracket or gear wears out, replace the parts with new ones in a timely manner.
Creaking of the rods can be avoided if you regularly lubricate them with technical oil. You can replace gears and other similar parts yourself. The necessary components are sold in any specialized store.
