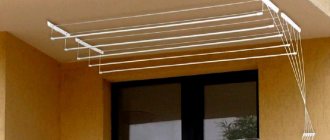
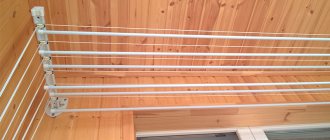
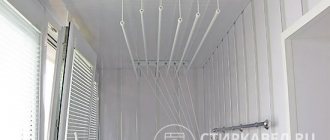
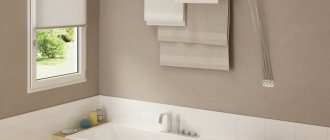
Drying clothes using modern washing machines and technical devices is very convenient and fast. However, drying in the fresh air is a more gentle and reliable option for preserving things in their original practical form. In order to hang things, there are a lot of devices (for more details, see the article: “Laundry dryer on the balcony”), one of the best is the “liana” for drying clothes on the balcony. The product is convenient, compact and durable. You can buy it at a good price at any hardware store.
Why are these dryers so popular?
The main advantage of this design is the ability to place it on a balcony, veranda, or in the bathroom. Almost every apartment within the city includes a balcony or loggia, which usually serves as a drying area. The design of the dryer ensures free air circulation, due to which things dry faster, do not dry out, and are always fresh and pleasant.
Advantages:
- Comfortable design, attractive design. “Liana”, unlike ropes (more details in the article: “Clotheslines for the balcony”) and wires for the same purpose, is mobile, takes up less space, and looks more aesthetically pleasing.
- Comfortable adjustment and safety. In order to hang things, there is no need to climb onto a bench or stepladder; you can simply lower the rods down to the desired level, and then return them, along with the things, to their previous position.
- Ease of use. The device is comfortable to use; even a child will find it convenient to hang things on it.
- Capable of heavy loads. The device, together with a durable cord, copes well with the pressure of heavy laundry. Plastic products are designed for a load of up to 5-7 kg of weight, while metal structures are designed for a load of up to 12 kg.
- Easy assembly and installation. Due to its simple design, as well as detailed, clear instructions, the product can be easily installed independently, without the help of specialists.
A good bonus is the pleasant price of domestically produced “lianas”. Which varies from 400-500 rubles. (simple options), up to 1000-1500 rubles. (more durable and easier to use). Foreign models cost up to 2,500 rubles, but most often the difference in price allows you to win only in the brand name.
Common installation errors
Often, beginners make mistakes, which subsequently lead to a violation of the integrity of the “Liana” or to its dismantling. The most common errors are:
- Carrying out incorrect calculations. This results in over- or under-tensioning of the bars. To solve the problem, you need to take correct measurements before installing the clothes dryer.
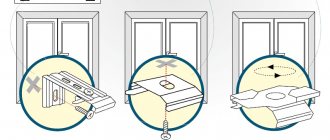
- Incorrect selection and installation of fasteners. Very often there are situations when the self-tapping screws are not fixed deep enough in the wall, or their diameter does not match the diameter of the hole. To solve the problem, you need to select the correct diameter of the drill and screws. For a 6 mm drill, it is necessary to select dowels of the same size that will fit tightly into the hole.
- Using dowel nails. The structure, secured by these elements, will last literally until the first drying, after which it will collapse under the weight of the laundry.
Features of the balcony “liana” design
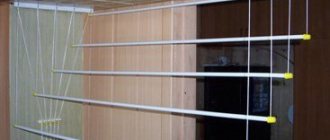
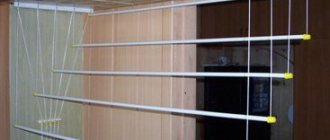
The design of the dryer includes a frame that is fixed to the ceiling. Tubes and ropes are attached to this frame. The tubes are rods made of plastic or metal; they serve as crossbars for hanging wet things.
At the same time, the ropes that hold the rods pass through the frame on the ceiling and are attached to a special holder installed on the wall. Thanks to this holder, the position of the height of the tubes in such structures can be easily adjusted.
Diagram of the balcony “liana” arrangement
The need to reach clotheslines that are attached too high and inconveniently when using a “liana” is completely eliminated. It is enough to loosen the lock, pull the desired rope, and the crossbar for hanging clothes will be at the desired level. Then, it can be immediately returned to the reverse position, freeing up the space from hanging things.
A distinctive advantage of this design is the ability to adjust the height of each individual tube. By hanging clothes and linen at different levels so that they do not block each other, you can ensure the air supply necessary for each item.
You can get a better look at the “liana” device in this short video:
Replacing ropes
Over time, the cords wear out and fray, so you have to install new ones. To determine the required length, you need to do the following:
- Multiply the size of the bar by 2.
- Measure the distance from the clamp on the wall to the ceiling and also double it.
- Add up the numbers and add 1.5 meters to the result.
To change the rope, it is not necessary to follow the same steps as during installation. The end of the cord is tied to a piece of the old one and pulled through all the necessary holes. This makes replacing dryer ropes much easier.
How to choose a “liana”
When purchasing a dryer, it is worth considering a number of nuances. The first thing you need to do is measure the room, carefully read the instructions, and only then choose the required size of the structure for the room. The installation length usually ranges from 0.5 to 2 meters (the most common models are 1.5, 1.9 and 2 m).
To avoid having to immediately dismantle the purchase after installation, you must first calculate whether it will interfere with the movement of doors and windows. It is also worth taking into account the features of the ceiling; if it is suspended or made of polystyrene foam, then it will be easiest to install the dryer on the wall.
After completing the preliminary measurements and choosing the appropriate size model, you can proceed to the selection of material. Rods and frames are mainly made of steel, aluminum and plastic.
Modifications and sizes
The Liana type ceiling clothes dryer is produced by different manufacturers. The models work on a similar principle, but differ in some parameters.
The package includes:
- Rods for hanging laundry (usually 5 or 6).
- Cords for each plank (long and short).
- Decorative caps (one or two per rope).
- Two brackets with rollers.
- Fasteners (screws) and plugs.
- Plastic clip for cords on the wall.
Ceiling dryers "Liana" primarily differ in size. The length of the crossbars ranges from 50 cm to 3 meters. But more common are from 1.4 to 2 m (in increments of 10 cm). The maximum weight of wet laundry is 12 or 12.5 kg. The permissible load on one crossbar is up to 2.5 kg (approximately one duvet cover).
Tubes are made from the following materials:
- plastic (cheaper, but breaks faster than others);
- aluminum;
- iron coated with powder paint or PVC to prevent rust;
- of stainless steel.
The last two options are stronger, but also heavier. Crossbars larger than 2.2 m are made only from steel pipes with a diameter of 12 mm in accordance with GOST 10704-91.
Wall-mounted models of liana-type dryers are also available. They have a similar design, the only difference is that the brackets are attached to the wall.
What material to choose a dryer from?
Let's look at the main types:
- Stainless steel. Models are distinguished by high strength, durability and a higher price. Sometimes the low cost of a device can be due to the aluminum rods in it (which are often not coated with the necessary polymers). This should be taken into account; in turn, when contacting stainless steel, problems with gray spots are excluded. When in contact with air, unlike aluminum, this metal does not oxidize.
- Steel. Practical, strong, durable. However, it does not have the same service life as stainless steel. To extend the service life of a steel model, you can additionally treat it with special polymer materials.
- Aluminum. Due to its lightness and strength, it has proven itself well in the production of “liana” dryers. Experts recommend that when purchasing structures made from this material, choose products with an aluminum frame. The crossbars must be made of a different material. Upon contact with this metal, gray spots form on things at the point of contact. Therefore, if you take a product with aluminum tubes, you should first check whether they are coated with special polymers.
- Plastic. The material has a long service life and the absence of problems of corrosion and destruction that are characteristic of steel. Plastic products can usually be purchased much cheaper. The only negative is the relative weakness of the design. Tubes are often not designed for high loads and can simply bend, unable to withstand the weight of the laundry.
Steel construction
When purchasing a “liana”, a very important criterion is the weight that the structure can withstand. If the dryer is small, then there is no point in purchasing it from steel, because such a “vine” cannot really be loaded. If you purchase a “liana” over one and a half meters long, you should pay attention to the maximum load specified by the manufacturer.
If a low-strength plastic “liana” bends after the first wash, then what was the point of buying it.
Useful videos about dryers
Installation of a Polish-made dryer in the bathroom:
Recommendations for installation on plastic lining:
Video instructions for installing the “liana” on the balcony:
The easy-to-use “liana” is a good and economical assistant for housewives. Laundry is washed on average 2-3 times a week, which means the dryer will be busy all the time. It is much more comfortable when the laundry hangs high from the ceiling and does not interfere with moving around the balcony. Ordinary ropes will not provide such convenience.
YOU MAY ALSO BE INTERESTED
Choosing a location for the dryer
“Liana” is usually installed on a balcony or loggia. In suburban conditions, an alternative to them can be a terrace, veranda, as well as any open space under a canopy, which will protect things from moisture and under which fresh air will flow to them.
If there is free space in the bathroom, then the dryer can be installed there too. The disadvantages here are usually a lack of ventilation, plus high humidity. Thus, if the room is not equipped with special devices, the laundry will take much longer to dry, and mold may also form.
When choosing a location for the dryer, it is important to consider the strength of the support on which the brackets will be attached. If the wall or ceiling is covered with plastic sheathing, then the place where the dryer is mounted should be replaced with a more durable support. Wooden blocks are perfect for replacing plastic. They will support the weight of the structure along with things.
Ceiling dryer Liana photo
In this section, we invite you to look at photographs on the topic of our article “How to install a clothes dryer “Liana”: Instructions.” All photos are clickable.
Assembly and installation of the dryer
Installation steps:
- Marking. First you need to mark the location of the brackets, then drill holes for the dowels.
- Installation of brackets. It is necessary to accurately adjust the distance between the brackets; otherwise, adjusting the height may be difficult.
- Fastening the holder. Using this element, the height of the crossbars is adjusted; it should be at hand, but its distance to the brackets must clearly comply with the instructions.
- Cutting the rope into the required number of pieces.
- Installation of crossbars, stretching and fixing nylon cords, installation of fittings.
This video will help you learn more about the details of assembling and installing the dryer on the ceiling.
Assembly instructions
Before hanging a ceiling-mounted clothes dryer, you need to prepare the following tools:
- hammer drill with drill, diameter 6 mm;
- screwdriver;
- tape measure and marker;
- dowels with a diameter of 5 mm and screws with a diameter of 4 mm.
Set of tools for installing the drying structure
Start by printing out the packaging with the dryer design parts. Remove all the parts one by one, check their availability with the completeness in the instructions. Please read the installation manual carefully.
Liana dryer disassembled
The work of installing a liana dryer can be easily done with your own hands, without turning to the help of specialists. Detailed instructions with photos are given in the table:
| Illustration | Description |
| Attach the fasteners to the ceiling, having previously measured with a tape measure and marked the distance between them equal to the length of the tubes. Mark with a marker the location of the holes that need to be drilled to install the fasteners | |
| Use a puncher to make holes in the ceiling and insert dowels into them | |
| Attach the fasteners with rollers to the holes and secure them with self-tapping screws | |
| Select a location for the stop bar so that it is easily accessible. Attach the plank at a height of 1.5–1.6 m from the floor using dowels and screws | |
| Thread the short and long cords through the ends of the rod (if they are not already tucked in) and secure them. Pull the short cord through the roller in the mount closest to the locking bar. Pull the long cord through the rollers in two fastenings | |
| Place caps on the cords and secure them so that it is convenient to lower and raise the handset. Sequentially install all the rods included in the kit |
As you can see, installing the dryer is not difficult. Finally, check the functionality of all rods and wipe them from dust and dirt. Now you can start drying your clothes.
Device installation rules
Tools required for installation:
- perforator;
- electric drill;
- screwdriver;
- screwdriver;
- hammer;
- pliers;
- roulette;
- metal ruler;
- scissors;
The instructions supplied with the dryer clearly indicate the installation rules and specific mounting dimensions for a particular brand of dryer. The general installation diagram is shown in the figure below. In general, the installation process of “Liana” is carried out in the following order:
- Installation and fastening of ceiling brackets.
First, the slats are applied to the ceiling and the attachment points are marked. Then, using a hammer drill or electric drill, holes are drilled at the marked points into which the dowels are inserted. The bracket strips are secured to the dowels with self-tapping screws.
- Installation and fastening of the wall adjustment bracket.
Its installation and fastening is carried out on the wall at the required height in the same way as installing brackets. The installation height of the bracket is chosen arbitrarily, taking into account ease of maintenance.
- Dryer assembly.
This step involves installing and securing the cords that are attached to the laundry rods. They must be passed through the rollers of the brackets according to this principle: a long cord is passed along the left bracket, and a short one through the roller of the right bar. The ends of the cords are inserted into the fixing caps and secured to the fixing bracket. This bracket allows you to set the height of the rods when it is pulled out. This fastening is done alternately on all rods.
You can also use the video to study the issue in more detail.
Operating rules
Using Liana is very simple:
- If you need to hang laundry, you need to lower the tube by releasing the cord lock.
- Place the laundry.
- Pull the same cord so that the tube rises to the required height. Reinsert the retainer into the control mechanism.
The design does not require specialized care. To extend the service life of plastic tubes, they must be wiped after each drying of laundry; for metal tubes, this procedure is not necessary.
It is necessary to wipe the tubes before each time you hang up the laundry, so that the dust that settles on them does not stain the washed items.
The most common breakdowns are: deformation of tubes and wear of ropes. Defects can be easily eliminated - you just need to replace the part that has become unusable. There is no need to buy a completely new design. It is necessary to completely replace the dryer if such parts have become unusable, without which the effective functioning of the product is impossible or which cannot be replaced with similar ones.
The service life of Liana dryers is from five to ten years. In this case, a prerequisite is the correct installation of the structure; also, in order for the product not to lose its functionality, it should not be overloaded.
Video: replacing the cord on a Liana dryer
Materials
Manufacturers can use various materials to make certain elements of the Liana dryer. The quality and reliability of the design as a whole will depend on this. The cylinders on which the laundry is placed can be made of metal or plastic. Metal tubes have a protective anti-corrosion layer.
The most reliable material in this case is stainless steel. Steel tubes can withstand the greatest loads compared to aluminum or plastic parts. Equally important is the quality of the material from which the ropes were made. Thin ropes are not able to ensure the reliability of the entire structure at the proper level.
Decorating the room for drying vines
As already mentioned, there are two types: ceiling and wall. It is important to consider which surface the load will be placed on.
The durability and safety of the dryer largely depends on high-quality installation
Ceiling finishing
The ceiling option involves attaching the structure to the ceiling covering. Suspended and tension structures may not be able to cope with heavy loads.
An example of attaching a creeper dryer to a ceiling with wood paneling
You will need to install metal supports on the ceiling, which are special corners. They can only be installed before finishing the ceiling.
If the facing material cannot withstand such a load or there are no metal corners for mounting the structure, then it is better to give preference to wall-mounted models.
Wall decoration
Installation of the wall version is much easier. Drilling holes for dowels through brick or some other finishing material will not be difficult.
An example of attaching a wall-mounted dryer to a balcony lining
Wall mounting option with plastic panels:
The most suitable place to install the Liana dryer is a balcony or loggia. It is very important that the room is glazed. Otherwise, when drying, the clothes may become dirty from dust or precipitation. In winter, clothes can freeze completely.
Special models of dryers are designed for use on open balconies, the design of which corresponds to such operating conditions.
In the event of a breakdown, many structural parts can be replaced with new ones. If you follow all the operating rules for this design, it can last up to 10 years.
Some successful models
In Russia and Belarus, good models of Liana-type drying devices are produced, which, at a price much lower than their European counterparts, have similar characteristics to them. For example, a Russian-made dryer from the Turkish brand Dogrular, model SP1505, weighs very little - a little more than 2 kg. Moreover, 5 tubes are capable of supporting clothes with a total weight of at least 10 kg. Durable rods and fasteners are made of aluminum, while the design also contains plastic parts. The width of the device is 1.5 m, the total length of the drying surface is 12 m.
The Belarusian Comfort Alumin dryer is produced with rods 1.5 and 2.5 m long. Both modifications are capable of drying clothes with a total weight of up to 10 kg using 5 tubes. Materials: aluminum and plastic.
In addition to products from the CIS countries, drying products made in Europe can be purchased in the retail chain. Their cost is significantly higher, but the dryers have very good characteristics. For example, the Italian design of the Gimi Lift trademark, having steel rods with a protective coating, can simultaneously dry up to 12 kg of things. Moreover, the maximum weight does not depend on the length of the rods, which can be of several sizes - from 1.2 to 2.4 m.
French products from the Luminarc Liana brand are cheaper than Italian ones, but their characteristics are no worse. Drayer tubes, like most other parts, are made of steel and can support weights of up to 12 kg. The number of rods is 5. In the retail chain you can find dryers of this brand with a tube length of 1.4 m.
Types of clothes dryers
A clothes dryer is a necessary item in every home. There are several varieties of such devices, which differ in convenience and method of fastening and placement:
- Floor dryer. Such a dryer is installed on the floor when it is necessary to dry clothes; when it performs its function, it is folded and put away. The device can be folded vertically or horizontally or have a monolithic, non-demountable structure. The last option is the most inconvenient, as it takes up a lot of space.
- Wall dryer. The wall-mounted model is mounted on the wall and, if necessary, folds or unfolds.
- Ceiling dryer. The dryer is attached directly to the ceiling and walls. Can be retractable or stationary. The retractable option is convenient and does not use up the usable area of the room.
- Electric dryer. This type of dryer can be mounted on the ceiling, wall, or floor. An electric device significantly speeds up the drying process, but it requires an electrical network to operate.
Device design
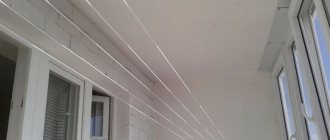
The Liana dryer has a fairly simple design. In the photo above the system is shown assembled in the interior of the loggia, and in the photo below it is in working condition. The design features a wall and ceiling part. The instructions for the device regulate the equipment of a specific type of dryer and the rules for their installation, but in general all types of “Liana” have similar basic elements.
The system under consideration consists of the following main parts:
- Main brackets (2 pieces): are the load-bearing elements with which the entire system is attached to the ceiling.
- A set of rods for hanging clothes: the number and length depend on the brand of dryer.
- Cords for hanging and adjusting the location of the rods: 2 pieces for each rod (short and long).
- Cord Management Bracket: Refers to the wall portion and allows you to adjust the height of each rod individually.
