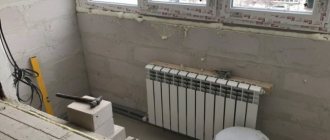
Waterproofing a balcony or loggia is often associated with certain problems, because solving the problem of how to seal cracks on a balcony and ensure tightness from the outside and inside is very difficult even for professional builders. Namely, these defects in the walls, floor and ceiling of a loggia or balcony bring increased humidity, condensation, and the formation of mold and mildew.
Typical leak on the balcony.
If it is planned to carry out work on thermal insulation of a room, then sealing and waterproofing, the process of sealing cracks, become even more relevant.
As for the open balcony, oddly enough at first glance, its waterproofing is absolutely necessary.
After all, it is constantly exposed to difficult operating conditions and is therefore susceptible to destruction. Still, performing a small amount of repair work is not as expensive as further major repairs.
How to seal cracks on a balcony made of plastic panels
The first thing you need to do is prepare the necessary tools. You will need: sealant, spatula, solvent, mounting tape, scissors and a vacuum cleaner. Do not forget about means to protect your hands - rubber or thread gloves.
Then, adhering to a certain algorithm, we begin work on closing the gap:
- We carefully remove dirt, dust and debris, and also clean out crumbled cracks and chips with a spatula.
- Use a vacuum cleaner to remove any remaining dust that has accumulated in the crack.
- We treat damage to plastic with solvent or alcohol. Cracks or crevices prepared for further processing must be dry and free of grease. In order not to stain adjacent areas of the surface, the gap must be covered with mounting tape.
- Carefully seal the damage with silicone sealant and immediately remove excess sealant with a spatula. You must try to carry out the work carefully and as quickly as possible. Silicone sealant hardens very quickly and if you miss the moment, it will be impossible to fix the seam or remove excess.
Roof repair on the top floor
On upper floors, the roof can be supported on consoles or on consoles and posts.
Related article: How to insulate balcony walls from the inside
The cantilever roof is an independent structure, its frame is fixed only to the wall, not attached to the balcony, it is easier to install, and its repair will cost less.
It has low thermal insulation and transmits heat well. Insulation measures are carried out using lightweight materials. For information about balcony roof installation errors that lead to leaks, watch this video:
The cantilever-rack roof is attached to the balcony frame and forms an integral structure with it, retains heat better, and can withstand significant loads. To seal such a roof, you can use any materials.
If the roof of the house is made with a slope, then the roof of the balcony is also made with a slope.
If your balcony is leaking, you can do the work to fix the leak yourself. Sometimes minimal costs are enough to eliminate water leaks on the ceiling or balcony wall. To avoid situations with unexpected leaks on the balcony, it is necessary to regularly carry out preventive repairs.
Repairing cracks in different materials
Gaps in new buildings and old houses can form as a result of various influences and errors of builders. All detected cracks must be sealed as quickly as possible to prevent them from increasing in size and deepening.
If there are cracks in the concrete elements of the balcony structure, it is necessary to first prepare the surface. You need to remove dirt, concrete chips, oil stains and other contaminants. Then you need to wash the crack and dry it. It is best to use a high-quality waterproofing material such as bitumen mastic for processing. After this, the crack can be closed with cement mortar.
If cracks were found on a wooden structural element, then the surface, as in the previous case, must first be prepared by cleaning it from dirt and dust, and also removing all decorative coating (paint, varnish, etc.). You can fill a crack in a wooden element using ready-made putty, which is available in a wide variety in stores.
The selected insulating material must be applied to the problem area using a spatula, after the material has dried, it must be sanded and painted over or varnished. If a crack is found on a plastic surface, it can be sealed using silicone sealant.
Almost any cracks that form on a modern or old loggia or balcony can be repaired with your own hands.
At the same time, if there are a lot of cracks, and they pose a serious threat to the operation of the balcony room, then major repairs are required, which is very difficult to do on your own. In this case, you need to contact utility service specialists or a management company, where they should send an expert to assess the condition of the balcony.
In some cases, when a balcony leaks, all work is carried out free of charge (usually this applies to old houses or in the presence of obvious violations of construction technology).
Concrete
Concrete is a solid thing, so we decided to divide the description of work with it into three parts.
First, let's talk about how to seal small cracks. For this we will need either ordinary cement mortar or polyurethane foam. For those who are new to repairs, we will tell you about the last resort in more detail.
Polyurethane foam consists of a polyol and an isocyanate, which form polyurethane foam at the output. This substance is distinguished by its strength, water resistance and other excellent insulating and sealing properties.
When choosing foam, pay attention to several indicators:
- household or professional - the first option is quite suitable for your purposes, since its use does not require special skill;
- temperature conditions suitable for use. On each cylinder you can find indicators and seasonal purpose. For example, summer foam can be used in the range from 5 to 35 degrees above zero, winter foam - from 10 to 35 below zero, all-season foam - from -10 to +35°C. Please note that the specified temperature is only necessary for the actual work. Once dry, the foam will withstand almost any conditions. But while it is in a liquid state, you should pay attention to the above indicators;
- shelf life and absence of deformation of the cylinder.
It is clear that an expired product may give a completely different effect than you expect. A dented cylinder indicates a mechanical impact on it, as a result of which a chemical reaction could begin, and as a result the foam has already hardened. In general, pay attention even to such banal things.
So, let's get down to minor repair work.
As in the case of plastic and wood, we thoroughly clean the gap. Garbage, dirt, crumbled concrete - all this must be eliminated.
If after cleaning the edges of the crack are wet, wait until they dry completely.
Now we treat the gap inside and along the edges with a deep penetration primer. This will help strengthen the concrete and prevent its subsequent destruction under the influence of external factors.
We are waiting for the primer to dry completely.
Fill the gap with foam. Remember that it will gradually expand. For this reason, the hole should be filled to a maximum of two-thirds. As it expands, the foam will successfully penetrate even small pores and cover the entire volume of the cavity being repaired.
Now you need to wait for it to harden. On average, this takes about a day. After this time, we cut off the excess foam that has protruded above the crack. To do this, you will need a sharp knife; you can take either a household knife or a stationery knife.
Next, the repaired surface should be painted or filled with liquid cement. Our goal in this case is to protect the sealant from exposure to sunlight, since it affects its integrity.
If the crack was initially very small, then you don’t have to bother with polyurethane foam, but get by with regular cement. Apply it with a spatula, smooth the surface and wait until it dries.
How to seal cracks on a balcony
To seal balcony cracks, they use a wide range of not only materials specifically designed for these purposes, but also their combination with conventional building materials.
Sealing cracks in concrete surfaces
Often, where the concrete floor and ceiling meet the walls, there are gaps up to 10 mm thick. When deciding how to seal cracks on the balcony in this case, they often use polyurethane foam, cement-sand mixtures or cement-based adhesives.
Before sealing the seams, they are cleaned of dust and debris (this is best done with a vacuum cleaner), poorly secured areas are knocked down, and sometimes a crack that is too narrow is widened.
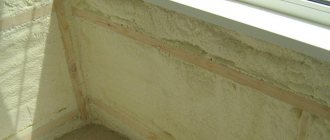
For better adhesion and drying, foam is applied to a slightly wetted surface, taking into account its strong expansion after hardening, and the cracks are primed before sealing with cement mortars.
Rice. 2 Putting the seams between the slabs of the loggia and balcony with foam
After the foam in the seams has dried, its excess is cut off with a painting knife, and to prevent decomposition under the influence of ultraviolet radiation, it is painted over or covered with cement mortar on top.
Sometimes there are large gaps of up to 100 mm between the concrete floor and the parapet slab. In this case, foam is usually not used, but the cracks are sealed with bricks, blocks of cellular concrete (gas silicate), laying them on cement mortar. Large gaps between concrete slabs can be sealed using rigid and durable Penoplex insulation, gluing it onto the foam.
To seal wide holes on the balcony, they use tin or profile sheets, wooden boards and beams, plastic, metal profiles, decorative artificial and natural stone, tiles - and the main method of attaching them to the joints is polyurethane foam and cement mixtures.
Sealing cracks in wooden surfaces
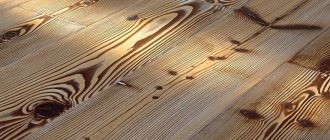
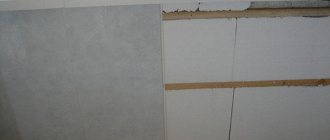
Sealing the cracks of a balcony or loggia may be necessary when laying a wooden floor around the perimeter between the boards and the wall - in this case it is more effective to use polyurethane foam. If you need to cover up cracks, crevices and holes in the wooden surface itself, then use wood putty, matched to the tone of the board.
Rice. 3 Filling the space between the wooden cracks with putty
Before applying it, the area to be treated is cleaned of dirt, dust and defective areas, the putty is applied between the cracks with a spatula and, after drying, sanded with fine sandpaper; if necessary, the repaired area is varnished.
Eliminating cracks in plastic
It is better to seal the gap in the plastic with silicone sealant; sometimes a cheaper acrylic type is used, but it has low water resistance and cracks when exposed to subzero temperatures.
To apply sealant, a special gun is used, into which a cylindrical tube with sealant is inserted; when pressing on the handle of the gun, the material flows onto the surface to be treated through a narrow fitting.
Specialists with extensive experience apply the sealant, leveling it to obtain an aesthetic arc-shaped surface, with the index finger of the hand dipped in a soap solution.
When applying it yourself, it is best to use masking tape, covering the seam on both sides to the required width. For leveling after application, you can use a special plastic or rubber spatula with arched edges, and then level the seam with a finger dipped in a soapy solution.
The advantages of using sealant are its fast drying time and a perfectly smooth, waterproof and durable seam.
Rice. 4 Seal cracks and holes with cement mixtures
Materials used
Among all the modern materials used to seal joints and holes in loggias, the following can be distinguished:
Experts recommend buying Polish sealant: it is the most acceptable in terms of price and quality
- polyurethane foam;
- cement composition;
- silicone-based sealants;
- corners and galvanized metal sheets;
- primer;
- waterproofing type mastic;
- insulating tape with a vapor-permeable structure.
Whatever material you use on the walls and ceiling, you need to carefully prepare the surface before the installation operation. The joints and crevices of the walls are cleaned of dirt, dust and completely moistened with water.
After the preparatory work before the repair is completed, it is best to dry the cracks with a hair dryer in order to eliminate any remaining moisture!
The choice of a specific material depends on what base you will apply it to.
Polyurethane foam is deservedly considered a universal remedy.
It is recommended to close cracks on wood surfaces with putty, sealant or simple window putty.
The fire hatch and its joints in the cement base are covered with cement mortar. It is advisable to cover a seam or hole in a concrete slab with waterproofing, otherwise moisture that gets into the pores will quickly destroy the entire structure of the material.
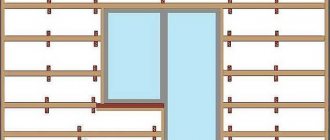
Standard diagram for constructing a good, strong balcony without frames
If the gap is located at the top of the balcony
In cases where, due to errors during construction, the sealing is broken and the balcony is leaking, a large gap has formed between the wall of the house and the load-bearing slab above the balcony, then water will certainly penetrate through it during rain.
- The first step is to remove all dust and dirt, oil and moisture stains from the crack. To thoroughly clean the gap, it is recommended to use a wire brush.
- To seal the gap itself, you can use a special waterproofing mastic composition, which today can be found in any hardware store. In addition, sealing can be done using conventional polyurethane foam. However, the first option looks more reliable and effective.
- The mastic must be applied to the cleaned surface. The composition is applied with a spatula or brush. If it was decided to treat the gap using foam, then it is recommended to additionally prime the surface before treatment. It is better to fill the gap with foam from above from the adjacent balcony. As soon as the foam has completely hardened, you need to remove the excess in order to provide your neighbors with a more or less flat floor, and yourself with the same ceiling.
- Finally, the repair area must be covered with cement mortar and primed after it hardens.
https://youtube.com/watch?v=2VA1W714Hvs
In cases where it is impossible to reach an agreement with neighbors for certain reasons (perhaps no one lives in the apartment), then it is recommended to use mastic compositions and roll insulation materials that will not allow moisture to penetrate inside your balcony. It is very good if the roll can be mounted at an angle - in this case, the accumulating water will be diverted away from the balcony.
How and with what to seal the ceiling joint between the slabs
The second serious problem that can bother you if you do not take action in time is a ceiling leak. Look at the ceiling of your balcony (or the floor of the top floor). If you see a monolithic slab, then everything is in order. But the picture may be different:
If you leave everything as is, installing double-glazed windows, then moisture (rain water) may seep into the seam between the slabs from the street. It is imperative to draw the attention of craftsmen to this feature. In addition to the strip at the bottom of the floor, they will also easily install you a special protective panel treated with silicone:
Watch the video on installing the protective panel:
So, today we learned how to seal the gap between the parapet and the floor on the balcony, as well as how to close the seam between the ceiling tiles.
Stage 2. We carry out glazing
If your balcony is already glazed, you can skip this step. The glazing procedure itself largely depends on the parapet installed on the balcony. If we are talking about iron sheathing, then you must build it up using foam blocks or ceramic bricks
It is important that the resulting wall thickness exceeds 10 cm. And if you have a reinforced concrete parapet, you can immediately begin installing windows
Start glazing the balcony before insulating it
Today, many (especially fans of environmentally friendly building materials) prefer double-glazed windows with wooden frames. It is worth remembering that such structures need to be treated with an antiseptic and painted regularly. You can learn about installing double-glazed windows with wooden frames from the video below.
Video - How to install a wooden window with double glazing
However, the majority of consumers still buy PVC windows. When purchasing, choose a special plastic profile that is characterized by increased rigidity and strength characteristics. In addition, the profile must have good thermal insulation properties.
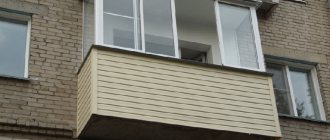
The photo shows plastic balcony windows
Plastic windows should also have:
- 5-chamber profile;
- 2-chamber (if you live in the middle zone) or 3-chamber (if in a more severe climate) double-glazed window;
- reinforced reinforcement.
After installing the PVC structure ordered according to the dimensions of the balcony (the work should be carried out by specialists), you can proceed directly to insulation.
Step-by-step lessons on landscaping a balcony
Lesson 01. Glazing and insulation of balconies and loggias. Search for craftsmenLesson 02. Preparatory operations before glazing a balcony, loggiaLesson 03. Features when ordering windows for a balcony or loggiaLesson 04. How and with what to seal the cracks on a balcony or loggiaLesson 05. How to sheathe the outside of a balconyLesson 06. What you need to know about installing double-glazed windows on a balconyLesson 07. How to make a floor on a balcony Lesson 08. How to insulate a balcony
Sources used:
- https://balkon4life.ru/uteplenie/iznutri/chem-zadelyvat-shheli-na-balkonah-i-lodzhiyah/.html
- https://balkonvdome.ru/remont-i-strojka/treshhiny-na-balkone.html
- https://balkon-info.ru/remont-i-otdelka/remontnye-raboty/chem-i-kak-zadelat-shcheli.html
- https://rykinekruki.ru/remont-lodzhii-balkona/urok-4-zadelka-shheley-mezhdu-polom-i-parapetom-balkona/
The use of foam
Set of tools:
- Tape measure or ruler;
- galvanized sheet;
- Screws for metal;
- A hammer;
- Scissors on metal;
- Plugs;
- Drill or punch;
- Cylinder with mounting foam;
- Gloves.
Fences on the balcony lifted above its floor a few centimeters, forming a decent gap. One circuit not handle foam.
The easiest way to plug this hole by setting the stub of the galvanized sheet.
- Determine the size using a measuring tape, and transferred it to the size of a sheet of galvanized;
- Is added to the height of 20 cm and folded sheet metal in the form of a corner, cutting off the excess with scissors for metal;
- Carefully manufactured customize shape with a hammer, and fixed to the parapet and railing screws and dowels;
- Along the perimeter of all zapenivaetsya.
Small cracks can be repaired on the balcony of one component foam.
Plastic
Cracks and holes in plastic can occur for various reasons. This may be a result of improper installation or mechanical impact. Of course, if the hole is too large, you will either have to dismantle the plastic and install a new one, or invent a temporary patch from scrap materials, which will not look very aesthetically pleasing.
If the cracks are of an acceptable size, then they can be dealt with quite quickly and easily. I’ll say right away - do not use polyurethane foam for these purposes! Although this is the very remedy that is thought of first when the need arises to repair a hole, in our case it may turn out to be critical.
Let's explain why. Polyurethane foam has the property of expanding as it dries, and plastic is a material prone to deformation. Since it is impossible to regulate the exact amount of foam, it can push the gap apart, crushing its edges, and the result will look very bad.
So for our work, another product would be optimal, namely silicone sealant. it consists of silicone rubber, reinforcer, adhesive, plasticizer and vulcanizer. Some types also include dyes, fillers such as sand (these help the sealant better adhere to the surface to which it is applied) and fungicides.
It is the content of fungicides that you should pay special attention to when choosing a specific product. After all, they fight existing pockets of mold and fungi, and also prevent the appearance of new ones. Since we are talking about work on a loggia or balcony, we should take into account the fact that this room often has a high level of humidity. Especially if the room is not properly equipped and has neither insulation nor ventilation.
You can choose other components as you wish, it’s not so important. Silicone sealant by itself, without additional substances, perfectly adheres to the surface being treated and subsequently, after complete drying, effectively protects it from moisture.
Have you stocked up on everything? Let's start the procedure.
That's the whole procedure. Silicone sealant does not need finishing; it will be invisible on the plastic, so you will get a visually perfect, undamaged surface.
Treatment of large cracks
The properties of the polyurethane foam are such that it falls into horizontal cracks under its own weight if the hole size is more than 5 cm. For large cracks, corners or galvanized iron are used, which are attached with screws to the concrete surfaces of the loggia, forming bends in the corners. To close large defects, work is carried out in the following order:
- 1The gap is measured in height and width;
- 2A patch is cut out of a sheet of iron using metal scissors with a margin of 20 cm in width to form an overlap on the surface;
- 3The shield is bent in half and attached to the fence and wall (floor) using self-tapping screws. Self-tapping screws are screwed into pre-drilled holes;
- 4Small cracks are foamed, after hardening the irregularities are cut off;
- 5The porous surface of the cuts is covered with mastic or glued with insulating tape.
If foam sealing work is carried out outside the balcony slab by industrial climbers, you should ensure that the sections of the foam are reliably protected from atmospheric and UV exposure. To do this, the surface of the cuts is cemented and painted.
Compliance with the work rules will ensure tight connections and reliable protection from rain, wind and any bad weather.
Technology for sealing seam cavities between the ends of floor slabs
Starting to seal the seams, you will have to repair the entire ceiling. First, evaluate your strengths and capabilities. Repairing the ceiling is quite a labor-intensive task. To prepare well for it, you need to clean the ceiling from old coating, whitewash, crumbling plaster, and peeling putty.
The old whitewash is washed off with water, first the ceiling is moistened with water from a spray bottle, preferably hot, after waiting about 15 minutes, the ceiling is cleaned with a spatula to remove the old whitewash from the plaster.
If the ceiling has traces of rust, treat it with a special anti-rust compound. In places where the old putty is coming off the ceiling, it is necessary to clean it with a spatula. Then the seams are freed from the remnants of the old plaster, the remains of cement mortar, debris, and dust are removed, and if necessary, the seams are expanded with a hammer drill. The seam should ideally be U-shaped or widened inside so that the putty can be better secured. After expanding the seam, remove dust from it with a brush and wipe with a sponge soaked in water.
Then it is necessary to evaluate the size of the resulting cavity in order to decide how to seal the ceiling joint between the laid floor slabs. Depending on its size, different sealing materials are used. Shallow seams over 3cm wide are moistened and then blown in with foam. After the foam begins to harden, cut off the excess with a knife, and you need to make a triangular-shaped depression from the edges of the floor slabs to the center of the seam to a depth of 5-7mm.
Stage 4. Insulate the walls
The technology here is almost the same as for floor insulation. Follow these steps:
Step #1. Mark the future location of the slats on the walls (as well as for the floor).
Step #2. Attach the slats in accordance with these markings.
Installation of sheathing under insulation
Step #3. Apply polyurethane foam to the surface using wave-like movements. At the same stage, you should drill holes for the dowels.
Step #4. Attach the foam sheets using plastic mushroom dowels.
Insulation of the loggia with polystyrene foam
Step #5. Blow out all the resulting cracks with foam, then seal with mounting tape.
Step #6. Lay a waterproofing layer on top - for example, penofol, which will also serve as thermal insulation.
Attaching penofol to walls
The use of penofol for insulating a balcony
Step #7. Seal the seams at the joints with foil tape.
Step #8. Mount the counter-lattice on top of the foam foam and install the finishing material.
Counter-lattice for finishing
Processing joints between walls and slabs
Poor insulation at the junctions of walls with the floor and ceiling can cause moisture to get inside the loggia and ruin expensive cosmetic repairs. Before processing the joints, they must be thoroughly cleaned of dust and dirt and covered with primer. The cracks are filled with cement mortar and covered with a layer of sealant. For a more reliable result, you can glue the joints with elastic waterproofing tape.
Reliable waterproofing of joints using sealant and elastic tape
We hope this article helped you learn how to repair a loggia and prepare it for subsequent finishing work.
Repairing a balcony slab for neighbors above
Since renovations are being carried out by neighbors on the floor above, logically, the owners of the balcony should do it. But if you are unlucky with your neighbors and they refuse to bear the costs, there are two options: contact the utility services or carry out the repairs yourself. Let's consider the procedure for repairing a balcony slab from above on your own.
Preparing the slab for repair
First of all, the old coating and cracked screed are removed. All loose mortar is removed and unstable pieces of concrete are knocked out. The joint between the slab and the wall of the house is well cleared, and any defects found are sealed with cement mortar. If there are potholes and cracks on the surface, they should also be repaired and leveled. The surface of the slab must be flat, without sharp changes, so that the waterproofing layer placed on it does not deform or break through.
Waterproofing device
About 20 years ago, roofing felt was used to waterproof balconies, which was glued to melted resin. In a residential apartment, it is difficult to carry out such manipulations with resin and roofing felt, so more modern methods can be used.
Materials for waterproofing on the balcony:
- Bitumen-polymer coating (painting) mastic with rubber and rubber additives;
- Polymer waterproofing based on synthetic rubber;
- Plaster insulation;
Waterproofing is installed, extending onto the wall to a height of 15 cm and distributed along the balcony to a width of at least 50 cm from the wall. Any type of material is applied in several layers, each 1 cm thick. The layers are applied alternately after the previous one has dried.
Screed on the balcony
When the waterproofing is installed, a cement screed is poured on top.
A smooth rounding of mortar is made near the wall, covering the waterproofing, and a thinner layer of screed is laid along the edge of the balcony slab. Thanks to this, a bevel is created from the wall of the house, and water flows down freely without lingering on the slab. If the balcony is on the top floor, waterproofing is installed on a reinforced concrete canopy. It is laid in the same order as on the balcony of the neighbors above.
Important. Since there is no guard on the canopy, all work is carried out with insurance
It may be necessary to hire construction workers who are involved in industrial climbing.
Where to go if your balcony is leaking
If the balcony on the top floor is leaking, we write a statement to the housing and communal services, they are obliged to either carry out the repair work on their own, or reimburse the amount spent on repairs to the owner of the apartment. Housing and communal services will carry out repairs on their own if the balcony is in disrepair.
In other cases (if the apartment is not on the top floor), it will be necessary to carry out sealing repairs at your own expense, with the involvement of specialists from a construction company or with your own hands.
Sealing and waterproofing the balcony ceiling from the inside
After glazing a balcony or loggia during precipitation, we sometimes see an unpleasant picture - the balcony is leaking. This could happen if the ceiling and roof of the balcony (loggia) were not sealed and waterproofed.
If the balconies are poorly sealed, the joints of the windows leak, the roof leaks from above, and the floors flood. How to fix this defect?
From the inside, all work to eliminate leaks can be done independently. We seal all seams. We use polyurethane sealant Germoplast or Emfi. Before covering the defects, we use a grinder to cut out the seams and cracks, clean them of dust and moisten them with water.
We also pay attention to dark spots on the ceiling - in these places there may be microcracks through which water also flows. We also cut them and seal them
Sealing seams with polyurethane sealant
Next, we examine the glazing of the balcony (loggia). Often frames are installed with violations of technology. These defects will have to be corrected yourself. Otherwise, after sealing and waterproofing the ceiling, we will constantly observe how water flows through the cracks in the glazing.
When installing glazing, polyurethane foam is used. When exposed to ultraviolet rays, the foam is destroyed and water flows freely through these seams. It is necessary to partially remove the outer layer of foam and fill the formed groove with a hydro-swelling elastic cord. When exposed to moisture, the cord expands in volume and prevents water from leaking in this area.
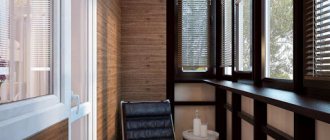
Leaking at the bottom of the loggia frames due to poor sealing
We begin waterproofing the ceiling by cleaning the entire surface and treating it with an antiseptic to protect against fungal mold (for example, Dali). Then we seal cracks and chips using the technology described above.
For the ceiling, it is better to use polyurethane mastic Elastomix or Elastopaz. They have good adhesion and applying it to a damp ceiling surface is not very difficult.
The ceiling is covered with mastic in two layers - the direction of the second is perpendicular to the first. The waterproofing layer is reinforced with mesh after the first layer. To create a durable crystalline protective layer, it is necessary to allow the mastic to harden for 3 days.
When insulating the roof, sheets of foiled polystyrene foam are glued to the ceiling - it also acts as a vapor barrier. The seams between them are also sealed.
Choosing a sealant
If your balcony is leaking, you need to fix the leak immediately. There is a wide range of sealants on the market, so how can you avoid making a mistake when choosing.
- acrylic is destroyed by sudden changes in temperature, it is not plastic, seams treated with this composition will begin to leak over time;
- silicone is not flexible enough, cannot withstand heavy loads, and is not recommended for outdoor use;
- thiokol is made from two components, but is inferior in strength to silicone;
- polyurethane is very plastic; when purchasing, you need to pay attention to the brand of sealant that can withstand exposure to ultraviolet rays.
Polyurethane sealant is the most suitable for sealing balconies.
How to seal very large gaps on a balcony
If a crack of up to 8-10 cm in size appears on the balcony, it can be very easily repaired using polyurethane foam. But what to do if the size of the gap is such that a person’s palm fits into it. In this case, it is better to use foam together with galvanized iron. Most often, this method is used if it is necessary to close the crack between the floor and the parapet.
To work you will need:
- galvanized iron sheet;
- metal screws;
- metal scissors;
- tape measure, ruler;
- perforator;
- polyurethane foam;
- gloves and broom.
Algorithm of actions:
- We carefully measure the size of the crack.
- Using metal scissors, cut out the required piece from a galvanized sheet, adding 15 cm along the edges to form corners.
- Use a hammer to hammer the sheet into the required shape to seal the crack.
- Using fasteners, we securely fix the shield to the surface of the balcony.
- The remaining cracks and voids are filled with mounting foam, the excess of which must be removed.
- Using lining, tiles or wooden panels, you can give an aesthetic and beautiful appearance to the sealed gap.
Video: how to use polyurethane foam correctly
After completing the preparatory work that I told you about in Lesson 2, it’s time to start glazing the balcony. In addition to installing double-glazed windows, instruct the company that will come to you to perform additional work related to sealing the gaps between the floor and the balcony parapet. The fact is that this is a fairly important part of the entire enterprise, and the final result depends on how well it is performed. You can’t make mistakes or any kind of carelessness here, because otherwise, moisture from the street may get directly onto the floor, and then all efforts related to insulating the balcony will end.
CONTENT:
Important points
If you insulate your balcony, you will be able to not only expand the living space of your apartment relatively cheaply, but also significantly reduce heat loss from your home. The fact is that it is through the balconies that most of the heat escapes. But in order for everything to be done efficiently, you need to know where to start. With a well-designed scheme, turning a cold balcony into a small, but almost full-fledged room will be much easier.
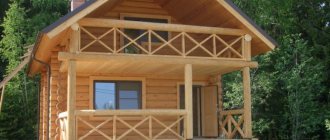
Comfortable insulated balcony as an extension of the apartment
So, first sketch out a rough work plan - it will include:
- preparation and selection of insulation;
- glazing;
- isolation;
- finishing;
- arrangement of an additional source of thermal energy (if necessary).
Video
You can watch a video about how balcony seams are sealed.
There is nothing eternal in the material world. From time to time, something breaks and begins to deteriorate, for example, a balcony. No, it doesn't fall, but cracks and crevices appear. As a result, the problem arises - how and how to seal the cracks on the balcony and whether it needs to be done. Of course it is necessary. After all, by repairing defects, you improve the functional qualities and aesthetic appearance of the balcony.
It is necessary to seal cracks on the balcony and loggia to prevent heat loss and improve sound insulation.
The content of the article:
Features of working with cracks on a wooden surface
Wear on wooden walls or cracks in a wooden floor on a loggia is so insignificant that there is no need to eliminate it with polyurethane foam. Builders recommend filling small gaps between parts of frames with putty. You can buy it ready-made in a store or make it yourself from PVA glue and crushed sawdust.
The seam must be thoroughly cleaned, and then walked along the edges of the crack with a spatula to remove old paint and varnish.
To work with window putty or putty, use a putty knife. After the procedure, go over the wooden surface with an emery sheet, and then open it with fresh paint (varnish). A wooden hatch is sealed in the same way.
Tree
Most often, cracks in wooden cladding are formed due to the influence of various environmental factors - in particular, humidity and subsequent drying out under direct sunlight.
If such a problem occurs on your balcony, we recommend working with the entire surface first to prevent problems from occurring in the future. Here is a complete list of factors that affect the condition of the boards:
- insects (wood-boring beetles);
- high humidity;
- temperature changes.
The casing should be protected from all this, otherwise it will later turn into a collection of patches. The simplest way is a three-stage scheme.
First, treat all the wood with a special antiseptic that will protect the sheathing from insects and rot. Then let it dry completely, then apply a finishing coat with varnish or paint.
However, instead of the last two methods, you can use stain by saturating the boards with it. If you still decide to finish with varnish or paint, then leave this stage for last, do it after fixing the defects, which we will talk about now.
So, what can we use to repair wood paneling? Polyurethane foam is no longer needed for the same reasons that we gave in the case of plastic.
Wood is a fairly soft material. Of course, stronger than plastic, but also subject to deformation. Not only can the gap itself widen, but also the windows and doors will no longer close normally due to the displacement.
So let's put the foam aside until better times and turn our attention to ordinary factory putty. The work ahead of us is even simpler than in the case of plastic.
We thoroughly clean the gap, removing dirt, debris, dust and rotten, crumbling parts.
We fill the resulting hole with factory putty. The optimal tool for this is a spatula. The putty must be applied carefully; it should properly fill even the smallest bends of the crack. In this case, you should avoid protruding excess, so do not forget to constantly level the surface with a spatula.
After the work is done, we wait for the putty to dry. The approximate drying time is usually indicated on the packaging.
After drying, sand it. To get the most accurate result, we recommend that you first take a large sandpaper for this, and then a very fine one, then the surface will be perfectly smooth.
We complete the procedure with finishing - varnish or paint. At this stage, you can cover the repaired areas simultaneously with the entire sheathing.
If the boards we repair are not the internal lining, but the material from which the balcony railing is made, then it is advisable to take care of its outer side. After all, the outer part of the putty crack will be exposed to rain, and therefore the putty will collapse quite quickly.
So, if you can safely reach the desired area, treat the outside with something waterproof. But, if there is even the slightest danger, then it is better to hire a specialized team to completely cover the outside of the balcony with something like siding. Then no humidity will harm the balcony railing.
Plastic balcony repair
Silicone sealant is ideal for sealing cracks in a wooden wall
In order to restore integrity when using such material, you will need:
- sealant;
- gun;
- putty knife;
- scotch;
- hair dryer;
- vacuum cleaner;
- scissors.
With the help of these tools, we begin the first stage of work - cleaning. For more information on sealing cracks, watch this video:
Solvent treatment is necessary to degrease the surface
After thoroughly cleaning the balcony, the following manipulations are carried out:
- Sanding crumbled elements.
- Using a vacuum cleaner, remove dust from the crack.
- We treat the crack with a solvent (in order to achieve the degreasing effect).
- If moisture or water is present, it must be removed with a hairdryer.
- The tape is used to cover the gap (so as not to smear the plastic).
- A container with sealant is inserted into the gun and the plastic tip is cut off.
- The gap is sealed with silicone.
Remove all excess immediately with a spatula, and also take into account the temperature at which you are working, since it affects the hardening of the silicone.
Preparation
So, assess the scale of the damage, look at how many cracks and cracks there are on the walls, in the corners and between the balconies. Clean up, remove all unnecessary things and garbage. Vacuum up small crumbs and dust.
Repairs on the balcony should be carried out in the spring and summer, when the air temperature warms up from + 5° and above, but not in the heat. The effect of building materials depends on weather conditions.
To work you will need the following accessories and tools:
- Gloves, work clothes with long sleeves and trousers.
- Rags.
- Alcohol or solvent, acetone.
- Putty knife.
- Knife, scissors.
- Hammer.
- Household tape.
Floor waterproofing
Work begins with making a concrete screed. For an open balcony, it is necessary to make a screed with a slope of 2%. It is necessary for the free flow of water from the surface of the slab. The screed is reinforced with metal mesh.
When making a screed, three types of seams are required:
- Compensation – formed when laying the pressure layer. Another name is temperature.
- Forced - seams dividing the screed into squares.
- Wall-mounted – located at the junction of the balcony slab with the façade slab.
Subsequently, the seams are filled 50% with mastic for sealing, into which an elastic cord is pressed.
The screed is cleaned of dust and debris, and a primer is applied to it for better adhesion. One of the best is Primer WB.
Apply several layers of polyurethane mastic (for example Hyperdesmo RV) to the moistened concrete. The final thickness of insulation on the floor of a balcony or loggia must be at least 20 mm.
In addition to the floor, the waterproofing layer should extend up to 150-200 mm onto the walls.
Application of polyurethane waterproofing to the floor of a balcony (loggia)
To insulate floors, foam sheets are laid between wooden joists on top of the applied mastic. OSB boards are fixed on top, which are the basis of the decorative coating.
Ceiling leak repair
If the balcony ceiling is leaking, what should the neighbors do from above? First, we find the location of the leak; it may be yellowish or brownish.
Stages of work:
- We clean the ceiling surface from dust, dirt, loose building materials, remove the plaster, wipe the surface with a damp cloth without using detergents.
- We treat the surface with a primer and wait until it dries. The primer gives the surface strength and promotes stronger adhesion between building materials.
- We expand all cracks, even the most microscopic ones, using a grinder and fill them with polyurethane sealant.
- We seal the seams at the connection between the ceiling and the wall and at the connection with the balcony frame, smooth the seams with a plastic or wooden spatula dipped in soapy water so that the sealant does not stick to it.
- A canopy must be installed on the balcony frame, and the joint between the canopy and the frame is treated with sealant.
Waterproofing can be carried out using coating materials
If the balcony is leaking from above, you need to contact your neighbors so that they also seal their balcony.
What to do if the balcony continues to leak. After treatment with sealant, more serious work is carried out to seal the seams on the balcony. To do this, choose either rolled materials or coating mastic.
It is easier to waterproof with coating materials. This work can be done with your own hands; the floor, ceiling, and side walls are covered in several layers of polyurethane mastic. For the first application, use a sprayer or a molar brush with synthetic bristles, layers are applied along the balcony slab.
The second layer is applied after the first one has set (after several hours), across the slab. Before applying the second layer, the surface is moistened. For three days, to avoid cracking of the coating, the surface is constantly moistened.
When laying roll waterproofing, the joints are laid overlapping and treated with sealant. To install such insulation on the roof, it is better to invite specialists, since working at height is associated with risk for people without experience.
Sealing of joints should be carried out not only when leaks occur, but also for the purpose of prevention.
If the cracks are very deep, first we fill them with mounting foam (after wetting the crack from the inside), then we apply sealant to the foam. Sealants do not adhere to detergents.
Painting waterproofing
It involves applying several layers of water-repellent mastic to the surface. There are coating and penetrating mastics.
Coating mastics are produced on the basis of bitumen and rubber, cement with polymer, and have good adhesion to stone, polyurethane, and concrete surfaces.
Penetrating compounds are produced based on cement, quartz and the addition of chemically active substances. The composition is a powder that requires dilution with water before starting repair work. They have good adhesion to concrete surfaces on the balcony.
Roll waterproofing
Installing roll insulation will require some experience and tools. We lay the roofing felt sheets on the surface and heat them to bind them together using a hair dryer or gas burner.
Materials with an adhesive base, for example, penofol, are glued. Penofol has a metallized coating, provides waterproofing and vapor barrier on the balcony.
Fixing roof leaks
If the roof on the balcony is leaking, we will repair it without delay. The longer the water stagnates, the faster the surface of the slab will begin to deteriorate, which will lead to the destruction of the reinforcement.
If at first it is possible to put a patch in place of the leak, if the repair work is delayed, the need for a major overhaul may arise.
If the balcony has just started to leak, we will inspect the roof. If the waterproofing material is destroyed, we purchase the same material, cut out a patch from it 10-20 cm larger than the damaged area and solder it using flux, sand it, and paint it with moisture-resistant paint. For more information on how to fix a leak, watch this video:
What to do if major repairs are required:
- We disassemble the old roof, widen the cracks, look at the condition of the reinforcement (if it is a slab) and the frame if the roof is made of roofing materials.
- If necessary, a metal frame from steel profiles is manufactured and installed.
- A wooden or metal sheathing is attached to the frame.
- The waterproofing layer is secured on top using a stapler or self-tapping screws in one single piece.
- Roofing material is being installed.
We treat all wooden and metal elements with protective compounds.
If there are gaps at the top
It happens that the loggia leaks through the ceiling. In this case, the crack most likely extended to the adjacent balcony. In order to seal the gap from above, you may have to visit your neighbor. If you want to work with polyurethane foam, then it is most convenient to do this while on the upper balcony.
But you can patch up holes while you’re at the bottom. Waterproofing mastic will help you here. This substance is perfect for ceiling repairs. Firstly, it easily penetrates into all the cracks and pores of concrete, lays flat, and secondly, it dries quickly. The mastic protects the surface from moisture, it does not crack and can even be painted in the desired color!
Before use, stir the contents of the jar well. You also need to clean the ceiling and dry it if it is damp. Apply mastic with a regular brush. This waterproofing takes about 6 hours to dry.
Whatever the cracks on your balcony, they can all be repaired, you just need to choose the right remedy.
What causes leaks
A leak can occur both on an open and glazed balcony with finishing work completed, if there is even the slightest crack in the walls or ceiling. The leak must be eliminated immediately, otherwise moisture will lead to the formation of mold and destruction of metal fittings.
Causes of leaks on the balcony:
- poor-quality or deteriorating sealing of seams and joints;
- there is no roof over the balcony or the roof is in disrepair;
- the reinforcement begins to deteriorate, which leads to the formation of new and wider cracks;
- the drip is installed incorrectly or is missing;
- the panels have cracks, microcracks, chips;
- on the top floor the balcony is not glazed;
- The screed is not filled correctly, the drain is located above the floor level;
- The roof of the upper floor is made without a slope, this leads to stagnation of water, concrete tends to absorb moisture through its pores, which leads to corrosion of the reinforcement and cracks form.
The appearance of tiny cracks in the walls and ceiling of the balcony, stagnation of moisture can lead to water leaking onto the balcony, even if it is glazed.
How to seal cracks on balconies and loggias:
1. Eliminating cracks on concrete surfaces
Often there are gaps of several centimeters between the concrete floors. In such cases, polyurethane foam, cement mortar, and primer are used.
Firstly, the end of the gap must be thoroughly cleaned of dust and debris, and elements that are poorly attached or weakened under the influence of water or other factors must be removed. After cleaning, you need to make sure that there is no moisture in the crack, then we treat the crack with a primer and fill the holes with foam.
It is better to use foam with a special gun (a device into which a bottle of foam is inserted), this will make it possible to deliver foam to hard-to-reach places. Since the foam has the ability to expand, you don’t need to squeeze it out a lot. It is enough to pour in a little more than half the volume of the crack to seal it. Within a few hours, the foam will expand, filling all the small pores hermetically.
After a day, excess foam can be cut off with a stationery or ordinary knife and everything can be puttied with a thin cement mixture. Instead of cement mortar, you can use paint. The main thing is to protect the foam from solar radiation, which destroys it. If there are small cracks in the concrete, they can only be sealed with cement mortar.
But sometimes the gaps between the plates are more than 8 cm. In this case, the polyurethane foam will not be enough. Galvanized iron is mainly used to cover such a space.
Strips are cut out of a sheet of iron using metal scissors, which are then bent into corners for the slabs. Such corners are fastened using a puncher to dowels. Depending on the size of the gaps, the corners can be attached to one of the plates or to two at once. After reducing the size of the crack, it is filled with polyurethane foam. Then the excess is cut off and primed or painted.
2. Eliminating cracks on wooden surfaces
If the gap is large enough, you can try filling it with foam. But, when working with foam and wood, you need to be very careful. Wood is a soft material and is easily deformed when force is applied, and using more foam than necessary can easily dislodge wooden elements. The consequence may be a window or door not closing.
For wood, it is better to buy ready-made factory putty. Before starting work, the gap must also be cleaned of dust, dirt and crumbling rotten elements. It must be applied with a spatula and very carefully. After complete drying, the place with putty is carefully rubbed with sandpaper and varnished or painted to match the wood.
3. Elimination of cracks on plastic surfaces
Silicone sealant is most suitable for working with cracks in plastic surfaces. The use of cement mortar and foam is excluded (for the same reason as for wooden surfaces). To seal holes in plastic, you will need the following materials: a package of sealant, a gun for a bottle of sealant, a spatula with a rubber tip, tape with a double-sided adhesive layer, hand gloves, and solvent.
Clean the surface of the crack and dry it thoroughly. Silicone tends to stick to everything, so you need to use it carefully and try not to stain anything. In order for the sealed gap to look neat, it must be covered with tape on both sides before applying silicone. Fill the hole with silicone using a gun. It has a long tip and makes it possible to reach the most inconvenient places. We immediately remove excess sealant and any imperfections with a spatula with a rubber tip. It is better to remove excess sealant immediately, since after hardening it will not be possible to do everything neatly due to the silicone consistency.
After the sealant has hardened, we check to see if we missed anything. If there are areas with cracks left somewhere, then we do the work to eliminate the gaps. When everything is perfectly done, remove the tape. The advantages of silicone are its transparency; after hardening, it does not require additional priming or painting.
You need to get rid of cracks not only from below, but also in the upper slabs that serve as the roof of the balcony or loggia. We use the method for concrete floors. You can replace the foam with waterproofing mastic. If there is a crack in the upper ceiling, then it is advisable for the neighbors above to also carry out procedures to eliminate it, otherwise moisture will still be able to penetrate your balcony.
After the cracks have been eliminated, the balcony can be insulated or repaired. With the correct method of sealing cracks, the balcony will be protected from drafts, precipitation and cold.
From time to time, sealed cracks need to be checked to see if the material has peeled off and if unfinished gaps have appeared.
Principles of sealing cracks
Here you need to take into account several factors: the size of the detected cracks, the material from which the surfaces are made, the position of the crack (vertical, horizontal, diagonal). Decide how waterproofing will be done for a balcony or loggia, how it is more convenient to do it from the inside or outside. Of course, the most common solution to this problem is the use of traditional polyurethane foam.
Sometimes foam is enough.
When using it, you do not need any construction skills and abilities, and the work does not take much time and effort. If the cracks are narrow and located in a vertical plane, then they can be easily sealed with polyurethane foam. In cases where the situation is more complex, the use of other materials and methods will be required.
Waterproofing and sealing in the presence of sufficiently wide gaps that are located between reinforced concrete surfaces, a load-bearing slab or wall, especially from above, bring quite a lot of problems. Naturally, using construction foam alone will not be a solution here, because it is necessary to use more complex and technologically advanced materials.
If the gap is large, then you can use cement mortar to completely eliminate it.
When the gap is really wide, then it may make sense to call specialists in the repair of balconies and loggias, who can do the work from the inside or outside using modern equipment and suitable insulating materials at the proper level.
General scheme for sealing balconies and loggias.
The most common method of sealing cracks is the use of vapor barrier tape in combination with polyurethane foam: first we close the gap using insulating tape, which provides protection from moisture but allows steam to pass through.
By using insulating tape, the foam will not go anywhere and will be fixed in one place, and will also be well protected from atmospheric influences, which will significantly extend its service life. As soon as the polyurethane foam has dried, another layer of insulating tape or any other similar material must be applied to it on the repaired side of the balcony or loggia.
Possible sealing option.
If the balcony is leaking, then waterproofing the balcony with your own hands has another method - sealing a large gap with a galvanized metal sheet.
First of all, we take accurate measurements of the resulting gap, after which we make marks on the galvanized sheet. You need to add about 15-20 cm to the width. You can cut such a plug using metal scissors. The shape of the plug can be changed using a hammer. Fastening is carried out using dowels or self-tapping screws. All joints must be additionally foamed with polyurethane foam.
How to seal seams
You need to start, as always, with general cleaning. Specks, dust, pieces of concrete screed that have broken off can affect the result. Don’t be lazy and notice the entire area several times, and vacuum the seams on the balcony. This will not take you more than two hours, so do everything carefully.
Let's move on to the sealing process itself. It is not complicated and does not require special knowledge and skills. If you think that this is unnecessary, I can assure you that he will not live even five years. The ingress of moisture will lead to its complete destruction.
If you only want to insulate the outside, you need to remember that working at height requires a completely different approach, and it may be better to turn to the help of professionals. Understand that no amount of money is worth your health, and the lack of proper equipment can lead to disastrous consequences. The services of a person who will do everything in one day will not ruin you, and you will be calm, knowing that everything will be done efficiently and without threats to human life.
All you need for the job is a special gun. If you have never used it, you can watch how to do it correctly in the video below:
A little secret: additionally you can use rubber seals. They are sold in any hardware store, and they are very often used for soundproofing entrance and interior doors, as well as for soundproofing domestically produced cars.
If you are the happy owner of wooden structures, don’t even think about using polyurethane foam! Wood is a material that can be deformed much easier than concrete slabs. If you overdo it with foam, you can damage the entire balcony, and you will have to dismantle the covering, which will take away your precious time and hard-earned money.