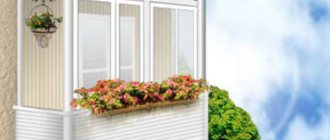
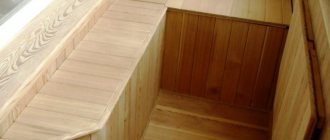
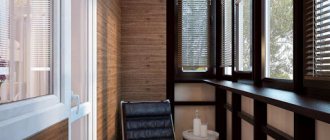
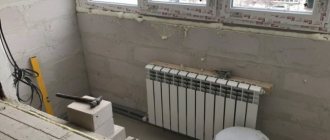
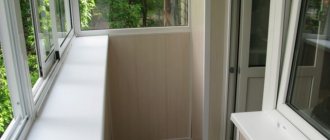
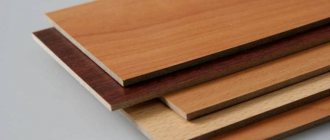
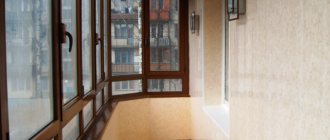
Every person tends to strive to improve their home as much as possible, expand its functionality and competently decorate the interior. An important role in solving these issues is played by the balcony space, which is available in almost every city apartment and is often not used. The fact is that you can turn your balcony into a natural extension of your living space with your own hands, making it a cozy office, a winter garden or a bright terrace. What will it take? Glaze, insulate and decorate. A proven and easy-to-install option for finishing a balcony is clapboard cladding - a job that even a novice home craftsman can do.
Lining or eurolining?
The prefix “euro” is not just a figure of speech; behind the words are hidden important technological characteristics based on compliance with the quality standards of profiled boards. The European standard is considered more stringent, as it regulates, among other things, the radius of workpieces and careful surface treatment. If the required level of humidity according to Russian GOST can be achieved by atmospheric drying, then the European standard can only be achieved by forced drying in special chambers.
| type | standard | humidity, % | height, mm | spike, mm |
| eurolining | European DIN 68126 | 8 – 12 | 12.5 | 8 |
| lining | Russian GOST 8242-88 | 18 — 25 | 15 – 18 | 4 — 6 |
A distinctive feature of eurolining is additional compensation grooves (grooves) on the back side, which prevent deformation of the lamella during seasonal fluctuations in humidity and temperature. This makes eurolining the optimal choice for finishing a balcony.
In addition, the lining is made with different profiles; its choice is complete freedom and purely a matter of taste.
Wiring
When decorating a balcony, apartment owners often add sockets and lighting to the updated room. In some cases, there is also a telephone, Internet and television cable. You need to think about all these conveniences before sewing everything up with a board. At a minimum, you will need to remove all the necessary cables.
Then there are two installation options: hidden and external. From a fire safety point of view, open wiring is most preferable. In this case, installation is carried out after finishing. The wires are laid in cable channels. Overhead sockets and switches, wall lamps are selected.
Hidden wiring is more aesthetically pleasing. The gap between the walls and the outer surface of the finish allows for the installation of hidden electrical elements. However, both the safety requirements and the complexity of implementation are much higher here. And, naturally, all the work is done before covering your balcony with clapboard with your own hands.
All cables must be laid in corrugated pipes. To pass the sheathing bars, cuts are made or holes are drilled. Mounting boxes are installed for sockets and switches. They are connected to the corrugated pipe with couplings.
When choosing lamps, you should opt for waterproof versions. Since condensation may form in an unheated room during the cold season. Such lighting devices, as a rule, have the possibility of connecting to a corrugated coupling.
Types of wooden lining
Regardless of the standard by which the lining was produced, at the last stage, after all the drying and final planing procedures, the finished material is calibrated and sorted into classes (Euro version) or grades (Russian equivalent).
In addition, the division of lining into classes or grades is also influenced by the internal specifications of the enterprise, which, if necessary, need to be further clarified.
| class/grade of lining | peculiarities | dignity | flaws |
| extra/higher | selected manually, installation is accessible even to a beginner | perfect surface, uniform color, absence of any defects | high price |
| A/first | high quality, suitable for front cladding | Smooth surface, excellent fit, no resin pockets allowed | Small non-through cracks are acceptable, no more than one knot per 1.5 square meters. meters |
| B/second | decent appearance, optimal combination of price and quality | imperfections can be puttied or hidden with colored varnish | no more than 4 knots per 1.5 square meters. meters, several non-through cracks are allowed |
| C/third | what is left after selecting higher varieties | low price | may have resin pockets, blind cracks, stains, knots |
Regardless of the type, defects in the finished wooden lining are unacceptable:
- areas of rot, rotten (dark brown or black) knots;
- perforating injuries or holes;
- wide chips or cracks;
- insect damage (wormholes).
There should be no traces of production left on the lining, be it any marks, traces of mechanical or chemical influence.
The first and second grades are considered the best for finishing a balcony; It is better not to take the third one, since when the temperature rises, the resin pockets will sweat. The highest grade is suitable for an unlimited budget.
Which tree is better
Lining is made from a variety of wood species; the choice of wood depends rather on the region and personal preferences. However, there are also general provisions:
- inexpensive conifers ( pine and spruce ) are well processed, retain their aroma and fungicidal properties for a long time, but do not tolerate fluctuations in temperature and humidity, release resin, and can crack;
- cedar and larch are much more expensive, but are less dependent on seasonal fluctuations in the atmosphere, retain their color for a long time, and look elegant;
- oak and ash are durable, do not rot, do not warp, and have a beautiful pattern;
- alder and aspen are affordable, moisture-resistant and easy to process;
- linden does not need constant varnishing, is not afraid of humidity, its natural shade can vary, but is prone to darkening over time.
When finishing balconies, it is recommended not to save money, but to take lining made of linden or alder as a more or less affordable option, or from larch or oak if you have the appropriate financial capabilities.
Conclusion
PVC and wood lining is one of the most popular and affordable materials used for DIY finishing of balconies. It is quite easy to install. The subsystem where the cladding will be attached allows for unnoticed installation of wiring, lines for split systems, and even pipes. It should be noted that installing a radiator is also a fairly common solution.
Wooden lining on the balcony: pros and cons
Many people prefer to cover their apartment balconies with clapboards because they see only advantages in wood. In many ways this is true:
- the tree is “alive” to the touch, it is pleasant to walk on it barefoot, it smells in the sun;
- wooden lining is easy to process and quite simple to install;
- the price is affordable, repair work is carried out easily and quickly, materials are always available;
- wood insulates from street noise and creates a special cozy atmosphere on the balcony.
Description of material
Lining is a cladding board made of natural wood - a high-quality, environmentally friendly material for interior decoration, which has excellent performance characteristics. This cladding is easily installed using the tongue-and-groove method and fits well into the interiors of country houses, saunas, baths, and in city apartments it can be found on balconies or loggias. Walls lined with clapboard create an atmosphere of homely warmth and comfort in any room.
Natural wood lining is an excellent material for cladding balconies and loggias
The material received its name “inherited” from the wooden strips (slats) with which railway transport cars were sheathed in the last century. Subsequently, they began to be used as a decorative element in the decoration of premises, and all similar products were called “lining”. In addition to natural wood cladding boards, there are its artificial analogues (plastic and MDF panels) - a material that is less expensive, but has poor performance characteristics and low quality.
How much lining will be needed to finish a balcony?
To decide how much lining you need to buy, you first need to do some small calculations:
- armed with a tape measure, measure the height and width of each wall (and ceiling) that will be covered with clapboard;
- determine the area of each part by multiplying the height by the width;
- add all the obtained values together, divide the sum by 10,000.
The resulting number is the basic need for lining in square meters. Lining is sold by square meters, not linear meters. When purchasing, it is recommended to add 10–15% in case of unforeseen situations (damage or defects).
Preparation for installation of lining
Wooden lining, even of the best varieties and made from the most expensive wood, is still quite a fragile material, susceptible to the influence of natural factors - humidity and temperature.
Therefore, before you begin installing the lining on the balcony, you need to make sure that:
- the balcony is waterproofed;
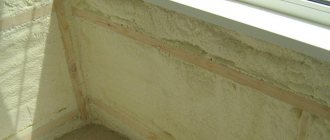
- the walls are leveled and insulated;
- window joints are insulated;
- surfaces are treated with antiseptics and antifungal compounds.
If we assume that some, even small, part of the wall will have access to moisture and cold from the street, then fungus will definitely grow there, the surface will warp, and the entire balcony will have to be disinfected and re-stitched.
In addition, if you are not sure that the lining has been treated against fungus and pests, this must be done a few days before installation yourself.
Plank profiles
Wooden panels for cladding differ not only in quality and size, but also in appearance and locking design. Taking into account the desire of consumers to create an individual design indoors, manufacturers produce several types of profiles. The following types can be used to cover a balcony:
- Standard. The length of the board is 2-6 m. The outer surface is smooth, carefully sanded. The cross section has the shape of a trapezoid. An additional chamfer (angular or rounded) is made on the front side near the tenon. This allows you to see clearly defined seams on the wall after installation.
- Softline. The surface has no corners, which reduces the likelihood of burrs and chips. The rounded profile creates an unusually decorative effect.
- American. The inner plane of the plank is supplemented with a special recess, which allows for overlapping wall cladding. There is no chamfer near the tenon; a smooth transition is made from it to the center of the front part. This design exactly imitates siding panels with reliable joining of elements.
- Landhaus. The front side of the parts is processed with a milling cutter, hot stamping or another method to obtain a complex pattern on the surface. The inner side of the lamella is flat with grooves. A reliable connection is ensured by the side joints in the form of spikes. The processing method makes this type of lining the most expensive.
- Block house. The front part is completely curled. After installation, it seems that the balcony is made of round logs. Grooves on the inside will allow moisture to flow freely. The type of joints is tenons and grooves. This material is often used to decorate saunas.
- Calm. The planks are similar in appearance to eurolining, but have a not so wide tongue-and-groove part. There is no chamfer near the tenon, which makes the seams faint after installation.
Lathing
Lining is extremely rarely attached directly to the balcony wall, only in those rare cases when there is no need for insulation and the walls are completely flat.
In the vast majority of cases, installation is carried out on a lathing - a special frame made of wooden slats, which is fixed to the concrete surface of the walls and ceiling. The lathing is needed so that the wooden slats do not come into contact with the concrete base, and to minimize their curvature. The space between the wall and the lining is most often filled with insulation.
Installation of sheathing and lining
At the very beginning, before installation, the curvature of the walls is determined using a level and markings are applied.
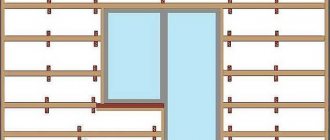
Depending on how the lining will be installed, the guide battens are chosen in the opposite direction - this is necessary to secure the structure and make it stable. Most often, the lining on standard balconies is fixed vertically, therefore, the sheathing slats need to be fixed horizontally.
Frame for covering the loggia
Frame for covering the loggia
Cladding always begins with the arrangement of the sheathing (frame). Actions for the initial stage:
- Check with a level the degree of evenness of all surfaces of the balcony.
- Install vertical slats, lay horizontal ones between them.
- Cut the guide rail to the required length.
- Mark marks for future fastenings, marking them with a pencil every 60-80 cm.
- Drill holes with a 6 mm drill (depth - 5-6 cm).
- Start work from the corner posts, laying three slats: at the level of the knee, hip, shoulder. Maintain an interval of 50 cm between them.
- Hammer the slats with dowels. Tighten with self-tapping screws, having first threaded plastic choppers onto the guides.
- Create a row of vertical slats.
- Pre-tighten the cord so that the sheathing subsequently lies flat.
- Mount and secure the remaining beams.
How to properly secure the lining
Lining on slats can be secured in two ways:
- open, on finishing nails (with a small head);
- hidden, on clamps.
Each method has its own advantages and disadvantages. For example, a nail driven into a groove has a very high probability of splitting it, which will later lead to the lamella falling out. You can, of course, hammer nails into already drilled holes, but this is extra work.
And in any case, the connection point will be too noticeable, and when decorating the front of a balcony, this is more of a disadvantage than an advantage.
Therefore, most people prefer clamps: metal fasteners that hold onto the rail, and the lining is held by the groove with a tongue of a certain shape.
We place the clamp on the self-tapping screw to the sheathing
It is important to choose the right clamp; for this you need to focus on the size of the tongue and the thickness of the lamella. For standard eurolining, a 4 mm clamp is suitable; for other models it is better to take 5 mm. For the highest profiles, a 6 mm clamp is suitable.
The wooden lining is fixed starting from the extreme corner on the side of the working hand. The very first board is fastened with self-tapping screws (this part will be hidden by moldings at the end), the subsequent ones - in the groove and on the gluers in the rear groove to the guide rails.
If the joints do not connect well, the incoming lamella can be slightly tapped through a spacer (for example, part of a rail) so as not to spoil the surface.
To prevent the lining from bursting under the pressure of the self-tapping screw, you can first drill out the hole a little with a small drill.
After the ceiling and walls are sheathed, decorative elements, moldings and baseboards are installed. They are fastened with special nails in increments of no more than 5 centimeters.
What do you need for work?
In addition to the lining itself, you will need construction tools and accessories.
Tool:
- Hammer/drill, preferably high power;
- Screwdriver (preferably, but you can use a drill);
- Bit holder and bit set for screwdriver/drill;
- Hammer;
- Hacksaw/jigsaw;
- Various brushes for applying primer and antiseptic;
- Building level;
- Pencil, ruler, square.
Materials:
- Polyurethane foam;
- Polyethylene foam;
- Scotch tape (painting);
- Frame material (metal profile or timber);
- Lining;
- Holders for lining;
- Nails, screws;
- Decorative elements (corners, baseboards);
- Varnishes/paints for wood);
- Priming;
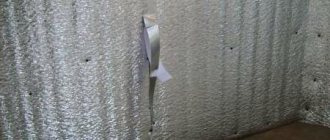
If necessary - insulation, film to protect the insulation.
How to cover the lining on the balcony
After the balcony is covered with clapboard, it is recommended to further process it. It is best to use protective impregnations that will preserve the texture and pattern of the wood and prevent it from fading in the sun.
Several layers of varnish will give the balcony an elegant look and extend its service life by at least ten years.
But stains or other coloring compounds will spoil the natural beauty of the wood, so they should not be used.
Subscribe

