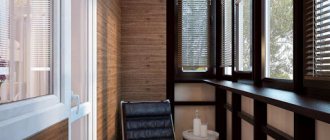
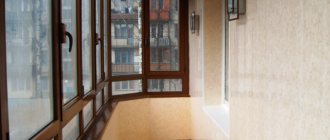
The development of some residential buildings does not require balconies on the first or even second floors. Such apartments have limited space. However, this problem can be solved if you set out to add a loggia to the room. This will significantly expand the space and arrange additional square meters to your liking. Of course, installing a balcony with your own hands is a labor-intensive and costly process. However, if the project is designed correctly, it is not so difficult to complete. In most cases, you can do a balcony extension yourself, subject to obtaining the appropriate permits.
This is a very important issue, since any redevelopment must be carried out in accordance with the law. If the owners of apartments on the first or second floor begin the process of unauthorized construction of new structures, they will most likely have problems with the building management authorities. As a result, they will simply be given a conclusion on the demolition of the constructed balcony.
Preparation of necessary documents
The most reliable way is to first consult with familiar architects and lawyers. They will tell you who is best to contact in order to quickly obtain a building permit from the appropriate authority. Most likely, you will need the following list of documents:
1. Papers confirming that you are the owner of the apartment or ownership.
- Information from the Technical Inventory Bureau containing the floor plan.
- Consent of housing and communal services.
- It is also necessary to collect signatures from neighbors, thereby confirming that the other residents are not against the addition of a loggia.
- Redesign drawing or diagram.
- Your actions must also be coordinated with the utility service.
- Obtain permission from your city's Department of Architecture.
- Submit a corresponding application to the district administration.
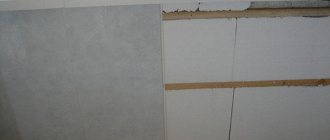
Types of sheathing
Lathing scheme for panels or lining
The material and method of assembling the lathing directly depends on the finishing and on the structural features of the insulated balcony. The frame is assembled either from wooden blocks and slats, or from galvanized profile , which is often used for plasterboard structures.
Metal profile lathing
In addition, there is also a plastic profile, but due to its high price and low strength indicators, it is used quite rarely (most often, it is ceiling lathing).
Wood is a natural and warm material; condensation does not form on it, unlike metal, and it is easier to work with. For a balcony, this is a more preferable option, but with some reservations. It should be remembered that under certain conditions wood is subject to deformation; therefore, when choosing bars for sheathing, it is necessary to pay close attention to their quality.
Excessively high humidity of the wood can lead to the fact that when it dries, it will lead, and with it, possibly, the entire structure. The ideal option is dry planed timber of coniferous species (pine, spruce, larch).
Planed dry lath 20x40mm 3 m long will cost 50 rubles.
This will cost 2-3 times more than conventional scaffolding, which is also applicable (if you have the opportunity to choose and confidence in your own competence to make the right choice). In any case, it would be a good idea to treat it with an antiseptic solution before starting to assemble the frame.
To prevent the bars from moving, we foam the cracks!
A structure made from galvanized profiles will cost more than from scaffolding, but cheaper than from dry joinery. The main disadvantage is the high thermal conductivity of the metal, up to freezing in winter when located close to the street.
Assembly method
There are two options - either a horizontal arrangement of load-bearing elements or a vertical one.
Vertical arrangement of the sheathing
As a rule, various types of lining, including MDF and PVC, are mounted vertically, which implies a horizontal arrangement of the wall sheathing.
Horizontal arrangement of sheathing with vapor barrier
In the case of sheet finishing materials (plasterboard, OSB), there is no fundamental difference. The main thing is that the rail is located along the entire perimeter of the sheet being screwed, and the internal space is filled with sufficient frequency.
Types of balcony structures
The supporting slab of the attached loggia can be attached to the wall of the building in different ways.
Exterior view of the cantilever slab
In this regard, the following options for the arrangement of architectural elements are distinguished:
- Balconies with a cantilevered slab, which in one part fits into the wall, as if “pinched” into it. This is how most balconies in standard high-rise buildings are built.
- With a stove on console blocks. They are inserted into the structure of the wall. Such structures are used to add balconies to private houses.
Balcony with supporting structure on cantilever blocks
- Supporting the base plate on brackets. Such add-ons are quite durable.
Supporting the load-bearing wall of the balcony on brackets
- The base of the future loggia can be attached to the wall on one side, and rest on the column on the other. Such designs are convenient to use for wide load-bearing slabs.
- Extended balcony. This type of extension is a separate structure supported solely by columns. In this case, the attachment to the wall of the building is only partial or completely absent.
Attaching the frame base to the walls
To attach the frame to the wall, you must first secure the insulation. After which it is necessary to build a frame for future panels. To begin with, you should measure the length, the distance between the main planks running along the entire wall, after securing which, you should measure small sections around the windows and doors.
After that, planks are fixed along the contour of the wall (including additional ones, above the window, and along the contour of the walls); they are needed only for reliable fixation of a special profile for hiding the ends of the panels.
They are attached to the base with self-tapping screws 70mm long every 500mm. It is best to mark the attachment points on the floor, then screw them to the length of the stick, then screw them in place to the base. At the bottom, the planks are fixed 30-50 mm from the floor, at the top - at the level of the ceiling elements.
You need to mark the places where the screws are attached to the planks after the final fitting and cutting; it’s easy to forget about the cut off small piece, and it’s even easier to step on it.
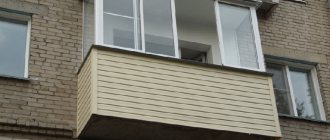
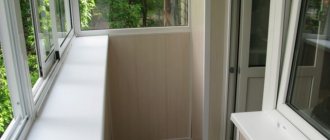
Installation of a loggia on the first floor
The problem of lack of additional space is relevant in most cases for owners of apartments on the lower floors. Often, installing a balcony with your own hands is simply a necessity.
Self-installation of a balcony
In this case, two types of extensions are used - suspended and attached structures.
Suspended Balcony Structure
To install such a balcony on the ground floor, you will need a metal frame, which will be fixed to the wall of the house. This frame is made from corners of a certain size. The base will be products 60X60 mm, for the railings you will need corners 45X45 mm. In this case, the base should be an isosceles right triangle.
After completing the welding process, you need to screw the base to the wall using anchor bolts. Reinforcement should be attached to the protrusions of the base on top. This metal frame will become the basis for the floor of the loggia. Then the fence is attached, the window is dismantled and a doorway is created in the wall. When the base of the suspended balcony is ready, proceed to the construction of the floor. This will require wooden logs. It is better to immediately insulate the floor, and then lay out a decorative coating. You should also weld a sheet of metal underneath for greater strength. Professional sheets are suitable for external finishing. The next stage is glazing. This process is no different from installing windows on ordinary balconies.
Standard balcony on the ground floor
If it is necessary to increase the area of the extension, install a balcony structure with an extension. In this case, you need to take into account the appearance of the future loggia. Therefore, it would be useful to appropriately design or finish the supporting frame.
Extended balconies
Most often, installing a loggia with your own hands is done using an attached type of structure. An extension is made to the facade, and the entire structure of the balcony is supported by the foundation.
Attached structures have their advantages: they allow a large reach from the wall and allow you to increase the area of the loggia.
Work is being carried out from the foundation. First, markings are applied. It is important to avoid mistakes and check all parameters with the diagonals. After this, they dig a hole under the foundation and strengthen the standard foundation blocks in it. It must be taken into account that the depth of the pit will be greater than the depth of freezing of the ground. The height of the foundation of the balcony and the building itself must be at the same level. In terms of external cladding, the foundations of the superstructure and the house must also be in harmony. It is necessary to maintain unity of style.
Then the walls of the loggia are made of brickwork. The height should coincide with the balcony board of the house. The ideal thickness is 250 mm. The brickwork itself is adjacent to the wall as closely as possible.
The second floor balcony slab can form the basis of the roof. In the case where the extension is much larger in size, it is necessary to install a separate roof.
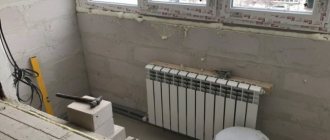
After this, an entrance is cut, a balcony block is installed, and the room is insulated. When designing the opening, do not forget that the balcony door always opens into the room.
Features of balconies
Mounted
Hanging balconies differ from permanent balconies in that they can be installed on any floor, regardless of whether there are balconies below or not. They can be installed anywhere, since they are mounted on a special frame, which, in turn, is fixed to beams.
You can also hang clotheslines there, install a drying rack, a window sill, or put a flower pot there. The differences, in general, are exclusively in design terms. But there is one very important “but”: such buildings need additional strengthening.
Scheme of strengthening the slab of a small balcony using guy wires
Moreover, the brackets and the metal frame itself rust over time; the structure will have to be strengthened at least once every 5 years. This rule should not be neglected, because you need to understand that we are talking about the safety of human life.
Before talking about the features of permanent balconies, it is worth adding that most often plastic material such as PVC or siding is used for finishing hanging balconies. A window sill, clotheslines, a flower pot and a dryer can be installed there, we must repeat, the same way as on a permanent one.
Capital
As it is not at all difficult to guess, a capital balcony is a structure that extends from the load-bearing wall of an apartment building. In new buildings, all such structures are exclusively capital.
Basic methods of fastening balcony slabs
On the one hand, such a design can withstand a very heavy load. On the other hand, it is extremely difficult to repair it; it will require a lot of time and a lot of money.
To drain water, even in capital balconies, the slab is laid at a certain slope.
The main thing that needs to be done when strengthening such a structure is to strengthen the load-bearing balcony slab, fences, parapet and everything else - this is also important, but secondary.
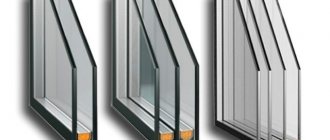
You can also install clotheslines on the loggia, put a flower pot, install a window sill in front of the parapet, organize a dryer, do glazing by installing any window, whether plastic, wooden or aluminum.
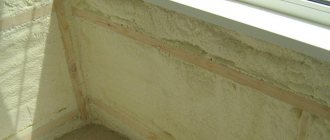
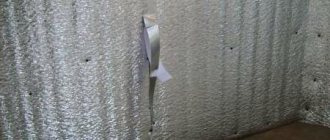
Insulation and waterproofing
Insulating a balcony with mineral wool
Lathing under PVC panels on a balcony requires additional insulation and waterproofing. Foil materials are used for work. They are easy to install and practical. Attached to the base before installing the frame. Mineral wool or expanded polystyrene are also used for insulation. In this case, the sheathing is first made, and then the protective material is fixed.
Mineral wool is more in demand among builders. It has a low cost, is easy to install, provides reliable thermal insulation, is resistant to fire, quickly dies out when smoldering and does not release substances harmful to health into the space.
The waterproofing is fixed on top of the insulation. Staples are used for fastening. It is important to install the film so that there are no cracks or tears in it. Otherwise, even minor damage may seep in moisture. The waterproofing material is attached with an overlap of 10 cm. The joints between the sheets are taped.
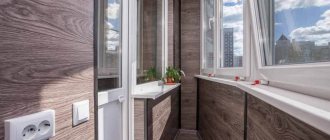
Balcony lathing helps secure the facing material and insulation. In this way you can make the room more comfortable. It is quite possible to carry out all the installation work yourself, but you must strictly observe the installation nuances depending on the chosen material. You should also not forget about preparing the elements and bases. Step-by-step instructions will make installation quick and easy.