The balcony in the apartment is used as additional space. To make it residential, and therefore expand the area of your apartment, you need to think about thermal insulation. And to make it comfortable to be in, it’s worth working on its decoration.
As a result, you will have at your disposal an additional, albeit small, room where it will be comfortable both in the warm and cold seasons. Below are step-by-step instructions for putting this space in order so that it is pleasant to be in it.
Preparation for repair
At the stage of preparation for repairs, it is necessary to create a project, according to which the work itself will then be carried out. Even at this stage, they find out the costs that the homeowner expects. Before you make a balcony with your own hands, you need to determine in what order the individual operations will be carried out.
You need to choose ideas for a balcony that appeal to all family members, including photos on the Internet, and determine at a general meeting which of them will be used in the future.
Also, at this moment it is determined whether the balcony space will be heated or not. If the answer is yes, then choose the best heating method. In addition, they decide what material will be used to decorate the outside of the structure and insulate it.
Along with general decisions regarding repairs, the preparatory stage also includes a number of works, including:
- Removing dirt from the surface of the balcony and dismantling the old finishing of the balcony, including cladding and a layer of paint;
- Identification of voids in the floor and ceiling, if necessary, strengthening of the balcony slab;
- Construction of a parapet and additional partitions, or if they already exist, but are not in the best condition, repair them. It must be remembered that the balcony cannot bear too much weight of the structures. To avoid this, you can use foam blocks or other building materials with low mass for the parapet;
- Sealing cracks and irregularities on the surface of the balcony with cement-sand mortar;
- Leveling the loggia floor to obtain a smooth surface.
When the space preparation work is completed, the main repairs need to begin.
Construction of a balcony on a foundation
Foundation
Extension of a balcony
If the balcony is attached to the first floor, a simple strip base will be sufficient. If you are constructing an extension on the higher floors, build a strip-column foundation.
In general, the procedure for arranging concrete foundations remains almost the same. The following are instructions for constructing a strip-column foundation. By removing recommendations for installing poles from the manual, you will receive ready-made instructions for installing a strip base.
Foundation
First step. Mark the future foundation on the ground. Use pegs and string to mark.
Marking
Second step. Get rid of the top layer of soil. Dig a trench of the required depth (determined in accordance with the soil characteristics of the area) and holes for the posts.
Third step. Drive (screw in) the support piles. You can also make supports yourself from pipes, concrete pillars or other suitable materials. To ensure additional strength of the installation, before installing the pillars, the bottom of the pits can be filled with a 20-30 cm layer of concrete. The empty space between the walls of the pits and the pillars after their installation is also filled with mortar.
Fourth step. Compact the bottom of the trench, fill it with a 10-centimeter layer of crushed stone and a 15-20-centimeter layer of sand. Thoroughly compact each layer of backfill.
Fifth step. Assemble the formwork from durable boards.
Sixth step. Lay the reinforcing frame. Use reinforcement with a diameter of 10-14 mm. As a result, you should get a reinforcing mesh with a cell size of no more than 150x150 mm.
Seventh step. Pour the concrete and give it a month to gain strength. It is recommended to dismantle the formwork after the concrete has completely hardened.
Eighth step. Cover the frozen foundation with waterproofing material (bitumen, roofing felt).
Ninth step. Fill all voids with soil.
Tenth step. Tie the pillars along the upper edges using a channel. The height of the foundations of the balcony and the house must be the same.
Forming a balcony frame
Balcony design
First step. Lay wooden logs or a reinforced concrete slab on the finished base.
Do-it-yourself installation of an extension ceiling
Second step. Using a hammer drill, create an opening in the wall for installing a balcony block.
Third step. Install the balcony block. After installation, level the slopes with cement mortar and seal any existing cracks with polyurethane foam.
Balcony block
Fourth step. Build walls. For this, it is most convenient to use building blocks, for example, made of foam concrete. They have a relatively light weight and will put a noticeably less load on the foundation compared to the same brick.
Parapet made of foam blocks
The thickness of the walls should be at least 25-30 cm. Bring the walls to the upper ceiling.
During the construction of walls, perform reinforcement every 3 rows.
Finally, all that remains is to arrange the roof. The roof structure must be made with a certain slope in the direction from the house.
To equip the roof, it is enough to lay wooden logs or mount a metal frame, and then lay the finishing roofing material.
Roof
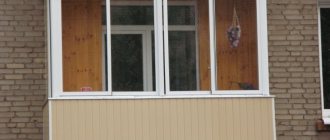
Glaze the balcony. After this, all you have to do is insulate and finish the finished structure. Recommendations for conducting these activities will be presented below.
Glazed balcony
The diagram shows the installation of balcony frames with offset
Choosing the right glazing
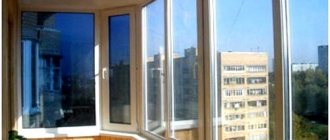
The initial stage of the repair procedure is the selection of glazing for balcony windows and then its installation. There are two options, “cold” and “warm”.
- Cold glazing means installing window products made of polyvinyl chloride or aluminum, in which the glass is made of a single layer. This system will protect those on the balcony from gusts of wind, dust will not penetrate into the space, and rain and snow will not get there. But in this case the heat inside the balcony will not be retained. And in the cold season there will be low temperatures.
- Warm glazing means that window products made of wood, warm aluminum or PVC profile are installed on the balcony, and a single-chamber or even double-glazed unit is placed inside. Then those living in the apartment can go onto the balcony and stay there for a while even during the cold season. Another case is the glazing of a balcony, when this space is supposed to be connected to the living room to which it adjoins. Then they buy structures that have an installation width of 70 millimeters or more, inside which there is a double-chamber double-glazed window, the thickness of which is 40 millimeters.
Glazing a balcony with your own hands is not difficult for a person with minimal repair experience, and inviting a specialist for this purpose is acceptable, but not necessary.
Construction of an external balcony
This method allows you to build a balcony above the first floor.
Installation of balconies
Frame
The construction of the structure begins with the arrangement of the frame.
First step
Attach a 5x15 cm beam to the load-bearing wall. Use anchors for fixation.
Second step
Supporting structure Supporting structure Supporting structure
Install the main supporting structure on the previously fixed beam. Fasten it so that after installing the floor, its total height is 50-100 mm below the door threshold. This will eliminate the risk of atmospheric moisture entering the room.
Basic structure
Basic structure
Third step
On the opposite side, mount a longitudinal support element and install transverse beams on it. The supporting element is located on the columns. At the same time, its installation level should be made with a slight slope (2-3 degrees will be enough) to ensure effective removal of precipitation from the house.
Balcony frame
Balcony frame
Frame
Struts
Perform additional strengthening of the frame using struts. In such a situation, the function of struts will be taken over by inclined elements, resting their lower edge against the supporting column or load-bearing wall, and with their upper part against the transverse beams.
Thanks to the struts, the stiffness of the balcony will be significantly increased.
In some situations, it is more convenient to use wooden triangles with right angles, made from thick and durable boards, as struts. At this moment, be guided by the situation.
Installation of a balcony block
Support columns
The main support of the structure under consideration is a strip-column foundation. Recommendations for its arrangement were given earlier.
A wooden beam of square section will perfectly cope with the functions of supporting columns. Select the parameters of the timber individually. Most often, supports with a side of 100 mm are sufficient. Instead of timber, you can use another suitable material at your discretion.
The columns must be installed strictly vertically, otherwise there will be no question of the reliability of the balcony structure. To ensure verticality, support the columns with temporary struts while the foundation dries.
Construction of a balcony
Floor
Floor on the balcony
Lay a 4 cm thick planed board on the floor. Pre-treat the material with an antiseptic and fire retardant.
Lay the boards across the support beams. Leave a 2-3 mm gap between the boards to drain precipitation.
Use self-tapping screws to secure the boards. The heads of the fasteners should be slightly recessed into the material.
Floor on the balcony Floor on the balcony
Railing
And the last structural element of the balcony is the railing. The choice of manufacturing material, design features and appearance of the railing remains at the discretion of the owner. If you wish, you can do without them altogether by making fences of suitable size from concrete slabs.
Glazing
For glazing, you can use wooden frames or metal-plastic structures. At this point, everything also remains at the discretion of the owner.
Laying lags
Often the balcony floor has an uneven surface because the house is not new. During operation, many cracks, potholes and irregularities form in it. Also, the floor is often not completely horizontal; it runs with a slight slope in the outer direction, designed to divert precipitation that gets inside.
If the unevenness on the floor is very pronounced, then leveling it with a cement screed means that the mass of the entire structure will increase noticeably. Also, after the screed is completed, the cement will dry, which will take a certain period; during this time, work will not be possible, so the repair will be delayed.
There is another option, leveling using logs made of natural wood (light wood species). Floor joists are wooden blocks with a square cross-section of 50x50 millimeters; you will also need plastic spacer wedges and anchor dowels.
Before laying the logs, you need to make sure that they do not rot. For this purpose, the workpieces are treated with impregnation or an antiseptic, then dried.
Before laying the logs on the balcony floor, it is covered with a layer of waterproofing film. Alternative methods are laying roofing felt or mastic with a bitumen base.
Decorative rock
This material owes its particular popularity to its qualities:
- Strength.
- Resistant to temperature changes and high air humidity.
- Ease of construction work.
- Beautiful view of the walls after finishing.
Decorative stone has a wide price range, depending on the manufacturer, texture and quality.
Lathing walls and ceilings under panels
The next stage of finishing the balcony with your own hands is lathing the ceiling and walls. The sheathing itself is a timber structure that acts as a frame for the balcony. Subsequently, the interior finishing of this balcony is mounted on the sheathing. The sheathing is made from high quality timber, it is required that it be dried. Before installation, it is necessary to coat the timber with an antiseptic, which will increase the service life of the sheathing. The thickness of the lathing depends on what kind of insulation will be used on a given balcony.
First you need to apply markings to the walls and ceiling, which will make it possible to accurately determine where the individual elements of the sheathing will be located.
Then the timber is cut into pieces of the required length and attached to the walls with dowels, carefully observing the markings.
Construction options
There are 2 main options for building a balcony, namely:
- on the foundation. This option is suitable exclusively for owners of apartments located on the ground floor. Also, such a balcony can be attached to a private house;
- on a hanging frame. The structure is carried forward from the wall of the building and is mounted on a frame made of metal elements or on brackets.
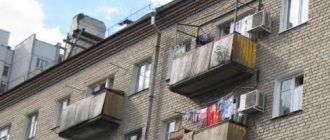
Free-standing balconies on supports
If the structure is attached to the second and higher floors, it must have additional supports. It is prohibited to attach the building exclusively to the wall - it will not hold up.
The function of supports is most often performed by columns. They fit well into the surrounding environment and complement the architecture of the house.
Before starting work, draw up or order from a specialized organization a balcony project with a detailed diagram.
Lighting and socket connections
If the householder decides to connect the balcony to the electrical network, then this stage of work is carried out at the same time as the installation of the sheathing. Inside the balcony, electrical cables and other communications are laid, and the points where sockets and switches will be located are also determined.
Even before performing all operations, you need to decide how many lighting fixtures will be located on the balcony. You need to know, preferably accurately, about the total illumination power. Taking into account this value, the method of power supply is selected. It could be:
- Socket in the apartment, which is located at the shortest distance from the balcony;
- Junction box;
- Electrical panel
To protect these communications from any accidents, it is necessary to take the electrical wires into special metal sleeves, which will significantly complicate access to them.
What is included in the finishing work?
The main point is the correct finishing on the balcony. It consists of the following components:
- strengthening the skeletal structure of the balcony;
- installation of modern heat-saving window openings;
- installation and insulation of the roof;
- siding or other similar material is installed on the outside;
- parapet insulation;
- installation of a warm electric floor;
- supplying lighting and electrical sockets to the balcony;
- arrangement of a cozy and comfortable room.
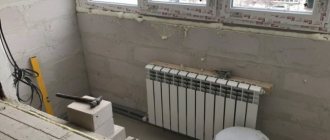
Insulation of walls, ceilings and floors
Inside the balcony you need to insulate the walls, with the exception of the one that separates this space from the rest of the apartment. The ceiling should not be insulated if the floor is insulated on the balcony located directly above it. And if the ceiling is insulated below, then this loggia does not need to insulate the floor.
You can prevent heat loss from the loggia space by insulating the walls with one of several materials. Among them:
- Polystyrene foam, which gives a good level of thermal insulation. This material also has a low mass and low price.
- Mineral wool has excellent thermal insulation. At the same time, it absorbs moisture well, accumulating it, therefore, if this material was chosen, it is necessary to provide a layer of waterproofing;
- Penoplex is a material with good strength and does not suffer from moisture;
A common technique when repairing a balcony with your own hands is a combination of two materials. So, penoplex can be used to insulate floors and walls, and for the ceiling you can purchase polystyrene foam due to its low mass. Individual insulation elements are installed in the spaces formed by the sheathing, using foam or glue to secure them in place.
Nowadays, foil-coated thermal insulation materials are increasingly used.
They make it possible to simultaneously solve both the main problem - thermal insulation, and achieve good moisture insulation.
How to dismantle balconies (loggias) and repair damage with your own hands
To begin repairing the balcony, you need to do preparatory work. First of all, you need to take off the old shirt, unscrew and take out everything that is not included in the balcony package.
Now you should check for damage that may have occurred over time. These may be cracks and crevices along the edges that need to be eliminated. To do this, the surface is cleaned of all debris, stones, and chipped parts. After this, the damaged areas are treated with a primer, you need to wait until it dries and apply a cement layer. For minor damage, one cement layer is sufficient. The cement mixture must contain an adhesive base so that it does not erode or crack.
If the cement surface has various voids, then they must be carefully cemented.
Selecting materials for finishing walls, floors and ceilings
Now there are a lot of materials that are used to cover walls during the repair of balconies and loggias. It is not difficult to decorate the inside of a balcony with your own hands using any of them; the owner of the house can purchase any of the materials mentioned below.
Fiberboard or PVC panels are common, as are oriented strand board and plasterboard.
Among natural materials, it is worth mentioning wooden lining.
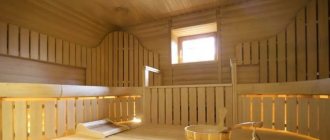
The lining has excellent environmental characteristics, it is easy to work with, and this finish will retain its appearance for a long time. And, of course, she looks great.
You can start installing it from any selected corner of the loggia, with the very first element being installed using a level. Following this, subsequent panels are placed so that they fit into the groove of the previous ones, so finishing the balcony with clapboards with your own hands is done simply.
There are also a lot of materials on the market for flooring. You can build a plank floor, cover it with laminate or linoleum, or lay ceramic tiles. The choice depends on the financial capabilities and design requirements of the homeowner.
The ceiling can be finished with PVC panels or the natural material described above - clapboard. In addition, you can install a suspended ceiling. Standard whitewashing is also a completely acceptable option.
The use of PVC panels is a very practical option, which at the same time leaves room for design delights, since these elements can not only be given any color, but also products similar in appearance to marble, stone or wood can be purchased.
When installing the covering on the ceiling, it is important to ensure that in its finished form it does not interfere with opening the balcony window.
Loggia 6 sq. m.
Photo of the renovation of the 6 sq.m. loggia. m clearly illustrate the fact that a large space opens up a wide field for the imagination.
Here you can not only functionally use square meters, but also introduce into the interior those decorative details that would hardly be appropriate if there were space restrictions.
- The recommended color scheme for a room of this size is warm, pleasant shades. They will create an indescribably cozy atmosphere.
- The walls should be finished with Venetian plaster, choosing a composition in beige-pearl tones. It looks impressive and stylish. In this case, you can do without any decorative addition.
- The partition under the double-glazed window should be coated with white paint and decorated with square panels in pinkish-chocolate tones, stylized as compact cabinets.
- A glossy stretch ceiling would be appropriate in such a loggia. It will allow you to visually expand it. As for the lamps, it is worth stopping at a chandelier with semicircular shades and several sconces. As for the floor, it is better to use laminate. It should be darker than the decorative panels.
- Blinds should be installed on the windows - they will protect the room from the hot sun. Wicker chairs and drawers, a round tea table, and a couple of modern linens will perfectly complement the decor.
Slope finishing
You can finish window slopes when repairing a loggia with your own hands using plaster, plasterboard sheets and plastic panels:
Verification of meters in Moscow- Scaffolding company Podem
LG TV repair in Astana
- Plastering is the standard option. It is generally very common, but due to the proliferation of alternative options, its demand is decreasing. This is a relatively labor-intensive job, and the sound and heat insulation in yoga will not be too high. At the same time, the costs will be relatively small.
- Drywall. Similar to plaster, this material does not have a very significant price. But in addition to this, it is also easy to install on slopes. Its disadvantage is that it is not very resistant to moisture.
- PVC panels. Their installation is also quick, they are not susceptible to the effects of time and do not suffer from ultraviolet radiation. The best solution is to decorate the slopes with PVC panels, also using them to cover the walls.
Drywall
This material is popular among craftsmen and apartment owners:
- The material is easy to use in practice and is easily applied to the underlying substrate.
- Combines well with other finishing materials.
- Does not contain toxic impurities.
- Can be used as a basis for subsequent painting, wallpapering or clapboard.
- The use of the material allows you to realize a wide variety of ideas for decorating a loggia: from high-tech to elegant baroque.
In addition to all these advantages, the porous structure allows the material to “breathe”, maintaining natural air circulation.
Installation of the lamp
To illuminate the loggia, you can use standard chandeliers, floor lamps, sconces, LED strip, as well as spotlights. In cases where the size of the loggia is significant, it is necessary to take care of comprehensive lighting so that individual devices illuminate individual parts of its space.
You also need to make a careful choice between direct and diffuse light sources.
Direct light makes sense if you want to create a reading space, illuminate a clearly defined area or object, or if the space has a low ceiling. Diffused light helps create a generally comfortable environment in the room.