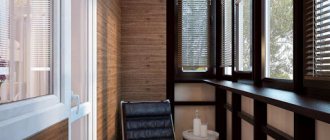
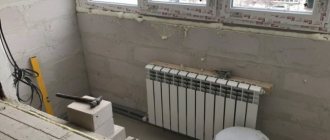
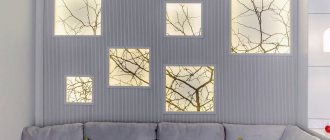
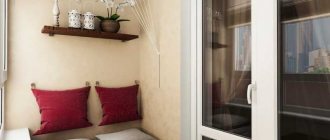
Often, when repairing a balcony, the ceiling is ignored. But many types of materials used for this purpose not only add aesthetics, but also increase thermal and sound insulation. A balcony or loggia can be turned into a full-fledged, albeit small, room, where it will be cozy even in winter. Let us consider in detail what materials are permissible to use, analyze their pros and cons, as well as the subtleties of installation.
Features of the ceiling design on the balcony
The format of most balconies is small; loggias have a larger area. The total footage of surfaces is not as large as in living rooms, so repair costs are slightly lower. A space that is insulated or added to an adjacent room requires insulation and sealing to protect it from weather and climatic factors.
- First they do general modernization and insulation, then they decide how to make a ceiling on the balcony.
- Glazed options provide additional insulation.
- If this is the top floor, you need a reliable canopy to prevent precipitation and ice from falling from the roof into the residential area.
- The interior lining should be in harmony with the ceiling decoration and lighting.
- In some cases, you have to start with repairing the ceiling, behind which the wiring and insulation boards are hidden.
- The balcony slab is made of cement. Therefore, it is always quite cold and attracts dampness, from which the insulated space must be protected.
Note! Natural wood used in wall, siding and ceiling cladding requires a fungicide treatment. This will prevent the “living” material from rotting and fungal infections.
Waterproofing of the ceiling slab and its joints is necessary, even if leaks are not visible. If there is heavy rain, this will be revealed and the repair will have to be redone.
Even capillary seepage of moisture will create a favorable environment for mold - a glazed loggia will cause allergic reactions and discomfort from the smell of dampness.
Plastic panels
Using plastic is a cheap and easy cladding method. The panels can be installed on a frame or glued to a concrete surface. If you plan to install lighting fixtures on the ceiling, holes for them should be cut in the plastic before finishing.
Advantages of a ceiling surface made of plastic panels:
- can be washed;
- the coating is not subject to corrosion damage;
- during frame installation, the products can be easily dismantled;
- there is no need to prepare a high-quality foundation.
If you need to imitate a wooden surface, choose laminated plastic lining with the texture of wood, which costs much less than natural wood. When the panels are mounted using a frame method, you need to ensure that there is enough space between the top edge of the door and the floor slab to open the balcony.
Choosing a Ceiling Plate Finish
After insulating the ceiling on the balcony, they move on to covering the surface. This should be a coating characterized by high aesthetics, practicality and excellent technical characteristics.
Concrete has a porous structure that is prone to moisture accumulation. In a frosty winter, the slab may crack due to a sharp jump in temperature. Therefore, the finish must be multifunctional in order to protect the ceiling from shedding, cracking and the appearance of microflora.
Helpful advice! Entrust the glazing of the balcony, insulation and installation of lighting fixtures to specialists, and, in order to save money, do the cladding yourself.
Isolation principle
The effect of moisture on a balcony slab can be destructive, and this is far from an exaggeration. If the structure does not have external protection from water, the liquid will gradually penetrate into small pores and cracks, triggering erosion processes. When the temperature drops below zero, such deformation effects will only intensify, which will lead to the appearance of the following defects:
- Cracks.
- Caverns.
- Areas with concrete crumbling.
Concrete itself is considered a porous material, therefore, with the gradual accumulation of moisture, so-called leakage paths begin to form in it, which soon become visible and progressive. Particularly affected by the problem is the junction of the slab with the vertical wall. In the absence of good waterproofing, this phenomenon contributes to increased dampness, as well as capillary spread of moisture into the walls, which leads to negative manifestations indoors.
Also, danger may be present in the end part of the slab, since frequent changes in temperature and humidity lead to erosion and gradual damage to the concrete, followed by shedding and coloring.
In addition to erosion, the balcony begins to undergo corrosive processes, as a result of which its load-bearing capacity suffers. The design itself becomes dangerous to operate.
If you fail to complete waterproofing work on time, you will greatly regret it in the future, because this will entail the need for incredibly expensive repairs with the involvement of professional specialists. To avoid such consequences, it is necessary to responsibly approach the issue of waterproofing an open balcony slab. A wide variety of tools are available on the market to implement such tasks. Some formulations are produced by foreign companies, while others are domestic.
At the stage of treating the balcony with a waterproofing layer, it is necessary to remove all vulnerable areas, places of deformation, crumbling and oil stains. Any cracks must be smoothed in depth and width by at least 5 millimeters. It is also necessary to remove dust from the surfaces in order to achieve a perfectly flat surface. The treated slab must be coated with a special repair compound, following the instructions.
Tension fabric
Among the finishing options with insulation, it is proposed to choose a suspended ceiling on the balcony. Wires and sprayed insulation (polyurethane foam) will be hidden behind the flexible membrane. The implementation will be inexpensive - just one piece of PVC roll is enough, which does not require soldering.
Options for decorating stretch film:
- Glossy;
- Matte;
- Plain;
- With color printing;
- With photo print.
Important! Gloss has the property of mirror reflection; it is used to create the effect of visual expansion of space. However, if the balcony faces south, it is advisable to choose a colored or dark panel. A white or silver membrane with gloss will be blinding, interfering with proper rest after lunch.
The elastic film is easily mounted and attached to a harpoon fastener; it falls into place after treatment with a heat gun. Equipment can be rented. The material will not lose its properties for many years, withstanding temperature fluctuations well.
It is worthwhile to correlate the level of the membrane with the height of the balcony in advance - opened plastic windows should not come into contact with it. Sagging slightly, the film can become deformed from contact if the transom is frequently opened.
Wood paneling processing
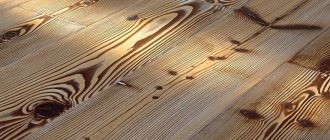
Recently, the option of finishing with wood, that is, clapboard or board, has been in particular demand. It is called a false ceiling and is produced by filing boards and panels to guides on a concrete slab. This option is great for open and glazed balconies, since with its help you can achieve additional thermal insulation, as well as get rid of various chips and visible defects.
Wooden structures fit perfectly into the classic style and combine well with wooden wall cladding. To extend its service life and create an attractive shade, wood can be treated with a coloring compound or a special oil-based impregnation. The advantages of this finishing option include:
- Attractive design and many textures depending on the type of wood.
- Natural and environmentally friendly.
- Affordable price.
- Easy DIY installation.
- Possibility of installing additional thermal insulation.
- Long service life. With proper care and maintenance of the ceiling, it can serve its owners for more than 20 years.
As for the disadvantages of wooden finishing, among them there is instability to the effects of fire, strong vulnerability to putrefactive processes and mold formation, as well as the need to constantly care for and treat the material with various impregnations. In any case, such disadvantages are completely offset by the advantages of lining.
To decorate the ceiling with wood, you can use any existing wood options: lining, imitation timber, block house, as well as regular planed boards. When laying the finishing, it is advisable to maintain an arrangement across the ceiling, which will allow you to achieve the visual illusion of expanding the balcony.
Dropped ceilings
The radical difference between suspended and suspended ceilings is that individual modules are attached directly to the base. The convenience of this design is the built-in lamps and facing slabs of the same format.
You can choose polymer slabs with a mirror effect, as in this photo - a beautiful suspended ceiling on the balcony.
- It is proposed to use panels from any facing material.
- If desired, the process can be entrusted to specialists, speeding up the repair of the balcony several times.
- Such an installation will take up a little of the height of the walls on the loggia and at the same time hide the wiring.
- This cannot significantly affect the feeling of freedom - there will be no sagging ceiling lights “stealing” the space.
Calculator for calculating the thickness of insulation of a loggia or balcony
The thickness of the insulation is an important criterion that influences the choice of thermal insulation material. A layer that is too thin will make it difficult to maintain a comfortable microclimate, and thick insulation will take up the already small area of the room. To find the golden mean, use a calculator to calculate the thickness of the insulation of a loggia or balcony.
To calculate, you will need to enter the following data:
- type of insulation from the provided list. The values of the thermal conductivity coefficients of each of them are already included in the calculator program;
- it is determined what type of surface will be insulated. This is due to the fact that, for example, the thermal resistance values for walls and ceilings are different. The calculator will tell you which one to take into account;
- enter the thermal resistance value;
- the next step is to indicate the location features of the insulated structure, namely, what is located in the “neighborhood”;
- the thickness and material of the enclosing structure are selected. If there is no partition in the case when a lattice parapet with thin cladding on the outside is insulated, the value “0” is selected for the wall thickness;
- Penofol is often laid as an additional layer of insulation, the reflective surface of which faces the inside of the balcony. A “thermos” effect is created, and the thermal insulation characteristics of the room are enhanced. This layer will reduce the thickness of the main insulation material. Choose one of the proposed methods (with or without penofol) to see how this will affect the final thickness of the insulation;
- You can also add additional layers that will be laid before finishing. For example, if you install OSB sheets, plywood, chipboard panels on top of the insulation. These materials also have thermal insulation properties.
The result of the calculations will be reflected in a special cell in millimeters. The resulting thickness will become an approximate value, since it is reduced to standard thickness indicators for manufactured heat insulators.
Plasterboard ceilings with textured cladding
Today, multi-level structures based on plasterboard are popular, where you can think about effective lighting with economical diodes. The design possibilities are beyond doubt. However, this hygroscopic and fragile material is only suitable for a glazed and well-insulated balcony.
A reliable aluminum-based frame will hide wiring and lighting equipment. If the area is large, decorative inserts can be mounted into the plasterboard structure:
- Illuminated stained glass;
- Stucco decoration or fresco;
- Tension fabric with a pattern;
- Mirrors with amalgam protected from moisture.
GCR boards are not left in their original form. After installation, they are puttied, then painted, whitewashed, covered with textured plaster or wallpaper.
A portico or plinth is needed around the perimeter of the ceiling. This finish also requires some “cut” along the height of the walls. Therefore, it is important to correlate the level of the structure with the balcony glazing and opening sections.
Helpful advice! When planning to replace double-glazed windows on multi-level ceiling structures, take care in advance of sliding windows and outward-hinged transoms. They should not come into contact with the lining of the upper plane.
Waterproofing works
You can call it real luck if the neighbor’s balcony above is already glazed and insulated. In this case, waterproofing work is much simplified. However, if the upper extension is completely open and susceptible to precipitation, you will have to work a little to protect your balcony from moisture. But this does not mean that open balconies cannot have good waterproofing, since responsible owners install special drains to drain incoming water.
If such a layer is available, waterproofing work will be significantly simplified, but for maximum protection of the building from the effects of precipitation, it is advisable to carry out a full range of measures or make sure that it has already been implemented in the best possible way. It is very good if there is friendly contact with the neighbor above - this will allow you to divide the financial costs between two and achieve maximum interaction between both balconies.
However, as experience says, in most cases, owners do not pay the necessary attention to the arrangement of balcony waterproofing, and sometimes they simply “don’t give a damn” about such an extension. Moreover, such irresponsible people not only refuse to protect the balcony space, but also do not agree to allow anyone into their territory. In this case, patience and endurance will be required - perhaps there is a chance to achieve mutual cooperation.
If any efforts are unsuccessful, you should contact the management company or other organizations involved in maintaining apartment buildings. It is important to understand that a leaking slab is a serious threat to the safety of other residents, so the relevant authorities must take drastic measures.
Cladding with slats
Sometimes this finish is called a “bath” due to its similarity with the wooden planks of baths and saunas. In this case, you can vary the materials - metal, wood or siding. Only the installation process is different. The only simple thing is to whitewash or paint the ceiling, which is not worth talking about much.
- The “striped” cladding looks rustic, but quite aesthetically pleasing.
- It hides all the unevenness of the concrete base and goes well with designer lighting.
- For example, you can insert strips of glass by laying an LED cord or colored tape.
- It is proposed to combine planks from the same material of different shades to give the interior originality.
Video on the topic “Making a slatted ceiling on the balcony with your own hands.”
Dyeing technology
The technology itself is considered relatively simple, so it is not difficult to do it yourself. To finish the ceiling with a painting composition, you need to prepare some available tools and materials:
- Primer for concrete compositions.
- The putty is usually a cement-sand mixture.
- Spatula and sandpaper.
- Paint for painting concrete and brick surfaces, as well as plaster
- Brush and roller.
The optimal consumption of the coloring composition should be indicated on the packaging. To achieve the most attractive shade, it is better to apply the paint in 2-3 layers.
Before starting painting, it is necessary to prime the ceiling. First of all, you should prepare it by cleaning it from the remnants of old plaster and paint with a spatula or sandpaper. Next you need to coat the ceiling with primer with a brush and roller, and then wait for it to dry completely. After leveling the surface, large cracks and chips need to be sealed with DSP, which is first diluted in water and acquires the consistency of a paste. Any irregularities and seams are treated with putty and thoroughly dried before the next step.
As soon as the putty has completely dried, you need to coat the ceiling again with a primer and dry it. After this, painting work can begin. To achieve uniform application of paint, it is necessary to pour it in a minimum volume into a special reservoir, and then distribute it with a roller, periodically wetting it. Only after this the paint is applied to the ceiling. The initial layer should be applied along the ceiling slab, and the next one - perpendicular to it. Corner joints are additionally painted with a brush.
If the paint is completely dry, all that remains is to complete the decorative work and install lighting fixtures, baseboards and other design elements. If you follow the basic rules and step-by-step guidance, the task will be completed quickly.
Photo of the ceiling on the balcony
Preparing materials and tools
Before starting installation, they calculate and purchase building materials. The quantity is determined by the type of slatted structure and the area of the balcony. There are three types of systems installed on the balcony (they can be found in the photo):
- Open. Inserts located in the gaps between the panels are used as decoration. Their width is 14-16 mm.
- Closed, formed by slats with grooves: the panels overlap each other.
- Gapless. Each panel fits tightly to nearby ones without overlapping them.
Open system
Material: features and requirements
The slats purchased for the balcony must have a flat surface. Dents and scratches are not acceptable. It is enough to take one photo to understand how visible it is after the balcony is completely renovated.
Important! The protective film with which each panel is covered in production is removed immediately before mounting it on the ceiling.
To ensure that the work is done efficiently and the balcony pleases its owners, in addition to the slats themselves, they purchase:
- corners or U-shaped profile with which the wall plinth will be attached;
- guides: stringers, combs and traverses. The specific list depends on the type of balcony finishing. For their manufacture, a steel profile 4 m long is used;
- adjustable hangers;
- anchors, dowel-nails or anchor-wedges.
Fasteners
Where to begin?
Before starting the decorative part of the work, any balcony awaits a painstaking and very important stage - waterproofing and insulation. It can be simplified only in one case: when the neighbors above have high-quality cladding and glazing, which is not always the case, and the factor of rain and other moisture will have to be taken into account and reduced to a minimum.
Concrete has a porous structure, which is especially vulnerable to moisture, and is especially damaged in winter, when accumulated drops expand in volume, contributing to the formation of cracks. Therefore, before starting work, it would be a good idea to invite a specialist who will assess the general condition of the balcony and give the go-ahead for waterproofing.
Today there are several popular and relatively inexpensive methods:
- Penetrating compounds (for concrete only);
- Coating compounds (for brick and wood);
- Rolled materials on polymer compounds;
- Sealants (for cracks and cracks).
- There are only two insulation materials suitable for most Russian balconies:
- Mineral wool;
- Polyurethane foam board.
The use of each of these materials is permissible only if it is known for certain that it is suitable in specific conditions. Otherwise, the consequences may lead to expensive major repairs.
