A balcony parapet is a protective structure that encloses the entire free perimeter of the building. The barrier serves as reliable protection for residents and an important element of the space, the basis for completing work on its finishing, glazing, and insulation. As a significant architectural detail, it can become a prominent decoration of the home.
The parapet should serve as reliable protection for residents and guests going out onto the balcony Source plusteplo.ru
Primary requirements
Before you begin strengthening the fence and subsequent glazing of the balcony, it is necessary to assess the condition of the slab. This will require the conclusion of the housing office commission, since the balcony base is part of the general building structure. You cannot independently make decisions about the permissible load on it.
The height of the balcony parapet is regulated by GOST 25772-83 and is:
- in residential buildings up to 30 m (10 floors) – 1 m ;
- above 30 m – at least 1.1 m.
It is also necessary to take into account and comply with the following general requirements for a parapet for glazing:
- the height of the new (inner) layer of the fence should be higher than the old (outer) layer 10-15 cm – this will allow you to easily install the drainage system at an angle;
- the specific pressure of a single-chamber double-glazed window is 23-25 kg/sq.m ; two-chamber 35 -37 kg/sq.m.
Reinforcement with metal profile (angle, pipe)
The most popular way to strengthen the parapet of a balcony or loggia. The old fence is left, but reinforced with a new welded structure. This self-supporting frame is attached to the load-bearing walls and balcony slab with dowels (screws for concrete). In addition, it is welded to the old parapet. If the balcony or loggia is not intended to be insulated and sheathed in the future, then it is better to cut off the old structure.
Do-it-yourself folding table for the balcony - read our publication on how to make it.
You can learn how to properly organize ventilation on a balcony from this article.
Replacing old fencing
Preliminary dismantling of the old parapet is possible (but not required) in whole or in part. This is done in cases where:
- want to free up additional usable space;
The balcony is expanded along the base of the slab - the old structure has fallen into disrepair and its preservation is inappropriate.
The base is completely rotten
When dismantling the parapet, special attention should be paid to the safety of work at height, as well as to fence off the potentially dangerous area around the house and prevent passers-by from being in it. In some cases, it is advisable to use the services of professional industrial climbers.
Usually they strengthen the existing fence without dismantling it. The choice of method depends on many factors (the general condition of the base, the size of the balcony, the type of old fence, the future use of the balcony).
Balcony railing repair
Even the strongest structures deteriorate over time and require repair. In some of the most advanced cases, the best solution is to dismantle the balcony railing and completely replace the parapet on the balcony.
If the condition of the fence is satisfactory, you can organize strengthening of the balcony parapet. To do this, fastening and reinforcing elements are welded to the finished structure. Rotten or cracked parts are partially dismantled.
To determine the condition of the fence, it is necessary to carefully inspect the entire structure. I strongly recommend entrusting this task to a specialist. The result of the inspection will allow:
- Identify visible damage.
- Determine the design features of this fence.
- Assess the deterioration of old fastenings.
Strengthening a balcony parapet is possible in several ways and depends on the materials used in the fencing.
Metal structures are strengthened by welding metal corners in certain places of the parapet. Worn sections of the fence are replaced with new metal elements. In addition, the old metal parapet can be strengthened by installing additional supporting parts (pipes and corners).
The use of foam blocks is considered a good solution for strengthening the fence. This material allows you not only to strengthen, but also to insulate the balcony.
Strengthening work is carried out not only when fencing repairs are necessary, but also if you plan to do glazing. Strengthening a balcony parapet under plastic glazing is practically no different from conventional strengthening of a fence.
It is important to note that installing a parapet on a balcony should not violate accepted building codes and safety requirements. When wondering how to make balcony railings for further glazing, remember that the main thing when installing a parapet is not beauty, but safety.
Thank you all for your attention. Vorotyntsev Andrey.
Strengthening the parapet with foam blocks
Foam blocks are an easy-to-use and relatively lightweight material with low thermal conductivity and hygroscopicity. For the construction of balcony railings, it is recommended to use grades D600 – D700. The work is carried out using the following technology:
- Clean the base of the stove from foreign objects, dust and dirt.
- If necessary, refill the screed. Lay a layer of waterproofing.
- Mark the location of the masonry.
- Take measurements of the fence. Calculate the required number of blocks. If the number of rows turns out to be fractional, then the trimmed row should be laid out first - this way the sections will be protected from moisture, which means the structure will last a long time.
- Along the line of reinforcement construction, a U-shaped profile is rigidly mounted as a mortgage. You can lay a layer of insulation between the old and new fencing, but this will reduce the usable area of the balcony.
- Lay out the first row of blocks, coating the bottom and side edges with mortar. Pieces of galvanized mesh are placed in the first and subsequent horizontal seams so that they connect adjacent blocks - this is how the structure is reinforced.
- Lay out the next rows of blocks with offset. Move the trimmed parts to the corners. Check the evenness of the masonry periodically with a plumb line and level. The side walls of the parapet attract the wall of the house. To do this, after each row, one end of the reinforcing rod is hammered into the wall, and the other is fixed in the seam with mortar.
- As they are erected, the blocks are impregnated with primer on the outside and inside.
Video instruction:
Bricklaying is carried out using a similar technology. It should be borne in mind that this material is much heavier than foam blocks. In addition, it is capable of absorbing moisture, which further increases the total weight of the brick fence in wet weather. Therefore, in most cases, the use of bricks for the construction of balcony railings is irrational and unprofitable.
Features of fastening plates
A balcony is not only a decoration for any home, but also an excellent place to relax; you can store supplies for the winter on it. In order to be safe from any incidents, it must be reliably repaired. You need to know what material the building is made of. Some people mistakenly believe that balcony slabs are a floor projection. But in construction, a variety of methods for attaching loggias are used:
- support on attached (reinforced concrete, steel or wooden) structures;
- use of cantilever floor slab;
- clamping or pinching the outer wall of a building;
- suspension of the slab to internal load-bearing transverse walls or to the ceiling.
In buildings built of bricks, the installation process is carried out using pinching. Builders embed reinforced concrete and backing elements into the outer wall, which forms a stop for the slabs. The edge that is adjacent to the outer wall thickens.
Sometimes in brick houses, to ensure reliability and safety, the lower plane of the balcony is welded to reinforced concrete parts using steel anchors.
In panel houses, slabs are most often supported by reinforced concrete structures using floors. In frame objects, the strengthening process occurs using block technology. It has absolutely no load, because the material rests on the consoles.
Strengthening the parapet with metal structures
This method of reinforcement is used if you plan to leave the balcony open or make cold glazing. The complexity and type of reinforcing metal structure depends on the goals of the event. So, if you just need to strengthen an old metal fence that can no longer withstand wind loads, it is enough to do the following work:
- Prepare new vertical supports.
- Attach them to the concrete slab through the corners and weld them to the existing parapet.
- Place horizontal railings on top of the supports and also weld them.
If glazing is installed on the new fence, you need to first weld a more complex structure, possibly extending it beyond the main perimeter of the balcony. Then fasten it to the slab and the outer wall, weld it to the old parapet.
Metal structures are also used to strengthen the existing parapet made of foam blocks, which was erected in violation of the technology: it “walks” in the wind and poses a potential danger.
Strengthening the balcony slab
Depending on the load that the slab will bear, the reinforcement material is selected. There are two main options - metal reinforcement and foam block reinforcement. The first method is universal and suitable for a balcony of any condition. The second method, due to the material used, is distinguished by its heat-saving function, durability and environmental friendliness. However, the foam blocks themselves take up a lot of space and reduce the area of the balcony.
Strengthening the balcony slab with metal supports
Rice. 6. Reinforcement with metal structures.
A metal frame is attached around the perimeter of the slab, onto which reinforcement with a cell side of 100 mm and a cross-section of 8-10 mm is welded. If part of the slab is lost, it is necessary to frame it with metal and fill the entire surface with concrete. The reinforcement should be buried 50 mm in concrete. Please note that for pouring it is necessary to use frost-resistant concrete with a class of at least B10.
Strengthening the balcony slab on the upper floors
Rice. 7. Balcony on the top floor.
This type of work requires the installation of upper or lower mansols. The reinforcement at the top is a strand of metal cable with a diameter of 20-24 mm, which is attached to the sides of the balcony using long anchors. In this case, one part is attached to the outside of the slab, and the second at a height of 900-1200 mm from the floor on the wall. The metal corner additionally tightens the joint between the wall and the slab. Moreover, the larger the hypotenuse of the angle, the stronger the fastening will be. Lower reinforcement is more effective, but requires permission from neighbors - mensols enter their territory. The installation procedure involves securing rectangular metal corners to the wall with anchors. In addition, lower reinforcement can be done by drilling holes under the balcony into which strong, large-sized reinforcing bars will fit. This option is suitable if there is no other covered balcony below you.
Parapet insulation
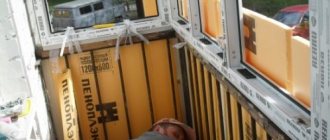
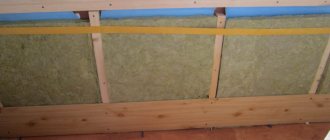
As a rule, sheet materials are used for this, the most popular of which are penoplex, polystyrene foam, ready-made sandwich panels, and less commonly mineral wool. It is enough to insulate the foam block masonry from the inside of the balcony:
- Attach rolled vapor-waterproofing material (penofol) to the inner wall of the parapet using self-tapping screws.
- Build a sheathing. To do this, attach a horizontal beam to the bottom and top of the masonry for the entire length of the parapet. Then attach vertical strips between them in increments close to the size of the insulation boards (usually 40-60 cm). This will reduce the time spent on trimming and will contribute to more economical consumption of material.
- Cut the insulation to the required size. Place it between the sheathing beams.
- Fill the seams with polyurethane foam. Trim off excess after drying.
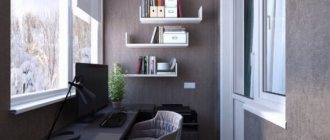
In order to ultimately get a really warm loggia, it is necessary to carry out comprehensive insulation of all walls, floor and ceiling. It is immediately worth noting that a completely protruding balcony, which does not have common boundaries with the external walls of the house, cannot be turned into a room suitable for year-round use. However, in this way you can get partially insulated additional space in the apartment, which in winter can be used as a storage room or dressing room.
The main reasons for the destruction of the balcony
As practice shows, the main reason why balconies collapse is depressurization of joints and violation of waterproofing. As a result, moisture enters the room, forming condensation, from which mold appears.
In addition, moisture can act on reinforced concrete, penetrating into it and causing corrosion on the reinforcement. The age of concrete directly depends on the penetrating ability of water - the older it is, the easier it is for moisture to penetrate inside. Corroded reinforcement loses its load-bearing capacity and expands, which causes a deterioration in the load-bearing capacity of concrete.
Also, the destruction of the base of the balcony is caused by high pressure on the slab, sudden changes in temperature and a long absence of major and current repairs, such as in Khrushchev.
The reasons for the destruction of balconies can be errors made during installation. These include: the presence of a reverse slope of the slabs, the absence of drips and drains in the lower part of the concrete slab and the absence of protective screens protecting the slab from moisture penetration.
There are 2 stages of destruction of the base of the balcony:
- The first includes minor destruction when it is necessary to strengthen the slab. Such destruction occurs in houses whose age is approaching 40 years. You can do it yourself, as this is a minor repair. For example, in cases of crumbling corners.
- The second stage is the destructive appearance of the object. These include the collapse of part of the balcony, the appearance of cracks at the junction with the wall, open sections of reinforcement, destruction is observed in the upper layer of the platform or detachment in its lower part.
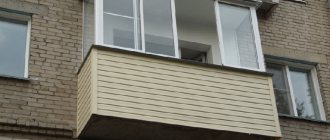
Covering the parapet with siding from the outside
Vinyl siding has proven itself to be an excellent material for exterior finishing of balconies. Simplicity of installation, low weight, a variety of colors, durability and affordable price are the main advantages of siding panels.
If the parapet is a metal lattice, then it is advisable to combine the insulation with the exterior finishing. Sequence of work:
- Place a level on the metal railing and secure a horizontal support bar, which will serve as the basis for the glazing.
- On the outside, make a sheathing of wooden beams in increments of about 60 cm. If the siding is laid out horizontally, install vertical posts; if it is vertical, then a horizontal sheathing is needed. Pre-treat the timber with an antiseptic. Carry out the work using a level.
- Attach guides and a starting strip to the sheathing for installing panels in the chosen direction.
- Install the first 2-3 siding panels, inserting them into the profile and securing them with self-tapping screws to the sheathing beams.
- At the same time as the siding is fastened, the insulation is fixed. Penoplex sheets cut to size must be inserted between the finishing panels and the metal parapet so that they fit into the cells of the sheathing.
- Complete the installation of siding on the outside of the balcony.
- From the inside, apply mounting foam to the joints between the insulation sheets and the wooden sheathing. The seams between the penoplex and the floor and walls are also sealed.
- Place a second layer of insulation on the outside of the balcony. The sheets are attached to the first layer with plastic mushrooms. The gaps between the parts are also filled with foam. A double layer of penoplex reliably protects the balcony from moisture and provides a good degree of thermal insulation. The parapet is now ready for glazing and interior finishing.
Balcony restoration stages
In order to carry out repairs with your own hands, for example, in a Khrushchev building, you need to know in what sequence and what to do.
- The first stage will be preparation for repairs - clear the balcony of debris, remove all unnecessary objects, remove crumbled concrete.
- Exposed parts of the fittings must be cleaned of rust. The first layer is easy to remove, but the lower ones need to be treated with a special product.
- The mesh of reinforcement is attached to the slab with dowels. So that it fits into the concrete screed without protrusions, leave a small gap between the mesh and the slab. Formwork boards are fixed along the entire perimeter of the board.
- Next, you need to prepare a solution consisting of cement and sand, which will be poured onto the reinforcement. Subsequently, the screed is covered with cement and rubbed, that is, “ironized.” It is important to remember that the thickness of the screed is twice or more times the thickness of the mesh.
- The surface located below should be treated with a primer and plastered a little later.
If the reinforcement cage is more corroded, the best solution would be to strengthen the slab. Here it is necessary to carry out a set of preparatory measures.
- The first step is to install steel beams on the sides of the platform and secure them to the wall with a console. Weld the mesh to them and begin pouring concrete, the process of which was described above.
- Upon completion of the repair work, the surface should be waterproofed. Coating or roll-type materials are suitable for this purpose.
So, if you do the repairs yourself, you should remember that this is not an easy task. This largely depends on the degree of destruction of the balcony. Some things you can do yourself, and others you can entrust to professional construction teams. To avoid mistakes, it is recommended to carefully check the degree of wear of a certain element. If you have no experience in this matter, then it is better to contact an appraiser.
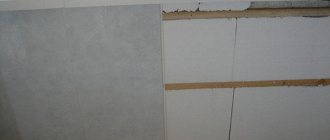
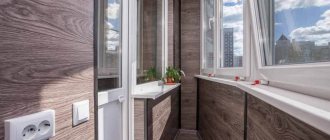
Interior decoration of the parapet
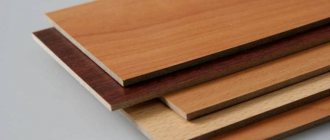
Sheathing the parapet on the inside not only gives a finished look to the repair, but also serves as an additional thermal insulation layer. The type of finishing is selected in accordance with the labor intensity of the work, financial costs, and the desired design of the room. The most popular methods of interior decoration:
- PVC panels;
- wooden lining;
- sheets of drywall followed by painting.
It is possible to use decorative stone or ceramic tiles, however, these materials are more expensive and heavier - this is not the best choice for finishing a balcony parapet.
Combination of decorative stone and plaster
Most standard parapets, especially in older houses, are not structurally designed to accommodate double-glazed windows. Therefore, special attention should be paid to the construction of the base for window blocks, since the strength and stability of the entire glazing will depend on the correct execution of this stage.
Subscribe
How to seal cracks on a balcony
It is better to seal the gap between the slab and the wall in a comprehensive manner, together with the neighbors below. And if you are repairing a balcony in a Khrushchev-era building, then the roof of your balcony is the floor of your neighbors above, so in this case you will have to use them too, so you can not only restore your own balcony, but also avoid leaks during precipitation.
The joint is well cleaned and embroidered in a V-shape, coated with liquid bitumen, onto which a fiberglass or roofing felt tape is glued, extending 100 mm onto the slab and wall. The patch is again coated with bitumen, a metal corner or a galvanized strip folded at an angle is placed on top, which is drilled onto the anchor for strength. Then you can do general waterproofing of the slab and further repairs.
Balcony repair, photo example of how to properly seal the cracks to ensure the structure is airtight
How much will it cost to insulate a loggia?
Having studied the insulation technology, you may wonder how much it will cost. At first glance, everything is quite expensive:
- 8,000 rubles for building materials (for a loggia with an area of 3 m²);
- 11,000 rubles – electricity supply and underfloor heating system;
- another 7,000-8,000 if glazing is required.
The result is about 30,000 rubles. But it is worth considering that materials from European manufacturers are of higher quality and, therefore, more expensive.
If you look at insulation as an investment for many years to come, then the cost does not seem so high, because if you overdo it with savings, in a few years you will have to redo everything all over again.
Required materials and tools
In fact, independent insulation of a balcony or loggia does not require special professional equipment. To carry out all work you will need:
- drill or screwdriver with impact bit;
- grinder for working with metal profiles;
- gun for sealants and foams;
- tape measure, marking pencil, construction knife.
Supplies you will need:
- wooden blocks or metal guides for the frame;
- various types of self-tapping screws;
- disc-shaped dowels for fastening rigid insulation;
- waterproofing film and vapor-permeable membrane;
- selected insulation in the required quantity;
- polyurethane or silicone sealant and polyurethane foam;
- any finishing material to cover the room.
Standard sets of screwdrivers, pliers and other small tools that any owner definitely has can be useful in the work.
In addition, when constructing the frame, you will need a liquid or laser level to align the guides.
The main stages when installing thermal insulation from the inside
Work on insulating walls, floors and ceilings is carried out after installing new glazing. If the balcony or loggia is already covered with metal-plastic or other modern double-glazed windows, then the integrity of the layer of polyurethane foam and sealants applied during installation is checked once again.
Surface preparation
The loggia parapet is carefully inspected to identify cracks and defects. To achieve minimal heat loss, as well as protect the structure from waterlogging, it is necessary to carefully seal all cracks with polyurethane sealant or polyurethane foam.
Additionally, all seams between the parapet, walls and floor are processed. The surface of the walls bordering the street is also inspected. It is necessary to protect all structures as much as possible from moisture penetration and heat loss through cracks and defects.
Waterproofing device
After eliminating identified cracks and defects, it is necessary to protect the surfaces of the room from external moisture. To do this, the inside of the balcony or loggia is completely covered with waterproofing films. The membranes are attached with an overlap, overlapping adjacent sheets by 5 - 10 cm and gluing all seams with protective tape.
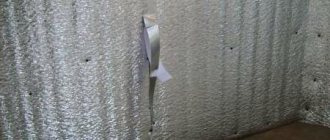
When using polyurethane foam or extruded polystyrene foam, the waterproofing layer does not need to be laid. The low permeability of the materials will not allow moisture to penetrate the body of the insulation.
Laying insulation
After preparation is completed, the walls, ceiling and floor of the loggia or balcony are covered with thermal insulation materials. Rigid slabs are attached to concrete or brickwork using disc-shaped polymer dowels. The distance between individual fasteners should not exceed 40 cm. Most often, five dowels are used for one standard plate.
The joints between the sheets are additionally insulated with toluene-free polyurethane foam. All winter versions of such materials may contain toluene, but its use is unacceptable due to the negative effect on polystyrene.
Vapor barrier device
After laying the insulation, all structures are covered with a vapor barrier. For these purposes, it is best to use special polymer membranes or foamed polyethylene. The presence of a thin layer of foil on the inner surface of the material will help create the effect of a thermos and additionally protect the room from heat loss.
The vapor barrier can be fixed using polyurethane glue. All joints are also made with an overlap of 5–10 cm and taped with waterproofing tape.
Frame installation and sheathing
After the main protective layers have been assembled, a frame is installed from wooden blocks of 40x20 mm or 50x25 mm for attaching the finishing material. Sometimes a metal profile 60x27 mm is used instead of wood.
The sheathing guides are fastened only after the elements have been leveled. For fixation, self-tapping screws are used, the length of which allows you to attach a beam or profile directly to a concrete or brick base. The location of the frame is determined based on the selected material.