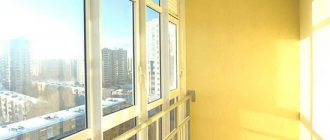
Insulating the balcony allows you to create additional space for a cozy rest in the cold winter. Moreover, almost any person can do this work, the main thing is to choose the right materials and follow the instructions for performing the work.
Insulation can be done in two ways: outside or inside. The right thing to do is to do it outside. In this case, the concrete or brick walls remain inside the warm room and therefore moisture from the air will not condense on them. If you insulate the balcony from the inside, then under certain conditions the warm air from the room will cool on the cold walls and moisture may condense on them. This can lead to the formation of mold, wet insulation and rotting of wooden joists.
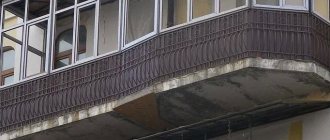
On the other hand, external insulation will change the appearance of the facade of the house and therefore the administration of the locality may require that the facade of the house be returned to its original appearance.
Selecting materials for insulation.
Mineral wool is an old, inexpensive and proven material. There are several types of mineral wool. Of these, it is worth paying attention to fire-resistant basalt wool. Its melting point is 1000C. Among the disadvantages of mineral wool are its short service life and high breathability. Over time, it shrinks, which leads to blowing at the junction of the wool and the sheathing elements. Its air conductivity is 1. That is, it completely transmits warm air to the street.
Also, mineral wool is very demanding for installation. Improper installation without the use of special vapor barrier films can lead to it getting wet and a sudden loss of thermal insulation properties.
Mineral wool.
Polystyrene foam is also a rather “old” and cheap material. Polystyrene foam has a fairly low thermal conductivity coefficient, a long service life, is environmentally friendly and easy to install. But despite its positive aspects, it has poor resistance to chemicals based on alcohol and petroleum products and burns quite well. Birds and various insects also like to make their nests in it. To insulate a balcony or loggia, you need to choose foam with a density of at least 25 kg/m3.
Extruded polystyrene foam (penoplex) is a modern material with high density and low heat transfer coefficient. It has high vapor barrier characteristics and low water absorption. There are several types of this material. Penoplex “comfort” is suitable for the balcony. This material is an improved version of polystyrene foam. It is environmentally friendly and more durable than polystyrene foam. This material can withstand pressure of 20 t/m2. The service life of penoplex is 50 years, it is easily cut with an ordinary stationery knife, birds and insects are not interested in it, and, unlike mineral insulation, it does not lose its properties when wet. The disadvantage of this material is its flammability, although it is slightly lower than that of foam plastic.
Extruded polystyrene foam (penoplex)
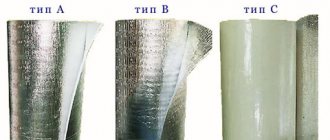
Penofol (foamed polyethylene with a foil layer) the main advantage of this material is its ability to reflect heat in the infrared range and low level of vapor permeability. This material is completely environmentally friendly and does not lose its properties when wet. Penofol is produced in rolls and mats. There are three varieties of this material, with a one-sided reflective layer, with a two-sided reflection and with one adhesive side.
Penofol in a roll.
Sprayed polyurethane foam. This insulation is sold in cylinders, like polyurethane foam. It has a low thermal conductivity coefficient and provides seamless thermal protection, and is quite easy to install. The only downside of this material is its high price.
Seamless insulation has a great advantage, since it has no joints or cracks with the structural elements of the house. When they are applied to the wall, they swell more than 100 times, fill all the voids and cracks and thereby eliminate the problem of cold bridges.
Sprayed polyurethane foam.
Geographical location and building regulations
SNiPs that regulate the required cold resistance of the walls of a residential building depend on climatic indicators. The insulated parapet also fully falls under these standards, since on the balcony it plays the role of an external wall.
So, according to these building standards, the required wall resistance to heat transfer in different cities of Russia is as follows (in cubic meters x degrees Celsius / Watt):
| Sochi | 1,8 |
| Krasnodar | 2,4 |
| Volgograd | 2,9 |
| Saint Petersburg | 3,2 |
| Moscow | 3,3 |
| Ekaterinburg | 3,7 |
| Irkutsk | 4,0 |
| Magadan | 4,3 |
| Yakutsk | 5,3 |
How to avoid moisture, mold and freezing.
Improper insulation of the balcony can cause the water vapor contained in the warm air to cool on the cold elements of the balcony and turn into water. This will lead to wet materials, rotting of wooden elements and the formation of mold.
Mineral materials in the form of cotton wool are especially sensitive to getting wet. Wet insulation freezes and its effectiveness decreases. In addition, if there is a large amount of moisture, it can even seep back into the room and thereby damage the interior decoration.
To avoid such problems, insulation must be installed correctly, namely:
- When installing materials, the formation of cold bridges must be avoided. Cold bridges are blown areas of the structure or places where there is no insulation at all or its thickness is insufficient.
Cold bridges can also be any metal structural elements that pass through the entire thickness of the insulation. Such metal elements conduct cold from the street through themselves into the inside of the insulated room. Metal screws and dowels that secure the wooden sheathing are also cold bridges, but the area of their cap is so small that they can be neglected.
Some craftsmen use metal profiles to attach drywall. They make lathing from such profiles. You can't do that. These metal structures are good cold bridges, as a result of which the structure may freeze and moisture condenses in such places.
- All wooden structures must be coated with an antiseptic before installation. This simple operation will prevent mold from forming and wood rotting when it gets wet.
- In order to prevent water vapor in the warm air of the room from penetrating into the insulation or the joints between its plates, it is necessary to glue the joints with metallized tape, and protect mineral materials with a vapor barrier film or ordinary polyethylene.
If the decorative finishing of the balcony allows, for example, it is planned to cover it with plasterboard with further wallpapering or cover it with plastic panels, then in this case it would be useful to cover the entire insulation with plastic film. Moreover, the joints of the film should be taped. This will create an airtight, vapor-tight barrier.
The graph below clearly shows how the dew point temperature (blue line) decreases at the installation site of the polyethylene film.
Thermal calculation schedule.
Relative humidity chart.
Before starting work, I recommend doing a thermal calculation. This calculation will help prevent the formation of moisture and mold on your balcony.
You can view the thermal calculation presented above or make your own using this link.
A competent approach to insulating a balcony: a calculator for calculating the thickness of the insulator
Reading time: 1 minute No time?
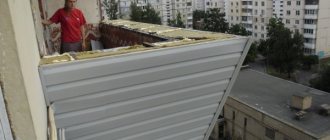
The main “cold bridge” on an insulated balcony is the parapet. Therefore, maximum attention should be paid to it when carrying out work to create a thermal circuit on the balcony.
Therefore, there is no need to blindly follow the recommendations of home craftsmen from other cities. Let's consider what thickness of insulation for a balcony will be optimal in each specific case.
Now the balcony is no longer a utility room for storing various things that are still or no longer suitable (simply speaking, trash that is a pity to throw away). In our convenient times, more and more apartment owners are considering it as an option for increasing residential square meters.
For this purpose, it is insulated. But, due to the great contrast of thermal insulation presented on the modern market, it is not at all difficult to make a mistake in its choice, which can have the most deplorable effect in the winter cold.
The main “cold bridge” on an insulated balcony is the parapet. Therefore, the greatest attention should be paid specifically to it when carrying out work to create a thermal circuit on the balcony.
The choice of thermal insulator is specifically influenced by the greatest negative characteristics of winter temperatures in your region.
How to insulate a balcony with mineral wool.
It is best to start work from the ceiling and move from top to bottom. If the ceiling of your loggia is the floor of your neighbors’ insulated balcony, then in this case you can save on cotton wool and install it of a small thickness.
Before working with mineral wool, you need to take precautions. Protect your eyes with deaf glasses and your respiratory organs with a special mask.
To protect the balcony from the cold, it is recommended to perform work in the following sequence:
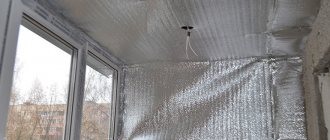
- We lay out a vapor-permeable membrane on the ceiling, walls and floor. This membrane will release excess steam from the insulation and will protect against water leaks from the street. We glue the individual parts of the vapor-permeable membrane with tape.
- We attach wooden blocks on top of the vapor-permeable membrane. With their help we create a wooden lattice. The height of the bars should be equal to the thickness of the insulation.
- We lay mineral wool mats between wooden blocks.
Mineral wool is mounted on the wall.
- We lay a vapor barrier film on top of the wool. This film will prevent the penetration of water vapor from warm air into the inside of the cotton wool. Ordinary polyethylene can be used as a vapor barrier film. It is very important to connect the film well at its joints. Therefore, we use regular tape to glue the joints of the film.
- We cover it all with decorative trim. This could be drywall followed by wallpapering, plastic panels or lining.
Heat transfer - its influence on the choice of insulation
The main task of any thermal insulation material is to reduce heat loss. This property has a certain characteristic, which is expressed by the value of thermal conductivity. It indicates how much heat passes through a material thickness of 1 m. The indicators of almost all insulating materials are in the range from 0.03 to 0.05 W/m/*K.
In order to determine what thickness of insulation for a loggia is necessary to maintain the desired temperature, the heat transfer resistance coefficient (R) is used. It is the reciprocal value and when calculating it, the depth of the insulating layer is taken into account:
Where d – depth, m; K – thermal conductivity.
Using this formula, you can calculate the required thickness of insulation. But first you need to find out the accepted standards, which differ depending on climatic conditions. These parameters are regulated by the conditions of SNiP 23.02-2003. According to them, the heat transfer resistance of the external walls of a residential building must correspond to the data in the table.
To calculate, you need to know the value of the heat transfer parameter for wall materials:
- Reinforced concrete - 1.56.
- Monolithic brick – 0.7.
- Cinder block – 0.5.
Knowing the thickness of the wall, you can calculate the thermal conductivity resistance of the loggia without insulation . For example, for a brick structure with a thickness of 64 cm (2.5 bricks) it will be:
Considering that the average thermal conductivity in Russia is 3.33, you should choose insulation of such a thickness that its value is at least 2.42. If you insulate a loggia with polyurethane foam , then its thickness should be as follows.
D=2.42*0.041=0.099 m or 100 mm
The table shows the thermal conductivity indicators of popular insulation materials:
Using this data, you can easily calculate the optimal thickness of the internal thermal barrier. This method is applicable only to the outer wall of the loggia (parapet). The side walls, floor and ceiling do not require the same depth since they do not have direct contact with the street.
How to insulate a balcony with penoplex.
With penoplex there are two installation options.
1) Installation with penoplex in a continuous layer.
This option is simpler and easier. One of its advantages is that the penoplex itself creates a sealed, vapor-tight cocoon inside the balcony, so there is no need to use vapor barrier and vapor-permeable films.
The procedure is as follows:
- We glue the foam boards using a special adhesive foam to the ceiling and walls of the loggia. Instead of adhesive foam, special mushroom dowels can be used for installing penoplex.
If the subsequent decorative finishing will be heavy, for example putty, then it is better to fasten the foam boards with mushroom dowels.
Adhesive foam is applied to the penoplex.
We place the insulation sheets in such a way that there is a gap of approximately 1 cm between their edges and the walls.
Penoplex sheets have a step along their edges. It acts as a lock between the sheets, but the density of such a lock is not enough, so before laying each subsequent sheet, we apply polyurethane foam or adhesive foam to the step.
Applying adhesive foam to penoplex locks.
- We fill all the gaps between the foam sheets and the walls of the balcony with polyurethane foam. In this way, we close all the ventilated gaps between the insulation and the walls.
- We glue all the joints between the foam sheets with metallized tape. In this way, we create additional protection against blowing through the joints and create a kind of water-tight sealed circuit.
If you need to use thick insulation, for example 80-100mm, then it makes sense to buy sheets 2 times thinner. In this case, they will be mounted in two layers with overlapping joints. This way you can reduce the airflow at the joints between the slabs.
Further actions depend on the decorative finishing of the balcony walls.
If wallpaper is to be glued to the walls, the procedure is as follows:
- We scratch the foam boards with a metal brush to give them increased roughness.
- We putty the entire surface of the slabs using a plaster mesh. There is an additional nice point here. A layer of plaster creates a non-combustible barrier between the room and the flammable material. As a fire protection, this is a fairly good option.
- We glue wallpaper onto the putty or paint the walls.
If the walls of the loggia will be covered with plastic or MDF panels, then a wooden frame will need to be made for them. Therefore, the procedure is as follows:
- We attach wooden blocks of small cross-section, for example 25x30mm, on top of the foam boards. They should be attached to the ceiling and walls of the loggia through the insulation. This can be done using metal dowels.
Installation of a wooden frame on top of penoplex.
Now you can attach sheets of plasterboard, plastic or MDF panels to wooden blocks.
2) Insulation of a loggia with a wooden lattice between foam sheets.
This method has its pros and cons. On the plus side, there is a wooden lattice on which you can attach almost any type of decorative finish, plastic panels, drywall, lining, etc. The downside is that it requires additional work to install wooden blocks, and since wood absorbs moisture well, it is necessary to use vapor-permeable and vapor barrier films.
Installation of penoplex between wooden blocks.
The procedure is as follows:
- We cover the ceiling and walls with vapor-permeable film. It will release moisture from the wooden blocks onto the street and at the same time prevent moisture from penetrating into the balcony from the street.
- We attach wooden blocks to the ceiling and walls using metal dowels for concrete. One of the sides of the cross-section of the bars should be equal to the thickness of the penoplex. We choose the distance between the bars 1-2 cm larger than the dimensions of the insulation.
- We lay foam sheets between wooden blocks. We fasten the sheets using adhesive foam and special dowels.
- We fill all the cracks between the wooden blocks and the insulation sheets with polyurethane foam.
- We sew it all up with a vapor barrier film. It can be replaced with ordinary polyethylene.
- We cover it with plasterboard, clapboard or plastic panels.
Stupid option
Articles about foamed liquid materials appear on the Internet. These are drying, polyurethane compounds with good characteristics.
In practice, this is a pointless option. Its price per 1 square meter is not prohibitive. There is another minus. It is inconvenient to work with foamed mass in narrow spaces. The next disadvantage is that the thicker the layer, the longer it takes to dry. Takes longer to evaporate volatile compounds. When the layer has dried, it is difficult to fasten through it. It’s impossible to see where the concrete ends and the partition begins, where you can drill a hole and where you can’t.
Using liquid insulation on loggias is stupid and harmful.
Insulation of the loggia floor.
- The work begins with the installation of wooden sheathing. Wooden logs are leveled using wedges and secured with dowels to the concrete base.
- If sheets of polystyrene foam or polystyrene foam are used as insulation, then the distance between the wooden logs should be approximately 1-2 cm greater than the size of their sheets. Sheets of foam plastic are placed inside the sheathing, and the remaining cracks are filled with polyurethane foam.
- If mineral wool is used as insulation, then simply pack it tightly between wooden blocks.
- To protect the wooden structure and mineral wool from moisture, we cover the entire floor with a vapor-permeable film or ordinary polyethylene. Polyethylene will retain water vapor inside the room and will not let it into the insulation.
We attach sheets of plywood or OSB to the wooden floor frame. Before installing plywood on the floor, do not forget to make marks with a pencil or marker on the walls where they are located. Knowing the location of the joists, it will be easier to screw the plywood onto the floor.
- We lay laminate or linoleum.
We attach wooden logs to the base.
Since penoplex is a fairly durable material (withstands pressure up to 20t/m2), it can be mounted on the floor without wooden sheathing. In this case, a sheet of plywood or OSB is laid directly on the penoplex. True, with this installation method it will be impossible to level the floor. Therefore, it would be more correct to make a wooden sheathing, then lay insulation and cover it with a sheet of plywood.
Calculation of the minimum thickness of thermal insulation
Knowing the building standards for wall insulation for your city, you can easily calculate what thickness of a particular insulation should be when insulating a parapet. The thermal conductivity coefficient is denoted by the letter R and is calculated using the following formula R=d/k, where d is the thickness of the material, and k is its thermal conductivity. To learn how to calculate the thickness of insulation, watch this video:
Based on this formula, we will try to approximately determine the thickness of foam insulation with a thermal conductivity index of 0.05 for Irkutsk (the required resistance is 4.0). Accordingly, d= R*k = 4 * 0.05 = 20 mm. This is the thickness of the foam that will be the minimum allowable when installing thermal insulation for a balcony parapet. Knowing the thermal insulation coefficients of a particular insulation material, using this formula you can easily find the thickness of the material you need.
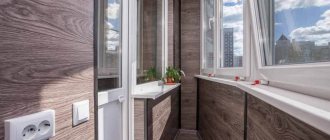
Decorative finishing of balcony walls.
Various materials can be used as decorative finishing for the balcony. This can be plasterboard and wallpaper, clapboard, MDF or PVC panels. For these types of decorative finishes, it will be necessary to install a wooden frame.
If the balcony is insulated with penoplex or polystyrene foam, then they can be puttied and painted or wallpaper can be glued to the putty. Putty should be done using a reinforcing mesh, and to increase the adhesion of the putty to the insulation, you can first scratch it with a wire brush.
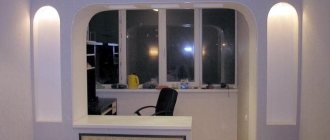
An example of decorative finishing for a balcony.
Myth about cadastral registration No. 26
Myth No. 26. Balconies and terraces are not included in the area of the house
The following types of areas and their uses should be distinguished:
| Type of square | Calculation order | Application |
| Total reduced area of a residential building, premises | taking into account reduction factors for balconies (0.3), loggias (0.5), terraces (0.3) and verandas (1.0) | only for calculating the price of the DDU agreement |
| Area of a residential building (for example, an individual residential building located on the corresponding land plot) | taking into account the full area of balconies, loggias, terraces and verandas (even open ones, not glazed or heated). | for cadastral registration and registration of rights; for tax purposes. |
| Area of a non-residential building (for example, a garden house located on the corresponding land plot) | taking into account the full area of loggias, terraces and verandas (even open ones, not glazed or heated); excluding the area of balconies. | for cadastral registration and registration of rights; for tax purposes. |
| Living area | excluding the area of balconies, loggias, terraces and verandas | for cadastral registration and registration of rights; for tax purposes. |
| Area of non-residential premises | presumably excluding the area of balconies, loggias, terraces and verandas (unfortunately, not enshrined in law, only the position of the Federal State Budgetary Institution FKP Rosreestr, expressed in letter 10N-1911-MS dated 09/03/18) | for cadastral registration and registration of rights; for tax purposes. |
The question of including the area of balconies and terraces in the area of the building has acquired great relevance due to two interrelated reasons:
- the state is increasingly obliging to register country houses in the cadastral register and register rights to them;
- the tax that must be paid after registering rights to a house is calculated based on the area of such a house according to the Unified State Register of Real Estate (Rosreestr).
There is an opinion that when calculating the area of a house, you need to take into account the areas of its individual parts with reduction factors, or do not need to include them at all due to the fact that they are unheated. We are, of course, talking about such parts of the building as the loggia, veranda, balcony, terrace.
Everyone is misled by the legislation on participation in shared construction, according to which (Part 1 of Article 5 of Federal Law 214) if part of a residential property of shared construction includes a loggia, veranda, balcony, terrace, the contract price can be determined as the product of the unit price the total reduced area of such a residential property and the total reduced area of such a residential property. The total reduced area of a residential property consists of the sum of the total area of the residential property and the area of the loggia, veranda, balcony, terrace with reduction factors established by the Ministry of Construction of Russia (from January 1, 2022):
- for loggias – 0.5;
- for balconies – 0.3;
- for terraces – 0.3;
- for verandas – 1.0.
However, when determining the area of a building for cadastral registration and registration of rights, the cadastral engineer is guided by the requirements of the current legislation on cadastral registration and registration of rights (Order of the Ministry of Economic Development of the Russian Federation No. 90 dated 01.03.2016), according to which, when recording residential buildings, the area includes the area of loggias and verandas , balconies and terraces (even open, unglazed and unheated). At the same time, to calculate the area of the specified building elements, no reduction factors (0.3, 0.5, etc.) are applied.
There is only one exception: the area of a non-residential building, including a garden house, does not include the area of balconies.
It is worth noting that the situation is the opposite with premises. They do not include the area of balconies, loggias, terraces and verandas.
A more detailed description of calculating the areas of residential and non-residential properties for cadastral registration and registration of rights can be found in our Cadastral Engineer Directory at https://cadastre.ru/article/1
WE HAVE FACTS, AND YOU?
Let's face it. How do we operate, proving that insulating balconies and loggias with 1 cm of isolon is the delirium of that same mare? We provide consultations from recognized experts, links to GOST standards, and thermal engineering calculations. You will find all this below. What does the author of Amateur Technology rely on? Apparently based on your fundamental knowledge. This is from his “scientific reports”:
- using polystyrene foam to insulate loggias is the dumbest solution of the 21st century;
- ask tourists how warm is isolon;
- believe me, I know what I'm saying
.
Well, in addition: “ With these hands I made a huge number of warm loggias
". I wonder how many people then had these hands redone when they got cold in winter or started having health problems?