Making repairs with your own hands is doubly pleasant. After all, this allows you to enjoy the process and gives you the opportunity to really get what you want. And independent actions are an opportunity to save money. As a result, this approach is very popular among us, but many suffer from it. After all, any repair involves certain difficulties that have to be overcome. And very often unforeseen circumstances or unusual situations arise. For example, there is a space above the door that needs to be filled. What is the best way to do this? What tools and materials should I use? How to properly lay the opening above the door?
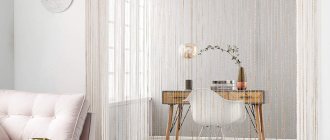
Opening above the door
Let's try to answer all these questions, using photos for clarity.
How to seal a doorway yourself
During the operation of buildings and individual premises, their owners often face the question: “How to properly seal a doorway?”
This is due to the need to liquidate or move it to another location. The choice of material depends primarily on where exactly it is located. If, as shown in the photo, a street entrance is being sealed, then, if possible, you should use the same material from which the building was constructed.
But in any case, it will be either brick or concrete wall blocks. Well, inside this problem can be solved much easier by sewing up the opening with plasterboard. Together with the video in this article, we will understand the intricacies of this work.
Eliminating a passage with a brick
When sealing openings, brick, as a structural material, has undeniable advantages. With its help, you can wall up a passage in both a load-bearing external and internal wall. Moreover, there is not much difference whether these walls are brick or panel. Although we note that in panel houses they are rarely allowed to move.
As for partitions, brick is more often used for sealing. The reason is that the thickness of asbestos-cement, plaster, or gas-block structures does not always correspond to half a brick. When the thickness differs, differences are formed, which can create certain problems during plastering.
Selection of material according to the thickness of the partition
But there is almost always a way out - you just need to try to choose the material that best fits the width. The same brick, but only solid, can be laid not flat, but on the edge, which is important for those cases when the partition has a minimum thickness (7.5-8 cm).
- You can see how it looks in the picture below, and the difference of 1 cm can be easily removed by increasing the thickness of the plaster coating. If, for example, the thickness of the partition is 9-10 cm, you can take not a single brick, but a one-and-a-half brick, which has a height of 88 mm, and also place it on the edge.
- If the wall is to be plastered, then it is better that the thickness of the “patch” be less than the thickness of the main structure. If the masonry protrudes beyond the plane of the wall, then in order to smooth it you will have to spend more plaster on the entire surface, which will entail unnecessary costs.
- Before sealing the passage with piece masonry material, you need to properly prepare the base and end surfaces. The base below should be level, without a threshold or floor covering. Usually this is a concrete slab, on which it is advisable to lay a strip of roofing material under the first row of bricks.
- So that the new masonry can firmly adhere to the old one, notches need to be made on it. If the wall is brick, you can simply remove part of the mortar from the end seams, or even slightly knock down the corners of the products to create peculiar grooves. Then the dust is carefully removed, the surfaces are thoroughly moistened with water - and you can begin sealing the opening.
The masonry is carried out in the usual way, with bandaging of the seams. For reliability, some craftsmen hammer long nails into the seams of the old masonry so that their free end can be placed in the new one. But by and large, this is not necessary.
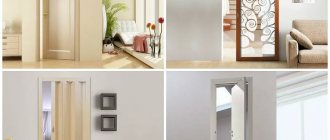
What it is?
A transom is a door that is located above the door of a room or to the side of it. The fact is that almost all manufacturers of modern interior doors produce standard door leaves: width - up to 1.05 m, height - up to 2.2 m. But in many old apartments and private housing construction, doorways are much larger in size. Therefore, the question immediately arises: how to deal with this problem?
You can order a door leaf of a size that will correspond to the height and width of the opening. In this case, the weight of the structure and the load on the hinges will be greater, which can lead to a decrease in the service life of the product and rapid deformation of the hinges, and therefore the cost of replacing the door leaf and fittings.
Therefore, in such situations, an excellent way to solve the problem is a transom , which also performs a number of functions at once:
- covers the space on top or on the sides that remains after installing the door;
- fixes the door leaf in the opening;
- effectively complements the interior design of the room.
Transoms can be made of any material and have different shapes.
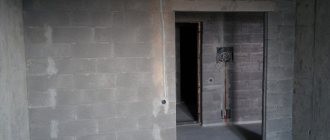
Plasterboard sealing
When it comes to moving a door, the owner of the premises is rather faced with the task of how to decorate the opening, since neither the strength nor other physical and technical properties of the structure are of great importance here. For interior renovations, plasterboard is perhaps the best material.
In any case, it is much easier to eliminate the opening in the partition using dry plaster mounted on a frame of profiles yourself - and the price of these consumables is low. We think that the instructions we have proposed will help solve this problem without any problems.
Frame and sheathing
Considering the size of a standard opening, four UD-28 guide profiles, three or 4 meters long, may be sufficient. Mount it along the entire inner perimeter of the opening in two parallel rows. The profile is fastened to the wall with 6*40 mm dowel nails, and with self-tapping screws with a press washer.
- Your task: to remove the surfaces of the area to be sealed. To do this, the guides are installed with an indentation from the edge, taking into account the thickness of the plasterboard sheet - the minimum is 12.5 mm.
- Then, sections of the CD 27/60 profile are placed across, to which, in fact, the sheet of dry plaster will be attached. The distance between the crossbars must be at least 60 cm. As a result, a kind of spatial frame is formed, which must be filled with any slab insulation, which will provide the structure with proper sound insulation.
Note! It is better to cut the facing part of the new opening from a single sheet, but if you have pieces left over, for example, after covering the walls of the previous room, it is quite possible to use them. The main thing to remember is that they need to be joined in the places where the cross members are located.
Just keep in mind that if you don’t have an edge plane to chamfer at an angle, you won’t get normal joints - and then they need to be properly sealed.
- If you don’t have any remnants of gypsum board, you will need to purchase two sheets measuring 2.5 * 1.2 m, and cut out solid fragments from them . This is done using a knife with a reinforced blade. According to preliminary markings, the plasterboard shell is cut, and then the sheet is refracted. All that remains is to cut the cardboard from the back side - and you're done.
- Next, the drywall should be attached to the frame and screwed with self-tapping screws, making fastenings every 20-25 cm. It must be screwed tightly, but without excessive force, so that the fasteners do not break through the shell and damage the core of the sheet. If the cladding was assembled from pieces, then the next step would be to seal the joints between them.
- To do this you will need a primer, putty and reinforcing paper tape . After the seams have been treated with a primer, they are half filled with gypsum putty, and while it retains its plasticity, the tape is pressed in. In conclusion, the entire area of the opening should be filled with putty - and it is ready for finishing (see Finishing a doorway: how and with what).
- Usually, an opening sealed with plasterboard, like the entire wall, is covered with wallpaper , but you can decorate it in a more interesting way. For example, you can cover this section of the wall with photo wallpaper with some interesting plot, and even frame it with the same platband as on a real door.
Related article: How to replace the lock cylinder of an entrance door
If the wall in which the opening needs to be sealed is thick enough, you can leave a recess in it. You will get a niche that can be decorated in any way you like: with the same wallpaper, fabric, decorative plaster, or with lighting.
Installation of gypsum board sheets
Let's figure out how to cover a doorway with plasterboard quickly and easily. In principle, there is nothing complicated at this stage. Here it is important to accurately mark the dimensions of the opening on the sheet and cut out the required area along the contour. To do this, you only need a sharp construction knife.
Along the marked lines, cut the cardboard layer one by one, then simply bend the sheet at the place of the cut. Thus, go along the entire contour.
There should be two such blanks. First install one of them. Fastening is carried out along the entire perimeter and along the installed crossbars. Then go to another room and lay soundproofing material between the frames. For example, it could be ordinary mineral wool or foam panels. The gap between the sound insulator and the frame can be filled with polyurethane foam.
Now you can install the second workpiece and secure it with self-tapping screws. Pay attention to how the fastening is done correctly.
- The self-tapping screw should be recessed 0.5 cm deep into the sheet.
- The distance between adjacent fasteners is 10-15 cm.
- The distance from the edge of the panel to the attachment point is 1.5-2.0 cm.
If there are still small gaps on this side between the gypsum board sheet and the end of the opening, they can be foamed.
In fact, you have already sealed the opening in the wall; all that remains is to align the walls of the room with the installed plasterboard sheet. Putty is used for this. But before this, it is necessary to treat the gypsum board sheet itself with a primer and seal the places where the screws are installed with a thin layer of putty.
After drying, a layer of putty solution is applied to the entire area of the sheet, extending onto the walls of the room. If necessary, the leveling material is applied in two layers. Before the second, the surface to be treated must be primed again.
The best option for finishing is wallpaper. The whole point is that the vibration of the house, whether you like it or not, will definitely do its negative work in just two or three years. Cracks will appear at the junction with the walls. And it doesn’t matter that high quality putty was used, and the leveling process was carried out by a highly qualified master. Cracks cannot be avoided. And with the help of wallpaper they will be hidden until the next renovation.
Ways to seal an opening above a door
Making repairs with your own hands is doubly pleasant. After all, this allows you to enjoy the process and gives you the opportunity to really get what you want. And independent actions are an opportunity to save money. As a result, this approach is very popular among us, but many suffer from it. After all, any repair involves certain difficulties that have to be overcome. And very often unforeseen circumstances or unusual situations arise. For example, there is a space above the door that needs to be filled. What is the best way to do this? What tools and materials should I use? How to properly lay the opening above the door?
Opening above the door
Let's try to answer all these questions, using photos for clarity.
Causes
What could be the reasons for this situation? Essentially there are two of them:
- design features;
- inaccuracy of measurements taken.
In the first case, there are situations when the door opening corresponds to the height of the ceiling. Quite often you encounter this in bathrooms, storage rooms and even living spaces.
Opening above the door
Is it worth calling a specialist?
The opening above the front door can be sealed by a specialist. However, such an action involves the need to pay for his services. If the budget allows, there is such a desire, then, of course, it is easier to call a master who will independently decide what technology and materials to use, as well as perform all the necessary actions. Moreover, many provide guarantees.
We will not choose this path, but will try to do everything with our own hands.
Expert advice
- It is necessary to install transoms only if, after installing the door leaf, which has certain dimensions established by the standard, there remains free space that is not necessary from a practical point of view. The possibilities of modern designers are so limitless that after certain manipulations the transom easily becomes an element of a design solution in the interior.
- A huge number of different materials makes it possible to make transoms not only from wood or glass. The construction market also offers metal (for entrance doors) and metal-plastic structures. The most important thing when choosing a material for a sash is to consider what material the correct leaf is made from. After all, a door and a transom made in the same style will look much better.
- Transoms can be located both at interior doors and at entrance doors. Depending on their location, certain requirements are imposed on them. Thus, the structure above the interior door can simply be a decorative element, while the shutter above the front door should not only reduce free space, but also have good sound and heat insulation, as well as strength, to prevent unwanted entry into the house or apartment. These features should be taken into account when choosing material for the manufacture of transoms.
As you can see, the transom is not very troublesome, but at the same time quite an effective solution for non-standard doorways. It will not only hide a space that has an unsightly appearance, but will also make the interior of the room more original. In addition, some transoms can be used as a source of additional lighting or room ventilation.
Options
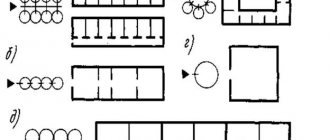
So, let's look at what options there are to seal the opening above the front door. Much, of course, depends on the material of the walls:
- construction of a plasterboard structure;
- use of wooden boards and bars;
- brickwork;
- use of available materials.
Construction of a plasterboard structure
To do this, we will need metal profiles or wooden blocks, drywall itself and self-tapping screws, primer and putty. Tools include a hammer drill (if the walls are not wooden), a screwdriver, a tape measure, a pencil, a level, a spatula, a roller, sandpaper and finishing material, which can be wallpaper, paint or other options.
First you need to build a structure. To do this, you need to carefully correlate this element with the parameters of the wall, taking into account that drywall will also be attached to the structure. It is necessary to consider the placement of elements to ensure proper rigidity of the structure.
Next, you need to secure the drywall using self-tapping screws. Moreover, they need to be pressed in a little so that they do not protrude above the plasterboard surface. These places, like the joints, must be sealed using putty. When it dries, the surface should be treated with sandpaper, after which it should be coated with a primer using a roller.
After this procedure, you can start finishing. To do this you will need: either wallpaper, or paint, or another option. Of course, since this area will be part of the wall, the finish should be identical. It's good if the rest of the part is not yet lined. If there are already wallpapers on the walls of the room, you will need to select the same ones or supplement them with some other option.
Using wooden boards and bars
This option is especially relevant if the renovation is carried out in a wooden house or in those apartments where wooden boards in combination with plaster are used as floors.
In this case, it is important to calculate everything correctly so that the resulting structure does not differ in size from the rest of the wall. You will need a minimum of tools: tape measure, pencil, building level, screwdriver, saw. The materials you will need are screws, putty and finishing material.
First you need to take measurements, and then act. After this, it is necessary to perform finishing operations.
Related article: Where should the bathroom door open?
Brickwork
Blocking the opening with bricks is the most difficult option. Therefore, to close the opening in this way, you should think carefully; it is better to avoid it. If the decision is made, then it is necessary to organize the base - make a crossbar on which bricks can be laid. To do this, you can use metal corners or channels. It is important to “weave” the bricks into the existing masonry to ensure sufficient strength.
Without the proper qualifications and experience, it will be very difficult to perform such actions. Therefore, it is still recommended to find an alternative.
Using scrap materials
For example, an old door leaf may be suitable for this purpose. It must be cut to size and then secured in the opening. This is perhaps the simplest and most affordable option. And if in other cases you can perform the actions yourself, then here you will need an assistant.
So, we figured out the options for how to seal the opening above the door. Each is good in its own way and has its own shortcomings, so the choice must be individual. It is only important to act consistently, take into account the recommendations, then the opening above the door will be completely identical to the rest of the wall.
You can learn even more about the possibilities for sealing or filling an opening above the door by watching the video provided.
Varieties
In order to accurately select a door between rooms with a transom, you need to know what design features these doors have and determine which type is suitable for a particular interior. As for the type of arrangement of the valves, today there are several options:
- mounted only above the door;
- installed on one or both sides;
- combined - installation is carried out from above and from the sides.
By shape
Attention:
Transoms can be rectangular or arched in shape.
Rectangular ones are the most practical and also classic version of the doors , which are suitable for any model of door leaf and any interior design. Arched ones resemble arches in appearance; they give the interior an original, sophisticated and sophisticated appearance.
By type of design
Based on the type of construction, the following types of transoms are distinguished:
- solid;
- separate;
- deaf;
- glazed.
Glazed
This type of shutter is suitable for dark rooms, as the glass serves as an additional source of lighting. Sometimes such transoms can open, providing ventilation to the room.
Separate
Autonomous structures are mounted separately from the door on the side and on top of the door leaf. Such designs are used if the distance between the door and the opening exceeds 12 cm.
One-piece
A solid transom is a door element that is similar in appearance to the top crossbar. Experts recommend installing such a leaf if the distance from the opening to the top of the door leaf is less than 12 cm.
Deaf
Such doors are installed when the door being mounted has significantly smaller dimensions than the doorway.
Sealing the opening above the door
Quite often, there is a situation where the doorway has no top.
That is, the height of such an opening is from floor to ceiling. I encountered such a miracle of architectural thought in toilets, kitchens, closets, bedrooms, entrance doors, and once even in the hall above the swing doors. Most often in Khrushchev buildings. Basically, above such openings there is a mezzanine, the doors of which open into the toilet, closet or kitchen.
There are several options for resolving the issue. Possible before installing the door
, build a frame from wooden beams or metal profiles and sew drywall onto it. You can first install the door, and then build the frame, using the top beam of the frame if desired, and again sew on drywall. Then the self-tapping screws on the plaster, or the entire plaster, are putty, and the joint between the plaster and the wall is also treated with putty. And as a result, we have a continuation of the wall that looks no different from its more complete and natural counterparts. You can hang wallpaper and live, enjoying the secret of the location of the void in the wall.
This is undoubtedly a complete and correct course of action that allows you to achieve the desired result. But. There is an option when you can get the same result without buying drywall, wooden beams, or metal profiles. But the effect will be the same - a feeling of something pleasant, kind and bright. You can use a fragment of an old door instead of plaster; it consists of a flat plane, without a panel of depressions and convexities. As a rule, most customers in my practice choose this option.
We measure the distance: the height and width of the opening above the door frame. We reduce the dimensions both in height and width by three to four centimeters and cut out a blank from the old door.
We insert the panel into place and wedge it so that there is room for foam on all sides.
After the foam has dried, repeat the same procedure on the other side of the door.
After drying, cut off the foam clearly and evenly.
Wallpaper can already be glued if desired. Or putty first to be neat.
And remember, you always have the opportunity to invite a professional and save your time, effort and nerves.
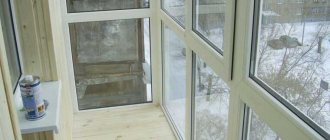
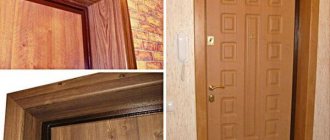
How and what is used to finish door slopes after installing the front door
After installing the new entrance door, all that remains is to update them with brand new slopes. They can be integrated into the interior design in different ways; plasterboard, laminate, MDF, PVC sandwich panels, as well as non-standard materials (for example, imitation natural stone) are suitable for design. In order not to spend money on the services of a specialist, you can install the slopes yourself, following the instructions.
Features of finishing for different walls
The easiest way is to seal openings in panel houses. The walls made of panels are stronger than brickwork and do not crumble at all, so the box is tightly installed in such an opening. You will need a little foam to seal the opening.
The brickwork is thicker than a concrete wall, so there will be room to turn around.
The material for the slopes can be anything: drywall, plastic and other sheet materials are suitable.
If you want the finish to look neat, use PVC panels as the finishing material; they are the most durable. Yes, and you can match the color of the door frame without any problems.
Plastering slopes
[flat_ab > Slopes are most often plastered along with the entire apartment when the finishing is not completed.
- Putty knife.
- Level.
- Master OK.
- Rule.
- Painting mesh.
- Painting tape.
- Painting corners.
- Construction mixer.
- Plaster (dry mix).
- Finishing putty.
- The primer is liquid.
- Sandpaper.
- Water-based paint.
Do-it-yourself plastering sequence:
- Prime.
- Install and fix the beacons using a level.
- Close the junction of the wall and the slope using a painting corner.
- Cover the front door and frame with masking tape
- Attach the painting mesh.
- Make a solution.
- Fill potholes.
- Apply the solution to the entire surface, stretch along the beacons, then wait for it to dry and seal the cracks.
- Prime.
- Level with finishing putty.
- Wait until dry and sand with fine sandpaper.
- Paint with water emulsion.
If we are talking about a private house, it is advisable to treat the cleaned opening with an antifungal primer before work and add a little to the solution itself.
Drywall slopes
Drywall is a popular material for finishing the slopes of the front door with your own hands. It is inexpensive, reliable and easy to install.
- Drywall.
- Dowels.
- Self-tapping screws.
- Profile guides.
- Glue.
- Drill.
- Knife.
- Roulette.
- A simple pencil.
- Rag.
- Level.
- Putty knife.
- Construction mixer.
- Hammer.
Related article: How to make a light door with your own hands
The procedure for installing slopes with your own hands using drywall:
- Clean the opening from dust and foam residues.
- Drill slots for dowels around the perimeter at a distance of 20 cm - this is necessary to improve the adhesion of the material to the surface.
- Using a tape measure, measure the width and height of the door opening and cut out guides: two side and one top.
- Stepping back about 1.5 cm from the door opening, attach the guide to the self-tapping screws so that its narrow edge is in the inner part of the slope.
- Measure the size of the strips for the slopes and cut them from plasterboard. When cutting, try to ensure that the edge of the drywall does not crumble and is smooth.
- Dilute the glue to a homogeneous, thick sour cream.
- Apply the adhesive mixture in heaps onto the cut-out parts of the drywall.
- Coat the dowels with glue.
- A sheet of drywall is inserted into the guide and pressed.
- Check the position of the slope with a level, then fix it for 6 hours.
- Remove any protruding glue with a rag.
- Periodically tap the surface with a hammer through the scrap.
The next day after installation, the slopes can be further processed: putty, paint.
Basic installation details
When installing an interior door, it is not necessary to order it with a ready-made transom , because you can make it yourself.
Important
It is necessary to start manufacturing the structure only after the door leaf has been installed.
To equip the transom you will need:
- timber for making a box;
- wedges made of plastic or wood;
- platbands and additions;
- construction foam;
- fasteners;
- silicone sealant.
The transom manufacturing process is carried out in the following sequence:
- First, the sash is measured, i.e. The width and height of the free space in the opening that needs to be closed are measured.
- Then the transom box is made. To do this, you need to mark the timber taking into account the obtained dimensions. At the same time, we must not forget that there must be a gap between the structure and the ceiling so that in the future it can be easily aligned in the doorway.
- The elements of the box are cut out and fastened together with self-tapping screws. The screws should not be tightened all the way, because during the installation of the transom it may be necessary to align the structure in the opening.
- The finished box is installed in the opening and secured with self-tapping screws. Wedges are used to level the structure.
- After installing the transom box, the sash leaf is cut out from the previously selected material.
- The sash is attached using self-tapping screws and fixed into an already mounted frame.
- The gaps between the opening and the transom are sealed with construction foam or sealant.
- Platbands and necessary decorative elements are attached.
Laminate slopes
Laminate is a floor covering, often used for entrance door slopes; it does not require additional processing, it resists mechanical stress. Do-it-yourself finishing has a lot of nuances.
There are two ways to install laminate slopes:
- Frame installation. With this technology, you can insulate the opening: fill it with mineral wool or polyurethane foam. The disadvantage of the design is that the slats are placed only in a horizontal position.
- Glue installation. It requires a flat surface of the opening, or it must correspond to the dimensions of the laminate. The laminate is glued to the foam (at low pressure).
The first method is preferable for apartments, the second is universal.
Slopes made of MDF panels
The most common finish: affordable, looks good, easy to install.
- MDF panels.
- Wooden bars, width 3 cm.
- Dowels.
- Self-tapping screws.
- Liquid nails.
- Platbands.
- Decorative corner.
- Guide strips.
Installation of MDF door slopes - do-it-yourself installation algorithm:
- Clear the opening.
- Drill holes around the perimeter for the dowels.
- Afterwards, attach the slats and guides.
- Measure dimensions and make templates for parts for slopes.
- Cut out the details.
- Install the top part onto the screws. Check that there are no gaps.
- Install into the side guides: inside on nails, outside on screws.
- Cover the outer corners with a flexible decorative corner to hide screws and irregularities.
- Cover the inside corners with decorative strips and the finishing is ready.
If you make slopes on the front door, it is not recommended to use plastic - it is very fragile, and the front door is often susceptible to mechanical stress.
After finishing the work, you need to install the platbands. If there is still wallpapering to be done, they will be installed after the renovation is completed.
Advantages: the finish looks presentable, easy installation.
Sandwich panel slopes
A PVC sandwich panel is two thin sheets of plastic with a layer of insulation (sheet thickness 1 cm).
Materials, tools for installing slopes of PVC sandwich panels on the front door:
- PVC sandwich panel.
- Profile (starting, cover).
- Plastic is liquid.
- Roulette.
- Knife.
- Self-tapping screws.
- Screwdriver.
- Drill.
- Screwdriver.
Installing slopes from sandwich panels, or how to do it yourself:
- Clean the opening from dust and foam residues.
- Take measurements of the parts of the sandwich panels (length width): one top, two sides. For convenience, you can cut out a cardboard template so that there are no gaps between the parts of the PVC sandwich panels after installation.
- Cut the starting profile and attach it with self-tapping screws (10 cm margins) along the edge. You don’t have to use a profile: make an opening in the foam 1 cm deep, insert the edge of the sandwich panels there.
- Install the PVC top panel.
- Afterwards, cut the starting profile to the width of the slope, install it under the ceiling and at the base of the floor. This does not have to be done if there is liquid plastic - the cracks can be sealed with it. But do not use sealant - it will darken.
- Installation of strips of sandwich panels.
- Cover the sections of the sandwich panels with a “lid” profile. Cut and install. An overlap forms in the corners of the structure.
- Where there is an overlap, cut the profile at an angle of 45 degrees.
If desired, the space between the PVC sandwich panel and the wall is filled with polyurethane foam. This is done after installing the sandwich panels.
For more information about installing slopes with your own hands after installing the front door, watch the video
Non-standard solutions
In addition to the above standard methods using popular materials, you can use more original options that will highlight the interior, decorate the front door and surprise your friends:
- Artificial stone is a non-standard finishing of slopes. The main advantage is resistance to mechanical stress (if it is not a plaster model, it is fragile). Not a cheap option, requires the participation of a specialist.
- Tile. A type such as clinker (imitation brick or stone) is suitable.
- Plastic panels are an affordable but unreliable finish.
- Decorative plaster – in terms of aesthetics and durability, it has no equal. But you will need to work hard to find a good specialist in this field, because this work requires a creative approach and professionalism.
Materials can be combined if their properties are similar (sandwich panel parts + stone, laminate + tile and others).