Window curtains are an integral part of the interior of a modern apartment. They carry both aesthetic and practical significance, protecting the room from bright light and prying eyes. To securely fasten the curtains you need to install a curtain rod. Let's try to figure out how they work and what they are like in this article.
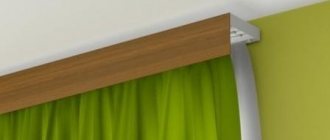
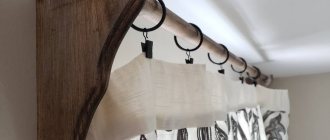
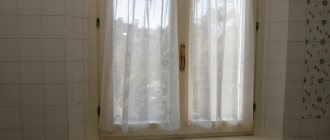
Attaching curtains to the ceiling gives a lot of scope for design ideas
Ceiling cornices: functional differences
Functionally they are divided into:
- single-row;
- double row;
- three-row.
Single-row is designed to secure one type of fabric and fits well with a particular interior style.
A single-row curtain rod has only one track for attaching curtains
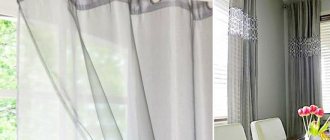
The double-row is the most common; it is used to fasten in two rows, which makes the window opening more saturated.
A double-row cornice allows you to decorate windows not only with thin fabric, but also with thicker night curtains
With the help of a three-row, exclusive design ideas are realized in creating an interior on the windows.
Three-row and wider products are used for complex compositions, for example, for Japanese curtains
What is the difference between one-, two- and three-row designs
A three-row cornice is useful when you plan to use tulle, a curtain and a lambrequin at the same time to decorate a window. Such a composition, on the one hand, requires a very balanced approach to the choice of color and texture of the fabric, on the other hand, a very critical approach to the selection of fastening elements, since we are talking about a serious increase in the load on the cornice.
The level of usability of the design and its further functionality depend on the correct choice.
In what cases is it better to choose a ceiling mount?
The following options exist:
- panoramic windows need to be curtained;
- to achieve the visual effect of greater room height using long curtains;
- the presence of minor defects in the apartment;
- the end of the window opening is located close to the ceiling, there is no space for installation;
- the walls are made of material that does not allow the bracket to be firmly fixed;
- to limit the access of cold air - the arched shape will provide good insulation;
- draw more attention to the canvas and hide the profile behind a decorative strip.
Using ceiling mounted curtains you can visually increase the height of the room
Hiding a wall behind solid curtains is perhaps the easiest way to hide defects in a window opening
Fastening device
It is important to consider that the product is mounted either on the original ceiling surface or on a previously fixed beam, or on platforms. Today there are two methods of fastening:
- An open type method in which hidden supports are first installed, and then fixation systems are installed.
- Closed type method - installation is carried out on the original ceiling, where the cornice is mounted behind the flooring.
The first method is the simplest and most common. The second method requires certain skills, but the result is worth the candle.
Many wall cornices can be mounted on the ceiling if the design of the brackets allows
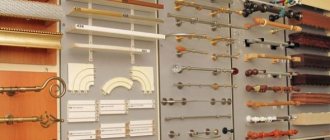
Materials for production
In order to make a competent choice from the wide range of products on the market, you must rely on two main conditions:
- Compliance with the stylistic features of the interior.
- The material from which it is made must have good practicality and wear resistance characteristics.
Cornices with a smooth surface are suitable for modern room decoration styles.
Classic interior trends require more elaborate design
A cornice with an imitation of a roughly processed surface would be appropriate in a loft or rustic style
Profiles can be made of metal or plastic. Plastic products have recently been noticeably crowding out their metal counterparts. They can boast of their low price, have a wide selection of colors, as well as many texture options, which allows you to implement more design solutions.
Plastic profile systems allow you to create various combinations, and components are sold separately
The metal analogue is made of black chrome or stainless steel, on a nickel, bronze, brass base, as well as aluminum. They are in a more expensive price segment, unlike their plastic counterparts, but the high price is compensated by their long service life and chic appearance, suitable for almost any interior.
Metal cornices are the most reliable in design, however, the permissible load on them also depends on the ceiling material
Double-row ceiling cornice with round rods
Installation.
You will need tools. The complexity of installation will depend on the weight of the structure.
The ceiling cornice is attached to the floor slab using a self-tapping screw. But it will be difficult for a stretch ceiling. You will have to first make a transverse wooden plank. Then you can stretch the ceiling. It is impossible to screw a cornice to a polyvinyl chloride sheet. It is even more difficult if the ceiling is suspended and the structure is made of either metal or wood. The whole problem will be weight. In such cases, a puncher and special rings for polyvinyl chloride sheets are needed. But if you do not have experience installing suspended ceilings, you will have to turn to experts.
With plastic everything is easier. There are holes for self-tapping screws. In addition, the kit will include plugs. They are needed so that the black heads of the fasteners do not spoil the appearance of the structure. You only need to mark the ceiling and screw the cornice. All is ready. You can hang curtains.
You can also combine materials to create combined cornices. They will help you put together aesthetic combinations of curtains of different shapes and weights.
Plastic curtain rods, description, pros and cons
- Weight. There are designs for light, medium and heavy curtains. This takes into account the weight of the canvas and the presence of related components.
- Varieties. It can be attached to the ceiling or wall, and has a universal mount.
- Tire profile. They have a hollow structure or with filling. In the first case, the design turns out to be very light, but the fabric is also lightweight. The filled profile holds heavier curtains, is rigid and has a more pronounced relief.
- Control type. There is either an electric drive or it can be opened and closed manually. Electric drives are becoming increasingly popular, while being inexpensive.
Straight cornice
Cornice with a turn
Cornice with baguette Flexible cornice
Note! Provided that modern curtain rods for heavy curtains made of plastic, on which heavy structures are attached, are strong enough, it is recommended to use a combined product with a metal base that has increased strength.
Inexpensive plastic models without decorative cladding are often used to secure curtains in niches where the design of the cornice does not matter.
Below in the table we consider the positive and negative aspects of plastic products:
| pros | Minuses |
| They have a lower price compared to metal counterparts. | They look less stylish compared to metal products. |
| Easy installation and maintainability. | They have low strength compared to metal and wooden counterparts. |
| Durability and reliability. | |
| Versatility. The structures are used in rooms with any climatic conditions. The material does not accumulate moisture, does not rust, does not ignite, and does not conduct electricity. | |
| Harmonizes with any type of interior. | |
| Made from environmentally friendly material, suitable for use in children's institutions. Minimal risk of allergic reactions in children. | |
| Easy to care for. |
Standard sizes
When choosing the size of a structure in a curtain rod store, it is important to build on not only the parameters discussed above, but also on existing standards. Different types of curtain holders can vary greatly in size:
- Wooden rods for curtains and tulle have a diameter from 16 to 50 mm. Moreover, the shorter the length of the cornice, the smaller its diameter will be. Rare models, the diameter of which is 75 mm, will be longer - up to 4 meters, and the remaining cornices have a length of no more than three meters.
- Metal holders also have different diameters: from 10 to 28 mm. The length of the cornice ranges from 160-350 mm. Curtains with a diameter of 28 to 50 mm can reach a length of 4 meters.
- Plastic structures are most often presented in the form of tires. The width of the product can be from 5 to 9 cm, and the maximum length is about 4 meters.
Aluminum curtain rods for ceilings. Description, advantages and disadvantages
Aluminum structures are very light and durable, which gives them an advantage over their wood and plastic counterparts.
Aluminum cornices are lightweight and easy to handle if necessary
There are the following types of aluminum profiles:
- in the shape of a round rod;
- tire, with special hooks;
- string type.
In the first version, the suspension has the shape of rings or loops. The profile has a standard outline and does not differ from curtains.
The tire differs from the bar in its shape, inside of which the loops for fastening move. It is attached to the ceiling and can be used not only when decorating window openings. With its help, they divide the room into separate zones.
Most models of profile aluminum curtain rods can be considered universal, since they can be installed on both the ceiling and the wall
String-type analogues have become very widespread; they are attached to the ceiling, but are included in a separate group.
The table discusses the advantages and disadvantages of aluminum products:
| pros | Minuses |
| They are light in weight. | Higher price. |
| Easy to install. | you need to purchase additional components. |
| Variety of models. | |
| High wear resistance | |
| Possibility to divide the room into separate zones. |
Installation
Installation features depend on the configuration of the product you are using. Wall structures are a round pipe, which is fixed to the wall using external brackets, while ceiling profiles are made in the form of a rectangular bus equipped with built-in guide grooves.
Double row cornice
Fitting
The first stage of installing curtain rods is fitting, which allows you to determine the required profile dimensions and adjust the purchased structure to them. To take measurements you will need a tape measure and a pencil.
- Determine the width of the window opening and the total width of the walls;
- Measure the distance from the top of the opening to the ceiling.
When installing a wall profile, the distance between the extreme points of the protruding parts of the cornice and the side contours of the window opening should be 15-25 cm to ensure complete coverage of the window with curtains. Accordingly, you need to use a pipe 30-50 cm wider than the window opening. The profile must be raised above the opening to a height of 5-10 cm, so it will not interfere with the opening of the window sash.
To properly hang a tire-type curtain rod, follow the same rules, but here take into account the distance between the profile and the wall - it should be 10-15 cm.
Trimming
Having determined the required dimensions of the cornice, shorten its excess length - using a tape measure and a marker, mark the profile along the entire circumference and cut off unnecessary sections with a hacksaw.
When using a tubular structure, both the main pipe and the second guide must be shortened. It’s easier to cut a double-row metal cornice of the tire type with a grinder, but if you don’t have one, a regular hacksaw will do, the main thing is to securely fix the tire so that it does not “play” during the sawing process.
Remove any burrs resulting from trimming using sandpaper or a file.
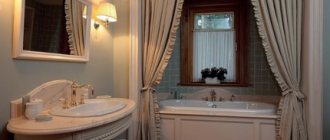
Examples and photos in the interior
This chapter presents photos of ceiling curtains for curtains suitable for various living rooms. Today, there are a great variety of products for fastening curtains made from various materials on the market. Implementing any design solution when decorating window openings is not particularly difficult. However, many nuances should be taken into account both when choosing a product and when installing a cornice, so as not to make gross mistakes and achieve a good result.
How to install a cornice with your own hands
Layout of curtain rods.
To assemble a round or semicircular cornice, you don’t need much experience, but there are a number of steps that are recommended to be followed
It is important to consider what type of structure will be assembled and what requirements apply to it. In any case, the ceiling surface must be flat.
If the ceiling plinth interferes with the installation of the cornice, it must be carefully cut off. Afterwards the surface is marked, for which the following are used:
- building level;
- metal ruler;
- simple pencil.
The markings must be made in such a way that the distance from the edge of the window bay on both sides is the same. If the surface marking is completed, you must proceed directly to the fasteners. Holes are drilled and dowels are driven into them. The pitch of such holes is best kept at 60 cm. Usually, ready-made plastic and metal ceiling cornices have drilled holes in the canvas, which are very easy to navigate.
Cornice mounting diagram.
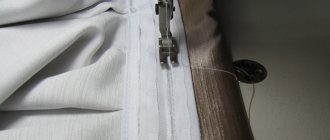
But there is one point that should not be forgotten. If the cornice is made of soft polymer, it will not hold the dowels. In this case, you must first prepare small metal plates. They are made for each hole. Now the cornice itself is being assembled. To do this, curtain hooks are inserted into the tires, after which plugs are installed along the edges. The strength of the assembly must be checked. For fastening, you need to use special butterfly dowels. Such elements are usually used for mounting plasterboard sheets; after fixation, they release reliable stops on the reverse side.
When choosing such dowels, you need to take into account the loads; on average, they do not exceed 5 kg for the ceiling and 8 kg for the walls. If you plan to hang a curtain with a lot of weight and additional decoration, then it is better to abandon such a curtain rod in favor of a metal one. It will allow you to support more weight. After the structure is attached to the ceiling surface, its reliability and ability to withstand loads are checked.
What if there is a suspended ceiling?
Installing a cornice on a suspended ceiling.
If you need to assemble a stretch ceiling, then you need to act completely differently. First you need to make special mortgages from timber, which will be attached to the surface of the base ceiling. The length of such a beam will correspond to the length of the cornice, and the thickness should be only 2 mm less than the distance from the tension fabric to the base base. The beam itself must be secured using anchors or dowels, after which you can begin to stretch the canvas.
When the ceiling is ready, you can begin preparing the holes; it is recommended to act very carefully. Small holes are cut in the canvas and covered with special rings. This is done to ensure that the stretch ceiling does not break during use. Through these holes the structure of the curtain rod will be attached to the mortgages. It is best to burn the holes themselves using a special tool; the same technology will be used when installing lamps. The cornice is fixed very tightly, but in such a way that during use it does not damage the canvas.
But it happens that the suspended ceiling is already in place, and it is simply impossible to attach the embedded beam without dismantling it. In this case, it is recommended to use wall brackets. They are mounted on the wall surface as close to the ceiling as possible, after which the curtain rod is simply screwed to them.
For a regular ceiling, lightweight plastic cornices are often used. Then a special glue “Liquid Nails” is used for fastening, which allows it to withstand a significant load - approximately 15-80 kg/cm. The installation process using this glue is extremely simple. First, you need to apply markings and clean the surface of whitewash or paint to ensure reliable adhesion. After this, prime the base and check its horizontalness. Glue under the cornice for future curtains is applied using a dispenser. The cornice is simply applied and pressed tightly to the surface. If there is a need for correction, the strip is carefully moved and all excess glue is removed. The solution dries in about 15-20 minutes, but it will set completely in 1-3 days, after which you can begin attaching the curtains.