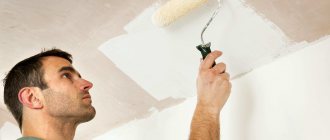
When renovating old premises, the owner has a question about whether it is possible to paint with water-based paint over whitewash, what is needed for this, how to do the work correctly so that the old plaster does not fall off the walls and ceiling.
Experts advise to first get rid of the whitewash and then start painting, but you must take into account that when washing the plaster a lot of dust will accumulate, so you will need polyethylene to pre-cover the surfaces to be treated before work.
Painting over whitewash.
Water-based paint on chalk whitewash – is it worth applying?
When painting walls, we must take care to create the highest quality adhesion of the paint coating to the surface. Therefore, whitewash, which clearly does not contribute to such adhesion, according to the rules, must be removed.
Experts do not recommend this type of painting, since the whitewash will simply peel off the wall and remain on the roller. The only exception is that the whitewash layer is very thin and adheres very firmly.
What difficulties might arise?
The question of whether it is possible to paint a ceiling over old whitewash with water-based paint is difficult to answer unequivocally. When making a positive decision, one cannot be absolutely sure of the success of this enterprise. Here are some arguments against:
- There is no guarantee that the seemingly strong old layer will not weaken in some places; The risk of getting a short-lived result still remains.
- Whitewash tends to get wet very quickly, becoming sticky; You may have to deal with such an unpleasant phenomenon as its smearing and small fragments sticking to the roller or brush.
- On a whitewashed ceiling it is difficult to see small irregularities or cracks under a layer of lime, but they will certainly make themselves felt after painting (the paint will highlight them).
Note: it is better to take a water-based emulsion with a matte effect; This coating smooths out and masks surface imperfections.
Paint selection
Many people ask, is it possible to apply water-based paint to whitewash? In fact, this finishing material is the only adequate way to paint such a problematic surface. Moreover, such paint does not require the use of a primer, having the function of the latter itself. But, again, it is necessary to ensure the strength of the whitewash layer.
If you plan to apply oil paint or enamel to the whitewash, then it is better to refrain from this step, as the result will be disastrous.
If the walls are covered with lime
Of course, it will not be possible to obtain a perfectly smooth coating without first removing the previous layer and plastering. But as a temporary measure, this method is quite suitable.
If the whitewash layer is small, and the surface is fairly smooth and does not crumble, you don’t have to rush to clean it. Water emulsion works well on lime. But it’s still better to play it safe and, to prevent the paint from crumbling, coat the wall with a primer. Cracks and potholes must first be plastered. You can get the desired color by adding colored pigment to the water emulsion.
When not to paint: how to clean old whitewash from walls or ceilings
Experts still do not recommend painting without first removing the whitewash. And therefore, the ideal solution in this case is to remove the layer of this very whitewash. There is no single master class here, and it all depends on the thickness of this layer and how firmly it holds:
- Thin layer. Despite its insignificant thickness, it is very difficult to remove. Significant impact will be required, and a grinding machine can provide this;
- Medium thickness layer. If this is exactly what you get, then this whitewash will most likely hold up well. However, it’s still easier to pick it up and tear it off the wall. We use a roller with good pile, generously wetting the walls or ceiling with it;
- Thick layer . As a rule, such a layer of whitewash adheres very mediocrely, so in most cases it can be removed with an ordinary spatula, after wetting it first.
Is it possible to paint over whitewash
There is no prohibition on painting old plaster. Water-based emulsion is easily applied to whitewash using a roller or spray gun. But how long the paint will last on the plaster depends on the quality of the old coating.
Therefore, when renovating an apartment, many owners prefer not to undertake such work, but choose the following alternative options:
- installing suspended ceilings in an apartment over whitewash allows you not to modernize the old surface;
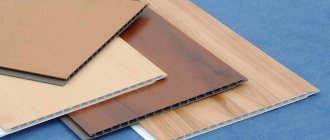
- Various plastic panels are introduced into the design of the kitchen and other auxiliary rooms, which are separated from the old lime at some distance.
But if a person does not have the opportunity to use modern repair methods, then all that remains is to use paints.
Then you must first make sure that there is a thin layer of whitewash on the ceiling and walls. Then the surfaces are examined for the presence of defects, cracks, and various stains. If all this is missing, then you can start painting without washing off the lime. The same actions must be performed if it is decided to use a water-based composition after whitewashing. You just need to wait for the applied lime to dry.
Some whitewash removers
- Paste. This method allows you to rid the walls or ceiling not only of whitewash, but also of dust and dirt;
- Soapy water. The solution is prepared as follows: for 10 liters of water, take 2 tablespoons of grated soap and 5 tablespoons of soda. It is necessary to wipe the whitewash layer with this solution until it completely disappears;
- Wallpaper remover. Apply the remover to the whitewash surface and leave for a while. After this, you can work with a spatula and clean the wall.
Painting technology
All work is carried out at temperatures above +5°C. You should not start painting in hot weather - the liquid will evaporate too quickly and streaks will appear.
If the water-based paint has dried out during storage, you need to add a little liquid. Please note that paint dissolves very slowly in water. It must be mixed until a homogeneous composition is obtained. It is more convenient to do this with a construction mixer or a drill with a special attachment. If color is required, add it before stirring.
So, step by step, how to paint a ceiling with water-based paint over whitewash:
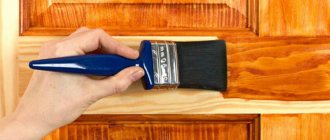
- You will need a long nap roller or spray gun. To treat small areas, you can take a regular paint brush. When using a roller, you will also need to purchase a special tray for pouring paint.
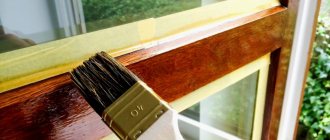
- First, hard-to-reach places in corners and niches behind radiators are painted. It is impossible to do this with a roller. Use a small brush.
- Don't use too much paint. Be sure to press the brush or roller against the edge of the tray or jar.
- No chaotic movements. The strokes are made strictly in one direction, away from the window. (Stripes running across the room will be noticeable.)
- Unlike lime, water-dispersed compositions do not form joints. Therefore, accidentally unpainted areas can be reworked the next day.
- Water-based emulsion has a high covering power, so most often one single layer is enough. If a second application is required, this must be done after 6-8 hours. Otherwise, the undried water emulsion will peel off.
- For re-painting, it is better to use a short-nap roller. Paint will be used more economically. And the surface will be smooth, without streaks.
So, we found out that it is allowed to paint with water-based paint over lime. Walls covered with a chalk composition should first be cleared of buildup. If you follow the above recommendations, you will be able to put your home in order in a short time without significant material costs. Violation of the painting technology may lead to repeated repairs. The crumbled layer will have to be removed and all work done again.
Surface preparation
To get a painted ceiling that looks like a stretch ceiling, that is, perfectly even in plane and color, its surface needs to be prepared.
Ceiling preparation includes the stages of removing the existing coating (whitewash or old paint) to the slab or drywall, sealing and gluing the joints between the floor slabs, if the slab is not solid, possibly plastering the failed areas, puttying the entire surface with several types of putty to eliminate defects such as pores, scratches, followed by grinding the resulting surface.
Preparation directly depends on the initial state of the floor slabs and the chosen paint. In houses where people have lived for many years, they may be whitewashed and once painted.
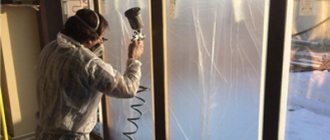
If the ceiling has been whitewashed, then the whitewash must be washed off. This is done using hot water, a roller, a spatula, a sponge and an old terry towel. The whitewash is moistened in sections with a roller with hot water once or twice, removed with a spatula, after which the floor slab is washed with a generously moistened sponge and wiped with a terry towel.
Proper removal of the whitewash should result in a clean gray concrete ceiling. It is acceptable if there is whitewash remaining, ingrained into the pores. After this, the ceiling is puttied, depending on the chosen paint, from two (for deeply matte) to five times (for glossy).
If the surface was previously painted with water-soluble paint, you need to check how the old coating holds up. Sometimes, if the ceiling was done perfectly, it will be enough to wash off the dirt from it and paint it once in the direction of the light falling from the window.
To assess the quality of the old coating, the ceiling must be wetted by creating a small draft. It is necessary to moisten up to two times, keeping for 30-40 minutes. If defects in the form of bubbles or paint delamination are revealed, they are cleaned off with a spatula and a coarse abrasive. Defective areas are puttied with a polymer finishing compound, and after it has completely dried, they are sanded “to zero” with the painted surface.
Updating or repainting the ceiling is not difficult at all. To correct all the unevenness, you must first clean it, remove the chandelier and thoroughly prime it.
Common mistakes made by DIYers
Beginners to renovation work can make a number of mistakes when painting a surface with water-based emulsion. In order not to repeat the mistakes of others, it is better to know them in advance:
- Painting without preparing the base. All dirt and defects remaining on the wall will appear after painting, and the result will be of poor quality;
- Wrong tool. It is better to choose a roller with a 6-7 mm pile; for the 2nd layer, a pile of 1.5 mm is suitable;
- Work with the brush in different directions; when the paint dries, strokes in different directions will become noticeable; you should always move the brush in one direction;
- Painting in one layer, applying one layer is difficult to obtain an even coating, it is better to do at least two;
- Paint on top of a non-dried surface, so as not to make a mistake, look at the packaging of the solution to see how long it should take to dry. Otherwise, the tool will stick to the surface and some of the paint will come off;
- Do not apply paint in hot weather or under bright sun. In hot weather, layers will dry too quickly, and in poor lighting it will be impossible to see flaws.
It is difficult to obtain an even coating when applying one layer; it is better to do at least two.
Putty
It is important to putty the surface for a good appearance and a more durable ceiling. When working, I use a carrier with a powerful lamp of about 100 watts, this helps to detect the slightest irregularities, which sometimes are not visible even in daylight.
Do-it-yourself whitewashing of the ceiling
Then, after a day, putty, and the detected defect, which I corrected, will set well, then I clean them with fine-grained sandpaper under the switched on lamp. For an ideal result and ceilings with serious defects, I make 2 layers of putty - in this case, I clean the first with a coarse sanding, the second, finishing, with a fine-grained sanding.
I pay special attention to the corners - to achieve the ideal angle, I use a spatula to level not only the ceiling plane, but also a small part of the wall adjacent to the corner.
Materials
- Chalk is the most popular option. The advantages of whitewashing with this material are low price and a perfectly white coating. The downside is its fragility: if you whitewash the ceiling with chalk, soon after the repair a nuisance may occur such as it falling off.
- Lime whitewash will mask minor irregularities well. Unlike chalk, this type of coating will last much longer. Lime can allow water to pass through itself, which is necessary in rooms with high humidity.
- Painting with water-based paint will cost more; the material is not used as economically as if painted with lime or chalk. There is no need to prepare the solution yourself - this material is sold ready-made. A wide range of shades allows you to realize any design ideas.
Preparing for coloring
In order to begin work on preparing the surface and working with water-based paint, you will need the following tools:
- dye;
- roller;
- small brush or roller;
- putty knife;
- water container.
A spatula should be used to level the surface. Using this tool, you can also scrape off the layer of old paint in those places where it comes away from the base. All existing cracks must be repaired with putty, after slightly widening them.
Regardless of which surface the layers of emulsion will be applied to, it is important to achieve an absolutely smooth structure, free from any irregularities or other flaws. You should also remove all furniture from the room or cover it with film.
When all these steps have been completed, you can begin applying the emulsion.
After the ceiling is leveled and prepared, you need to apply water-based paint. To achieve the required consistency, the emulsion is diluted with water in the ratio: ten parts of water-emulsion substance, one part of water.
It is important to thoroughly stir the substance before starting work.
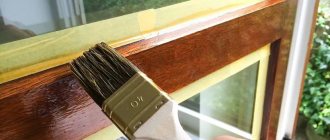
You need to start painting water-based paint from the corners. To do this, you need to take a brush and carefully, without getting on the walls, paint the corners. Next, with the same brush you need to go over the entire perimeter of the ceiling. This is necessary so that when working with a large roller you do not get it on the ceiling plinth or wall. The width of the strip should be 4 or 6 centimeters. Then you need to take a roller and paint the entire ceiling. It is not recommended to make sudden movements; the roller should be rolled as carefully and smoothly as possible.
When working with water-based paint, it is very important not to apply a large amount of emulsion to the ceiling at once. The surface must be painted in stripes.
After every three or four stripes, the roller should be lowered into the container with the emulsion again. In order for the substance to apply evenly, you need to roll it several times with a roller on a clean surface (there are special painting trays on sale for this). This is the only way to get a streak-free ceiling after the work is completed.
How to divorce
The puttyed and sanded unpainted surface of the ceiling looks quite decent. Defects, if any, will appear only after applying a coat of paint. Amateurs believe that paint alone can hide their imperfections. This is completely the wrong approach. On the contrary, it emphasizes and reveals all the defects that remain after surface preparation.
Only after applying the first layer can you clearly see all the scratches, small and not so pores, and the sagging of one layer of putty onto another. Therefore, the first layer, which is essentially a surface primer, must be done with a highly diluted composition. It must be diluted in certain proportions.
If defects appear, they are eliminated, and after that the main layers of coating are applied. If there are pores left that they are trying to hide with paint, then with each layer they will be visible more and more. As a result, the more you pour onto the defect, the larger and more noticeable it is. For basic coloring, the water-dispersion composition must be diluted if it is thicker than the consistency of kefir. Otherwise, you may end up with shagreen areas that differ from the rest of the ceiling surface.
Removing ceiling defects
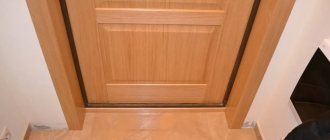
The result of whitewashing with water-based paint
After which I take a hammer and carefully tap the joints between the cinder blocks (if I see them), the corners, places near the fixtures of the lamps - there are often “surprises” here in the form of hollow spaces on which the plaster miraculously holds. And it is after my work that it can fall on the customer’s head, for which purpose I carefully examine the ceiling with my own hands every time.
After inspection, if defects are found, I seal them with alabaster or putty.
The technology is as follows: I wet the defect well to remove dust and moisten the surface - this is especially important for cement-based mixtures, then I do not touch this place for at least a day.
We whitewash the ceiling with our own hands
Then I remove the existing stains on the ceiling using copper sulfate or bleach; they can penetrate into the next layers and ruin the appearance of the ceiling.
Useful tips from professional craftsmen
Important Be sure to take into account the characteristics of the room when choosing materials, tools and when making repairs. For example, in the bathroom it is better to use a moisture-resistant solution to protect the ceiling from the formation of fungus, otherwise the coating will soon begin to crumble rapidly
Typically 2-4 coats are required. Each subsequent layer must be applied when the previous one is completely dry.
It is important that the coating dries naturally. A beautiful, smooth ceiling is an important element in the perception of the overall appearance of the room. Read our articles on how to insulate, repair, level and putty the ceiling surface yourself.
Materials
The main rule is not to buy anything on the market. In addition to the risk of purchasing counterfeit products of low quality, materials in such places are stored incorrectly. Water-based compositions freeze at low temperatures, and after defrosting they lose their quality.
To choose the right water emulsion, you need to pay attention to the following:
Drying time. This indicator ranges from 2 to 24 hours
But it is important to remember that drying time depends on the humidity and temperature in the room. Optimal indicators: 18–20 degrees Celsius and air humidity not higher than 65%.
Viscosity
This parameter reflects the degree of dilution of the material with water. If you plan to paint with water-based paint using a roller, then this indicator should be no more than 45. If the work will be carried out with a spray gun, then no higher than 25.
Material consumption. Indicated in liters per square meter. Most manufacturers indicate consumption without taking into account surface absorbency, so it is recommended to add 10% when calculating.
Shelf life. This indicator is important if repairs are still planned, but the purchase of materials has already begun. Typically, the shelf life of water-based emulsions does not exceed two years.
Covering power. This indicator reflects how well the composition covers the color of the base. If it is low, you will have to paint the walls in several layers.
You will also need consumables:
- Primer. Provides a high level of paint adhesion to the wall. In addition, thanks to the use of a primer, smudges will not appear on the walls. It must be made on the same basis as the paint. That is, for acrylic paint you need an acrylic primer, for silicate paint - a silicate one.
- Sandpaper. Required for grinding the surface before work.
- Putty. If there are a large number of defects, starting and finishing putty will be required. If there are few defects, then only the finishing coat is sufficient.
- Polyethylene film. It can be used to cover the floor and bulky furniture that is difficult to remove from the room to protect it from the composition.
- Masking tape. Serves to limit areas for painting and secure the film.
Some consumables, such as polyethylene or masking tape, are not required for painting, but it will be difficult to work without them