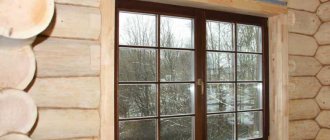
Any prudent owner protects his property. An important factor here is the fact of ensuring an attractive appearance of the item and extending its functionality. If furniture that has become unusable is often thrown away, then the walls and ceilings are repaired, and the windows and doors are replaced with new ones. Whether it is a detached house or an apartment, replacing entrance doors is a priority, as it allows you to protect the home and its owner from visits from unexpected guests. When choosing the size of door hinges, you need to take into account the type and dimensions of the frame on which you want to attach the door.
Classification
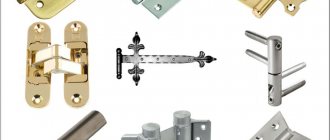
Designers say that a beautiful door attracts attention regardless of installation method. And installers claim that a reliable working mechanism is an important part that ensures trouble-free operation for many years. To figure out which door hinges to choose, you need to familiarize yourself with the range and manufacturers. It is better to purchase a product that suits the owner of the residential premises in all respects, including being in an acceptable price category.
The selection of the correct operating device for the operation of the door depends on:
- Size.
- Type or purpose of the door.
- Manufacturing material.
- Weights of fabric.
- Mounting method.
- Constructions.
A special parameter that does not affect the size, but plays an important role during installation, is the door opening side.
All about furniture hinges. general review
Hello dear friends!
In the last post, we looked at what types of facades can be installed, as well as what hinges need to be selected for them.
But you shouldn’t limit yourself to this knowledge, if, of course, you want to be furniture makers, and not just “jacks of all trades” who can boast of a self-made kitchen, a wardrobe, and two shelves for the nursery.
A furniture maker must be able to make absolutely any product, which, of course, technology allows for making.
So, I think you can already choose hinges for overhead facades (and not only for overhead ones, but also for internal, blind, 45-degree angled ones).
How many of them should be placed on a façade of a certain size? How can you adjust the façade thanks to them? How should they be cut in correctly?
And if you need, for example, to design a box whose installation angle is not 90 degrees, but, say, 80 degrees (I hope the meaning of the phrase “installation angle” has not yet been forgotten)?
There are no such hinges (standard installation angles are 30, 45, 90, 120, 135, 180, 270 degrees), but the facade needs to be hung.
“If not, then you can’t put up a façade,” you can say, and immediately admit your incompetence. And if you add that you visit my blog, then it’s also my incompetence.
But I don’t want you and I to have superficial knowledge of this issue, so I propose to go directly to the analysis of its essence, and we will start with a general overview of this irreplaceable fittings.
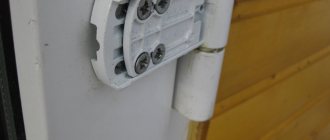
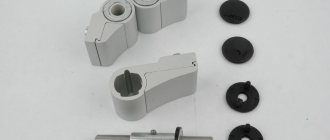
The loop consists of a base and an installation platform. We insert the platform into it, secure it with a screw - and it is assembled.
Further, it allows you to adjust the façade in all three planes (back and forth, up and down, left and right).
The front and back can be adjusted with a screw, which is used to secure the mounting pad in the loop.
This platform does not “sit” on a rigidly defined seat, but has some “play”, thanks to which it can be planted deeper or not. Thanks to this, the façade can be adjusted in depth.
Up and down can be adjusted using the same installation pad.
It is attached to the chipboard thanks to two holes (oblong shape). Self-tapping screws (usually 16x4) are screwed into them. And thanks to these oblong-shaped holes, by “losing” the screws, you can move the facade up and down.
It can be adjusted left or right thanks to a special bolt located in the middle of the loop.
Thanks to it, you can change the angle between the installation platform and the axis of the fittings itself.
And by changing this angle, we shift the facade to the right and left.
It would not be amiss to remind you that having shifted the facade in any direction, you need to adjust its depth, since such a displacement always increases the gap between it and the side of the box.
The size of the displacement usually varies within 5 millimeters. Why usually? Because furniture hinges are produced by different manufacturers.
With these examples, I think you understand the structure of this fittings.
Go ahead.
For example, you need to hang two fronts (let them be made of chipboard) on the boxes.
One of them measures 500 by 300 millimeters, and the other measures 1600 by 400 millimeters. Question: how many loops should be “attached” to the first and how many to the second facades?
Answer: The first of them requires a minimum, that is, two pieces, and the second - four.
It's simple: the larger the facade, the greater its mass, the greater the load on the hinge, the more of them need to be hung on it.
I provide an approximate table that shows the dependence of the number of loops on the size of the front.
The table is approximate, since the front can be made of different materials and, accordingly, have different weights. But the principle is correct.
Of course, the more loops the better, but there is one “but”.
The more there are, the more difficult it is to regulate the front.
Moreover, if it is adjusted incorrectly, the loads on the hinges may not be distributed equally. And this can lead to their rapid failure.
Well, how can you make the installation angle, for example, 80 degrees?
And it's very simple. You just need to buy a special platform to change the angle.
These pads are made of plastic and are placed under the hinge mounting pad when it is installed.
Each such platform is designed to change the angle by a specific amount.
For example, in our case, under the installation pad, you need to place this plastic “spacer” with an angle of 10 degrees.
Moreover, by 10 degrees you can either decrease or increase the angle. It depends on which side we put it on.
That is, with this thing you can make an installation angle of 100 degrees and 80 degrees for a regular overhead loop.
Moreover, the hardware in question from some manufacturers may have a special mounting platform instead of the usual one, specifically for changing the angle. Such sites can change the angle in the range from 5 to 22 degrees (maybe there are other numerical “runs” - this is not important).
Further, there are fittings with different diameters of the landing cup (26 mm, 35 mm, 40 mm).
The landing cup is the element with which it is “embedded” into the body of the façade. The most commonly used hinges have a 35mm cup.
Next, how to correctly place this fittings on the surface of the front, or more precisely, at what distance from its edges?
Well, in terms of height, this is “the owner’s business.” The main thing is, before determining this size, make sure that it will not be flush with the shelf, since the facade will not be able to be hung.
The main thing is the size in depth.
Typically, this is the distance from the edge of the facade to the cup itself (or to its hole).
Of course, all leading manufacturers of furniture fittings have catalogs that show all the sizes of this fittings and their installation dimensions.
But when installed, this size is almost always 4-5 millimeters.
Yes, to drill holes for the seating cups, you can use a regular drill and a special cutter (also called a Forstner cutter) of 35 millimeters (it is sold in appropriate stores).
Below are examples of hinge installation.
This is such an interesting piece of furniture.
That's all.
Until next time.
Loop sizes
In Russia, the production of door canopies is regulated by the state standard GOST 5088-2005. In accordance with the regulatory document, the following loop sizes are determined:
- Width: 27, 30, 35 mm.
- Height: 110, 130, 150 mm.
- Thickness: 2.5, 2.8, 3.0 mm.
Particularly popular are the average models, which have a width of 30 and a height of 130 mm. Larger door hinges secure large doors, while the smallest ones are designed for lightweight doors that are rarely opened.
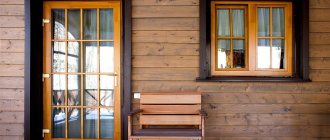
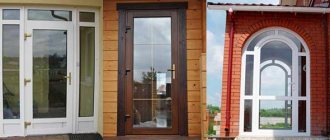
Types of doors
Depending on their purpose, doors are divided into interior and entrance doors. The latter are characterized by the heaviness of the models, that is, they are most often metal. The door hinges in this case should be massive. They should also ensure a reduction in the friction force inside the mechanism. The hinge design, which allows for a conical rod, a steel ball or a separator ball-bearing mechanism, works to reduce this indicator. A certain lubricant for the hinges will also help achieve the result.
To prevent the front door from being removed, experts recommend installing a third hinge, mounting it upside down. This method is used when using conventional half-hinged devices that do not require fixing the door leaf. Relevant today is the installation of reinforced door hinges at the entrance to residential premises.
With interior mechanisms everything is much simpler. Ease of closing, lack of noise and durability are important here.
A special feature of each door is the opening side. Loops are also distinguished: left, right and universal. Even a beginner can understand that the first two options are attached to doors of the same type, while the last one is acceptable for any type: right or left.
Types of furniture hinges by design
There are a large number of hinges that are attached to the hinged doors of boxes of furniture such as chests of drawers, cabinets and cabinets. Four-hinge hinges are the most popular in furniture making. This type of hinge allows you to easily adjust the position of the facade; a total of 3 positions are available:
- higher lower;
- left, right;
- to the facade, from the facade.
The design of such hinges consists of two parts that are connected to each other, a bowl with an elbow and a strike plate. This type of strip is sometimes called a fastening strip, but in this article we will talk about it as a counter strip.
All other loops are combined into a large group of “cupless loops.”
Such hinges include the following models: piano, card, pin and patch hinges. Today they can be found quite rarely in furniture production. For example: hinges such as piano hinges are now used in the production of tables, namely: fastening table tops and legs for book tables. In addition, some hinges are used as additional decoration, for example brass.
Overhead loop Planet B02-00 (200 pcs/pack)
54.00 ₽
The overlay hinge is a classic hinge that you can find on most furniture. It has different shapes and sizes - this allows you to choose a model that will suit your case.
Among the advantages we can highlight: freedom of opening and closing, reliable fixation of the sash, absence of distortions.
Loop 45* Planet VT404-45* (200/pack)
71.00 ₽
Hinge for special facades - used only when the facade is made of aluminum frames that have different widths. They are installed on special hinges; usually they can be bought at the same place where the profile was purchased.
These hinges are divided into two types, overhead and internal, which can be installed on corner cabinets at an angle of 45, 135 and 180 degrees.
Material
There are only two options for making loops. They are not size dependent. Door hinges are made from brass or stainless steel.
The first option has an interesting color and additional shine, which is achieved through galvanic treatment. Such mechanisms are considered more durable, but incur additional costs.
Steel samples are made by stamping, which reduces costs and increases accessibility to the masses. That is why their choice is preferable in the Russian market. They can also withstand heavy loads, although they are less durable.
There are combination hinges that are made of a metal alloy and coated with a thin layer of brass or chrome. However, it is economically profitable to purchase mechanisms with a paint coating that creates a color imitation of natural materials.
Drilling holes
Installation is carried out with all the rules:
- The depth of the hole for the furniture hinge should be about thirteen millimeters. If possible, the insertion of furniture hinges should not be deeper, otherwise the front side of the canvas may crack;
- The diameter of the hole depends strictly on the cup of the loop. Tools must be completely aligned with their axis to prevent damage to the surface;
- A sharpened cutter will help protect the blade from damage and chips;
- Do not rush while drilling, otherwise there is a risk of doing it sloppily;
- It is worth paying attention to the dimensions of the cups and their dimensions when installing furniture hinges;
Having drilled one hole, proceed to the next and so on until all the holes for laying the hinges are prepared.
What tools should I use for this?
The bowl must be secured to the facade, and the bar to the body of the bedside table. The furniture hinge must be inserted into the hole, which must be made in advance. The shoulder of the loop becomes a kind of bridge, now connecting both parts. To make holes for such loops, you need to prepare the following tools:
- screwdriver or drill;
- special drill-mill;
The diameter of the cutter for the hole for a furniture hinge is 35 millimeters or 25-26mm. It is selected depending on the size of the loop cups. To create holes for such hinges, you can also use a simple drill.
A multifunctional drill, with attachments that are easy to replace, is quite suitable for such work.
The middle spike must be installed in the center of the circle, outlined using a specially prepared caliber. Automatic calibration is used on the corresponding machines, but at home the master cannot do without a specialized electric tool.
During installation, hinges require a high level of care and precision. The chance to complete exactly the required niche is the most important advantage of the so-called Forstner drill. It can provide a stop that will prevent you from penetrating further than required. And the teeth of the drill do not allow it to deviate from the intended “course”. The end result is an almost perfect hole. And due to this, the cup fits into the recess quite tightly.
But the above-mentioned drill also has one significant drawback, which manifests itself when working with a solid piece of wood. This is low quality, which is to be expected if the instrument was not made in a factory. This is why you should choose tools exclusively from official companies. And, of course, don’t forget about warranty cards.
Depending on the type of panel you are working with, the cutter can get quite hot. Due to this, it can burn the edges and wood that is removed from the recess. That is why, when working with such a foundation, you should not forget about breaks in work. So that the drills have time to cool down at least a little. Working in three or four sets will be ideal. Particular attention should be paid to breaks when working with MDF sheets. If the activity is carried out with chipboard sheets, parts made of strong alloys can make recesses for hinges really quickly and without much stress.
Weight
The weight of the door leaf affects not only the size of the door hinge, but also its design. Reliable, expensive examples are chosen for metal entrance doors, interior samples made of solid pine or oak, and also as an original design solution. More modest specimens are suitable for interior or plastic doors. Lightweight hinges coated with varnish or paint can be a good addition to a country house interior or last for some time until a planned major renovation.
End
These same awnings are called Italian or heel awnings. They are mounted at the ends of the door, located closer to the side of the door on which the door leaf is attached, in the lower and upper corners. Doors hung on heel hinges can be opened 180° and, without removing them, their position can be adjusted in three planes. End canopies are universal.
They are suitable for most lightweight door designs without a rebate, the thickness of which varies between 4.1 - 4.5 cm. Hidden heel hinges are also available. They can also be installed on door leaves with a width of one to two meters from the ends in the center of the door, thereby ensuring its rotation by 360 °.
Mortise hinges
It is this type of design that requires preliminary determination of the side of the door opening. Typically, you purchase either a left or right mounting kit. The most important advantage of a mortise device is the ability to remove the door without unscrewing the hinges. The models have been produced for quite a long time and have won the love of most compatriots since the times of the USSR. Therefore, manufacturers choose durable materials for production and receive revenue from the number of goods sold. It is much higher than for interesting and expensive samples of other categories.
Overhead hinges
This option has received several names, each of which quite accurately determines the appearance of the door canopy. Butterfly hinges, hinged or card hinges have become popular not so long ago. Simplicity of installation, which does not require cutting into the door leaf and frame, simplifies the installation task and allows even a beginner to secure the door.
Previously, it was believed that overhead hinges could only hold a lightweight structure. Today, manufacturers produce canopies from materials with good strength characteristics. And including a design of 2 to 4 bearings, well-known brands increase the service life of hinges for interior doors by one and a half times.
Additional advantages of samples of this type are:
- Universality of copies without dividing into right and left loops.
- Affordable price.
- No manipulations with cutting out part of the canvas.
- Attractive appearance of the door after fixing the mechanism.
Professionals call significant disadvantages:
- Impossibility of removing the door without dismantling it.
- Installation of the structure only on perfectly flat surfaces.
- The occurrence of misalignment during operation on heavy canvases.
Pros and cons of overhead loops
One-piece overhead hinges have won the sympathy of consumers. Their design is simple and reliable. Experts note the advantages of universal overhead hinges over mortise hinges:
- quick installation - just make markings and fix the loop with screws;
- versatility - suitable for all types of doors;
- neat appearance of the door - without marks on the wood that remain after insertion;
- affordable price and wide distribution on sale;
- burglary protection - the door cannot simply be removed from its hinges;
- long service life - subject to high-quality materials;
- Easy to maintain - no adjustment required.
But there are also certain disadvantages to overhead loops:
- they can only be installed on a door with smooth edges;
- if you need to remove the door, you will have to unscrew all the fasteners and remove the hinges;
- the weight of the door leaf is limited - if the door leaf weighs more than 25 kg, it is necessary to install additional hinges;
- If the door block is askew, the door will be difficult to operate.
Hidden hinges
The name of the design is slightly exaggerated, since the samples become invisible only when the doors are closed. In addition, the complexity of installation is reflected in the number of sales. Only professionals resort to such specimens.
An inexperienced installer will not be able to secure the door with hidden hinges. After installation, it is possible to adjust the blade to increase or decrease the vertical gap. It is not recommended to use this hinge design for plastic doors and lightweight interior samples.
How to choose butterfly loops
As practice shows, butterfly card loops are one of the leaders in the counterfeit market, but fortunately it is not difficult to distinguish such a counterfeit. At the amateur level, it is enough to know 3 rules.
- Rule #1 . A steel or brass canopy is not lightweight. If you are offered an inadequately light product at a bargain price, it means it is a cheap alloy.
- Rule #2 . There should be bearings on the central rod between all sections of the canopy. Low-quality models may have steel washers instead of bearings.
- Rule #3 . Take the canopy in your hands and try to loosen it in a horizontal plane. If the sections on the central rod have play, then it will only increase further.
The presence of play between adjacent sections on the central rod indicates low quality of canopy assembly
Design
Professionals distinguish between 2 types: collapsible and non-dismountable hinges. Usually, they do not recommend purchasing non-separable options, since their opening principle using bushings cannot be called reliable. The result will be a creaking or sagging door. Collapsible options have a certain margin of safety and are quite durable, so they are always chosen for heavy canvases. However, they are expensive and are not recommended for budget interior doors. It is better to choose hinges for inexpensive apartment renovations, as well as for installation in country houses or outbuildings at an affordable price. Perhaps their strength will last for a long time, and the noise will not affect the functionality of the door leaf.
How to cut hinges into an interior door with your own hands without a router
When planning to install a block yourself, many home craftsmen have the question of how to cut hinges into an interior door with their own hands without a router. Professional installers use a router to install canopies. This is the right decision. Ensures accurate and quick door installation. But not everyone has a router at home. Therefore, you need to understand the process of installing door hinges without such a tool. To install door hinges on the door leaf and frame, you will need a hammer and chisel. You must be prepared that you will have to spend a lot of time and effort. It is important to be careful and follow the algorithm. The operation of the unit depends on correct installation. Inserting door hinges to install an interior door is carried out in a number of stages:
- Marking.
- Loop insertion.
- Installation.
It is worth considering each of these stages in more detail.
Marking
To properly embed the awnings, you need to determine the distance of the hinges on the door. This work must be done with the blade on its end. The procedure is described below:
- We measure 20 cm from the top and bottom edges of the sash.
- Place the hinge on the mark and trace around the perimeter with a pencil.
When marking, the hinge mechanism must be parallel to the canvas. The moving part of the canopy should protrude 2-3 mm beyond the edge.
Inset
Professional installers claim that it is impossible to make mounting holes for awnings using a chisel and a hammer. After all, a chisel will leave torn edges on the laminate or veneer of the canvas. This is what those who use a cutter to install hinges think so. If you don’t have such a tool, a hammer and chisel will do. With their help, you can carefully insert hinges with your own hands. Using a chisel you can install a wooden door.
Algorithm of actions:
- Using a sharp utility knife, cut through the laminate or veneer along the pencil markings. Remove the cut out part from the end.
- We perform the edging of the groove. To do this, place a chisel along the cut of the veneer or laminate and drive it 2 mm into the wood with hammer blows. You should go deeper into the body of the door carefully. It is important not to deepen the mounting hole of the canopy more than the thickness of the card. Otherwise the loop will sink. This will negatively affect opening.
The insertion of the loops is completed. Now you can install the canopy on the canvas and box.
Installation
We install the loop in the prepared seat. We make marks with a pencil for the holes for attaching the hinge. Drill holes with a thin drill. If you don't have a drill, you can hammer in the nails and pull them out. Secure the hinge with self-tapping screws.
How to install
There is a procedure for installing the closing mechanism, which is absolutely independent of the size of the door hinges and is as follows:
- Having placed the door on a horizontal surface (most often on the floor), the attachment points are marked by tracing the contour of the hinge.
- Fix a two-millimeter gap between the door and the frame.
- Attach (but not completely) the component parts and try the hinges in operation, opening and closing up to 5 times.
- The structure is thoroughly welded in the case of a metal leaf and tightened when installing wooden and plastic doors.
- After this, the installation of locking mechanisms and other accessories is allowed.
Installing a hinge on the door
Loops must be placed in the recesses made. Then adjust their location in relation to the facade. All canopies must fit snugly to the facade. And if their position is not corrected, the door will very quickly begin to warp. After aligning the hinges, you need to use a pen or regular pencil to mark the points for securing the screws.
Next, you need to attach the door with screws or a Euroscrew to the piece of furniture itself. In particular, a cabinet or bedside table. The algorithm of actions in this case is as follows:
- Mark the points for installing loop pads;
- Attach platforms for mounting the installed hinges;
- Attach the door to the side of the cabinet;
- Connect the loop;
- Adjust the doors using a regular screwdriver.
It is better to hang doors on a smooth surface. The side of the cabinet where the hinge strip is attached must lie horizontally. This will make fitting and connecting the door more comfortable. The door can be adjusted in a vertical position.
How to care
Door hinges do not require special care. The mechanism is lubricated at the very beginning of work or as needed. The need to process loops appears in case of jamming or unpleasant sounds. The process does not take much time and effort if the owner is aware of how to lubricate the hinges on the door without removing the panel or resorting to dismantling.
The best way is to slightly raise the door and fix it in this position with improvised means. After this, you can easily reach all work surfaces. Lubrication is carried out using special means:
- Machine oil.
- WD-40.
- Liquid for sewing machines.
- Solid oil.
- "Lithol."
The last two products are effective when used on entrance doors because they withstand temperature changes well.
Having drawn the product into the syringe, you need to squeeze it deep into the loop using a medical needle. In addition, the oil can be smeared with a brush or cotton swab. If the treatment is not performed for the first time, then before each subsequent application it is recommended to clean the surface of any remaining grease. Easy door care and ensuring smooth operation of the hinges will extend the service life of not only the mechanism, but also the door leaf.
Experts warn about many other, more complex points that you need to pay attention to when purchasing door hinges. Types, design features and reliability are the priority areas for the right choice from the point of view of door installers. Designers claim that color and material play an important role when installing the canvas. Most citizens want a silent and smooth closing mechanism. An integrated approach that takes into account all the listed requirements will help the user not make mistakes and choose the optimal door hinges. And periodic maintenance of the device will extend its service life.
Questions and answers about butterfly loops
| Question | Answer |
| After installation, the door squints or does not close tightly, what does this mean? | This means that the hinges are screwed with a deviation from the common central axis, which runs along the rod of the awnings. You need to take a plumb line, find out which loop is skewed and remount it. |
| Is it true that fabric on butterfly hinges sags over time? | Provided proper installation, canvases weighing up to 20 kg are not in danger of sagging. If the weight is close to the upper limit of 30 - 40 kg, then for insurance you can attach 3 or even 4 canopies to one canvas. |
| Is it possible to hang solid wood doors on butterfly hinges? | Highly undesirable. The weight of the wooden panel starts from 35 kg and can reach up to 80 kg; with a high degree of probability, such doors will sag. |
| How good are butterfly hinges with bushing rings instead of bearings? | If the canvas weighs up to 15 kg, then it can be safely mounted on hinges with bushing rings; they are 30–40% cheaper than models with bearings. |
| Why is the outer part of the butterfly attached to the box, and the inner part to the canvas? | The outer card is wide and the holes go along the perimeter; therefore, when screwing a self-tapping screw into the very edge of the canvas, there is a possibility of delamination or cracks. |