Interior thresholds are a functional design. Its main role is to mask the junction of different coatings or floor levels. They are required to improve the design of rooms and make the home comfortable. Therefore, you should know how to set the threshold of an interior door to avoid mistakes.
The main advantages of the designs are:
- noise reduction.
- protecting the premises from odors;
- protection from dust and drafts.
Varieties by type of design
In this case, two classifications are taken into account. The first involves dividing the thresholds into curved and straight ones. In essence, these are flexible plastic and rigid wooden elements. Aluminum can only be bent in the longitudinal plane along the length, but not sideways. Another classification involves division into collapsible and solid elements. Collapsible ones consist of two parts - the lower one is laid under both sides of two floor coverings, and the upper one covers the outer side. The coupling is formed by special groove clamping systems. But this option is allowed only during the initial installation, when the main flooring material is also laid. The one-piece element involves only external masking of the joint, but can be installed at any time without requiring intervention in the structure of the laid flooring. It is also worth noting the multi-level threshold between the tiles and the laminate, which is designed for an organic connection of coatings located at different heights. For example, if you need to technically level the gap between thick tiles and thin laminate, then a multi-level threshold of the appropriate standard size is suitable.
Installation methods
Installing thresholds is not particularly difficult, but has its own characteristics.
The length is measured and cut at the installation site. The line along which the fixation will be made is determined in the middle of the joint. And the width of the strip should overlap the edges of the material on both sides so that the gap is not visually visible.
The following installation options are available:
You can clearly see the installation procedure for different types of profiles in the following video:
The threshold is a simple fastener, but it is what adds completeness to any design. Properly selected material and high-quality installation guarantee the durability of the floor covering.
Source
Technology for installing an interior threshold
There are many ways to install interior thresholds. However, they all start with measuring the joint in the flooring that needs to be covered. After measuring its length, the resulting value should be noted on the purchased threshold, and the excess material should be cut off with a hacksaw or grinder. Otherwise, the complexity of installing the threshold depends on the type of its design.
Installation of thresholds with an open fastening system
Installation of thresholds of this design is very simple. In this case, profiles are used that have ready-made holes for fastening, drilled with the same pitch. To install such a product in a doorway, you need to attach it to the floor and mark the attachment points on it. After this, according to the resulting markings, you should make holes of the required diameter, install plastic dowels in them and secure the threshold with screws.
The fastener must fit tightly into the holes of the threshold, otherwise over time it will weaken and fall out. If there is a wide gap between the coatings, you need to select the appropriate threshold for it. In order not to spoil its appearance, it is recommended to buy screws with decorative caps for fastening.
If the joint of floor coverings has different levels from 3 to 20 mm, you can use a wide threshold, which is fixed at an angle, or a transition profile to disguise it.
Installation of thresholds with a closed fastening system
It is often chosen for aesthetic reasons. In this case, strips with floating internal holes intended for fastener heads, or special thresholds consisting of two parts - a rail and a T-shaped profile, can be used.
To attach the plank, you first need to make holes in the floor according to the previously made markings and insert plastic dowels into them. After this, the screws must be carefully inserted into the slot on the plank and turned over so that all fasteners fit into the installed dowels. Then the threshold should be fixed by slightly pressing it to the floor and tapping it with a hammer through a layer of paper to avoid damaging its surface.
To secure the T-shaped threshold, you should also drill the required number of holes in the floor and insert dowels into them. After this, the threshold strip must be fixed to the surface using screws, and an external decorative profile must be installed on top by snapping or gluing.
Special attention is always paid to installing a threshold in a bathroom. Currently, special products are on sale that do not allow water to penetrate into neighboring rooms in case of flooding.
An excellent option for the bathroom would be to install a guillotine threshold, the description of which is above.
If a wooden threshold is being installed in a toilet or bathroom, the work must be done so that there is a gap of 5-8 mm between it and the bottom of the door leaf. It is necessary for the normal operation of natural or forced ventilation, if one exists in the room.
Currently, according to many people, interior floor thresholds present a lot of inconvenience. However, those who use them are well aware that the functionality of these products is so obvious that they have a right to their existence. It is difficult to determine which of them is right. But with or without a threshold, interior doors - let it be practical and beautiful!
Advantages and disadvantages
In addition to the above, some of the most significant advantages of the installation include:
- Reduced noise level. Sound insulation is improving, but not as much as we would like. It is influenced to a greater extent by the design and material of the door leaf. The combination of a threshold with a box with a rubber seal has the best performance.
- Protection from dust, foreign odors and drafts. To maintain cleanliness and silence in the rooms, products with rubberized inserts are produced.
- Waterproofing protection. Used in bathrooms. Prevents water from entering neighboring rooms.
The disadvantages include the difficulty of installing the flooring and a certain inconvenience of moving between rooms. Especially for children and old people.
A high threshold can cause injury.
In addition, excessive sealing of the kitchen and bathroom leads to the need for additional ventilation.
Types of thresholds
The largest range of connections is found specifically in the metal series. Wood, plastic and other types of profiles are limited by the features of the material from which they are made.
Thresholds are of the following types:
Overlapping joint or straight
Designed for installation on single-level floor coverings. They are slightly concave strips with a smooth or corrugated surface. This series produces thresholds for laminate flooring with hidden fastening or open fixing.
Straight thresholds of various types.
The first ones are a strip, on the reverse side of which there is a guide groove formed by 1-3 protruding spikes made of metal, MDF or plastic. To attach it, you need to drill a hole in the base and drive a dowel into it. The head of the hardware is inserted into the groove, then the threshold is placed against the joint so that the point of the screw and the dowel insert coincide. The structure is nailed to the base until it touches the final floor covering.
The group of hidden fixation thresholds includes products of the “swallow” system or a multiclip. The fastening T- or W-shaped profile is fixed to the base. Then a plastic or iron insert is installed on it, onto which the edging itself is “put on.”
Equal and multi-level thresholds with a hidden multi-fastening system.
Thresholds with an open fixation method are considered the most comfortable to use for beginners. Holes for fasteners are already drilled in the strip at a certain interval (less than 50 cm). Simply place the bar in place and tighten the screw or self-tapping screw. Most Russian manufacturers supply hardware of suitable sizes complete with edging, which is very convenient for buyers.
Among the fascinating modifications it should be noted:
Self-adhesive single-level thresholds. On the reverse side, a polymer adhesive composition is applied to the edges. For installation, simply remove the protective paper, put the edging in place and press down or lightly tap on the surface. Despite the convenience and speed of installation, many buyers still do not trust this type of threshold due to the supposedly low level of reliability of the adhesive connection. To be fair, we note that high-quality products are recognizable for years, while Chinese and other analogues really come off after several months of use.
Thresholds with anti-slip protection.
Multi-level
Overlays of a standard or special shape, created to smooth out differences between floor materials of different thicknesses. The width of the products varies from 1.5 to 10 cm, and the height of the leveled difference between the coatings can reach 20 mm. The fastening methods are the same as for single-level ones: open and closed with all possible modifications. You can also include linings with a special shaped fixing edging: Z-, L-shaped and others. The packaging of each product includes simple and clear instructions in pictures.
Corner
Since stairs are often lined with laminate, let’s consider another type of product. In essence, these are well-known corners made of metal, wood and MDF, which protect the edge of the step from abrasion, dirt, chips, and also provide protection against slipping. The fastening methods are the same - open, using hardware, and closed, using additional or integrated edges of a special shape.
You can also replace the plinth with a corner, using it as an end or edging element.
Special for laminate
This group includes metal and MDF edges of equal and different levels, having a special profile - G-, H-, Z-, F-shaped, etc. They are used to connect homogeneous materials of different or identical palettes, densities and thicknesses. Convenient for forming expansion joints. The fixation scheme is exclusively closed.
Edging
This type of metal products is also called edge metal. In fact, this is a convenient analogue of a corner for steps or a plinth. The shape may be different, but the method of fastening is the same - closed. The sizes of products vary, so it is better to select them according to the existing laminate sample, and not in words.
We have listed only the most common types of thresholds. But this is enough to understand that the choice is extensive and you can find the right type of decorative overlays for any, even the most difficult installation conditions.
Advice! If you need repairmen, there is a very convenient service for selecting them. Just send in the form below a detailed description of the work that needs to be performed and you will receive proposals with prices from construction teams and companies by email. You can see reviews about each of them and photographs with examples of work. It's FREE and there's no obligation.
Mounts the box
For installation you will need a drill, cutters, a hacksaw, wedges, bars, a miter box, polyurethane foam, a level, self-tapping screws, a pencil, and nails. The slopes are checked before installation, the dimensions of the box are determined vertically and horizontally in 3 places. If there is a difference of 5cm or more between the parts on one side, then the walls need to be further aligned. In this case, the width of the door frame of the interior door should not be close to the walls; leave a small gap.
When assembling a box without experience, it is better to use parts that are secured at 45 degrees. You need to make recesses in the fabric for the loops. It is important to make them in the middle so that a distance of 18 cm is maintained at the top and bottom. After marking, holes are made for the hinges. Then screw the hinges, selecting a drill of equal diameter to the fasteners.
Don't miss: Tool for inserting locks into interior doors: a set of tools for installing door locks
Next the canvas is screwed on. It is necessary that the thickness of the interior doors be smaller or equal to the frame. After drilling the doors, make holes for the handles and the lock and install them.
All that remains is to insert the box into the opening. Moreover, the installation can be done if the thickness of the interior door frame does not exceed the width of the walls. When you have inserted the box and additional boards (if necessary), you need to foam the empty spaces. Do not rush to fill completely empty spaces, because as the polyurethane foam hardens, it expands.
If during installation the platband does not reach to cover the edge of the upper wall, then you need to choose wider platbands or shorten the opening. Otherwise, if the opening is too small, you can trim the wall to expand the space, but this is difficult. It is easier to trim the sashes, but this can ruin the strength. Therefore, they often act according to a complex option.
Peculiarities
Thresholds can come in a variety of colors and sizes, and they can be based on different materials. These elements most often differ in the method of fastening - open and closed. Each of the methods is good in its own way: the open one is easier to install, and the design itself is simpler and more reliable, but the closed threshold is much more difficult to install, but they also look much better.
The price of laminate thresholds depends entirely on the material from which they were made, so plastic and wooden samples will have completely different prices. But regardless of the material, it is necessary to take care of the floor, and in particular the threshold, otherwise even parts made from the most expensive materials will quickly become unusable.
As already mentioned, floor thresholds can be made from a variety of materials, and according to this feature they are divided into several groups.
Metal ones are the most commonly used and popular thresholds. The most common materials for such parts are steel, brass, and aluminum. Metal thresholds are covered with a protective film, which makes them look more impressive and suitable for the floor. In general, metal parts are very durable and reliable, they can withstand quite heavy loads at their low price.
Rubber ones prevent residents from slipping, they are easy to install, and after the installation process they will last for a long time.
Wooden ones are less common, because their service life is short, and due to natural materials the price of wood thresholds is much higher, but due to their appearance they are still popular, especially in combination with laminate.
Cork - made from cork and are flexible, which makes it possible to use them to develop non-standard design options.
Plastic ones are not famous for their long service life and reliability, but they are inexpensive and come in many different colors.
Selecting the material
Concrete threshold
Concrete construction is a durable solution for a hallway, bathroom or balcony. Making a concrete threshold is not very easy, but your efforts will pay off.
Wooden threshold
Wooden thresholds are an easier-to-install alternative. Its main disadvantage is the natural properties of wood, which can become deformed due to high humidity and frequent temperature changes. In this regard, it is better to choose a product made of hardwood: for example, oak or ash. If you haven’t found a suitable model, you can make a threshold yourself:
Plastic threshold
Plastic thresholds are a cheap option that is not difficult to find in stores. They are often self-adhesive, which makes installation much easier. However, such thresholds are not intended for long-term use; they are quite fragile and can become deformed or fade when exposed to sunlight.
Aluminum threshold
The best option in terms of price, quality and ease of installation is aluminum thresholds. Aluminum has good wear resistance and is not afraid of corrosion. Often aluminum thresholds are laminated to look like wood. This not only makes the product more attractive in appearance, but also increases its resistance to mechanical damage. Laminated aluminum is less deformed and there are almost no scratches on its surface.
Combination of tiles and laminate
However, laminate flooring is not suitable for every room. For example, in the hallway and kitchen it is preferable to use ceramic tiles. The fact is that these rooms get dirty more often. There is almost always high humidity in the kitchen; moisture from shoes accumulates in the hallway. Laminate flooring is susceptible to scratches and other damage, and can swell from water. Therefore, many people prefer tiles.
Combining ceramic tiles and laminate allows you to divide the room into zones. Laminate flooring is laid in the dining area of the kitchen, and the rest of the space is tiled. Here the question arises: how to design the joint between two flooring materials? Which connection is better: with a threshold or butt-to-butt? How are thresholds installed between laminate and tiles? These are the questions we will consider in this article.
Types of materials and their purpose
It is very important to choose the right texture and color for the floor covering; not only the aesthetics of the decor, but also the wear and tear of the product will depend on this. To connect two coatings of different colors and textures, you need to take profiles that are most suitable for one of them. Or you need to select textures for doors and openings.
Modern interior thresholds are made from the following materials:
- Metal is a new trend, it can be matte, shiny, silver, golden and is often matched in color to door handles, but it can be of any color and harmonize with other interior details;
- Wood is suitable for any coating, but requires maintenance - painting or varnishing;
- Cork is elastic, can bend, and is used where it is necessary to provide a difference;
- Plastic is the most budget option, has a huge selection of colors, but is short-lived - it can burst if you drop heavy objects on it;
- Laminate - can only be combined with a similar material; in conditions of high humidity it can gradually change shape.
By the way, moisture resistance is one of the main technical characteristics that interior thresholds should have; installing materials with this quality is especially important when moving from tiles to laminate. Because tiles are usually placed in the bathroom and kitchen, where water can often get on the floor.
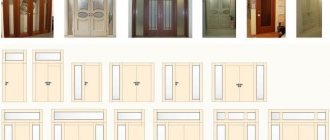
Types of interior thresholds - Photo
Metal thresholds
Today, metal floor linings are extremely popular - the construction market offers consumers an impressive range of such products. As a rule, products are made of aluminum. Such floor thresholds, the price of which varies significantly, can be made in different types: there are overlays in bronze, gold, silver, wood - it’s not difficult to guess what will cost more and what will be cheaper. With the help of such products you can make any interior more interesting and further emphasize the flooring in the room.
More information about prices:
- the most budget options will cost you 50-100 rubles for 1 threshold;
- products in the mid-price category cost between 200-400 rubles;
- the cost of expensive products starts from 450 rubles.
Metal floor thresholds can help protect the most vulnerable areas of your home, including stair treads and corners (as well as the flooring material). All products are equipped with a profiled surface, due to which they achieve an anti-slip effect.
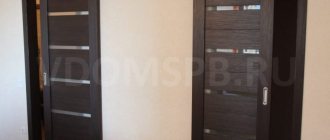
Differences between interior doors from foreign and domestic manufacturers
In specialized stores and on the market there are door blocks that deviate slightly from the standards accepted in the country. However, their cost does not differ much from standard models. As a rule, these are imported products. Each state has approved its own parameters for entrance structures. And this point must be taken into account when equipping the doorway. The height of products from Russian manufacturers is mostly 200 cm. A deviation of 10-15 cm up or down is allowed. Single-leaf models are offered with dimensions of 60-90 cm. If the entrance to the room reaches 80 cm, then there is no point in overpaying and purchasing products from an imported company. The only exceptions are situations when the quality and design are not satisfactory. In France, the size of interior doors is one centimeter smaller than that established in Russia. They usually make doors with a width of 79, 89 cm. In Italy, this parameter is 60-100 cm. In the CIS countries, door blocks are produced with a thickness of 75 cm.
What are thresholds for?
As you know, laminate flooring needs to be laid indoors with a gap from any enclosing structures - walls, door frames, columns, etc. This is due to the relatively large coefficient of change in the linear dimensions of the flooring material due to temperature and humidity changes. For this reason, experts advise laying laminate flooring separately in each room, and forming a kind of expansion joint between rooms in the doorway. This will allow you to avoid swelling of the coating in the future, compromising its integrity and geometry.
There is one more important note in the instructions for laminated parquet - the area of the solid coating should not exceed 30-100 m2 (depending on the density and size of the slab). That is, every 5-10 m in the room it is recommended to make an expansion gap
Limit laminate area and seams.
The resulting compensation gaps are decorated in several ways. The most famous of them are transition profiles or thresholds. Their purpose:
- Smoothing out differences in floor level or creating a neat transition from one type of coating to another;
- Protection of the ends of the laminate from dirt, chipping, burrs and other damage;
- Leveling seams at joints with a decorative effect;
- Creating a zoning effect.
Thus, thresholds are useful finishing profiles that can be used both for their intended purpose and for the implementation of various design ideas. Available in the following sizes:
- Width from 1 to 12 cm;
- Length from 0.9 to 3 m;
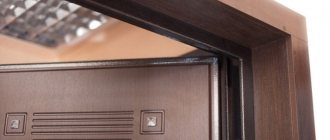
Assembling a door frame with a threshold
A special feature of a door frame with a threshold is its addition of a lower beam, sawn at an angle of 90°. First, a canvas is inserted into a box mounted on the floor or on two adjacent tables. A strip of packaging cardboard that covers the box beam and the surface of the door will help to accurately maintain the technological gap.
Fastening a metal or wooden threshold is done using a pair of galvanized self-tapping screws. This door design has increased strength and is suitable for entrance doors.
What are the thresholds?
Most often, a connecting threshold is used to design the joint between tiles and laminate. It is easy to install, durable, and provides a smooth transition from one material to another. Connecting thresholds are used to close joints both between two rooms (in a doorway) and in one room for clear zoning. A multi-level joint occurs in the doorway. For this case there is a separate type of thresholds.
There are several types of connecting thresholds:
- Flexible profile (metal or plastic). Used to close wavy joints;
- T-shaped profile. One of the most expensive types of connecting thresholds;
- Aluminum threshold. The most popular and reliable among all others;
- Wooden threshold. Suitable for straight joints;
- Box threshold. Mainly installed in the doorway of the bathroom and toilet. It has a height of 3-4 cm. It is believed that it protects against moisture penetration into other rooms. This connecting threshold is not very convenient to use, as it interferes with unhindered walking around the apartment.
Most often, aluminum thresholds and flexible profiles are used. Therefore, we will consider in detail the installation of these connecting elements.
Advantages
Most modern households accept it as an object that performs a specific function.
Here are some opinions on the usefulness of this component:
- Helps reduce noise. This is true. However, it is also necessary to take into account the noise absorption of the door leaf itself. It is higher on a solid wooden door than on a hollow one.
Important! If you use thresholds as sound insulation, then select a box in the store that has a rubber seal.
- The presence in the kitchen opening prevents the outflow of oxygen from other rooms if a double-circuit boiler with an open chamber is installed in the kitchen. In this situation, it would be better to install a plastic window with micro-ventilation. This will allow fresh oxygen to enter the room.
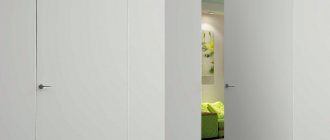
Door without threshold, photo
- When cooking, the kitchen door prevents oil smoke from entering other rooms. Here we recommend purchasing a good hood over the stove or a fan with natural circulation.
- Protects from draft and dust . You can't argue with that!
From all of the above, it is clear that installing interior doors without a threshold in the kitchen is quite acceptable. If alternative solutions to problems with sound insulation and air penetration through the gap under the door do not suit you, then use thresholds. It can be retractable, floating and so on.
Types of thresholds
Modern thresholds may differ in color and size, material, type and method of fastening. So, according to the method of fastening, the thresholds are divided into open and closed. The former are easier to assemble, but less aesthetically pleasing due to the bolts that stand out on the surface.
Various forms of aluminum thresholds
But the type of thresholds directly depends on their functionality - for example, they can be final, corner, straight, and also multi-level. Based on the material of manufacture, thresholds for laminate have the following types: wooden, metal, cork, plastic and MDF. Wooden thresholds can be called the most harmonious. Installation of such elements is carried out using mounting rails.
Despite the fact that wood is ideal for a laminated surface, such a material also has disadvantages - it will need to be periodically sanded and re-varnished.
Metal products are considered the most durable. Their popularity is also facilitated by their affordable prices. By the way, metal in this case can mean steel, brass or aluminum.
Aluminum sills are most often used. Their surface can be made to look like gold, silver or wood. By the way, the thresholds can be selected in accordance not only with the floor covering, but also with the door handles.
Cork thresholds are similar in cost to wooden ones. In addition, such products also have increased flexibility, which allows them to quickly take the required shape. But plastic thresholds can definitely be called the cheapest. Of course, the price in most cases corresponds to the quality and one cannot count on long-term use of such a product.
Often, in combination with a laminated coating, an MDF profile is also used, that is, a laminated type of slats. This product is cheap, but very susceptible to moisture.
Flaws
Inconvenient.
Constantly stepping over the threshold is not only inconvenient, especially for children, but also dangerous. There is always a chance of tripping over the threshold and falling.
Ugly.
An extra element in the floor, which also rises above the floor, does not always look attractive. Moreover, the door threshold quickly scratches, wears out and becomes completely unattractive.
A door threshold is appropriate when installing bathroom doors. The best solution in this case, which combines all the advantages of a door threshold and eliminates its disadvantages, is to install an automatic threshold (seal). (read more about installation)
The automatic threshold cuts into the lower end of the door leaf and, when the door is closed, falls down, resting against the floor with a soft seal, thus closing the gap under the door. As a result, we have a floor covering without thresholds, but at the same time the sound and heat insulation of the room is ensured.
Threshold types
Metal
Aluminum is used, less often steel or brass. Due to its durability, strength, and frost resistance, this is the most common type of threshold for home and commercial use. The advantages of metal products also include a wide range of decors. Including:
- Simple aluminum ones, to which no decorative technique is applied. Inexpensive, versatile and not too difficult to install.
- Anodized. The metal strip is subjected to anodic oxidation, as a result of which a thin metallized film of various shades and textures is formed on the surface: gold, classic and blackened silver, copper and bronze with a patina, etc. The effect is really beautiful, but this is not the only advantage of this treatment. Ready-made thresholds are not afraid of scratches, corrosion processes, are durable, and fit perfectly with classic laminate designs.
- Painted. Special polymer-powder compositions of rich and muted shades are applied to the surface. The coating is resistant to abrasion and impact, and can easily withstand frequent washing even with the use of aggressive household chemicals. Recommended for use in combination with classic wood decors, as well as marble-like laminates, ceramics, textiles, etc.
- Laminated. Aluminum strips are covered with a dense and durable PVC film with a laminate texture. This is the best-selling type of product, and all thanks to the reasonable price and the widest range of decors - up to 80.
PVC
Unique in its simplicity and practicality, the flexible threshold for laminate is produced by almost all factories producing skirting boards, panels and other plastic products. It is a set of:
- Mounting solid or perforated strip - attached to the base with self-tapping screws or mounting adhesive
- A profiled threshold that is inserted into the groove of the strip and fixed.
The product is made from semi-rigid PVC and is characterized by water, bio- and impact resistance. The flexible threshold is designed for:
- overlapping straight joints;
- alignment and connection of different-level materials; Multi-level thresholds.
- filling round gaps (for decorating columns, bay windows, etc.). Edging with PVC thresholds.
Thanks to the rich range of colors (up to 30 shades) and texturing, a harmonious transition is ensured between identical and different floor coverings, including multi-level ones (for example, a threshold between a 12 mm thick laminate and a 4 mm thick carpet).
Wooden
Wooden thresholds in natural, tinted and bleached shades belong to the luxury category and are most often used in combination with parquet and parquet boards. They are often purchased for laminate flooring, especially in cases where it is difficult to match the decor and tone of the coating with metal and PVC accessories. Solid wood profiles are expensive, not very difficult to use, and are not allowed for installation in damp rooms. For fixation, use super-strong mounting adhesive or a fastening strip made of metal or PVC.
LMDF
MDF thresholds laminated with PVC film deserve special mention. If only because they are universal. That is, they can be used to level significant differences, and, if necessary trimming, for simple straight seams. The assortment, as a rule, includes an average of 12-25 of the most popular shades.
MDF thresholds are used in combination with parquet, laminate, parquet or engineered wood. They are convenient because they are produced for certain collections, that is, the match in tone and texture will be perfect.
Separately, it is worth mentioning cork expansion joints - strips of cork of different thicknesses and heights. This is not a threshold in the classical sense. Rather, it is a kind of “buffer” between coatings that needs protection from moisture and dirt after installation. Rarely used in combination with conventional laminate.
General parameters and markings
When choosing a door design, keep in mind that the standards are conditional. That is, each manufacturer can independently determine the volumes. The purchased box can only protrude 3cm from the wall. (including installed platbands). The usual width is 90cm, but not all brands have it. However, for offices and old houses, 90cm. doesn't fit. For each place you need a clear measurement.
If the box has no threshold, it is U-shaped. They can be combined with canvases of any height and trimmed if necessary. If the design has a threshold, then more careful measurements are needed in order to accurately match the panels and the opening. Also, boxes can be arched, when the top bar is curved. To measure them, it is better to invite measurers who will make the arch. For ease of subsequent repairs, the structure is framed with telescopic platbands.
The product is marked according to GOST 6629 88 standards. All interior doors are designated as follows:
- The letter “P” means a panel, and the letter “D” means a team;
- By type of canvas: reinforced fully filled letter “U”, letter “K” swinging with glass, glazed letter “O”;
- The designation “DM” means the width and height for interior doors together with the frame;
- Auxiliary designations: float “N”, threshold “P”, on the left side “L”.
Types of floor thresholds
They can be divided into types according to the material of manufacture, design and installation method.
What are floor thresholds made from?
Metal thresholds for laminate flooring are most common; they are made of aluminum. They are quite practical and easy to install. But their main disadvantage is that they are taken out of the context of floor paintings. Let's say it is necessary to close the joint between the tile and the laminate, as a result, using a metal threshold we will create a conspicuous edging - a metal strip. Although aluminum thresholds laminated to look like wood are on sale today, it is often difficult to find them to match the chosen floors.
Metal thresholds for laminate flooring photo
In this sense, thresholds made by laminate manufacturers are more profitable. Such companies produce them for each decor of the laminate they produce. Therefore, when purchasing laminate, be sure to buy the original threshold for it. As a result, after installation, the threshold merges with the laminate and does not stand out against its background. The material for their production is the same as for the production of laminate - HDF board and lamination. The lights are installed in a hidden way.
Thresholds for laminate flooring photo
A separate point is flexible thresholds for laminate; they are used to connect curved joints (zigzags, semicircles, etc.) - these are rubberized thresholds and cork expansion joints. The latter have an advantage over the others, since they do not come to the surface - they remain flush with the laminate sheet. This is an ideal option for those who do not want to use a T-shaped threshold.
Flexible threshold for laminate photo
What is the design?
The type of threshold design determines its purpose; there are several types of laminate construction:
- multi-level,
- single-level,
- universal.
The first allow you to join floors located on different planes - for example, thinner laminate and thicker parquet boards.
To use the second type of thresholds, it is necessary that the floors being joined lie in the same plane.
Universal thresholds have such a design that they can be transformed into multi-level, single-level, and can also be used in cases where it is impossible to install a plinth - it is used as a finishing edge for the laminate fabric. These types include the Imncizo threshold from the Belgian company Unilin, which produces Quick-Step laminate.
Thresholds for laminate flooring photo
Methods for attaching floor sills
There are two types of fixation - thresholds for laminate with hidden fastening and open. The former are, of course, more preferable, since after installation the fastening elements are not visible. They come in HDF(MDF) and metal. The HDF design has two profiles - working and decorative. The working bottom one is fixed directly to the base, and the second decorative one is simply inserted into it. Metal thresholds with hidden installation have a slightly different design; they do not have a lower profile - we will look at them in more detail using an example of installation in the section below. But the type of thresholds with open fastening, after installation, will look less aesthetically pleasing, since it is mounted through the end-to-end method - with self-tapping screws through the decorative layer.
Thresholds for laminate flooring photo
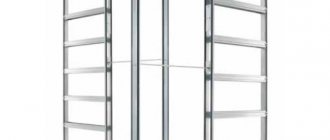
Additional elements for doors
The addition is a strip necessary to fill the distance of the box; it closes the free gap of the wall. To determine the amount of expansion, the width of the box is subtracted from the opening.
The standard for boxes is 7cm. If the wall is larger and you do not use an L-shaped platband, then they need to be installed. The cracks from the installation of the extensions are treated with alabaster or gypsum mortar.
Additional strips speed up installation, have a long service life, are not expensive, and do not damage wooden elements (no liquid finishing is needed).
Some extensions are assembled together in a U-shape and secured to a box, or can be mounted to a wall. The parts are mounted with self-tapping screws or liquid nails, which are poured into a special hole. To disguise self-tapping screws, use plugs or a furniture pencil.
Types of add-ons
There are two types of extensions - with and without a groove. Structures with a groove have ready-made holes that are needed for installation.
In grooveless bars, the grooves are made with a milling machine. Attaching to the box occurs with self-tapping screws. I install the first addition at a distance of 20cm. from the floor level at intervals of 60 cm.
Installation of accessories
Installation steps:
- After measurements, cut the bars - 3 pcs.
- Attach the extensions to the installed box. If the installation of the box has not been completed, then do it at the same time.
- Align the boards with mounting wedges, installing them between the frame and the wall.
- When everything is level, foam the gaps. There is no need to rush, this is done in two steps. While the foam has not yet dried, you can adjust the position.
- After the foam has hardened, the excess is trimmed and trims are installed.
Tell me about installing the threshold
The threshold should be exactly under the door leaf, in the middle (depending on how wide you plan it to be). And if you want it beautiful, then you don’t need a threshold at all, and laminate, parquet boards, and parquet are laid with a continuous sheet, on one level. But here it is important that the floor is level, without differences.
Nataliya109 wrote: And if you want it beautifully, then you don’t need a threshold at all, and laminate, parquet boards, and parquet are laid with a continuous cloth, on one level. But here it is important that the floor is level
It’s also important that the length or width of the installation is not too large, otherwise your floor may become like a house in the spring, when the heating is turned off
So not everything may be so smooth.
In general, I am engaged in the construction of websites and online stores.
Pekkonen wrote: And here it is also important that the length or width of the installation is not too large, otherwise your floor may become like a house in the spring, when the heating is turned off
So not everything may be so smooth.
Therefore, there must be a gap between the laminates, located in the middle of the door leaf, which hides the threshold.
The whole problem is that I don’t understand how the door will stand. If I take the thickness of the opening, divide it into two and make a threshold there. Will it be hidden by the door leaf? The door will open into the room in which the laminate is installed
Ultimately it all depends on the gap and the thickness of the threshold. The second method is universal.
There is no future door yet. How to place it under the canvas if it doesn’t exist yet?
Vitalicy wrote: There is no future door yet. How to place it under the canvas if it doesn’t exist yet?
Well... What do you think?? Of course, you can toss a coin. or better yet, decide on the door model. You don’t have to buy it right away (although it would be better). Look in person, measure the frame and trim. Even cut out a template and mark the floors using it. DO NOT make large gaps directly at the frame. Otherwise, holes may form after installing the door. In short, if you want to do it well, you need to mark the door along it.
mihamaster wrote: In short, if you need to do it well, you need to mark the door along it.
Usually it is enough to decide in which direction from the opening it will open. On this side, again usually, it is flush. Again usually (
) it is 4 cm thick. This means that the middle of the door will run along a line 2 cm deep into the opening from the plane of the wall.
Source
What tools are needed to install the threshold?
To install the threshold, you will need a set of standard household tools, which are often available to every home craftsman:
- A hammer with a hammer weight of 300 g or more.
- Hand saw for wood or metal.
- Grinder with abrasive cutting disc.
- Disc abrasives or hand file.
- Sanding machine for preparing wood.
- Hammer with the necessary drills.
- Screwdriver with a set of bits.
- Hand-held Phillips and slotted screwdrivers.
- Laser level, tape measure, pencil, square, plumb line on a nylon cord and other tools for measuring, as well as marking structural elements before installation.
- Dowel-nails or wedge anchors for installation.
- Primer, paint and varnish composition for finishing the element.
- A set of brushes for applying several layers of paint.
- Vacuum cleaner for cleaning mounting surfaces from dust after drilling.
It is recommended to use only high-quality, serviceable and well-sharpened tools, which guarantees the achievement of the expected result.
Installation procedure
If a new door threshold is installed to replace a worn one, then the defective element of the opening is dismantled; the work area must be thoroughly cleaned.
The interval between the frame posts is measured and the specifics of attaching the threshold to it are determined. For example, for wood you will have to take into account adjustments for the arrangement of the tongue-and-groove connection. Based on the measurement, the length of the workpiece is calculated.
Control of horizontal base. The threshold should lie strictly parallel to the top of the door block. Otherwise, problems will arise when opening/closing the door. Leveling the surface is easy to do by arranging a screed. Wedges will also help to raise the edge of the threshold if it is wooden. Regardless of the technique, it should eventually take a horizontal position.
Marking the opening. The recommendation on how to make an entrance door threshold in an apartment is clear - fix it on the concrete floor using anchor bolts or self-tapping screws with dowels. In a private house made of wood, fastening can also be done with nails. The optimal distance between hardware is 100 mm.
Installation of the threshold, alignment of its position relative to the horizon and fastening in place. The gaps between it and the floor are sealed (mortar or sealant, depending on the materials of the opening element and the base).
Surface design. Finishing a wooden threshold involves installing a covering metal frame. You can take a piece of channel of the appropriate width; sheet iron with which the block is beaten. In terms of decoration, painting steel is not difficult. But given the increased abrasion of this part of the opening, it is advisable to use stainless steel. As you know, white color belongs to the category of neutral, and therefore this finishing of the threshold for the door at the entrance will suit any block structure.
If the site was arranged during the installation process, then it must also be prepared. When applied to a concrete base, tiles at the front door will come in handy. The range of these products is large, and choosing an acceptable shade and texture is not difficult.
The threshold for a private house can be built from brick or concrete; strength and durability will be ensured. But in any case, you will have to work with the solution and import materials (for the same formwork). A simpler solution is to buy a ready-made threshold; in furniture stores they are sold in various modifications. But installing such an attractive structure as a guillotine on the front door is impractical. It is installed into prefabricated panels using special tools, and given the complexity, this work cannot be done competently on your own.
For a private home, the technology described is in most cases quite sufficient. There is a choice of both materials and technical solutions. And most importantly, you can implement them yourself.