How to glue the suction cup? It doesn’t matter whether it’s new or an old one that you’re sorry to part with, the device must be properly and securely fastened. Nowadays, in almost any supermarket you can see a variety of different devices or simply decorative devices on suction cups. Before purchasing, few people think about how high quality the suction cup itself is and how long it will last. But when the installation processes begin, then we begin to indulge in reflection: will this structure withstand the “responsibilities” assigned to it?
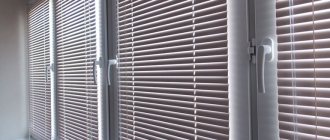
In the interior, of course, such things look bright, positive and comfortable, and they are also quite practical in terms of fastening and dismantling. Mostly, small shelves for the kitchen or bathroom are equipped with suction cups: soap dishes, all kinds of holders for hair dryers, combs, toothbrushes, washcloths, hooks, towel rings and other things. As well as various devices that are attached to windows and glass in the form of thermometers, recorders or any other gadgets. The devices are often small in size and designed to hold light weight.
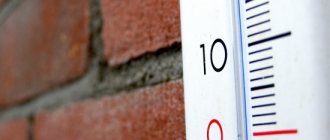
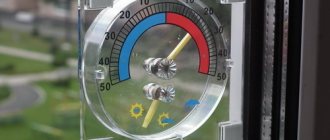
How to attach an outdoor thermometer to glass?
Do not damage the plastic window
, you do not need to glue a thermometer to it, nor, after drilling, screw it in with screws or self-tapping screws.
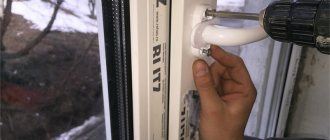
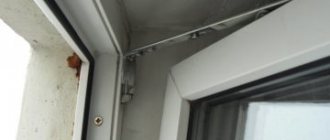
It is enough to carefully use a knife or a thin screwdriver to lift the rubber seal that presses the glass
, and slip the top of the thermometer under it first, and then the bottom.
Interesting materials:
How to install Google Camera on Xiaomi? How to install Google Earth? How to install Google camera on Redmi Note 9 Pro? How to install Google camera on Xiaomi? How to set Google as default search engine? How to set Google Assistant as default? How to install Google services on Huawei? How to put a placemark in Google maps? How to set a password for Google Play? How to set a password for a Google Chrome 2022 user?
Methods for attaching thermometers to plastic windows
Depending on the type of thermometer, you can use different installation methods. It is highly undesirable to drill holes in windows. Installation with glue or Velcro is carried out without compromising the integrity of the window unit. The most popular options are described below.
Velcro fastening
Standard models are usually sold with a ready-made installation solution. The plastic fasteners already have double-sided tape and small Velcro applied.
They are very easy to use, you just need to do this:
- choose a location for installation;
- wash the plastic and wipe dry;
- wipe with alcohol or solvent;
- you can mark the installation location with a simple pencil;
- remove the protective film from the Velcro;
- Press the Velcro firmly onto the surface.
This is not the most reliable method; the Velcro won't last long. You can glue anything using this method only in dry, sunny weather.
Double sided tape
To attach the thermometer to a plastic window, you must first clean and wipe with solvent both surfaces to which the double-sided tape will be attached. After this, you need to measure and cut pieces of the required size.
It is worth sticking tape on the thermometer, sharply pressing it against the prepared plastic and holding it under pressure for at least 5-10 seconds. This will ensure a secure fit.
You need to choose adhesive tape from leading manufacturers; the reliability of the fixation depends on the quality of the adhesive composition. This mount will not hold anything if the adhesive tape was stored in inappropriate conditions. It is important to avoid fakes. A significant disadvantage of this method is unreliability. The outdoor climate will mean that fastening with adhesive tape will last 2-3 months at most.
Glue
If you don’t want to use mounting tape, Velcro and double-sided tape, you can buy glue. Strong fixation is provided by types of glue that set instantly. These are the options you need to pay attention to.
Further instructions are approximately the same as in the case of adhesive tape. The surface is cleaned, degreased and glue is applied to the dry plastic, and then the product is pressed with great force. The greater the pressure at the time of gluing, the stronger the fixation will be.
Self-tapping screws
You can attach the thermometer to the window with self-tapping screws of the appropriate size. There is no need to pre-drill holes, but it is important to supplement the fixation with silicone sealant. Otherwise, the fastening will be unreliable. Simply attach the fasteners to the surface and screw in the screws.
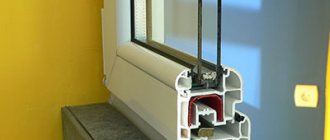
Installation with self-tapping screws is undesirable not only because the holes spoil the aesthetics of the window. For plastic blocks, such interference may cause loss of tightness. As a result, windows will be less effective at protecting your home from drafts, and additional heat leaks will appear.
Alternatives for a window thermometer that do not mount it directly on the window
The main purpose of a thermometer on the frame is to be able to look at it and see what the temperature is outside. But who said that the thermometer should be installed on the window sash!? The thermometer can be mounted on a slope outside, while its functionality will be fully preserved, and it will be convenient to monitor the readings. In this case, the frame of the plastic window will probably not be damaged. All you need to do here is to bend the metal fasteners to the diameter of the thermometer and drill holes in the wall for the dowels. Next, we screw the entire structure to the window slope and voila, the thermometer is in place. It may be unsightly, but it is pragmatic and the frame is intact.
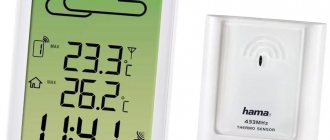
Well, another option would be to purchase an electronic thermometer with a remote sensor. The advantages here are obvious. You can simply place the thermometer on the window sill without drilling or gluing anything at all. There is no need to talk about installation here. The wire with the temperature sensor is simply thrown outside, and the thermometer itself is located in the room. If you want the thermometer to be in place, you can embed it into the slope, which in most cases are PVC panels. They are easily cut with the simplest stationery knife.
Then the wire is routed to the frame, and there it is also brought out beyond the sash. It is even better to install such a thermometer when the slopes are being made and the frame has not yet been foamed. Then the wire can be completely routed behind the panels and frame, directly to the street. He will not be visible in the room at all. The third option is weather stations with signal transmission via a wireless channel. Such stations work as follows. A sensor for measuring temperature and more is attached to the street, often it is also a barometer and a hygrometer. The sensor is mounted on standard mounts in the housing using a dowel.
Digital telemetry data is then transmitted at high frequency (433 Hz) to the main station, where it is decrypted and displayed.
In this case, the main station can now be placed not only by the window, but also in the room, in any place convenient for you. The signal transmission range is about 20 meters. The most popular well-known brand is stations. True, the price for them is “biting”. Well, the fourth option, or special case, is a thermometer installed directly on the glass, using suction cups, or using mounting tape.
Let's say right away that the option is not very successful, since the LCD screen is located on the street. During the cold season it may fail. It is better not to consider this option as a possible installation. And we also don’t need to mention about attaching the suction cup in the cold. Not reliable, which means not practical! Now that we have presented various options for thermometers and stations and methods for attaching them, let's look at all the pros and cons of each, as well as installation features. Let's start with the safety of each of the thermometers.
Types of thermometers
Nowadays, outdated wooden window structures are gradually becoming a thing of the past, they are being replaced with modern plastic ones a street thermometer on a window has changed accordingly
In this regard, the question arises of how to choose the right outdoor window thermometer for plastic windows and how to attach the thermometer to a plastic window. There are several types of measuring instruments for windows.
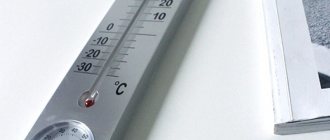
- A mechanical thermometer is the most common, simple and cheap mechanism. Thanks to its design, it is clearly visible from afar, but the accuracy of its readings is low. That is why such a device is not widely used.
- Liquid is the most accessible option for consumers, proposed by the inventor of the temperature scale, Celsius. These devices determine temperature quite accurately. Therefore, when choosing a price-quality option, this thermometer will be the best choice. These models have a significant advantage - a long service life.
- Electronic outdoor thermometers, the latest technological achievement in this field. Thermometer with a digital display in a translucent glass case, the design requires power. There is a function to remember information about the maximum and minimum temperature, and also shows time, pressure and air humidity. But it is characterized by high cost and short service life.
How to glue a thermometer to a plastic window in winter
If you need to attach a thermometer to a plastic window from the outside during the winter, the task becomes more complicated. Due to a sharp temperature change, the adhesive on Velcro or double-sided tape may not adhere.
Therefore, only the following options remain.
- You can hang the thermometer on brackets or holders, which in turn are attached to the plastic with self-tapping screws.
- You can choose frost-resistant glue that does not lose its properties even at extremely low temperatures.
For gluing, it is better to choose a sunny, more or less warm day, or frosty, dry weather. Winter is not the best period for street installation work; if possible, it is better to wait until spring and rely on weather forecasts.
How to install a thermometer or its sensor correctly
We have already told you a lot about installation, about the types and features of thermometers. At the same time, they have not yet spoken about the most important thing, about ensuring the accuracy of the readings. Let's start from afar. If you have ever seen how thermometers are installed at a weather station, then you know that for correct readings they must be placed in a place protected from the sun, not in the open wind, and not on the ground.
To be more precise, the thermometer must be protected from direct sunlight, otherwise it will greatly distort the result. Also should not touch metal. The ideal solution is to install the thermometer sensors or the thermometer itself in a ventilated casing, protected from the sun. Something like that.
Well, now that you already know so much, not only about installing and attaching thermometers to the window, you can summarize all the above information.
Velcro installation
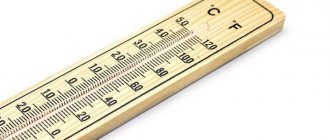
Before you start attaching the thermometer, you need to buy an outdoor thermometer with Velcro. An example of such a thermometer is shown in the photo below.
Now you need to decide on the installation location. The thermometer shown above can be turned in reverse by rearranging the lower and upper legs.
General installation recommendations
The question of how to attach a thermometer to a plastic window worries many after a purchase has been made. Before attaching an outdoor thermometer for plastic windows, decide on the installation location so that it is convenient to view the readings .
To avoid measurement errors, attach the outdoor thermometer away from heat sources and direct sunlight. For example, vents, ventilation systems, and external parts of the air conditioner will have an unnecessary impact on the thermometer readings. The sun's rays have a similar effect, so try to install the thermometer on the north side of the building . This will make it possible to obtain more accurate readings and increase the service life of the device. Only the electronic thermometer does not depend on the location.
It should also be remembered that an outdoor window thermometer is an inertial device; the time period for establishing its data readings is about 10 - 20 minutes. Therefore, when it is taken out of the package and installed, do not expect it to change its reading immediately.
Remember: an outdoor thermometer for plastic windows must be installed at positive outside temperatures and a minimum level of relative air humidity.
Attaching a thermometer is usually not technically difficult. But before that you need
just follow a few simple steps:
- The surface of the plastic window must be cleaned of dirt and degreased at the fastening points using solvent or turpentine. This must be done even on a new window. The thermometer will not last long on dirty glass.
- Wipe the surface of the glass dry, as the thermometer holders will not stick to wet surfaces.
The safest and simplest methods for fixing the device
There are several ways to attach outdoor thermometers:
- duct tape;
- suckers;
- self-tapping screws;
- brackets.
The most common method is to attach an outdoor thermometer using adhesive tape. If it was not included in the kit, it can be replaced with double-sided tape. Anyone can install the device using tape; this will not require much effort or additional materials, except for any suitable degreasing composition. As the latter, you can use alcohol, turpentine or nail polish remover, as well as any other product designed to degrease the surface.
If there is no adhesive tape on the “holding legs”, then it can be replaced with double-sided tape
To ensure that the thermometer is held securely, the place where it will be attached is treated with a degreaser and wiped dry with a lint-free cloth. The protective film is removed from the adhesive tape, and the thermometer is pressed against the surface with little force. The disadvantage of this method of fastening is its unreliability. If the window sash is opened frequently, the device may fall.
Surface degreasing is an important stage in surface preparation.
If you were unable to attach the thermometer using this method the first time, a knife wrapped in a cloth soaked in solvent will help remove it. In the same way, the adhesive tape should be removed from the device itself and replaced with a new one. After this, you cannot glue the thermometer to the same place. It is better to prudently choose a new position and repeat the same steps.
Attaching the thermometer to adhesive tape
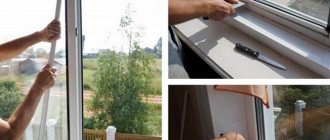
Also, suction cups are not a very reliable way to attach a thermometer to the frame or glass of a window. Most often, electronic thermometers are attached in this way. Suction cups can only be used if the frame cannot be opened at all.
Before installing the thermometer, the surface is also degreased, wiped dry, and only after that the device is installed on it.
However, in strong gusty winds or rain, detachment of the suckers is almost inevitable.
Mounting the thermometer with suction cups