Accessories
Currently, a door opening limiter is in demand. Such popularity is due to their functional purpose; such products provide reliable protection of the wall surface from impacts from the door during a strong opening. Therefore, in order not to see crumbling plaster on the floor or damaged expensive wall decoration, be sure to leave a wall or floor stop.
In addition, this door accessory will help you avoid troubles with your neighbors due to the loud knock of the door against the wall. There are several types of such devices: wall and floor stops. These products differ from each other in the material used in production, construction and design.
Functional purpose
The door locking device is designed to perform protective functions:
- Limits the movement of the sash during opening.
- Performs protective functions for entrance and interior structures, pieces of furniture located next to the door.
- Used as decor in various interiors.
Such devices are available on the market in a wide range and price range. However, the simplicity of the design of the stops allows them to be made from scrap materials. There are a lot of ways to make such products, so everyone can make a door stop with their own hands. But which option to choose, and what materials to make from, then everything depends only on your imagination. If you are interested in how to properly make a floor door stop with your own hands, then you should consider interesting solutions, we will talk about them below.
Limiter (clamp) for opening the front door: characteristics and installation procedure
There are many types of door hardware, without which not only convenience, but also the operation of the product itself is impossible. The list is significant - awnings, handles, eyes, locking mechanisms. But the door opening limiter is not included in the list of necessary accessories, and few people still know about it, especially if they install it during the installation of the unit. But in most cases, this fixing element is simply irreplaceable.
Soft limiter for interior structures
Making such a product at home is not difficult. The principle of manufacturing a soft stopper is based on the formation of a tilde (small pupa) and a soft filler. So, in order to make such a limiter for an interior door ourselves, we will need small pebbles or sand. These components are necessary for the door stop to gain sufficient weight. Considering that the door stopper is located on the handle on the side of the door where it opens, it is therefore necessary to provide a loop on the future stopper device.
Original door stop
As for the design and color scheme of the tilde, it’s a matter of taste, you can find ready-made patterns, you can find them in magazines or open the Internet and look there, if you don’t like the ready-made ideas, draw your own version. To make such a unique stopper, you will need to prepare the following materials:
- Textile.
- Pins.
- Soft filler: padding polyester or other material.
- Threads that match the color of the selected fabric.
But now we have come close to the question: how to make such a product? The first thing to pay attention to is the volume of the tilde; it should be such as to soften the impact of the opening door. Each detail must be cut out in duplicate. Next, the cut parts are stitched together, and it is necessary to provide an area that should not be sewn up; we will push the filler into it. Next, turn out the elements of the future limiter, fill them with padding polyester, and then sew the fragments together. That's all, the do-it-yourself stopper is ready to perform direct functions. Now all that remains is to install the door stop and enjoy your creation.
This limiter is sure to make everyone smile
How to choose a door stopper and install it correctly
A door stop (otherwise known as a door stop or stopper) is a special device that prevents the door leaf from coming into contact with the wall when the door is opened, which leads to an increase in the service life of both the door and the decoration of the room. You can select and install the limiter yourself. How to do it? Read on.
Door opening limiter
Floor limiter
You can also make a door leaf floor clamp yourself from scrap materials. The design of such a stopper is primitive, so you will not need many tools to make it. Below we will look at several options for creating such a useful thing.
- Wooden limiter. It is necessary to prepare a wooden block, it is good if it is round in cross-section. The size of the bar should be small. Next, measure the required distance. You can make a small door stopper in height, from four to six millimeters, or you can make a larger stopper, up to fifteen centimeters. It all depends on how you want the clamp installed.
If pure wood is chosen for manufacturing, in this case it is better to immediately cover it with stain of the shade you need and then apply varnish on top. But before this action, you must definitely sand the surface of the bar. Next, take a pin, you can use a double screw, and tighten it on the other side from the end.
Now you need to choose the place where the limiter will be installed. In this place you need to drill a hole on the floor, then insert a dowel into it, drive a wooden stop into it and screw it until it stops. Now you can personally see that making and installing door stops yourself is easy and quick.
creative door stopper
The limiter is metal. Such a stopper is created in almost the same way as a wooden one, only here there are nuances. First you need to prepare a metal tube and cut a piece of the required size from it. For the top of the door stopper, you can use a plug that is made of plastic. On the other hand, you will need to install the plate and secure it with screws. Installation is carried out in the following way: on the floor, select the location where the clamp will be located, then drill holes for installing the plate and secure with screws.
Attention! To prevent the edges of the door leaf from hitting the installed stopper, put rubber bands on it.
Fun latches for interior doors
Classification of door stops
All locking elements can be divided into the following groups:
- by location (wall, floor and over-door);
- taking into account the principle of operation (simple devices, mechanical devices, as well as magnetic limiters).
Moreover, door stops vary in material, size and design.
Having understood the features of each such retainer, it is easier for the buyer to make the right choice. And besides, this information is very important for those who will install the stops themselves.
Self-installation
We have learned two ways to make stop devices, and now let’s talk about how to install an entrance door stop yourself. For entrance structures in country houses, a wall stopper is often chosen. The fact is that in houses people often leave the front door open to ventilate the premises. And to prevent the wind and draft from flapping the doors in different directions, people manage to prop them up with various objects; many even put a shovel or rake against the door to create a stop for the door leaf. However, with the advent of door stoppers, many reconsidered the use of such supports and began to buy door stoppers. Some people prefer not to spend money on such devices and make them themselves.
To secure the corner of the sash, you can take two narrow strips of the same length. Strips can be cut from plywood. Then they are combined with each other with a metal corner; this design will not allow the door leaf to slam shut. The finished structure is placed on the door and door frame by screwing in self-tapping screws and metal corners.
Floor metal limiter
Such a locking element for opening the sash functions according to the following principle: when the sash is fully opened, the installed locking device begins to bend in the other direction. When the sash begins to close due to the wind, the stopper should fold in the other direction, but the metal corner located on the bend will not allow this to happen. In the case when you need to close the sash, then the stopper can be bent by hand and the door closed.
Did you like these DIY door lock ideas? Then we have prepared another interesting option in this video:
Voted over 293 times, average rating 4.2
Comments
Unfortunately, there are no comments or reviews yet, but you can leave your...
Add a comment Cancel reply
We recommend reading
Locks, Fittings Magnetic locks and other fittings for silent interior doors In apartments where large families live with an intensive lifestyle, comfort ...
Fittings Selection and installation of magnetic handles on interior doors The door handle for operating door structures has a large ...
Hinges, Fittings Features of hinges for interior folding accordion doors In small apartments, the issue of saving free space ...
Fittings What fittings for swing doors are available on the country's construction market? Accessories for swing doors are an integral part of the design, ...
Types of stoppers
There are 3 types of stops depending on the installation location: wall, floor, over the door.
Does your home have a door stop?
Not really
Floor
Floor stoppers are popular due to their small size and cost:
1 It may have a semicircular appearance. A shock-absorbing pad is installed in the middle of its structure, which comes into contact with the doors and stops the door. During installation, you need to carefully ensure that the hemisphere aligns with the opening angle of the doors. If the structure is displaced by a couple of millimeters, the door leaf will be damaged by the metal body of the sphere.
2 Pillar-shaped stops can be of different heights and widths. A rubber gasket in the form of a ring is installed on its body. But the rings will need to be replaced when it is seriously damaged, so that the doors are not scratched by the metal post. The columns, regardless of size, are visible and will not cause leg bruises.
3 The magnetic variety is distinguished separately due to its different design and principle of operation. In addition to the sharp slamming, the door locks the open position. It is a column with a magnet directed towards the door. A metal plate is attached to the door leaf, which will be attracted to a magnet at a close distance.
Wall
Wall limiters are installed instead of floor ones, for example, when covering floors with parquet, natural wood, etc. They are not expensive, but they cost more compared to floor-standing ones. They have a hemispherical or columnar shape. A rubber gasket is installed at their end, which keeps the doors from colliding with the environment.
Interesting! Wall-mounted models cannot be attached to sliding doors and plasterboard partitions.
A negative feature is the inability to disguise the device with design - it will stand out in the interior.
An interesting way to protect walls and furniture from handles is a silicone base gasket. They are not expensive, and the self-adhesive compound on the back will make installation easier.
Above the door
By placing the stop above the door, an almost invisible retention device is obtained. The simplest limiter is tape. It is installed in various places, most often by gluing.
The second type of stopper in the form of a goat's leg is similar to the floor and wall varieties. Because it comes into contact with the door leaf with a sealing gasket.
Idea No. 1: transforming old soft toys
It is very easy to breathe new life into a stuffed cat that has long been forgotten by children if you use it as a door stopper. To do this you need:
- Clean the toy from dust and dirt.
- Sew patches made of fabric or leatherette if there are abrasions or holes on the parts of the toy.
- Open the inner seam.
- Remove the filler.
- Heat coarse sand in the oven at 200°.
- Fill the hollow inside of the toy with a bag of cooled sand.
- Sew up the inner seam.
- Decorate the plush cat with a knitted scarf, satin bow or decorative hat.
Installation features
Installing a door stop with your own hands will go without surprises if, before starting installation work, the craftsman carefully studies the accompanying instructions included with the product.
Chain as a door travel stop.
In general, installation of the clamp can be represented by the following steps:
- The tools necessary to perform the work are prepared.
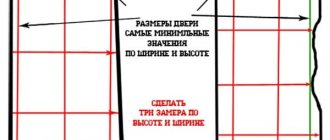
- The location of the stop is determined. To do this, you need to open the door and fix the door leaf in such a position that the distance between the door and the wall is at least 5 cm. And also, when determining the distance from the wall to the door leaf, you need to take into account the size of the handle installed on the door leaf.
- Perform markings (for this you will need a construction pencil).
- Drill holes for fasteners.
- Restrictors are attached.
If a brass fastener is installed, so that the product does not lose its beautiful appearance, it should be coated with a layer of varnish.
As a rule, installing a door stop with your own hands does not take much time: even a novice home craftsman can complete this operation in less than an hour.
Rate this article:
(
1 votes, average score: 5.00 out of 5)