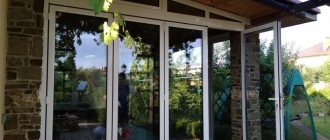
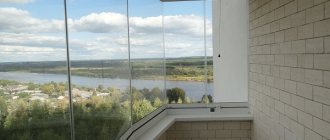
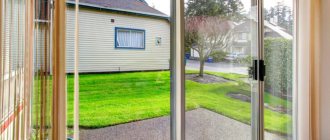
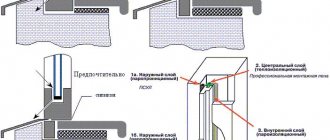
Glazing of balconies and loggias with wooden windows is the most common and also simplest type of glazing in our time. It will help to reliably protect against the negative effects of the external environment.
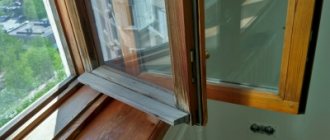
The difference between modern wooden windows with double-glazed windows and plastic windows is that the frame for wooden windows is made of laminated veneer lumber. This makes the windows invulnerable to temperature changes. Since wooden windows with double-glazed windows are more difficult to produce and take longer to produce than plastic ones, their cost is also higher.
Pros and cons of a wooden balcony
Wood is a natural material. It “breathes” and allows air to pass through.
Advantages of wooden frames:
- good heat and sound insulating properties;
- maintain natural humidity (without fogging up the glass);
- environmentally friendly - do not emit toxins even when exposed to high temperatures (if the balcony is located on the sunny side);
- choice of design - natural material lends itself well to mechanical processing;
- choice by type of opening - the doors can be swing, tilt and turn;
- safe for allergy sufferers;
- tinting in any color - the result will be an oak or mahogany frame;
- durability – with regular care, wooden frames will last for decades.
But, like any material, wood also has its drawbacks. Even if the wood is treated with special compounds, the risk of fire is higher than with other balcony glazing options.
Wooden frames require regular maintenance: you will have to paint or coat them with a layer of varnish at least once a year (read more in the article “how to treat wooden frames on a balcony”). Another disadvantage is the property of wood to expand (in high humidity) and contract (in dry weather). The doors may close poorly in rainy weather and shrink in hot weather.
Glaze the balcony with wooden frames
The price of wooden glazing depends on the area and type of wood. Pine frames are an inexpensive material that, with proper care, will last up to 10 years.
Advice: if you choose pine, then you should take a closer look at double-glazed windows with frames made of laminated veneer lumber. Solid wood is too soft and scratches easily. If there is a sudden change in humidity, it may crack.
Larch is a little more expensive, but the technical characteristics are higher. Walnut, ash, oak - closer to premium quality - appearance, beautiful pattern and texture of the wood. Well, the cost is, of course, appropriate.
The most expensive is mahogany. It is mainly used for finishing in original design projects.
The price of wooden glazing is also affected by:
- Opening method, number of doors. The more fittings, the more expensive the window will end up costing. Sliding and Finnish ones will cost more than standard double-glazed windows with a tilt-and-turn mechanism.
- The presence or absence of a decorative layout - divides the glass into geometric fragments (fixed on the frame or between the glasses), looks beautiful, but also affects the price.
- If you order a window from a carpentry shop made of solid wood, the cost will be inexpensive, but further costs for antiseptic paint will “eat up” the saved money over time. Plus, deformation is possible. Factory windows are made from laminated veneer lumber. The price exceeds the cost of PVC windows by 70-80%. The approximate service life in this case will be at least 30 years.
- Cost of installation, ebbs, slopes.
As a result, prices may differ significantly. To find out how much it will cost to glaze a balcony, you should order a measurement (usually free).
Types of structures
Regardless of appearance and size, all balconies have mandatory structural elements. Among them:
- base plate, which bears the main load;
- fencing (parapet);
- additional elements (visor, wind screen).
The main structural element is a slab, which is made of reinforced concrete or wood. The first option is applicable only for buildings built from durable materials (stone, brick, reinforced concrete blocks). The wooden slab is lightweight, so it can be installed on the facade of any building.
Depending on the method of attaching the slab to the wall, balconies can be:
- with a cantilever beam clamped in the wall (the reinforced concrete slab is recessed into the wall during the construction stage, and the overhang of the structure cannot exceed 1 m);
- with a cantilever slab and support on beams (beams are recessed into the wall, on which a reinforced concrete or wooden slab is placed on top, while the width of the balcony can reach 1.2 m);
- with a slab supported on triangular brackets (this option is used when the balcony is attached to an existing building);
- with a slab on supports (an attached balcony rests on columns, walls, and beams standing near the facade).
The French balcony also belongs to the category of balconies, although, in fact, it is only a beautiful enclosure of a window opening.
Wooden balcony frames with one or two glasses, which is better?
It all depends on how you plan to use the balcony or loggia. If the room is not insulated, it will still not be possible to use it year-round. Therefore, you can install simple wooden frames with one glass. Of course, they won’t save you from the cold, but they will protect your balcony from dust, rain and snow.
wooden balcony frames with 1 glass
Warm glazing involves the installation of double-glazed windows with at least 2 panes. Subsequently, even if the loggia is not heated additionally, the temperature in the room will be 10 - 12 degrees higher than outside.
wooden euro windows 2 glasses
Important: installing wooden frames is an additional load on the balcony slab. Because a wooden window is heavier than any PVC model, not to mention an aluminum profile. Therefore, it is better to check the condition of the supporting structure in advance.
Installation of wooden glazing
Consists of several stages. The process is not much different from installing plastic windows on a balcony.
Preparing the base
If a regular lattice fencing with railings will serve as a support, then all work on external cladding and insulation is carried out before installing the window frames. The top of the railing must be strictly horizontal. If not, then it is better to cut it off - leveling will cost more.
If the support is a brick or concrete parapet, the horizontal level is raised using cement mortar. Decorative finishing should also be done before installing double-glazed windows.
Read more in the article “balcony railing height”.
Installation
First, the double-glazed windows must be disassembled - the sashes must be removed, and the glass must be removed from the blind parts.
A window sill is installed (the width depends on the type of fencing) made of galvanized steel. You can choose white or choose metal with a coating that imitates the color and texture of wood.
A support profile (beam) is fixed along the perimeter of the fence and the top slab.
Afterwards, the frames are freely fixed with self-tapping screws with control of the vertical and horizontal levels (using a plumb line or level).
Next, all frames are rigidly attached to the base with anchors, glass is inserted, sashes are hung, and fittings are installed.
The cracks are filled with polyurethane foam. After it dries, the excess is cut off with a stationery knife.
At the final stage, the upper ebb is installed - made of galvanized or polymer-coated metal, 150 - 200 mm wide. This is enough to “drain” water from the frames.
Important: if the loggia is located on the top floor and it is planned to install a canopy from a metal corner, then it is better to coordinate the work in advance. Otherwise, the housing inspectorate may recognize the canopy as an unauthorized construction and issue an order for dismantling (read more in the article “canopy on the balcony”).
Afterwards the balcony is ready for finishing. Simple frames with one glass are painted or varnished. If necessary, insulate internal walls and floors.
Which insulation and waterproofing to choose
When insulating a loggia with wooden frames, it is better to use slabs based on basalt fiber. Since wood “breathes,” there will be no humidity or condensation on a wooden loggia, which means the risk that the slabs will “take on water” over time is minimal.
It is better to select waterproofing (if it is not polyethylene film) in the middle price segment. Cheap films do not work; they “creep” over time.
What to give preference: roof or visor
The roof is not included in the list of mandatory components of a balcony, but it can significantly expand its functionality. Instead of a roof, a canopy can also be installed, which will also act as protection from bad weather and direct sunlight.
Roof requirements:
- The surface area of the roof should be slightly larger than the surface area of the load-bearing slab and balcony railing.
- The roof must be installed at an angle to prevent accumulation of snow mass.
On a note! The roof can be single-pitch or gable. The first option is the simplest and most budget-friendly, the second is ideal for corner balconies.
A special Marquise canopy will help give your balcony an unusual and stylish look . This metal structure is covered with a special fabric, which allows it not only to act as a protective element, but also to emphasize the individual style of the entire structure.
Dome-type visors are less popular . This is due to certain difficulties in its manufacture, but many owners of individual buildings prefer this method of decorating the facade structure.
The arched canopy looks stylish and elegant , which is practical and highly functional.
How to make wooden frames with your own hands
You can make wooden frames yourself. You should not try to build complex structures - sliding or with a tilt-and-turn mechanism. Especially if you have no experience in carpentry. The simplest option to implement is solid glazing with a pair of hinged sashes. And if necessary, you can ventilate and wash the glass without any problems (read more in the article “how to wash windows on an outside balcony on a high floor”).
Which material to choose
The most common is pine. It is inexpensive and, with proper care, will last a long time. You can use birch bars - beautiful texture and pleasant color. When choosing, pay attention to the presence of knots. Subsequently, when the frames dry out and “shrink,” the wood may crack.
Advice: it is better to choose laminated timber. It is stronger, does not deform or crack over time. In addition, the wood has already been treated with an antiseptic, so additional impregnation is not required.
Marking
The width of the frame for comfortable glass washing should not exceed 70 cm, so take this point into account when marking. Afterwards, you can sketch out a drawing, note which frames will be blind, how many sashes are planned to be hinged (the narrower the sashes, the less space they will require to open).
How to do
The bars are cut to the size of the future window (preferably with a margin of 5 - 7 cm). Recesses for glass are cut out with an electric planer. To simplify the work, you can use thin strips, 12 - 15 mm thick, which are attached to the base with glue and small nails.
After the workpieces are assembled into a rectangle, the joints of the parts are treated with PVA glue and self-tapping screws. The geometry is checked with a square. For additional rigidity, the structure is reinforced with metal corners (sold at any hardware store).
The sashes are attached to the frame using card hinges 75 - 95 mm. When purchasing, keep in mind that they can be right or left (depending on the direction of the turning part). Or you can buy universal ones, 100 mm in size.
Important: the wind load on the sashes will be considerable. Therefore, after installation you will need to install bolts (top and bottom). A window wrap with a handle can be used provided that the glass size is small.
Afterwards the frame is painted or varnished.
How to install
The frames are attached to the base with anchors or self-tapping screws (if you first install a metal corner along the upper and lower perimeter). The gaps between the blocks are closed with wooden slats - flashings. To prevent water from pouring onto the windows from the upper balcony, install a canopy.
How to insert glass
A gap of 2-3 mm is left between the base of the frame and the glass (leveling out possible expansion and contraction of the wood), which is filled with window putty. The installed glass is secured with small nails or glazing beads.
In the same way you can make frames for a cold veranda at the dacha. The only difference is that there is no need to make swing doors.
Tip: if the glass turns out to be too big, it’s easier to adjust the frame using a chisel.
Making a subfloor
After building the foundation, it is recommended to start arranging the subfloor. We first cover the support with roofing felt in two layers.
The floor can be wooden or concrete. For example, in a frame veranda made of wooden beams, a wooden floor would be more appropriate. Concrete pouring will best fit into a brick extension.
Subfloor
We make a wooden subfloor like this:
- We fix the beam of the lower trim on the foundation. We use suitable fasteners, for example, anchors. To connect the beams directly, we first make samples at the places of their joints and additionally fasten them with galvanized nails;
- We attach wooden logs to the bottom trim. We keep the step at 50 cm - this way the floor will definitely not fall through. We use the connection option described above;
- fill the space between the joists with expanded clay;
- We make the flooring from unedged boards or plywood about 50 mm thick. We attach the flooring elements to the joists with galvanized nails or self-tapping screws.
We make a concrete screed like this:
- fill the base with a 10-centimeter layer of sand;
- pour a layer of expanded clay on top;
- lay the reinforcing mesh. For the floor of the veranda, a mesh of rods with a diameter of 6-8 mm with cells of 25x25 cm is sufficient;
- pour concrete.
The recommended thickness of the screed on the veranda is from 30-50 mm. For greater convenience and accuracy of pouring, we can pre-set beacon slats every 2-4 m.
How to attach a balcony to a wooden house
The only way to attach a balcony to an already built house without making major changes to the structure is to install racks. The advantage is that with this method the size can be any, plus the floor of the balcony will serve as a “roof” over the porch.
We discussed it in detail in the article “How to make a balcony in a private house.”
Installation of support posts
Racks can be brick or metal. They are installed only under the protruding part of the balcony, or on four sides (later they can serve as the basis for the walls of a garage or veranda).
Holes are cut in the load-bearing wall for load-bearing beams (beams with a cross-section of 200 x 100 mm) in increments of no more than 1 m. Depending on the width and expected load, the distance can be reduced to 0.8 m. For greater reliability, you can additionally install supports that are attached to wall at an angle of 45 degrees.
Another way is to install support pillars. They can be brick, wood or metal pipe with a diameter of at least 140 mm.
In accordance with the markings, holes up to 1 m deep are dug (depending on the depth of soil freezing). Sand is placed at the bottom. Afterwards, the support is installed (the wood is pre-treated with bitumen) and filled with cement mortar.
After 4-6 days, when the solution has dried, you can begin further work:
- a support is installed on the wall (along the length of the balcony);
- then the support posts are connected to each other by crossbars;
- The sheathing for the subfloor is installed.
Important: when installing poles, the vertical level must be strictly observed. For additional fixation, you can install wooden spacers. If the height of the house is large, it will not be possible to do without special construction equipment.
Installation of the base, laying the floor
The ends of the beams are connected by a transverse beam, which will serve as the basis for the fence. Afterwards the sheathing boards are laid. An OSB board and waterproofing are attached to the finished base (it is better to use special tape to connect the sheets).
Finish floor - planed boards, 40 mm thick, pre-treated with an antiseptic, laid with a slope to prevent water stagnation. You can use a terrace board (read more in the article “terrace board on the balcony”). It is durable, does not deform, and the textured surface looks beautiful even under a layer of paint.
Instead of boards, you can use ceramic tiles (read more in the article “tiles for the balcony on the floor”). In this case, the flooring is laid on an OSB board.
Important: tiles must be selected based on technical characteristics. It must withstand temperature changes. Use the adhesive for outdoor work.
Fencing installation
For safety, the height of the railing must be at least 1 m. Timber or figured balusters can be used as support posts. The design of fencing and railings is a matter of taste. You can use forged elements or narrow planed boards treated with stain or paint.
Material
Durable and durable materials are used to make balconies. Most often it is concrete and wood.
Concrete balcony
This architectural structure has its own characteristics:
- load-bearing structures are recessed into the wall. The reliability of the structure depends on the thickness of the wall; if it is not very strong, then additional supports are used;
- the balcony overhang is at least 1 meter in length;
- if the house is brick, then the base slab is inserted into the wall along its entire length;
- the upper level of the slab is set 5-8 cm below the expected level of the floor covering;
- the concrete base must be thoroughly waterproofed;
- The height of balcony railings should not be less than 1 m.
Wooden balcony
Usually inferior to concrete in size and reliability, but superior in decorative terms. Externally, the balcony resembles a cozy wooden house or hut. Wood is a material that has many advantages. First of all, it is the atmosphere of comfort that natural wood creates, its smell and appearance. Wood goes well with different finishing materials.
Features of a wooden balcony:
- for the manufacture of load-bearing structures, beams with a cross section of 10*20 cm are used;
- the minimum depth of beams in a stone facade should not be less than 25 cm;
- the beams are fastened to the walls with bolts or metal angles;
- vertical posts (boards 4*10 cm) and longitudinal ones (5*10 cm) are attached to the console;
- flooring and handrails are installed;
- All elements made of wood and metal are treated with oil paint, gratings and handrails are coated with frost-resistant and water-resistant varnish.
The gaps between the lattice bars for any structure should not be wider than 10-12 cm.

